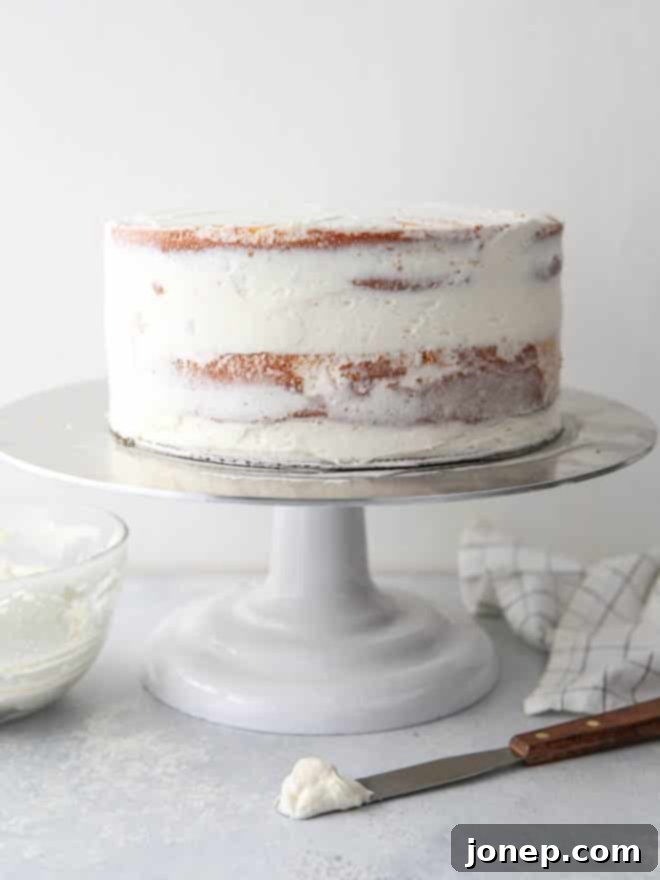
Achieve Bakery-Worthy Cakes: Your Ultimate Guide to Frosting a Layer Cake Like a Pro
Many home bakers find the thought of frosting a layer cake intimidating. Visions of uneven layers, crumb-filled frosting, and a generally messy result often deter even the most enthusiastic bakers from attempting this crucial step. But what if I told you it doesn’t have to be a daunting task? What if you could transform your homemade cakes from rustic to refined with just a few simple techniques and a bit of confidence?
For years, I hesitated to share my own cake frosting tips, feeling that I wasn’t a “qualified expert.” I haven’t worked in a professional bakery, nor do I run a custom cake decorating business. There are countless tutorials from seemingly more experienced bakers out there. However, I’ve come to realize that my journey mirrors many of yours. I’m a passionate home baker who has, through endless hours in the kitchen, observing others, and most importantly, learning from countless trial-and-error moments, discovered the secrets to making cakes truly shine. And perhaps, that’s my greatest strength – I’m just like you!
This comprehensive guide is designed to demystify the art of frosting a layer cake. It’s about empowering you with practical tips and techniques that will elevate your baking from perfectly acceptable to truly impressive. You don’t need years of professional training or an arsenal of expensive gadgets. With a handful of essential tools and a clear understanding of the process, you’ll be creating smooth, flawless, and beautiful layer cakes that rival any bakery. So, let’s banish those frosting fears and unlock your inner cake artist. Come along, and I’ll share everything I’ve learned to help you create stunning, delicious masterpieces.
Essential Tools for Frosting a Layer Cake Like a Pro
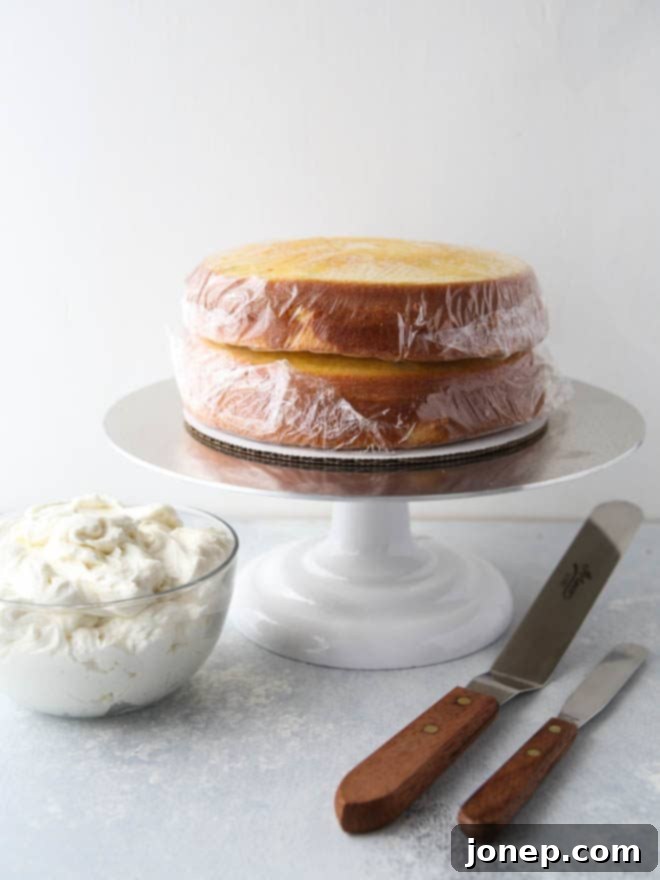
While you might be surprised to learn that you can frost a decent cake with just a butter knife, having a few specific tools can dramatically simplify the process and significantly improve your results. Investing in these items will make your cake frosting journey much more enjoyable and efficient, allowing you to achieve that professional finish with greater ease. Here’s a breakdown of what you’ll need and why each item is valuable:
(Disclosure: This post contains affiliate links. When you make a purchase through these links, I may earn a small commission at no extra cost to you, which helps support this site.)
- Prepared Cake Layers: This is your foundation. For the best possible outcome, your cake layers should be completely cooled, ideally chilled in the refrigerator or even frozen. Chilled cakes are firmer, less prone to tearing, and easier to handle, especially when stacking and applying the crumb coat. Ensure your layers are flat on top; any domes should be carefully leveled using a serrated knife. For detailed guidance on how to prepare and store cake layers or how to bake perfectly flat cake layers, refer to my dedicated tutorials.
- Prepared Frosting: The star of the show! For a standard 8 or 9-inch two-layer cake, you’ll generally need between 4 to 5 cups of frosting. The type of frosting matters; a stable buttercream (like American buttercream, Swiss meringue buttercream, or even cream cheese frosting that’s been properly chilled) is usually best for structural support and smooth application. Ensure your frosting is at the right consistency – not too stiff, which makes it hard to spread, and not too soft, which can lead to sliding layers and a crumbly mess.
- Prepared Filling (Optional but Recommended): If you plan to add a delicious layer of fruit preserves, lemon curd, chocolate ganache, or whipped cream between your cake layers, have it ready. A well-chosen filling can add an extra dimension of flavor and texture to your cake.
- A Turntable: This is a game-changer! While not strictly essential, a cake decorating turntable allows you to smoothly rotate your cake as you work, making it incredibly easy to apply frosting evenly to the sides. My beautiful Ateco turntable is a dream, but I achieved excellent results with a much more affordable model for many years. It genuinely makes frosting a cake so much more efficient.
- Cardboard Rounds: These inexpensive cardboard cake rounds are invaluable. Placing your first cake layer on a round makes it incredibly simple to transfer your frosted cake from the turntable to the refrigerator, a cake stand, or a carrying box without damaging your beautiful frosting work. They provide stability and ease of handling.
- Offset Spatulas: If there’s one tool to invest in, it’s a good set of offset spatulas. I use multiple sizes (small, medium, and large) for various tasks, from spreading frosting between layers to smoothing the final coat. This set of three is highly recommended. The “offset” design keeps your knuckles clear of the cake, allowing for smoother, more precise movements. Straight spatulas are also handy, especially for larger surfaces.
- Bench Scraper (Optional but Useful): Many professional bakers swear by a bench scraper for achieving perfectly smooth, sharp sides on their cakes. While an offset spatula can accomplish this, a bench scraper offers a wider, rigid surface for a truly pristine finish.
- Piping Bags and Tips (Optional): Essential for creating a neat frosting dam for soft fillings and for decorative details. A simple round tip (like tip 12) is great for dams, while star or open star tips are popular for decorative borders.
Note: For this particular tutorial, I used my reliable vanilla buttermilk cake recipe, renowned for its tender crumb and stability, paired with my whipped vanilla buttercream frosting, which offers a light yet stable consistency perfect for both filling and frosting.
The Foundation: Stacking and Filling Your Cake Layers
Building a stable and delicious cake begins with correctly stacking and filling your layers. This stage sets the groundwork for the smooth, even finish you’re aiming for. Take your time here; a solid foundation ensures your cake stands tall and proud.
Step 1: Position Your First Layer
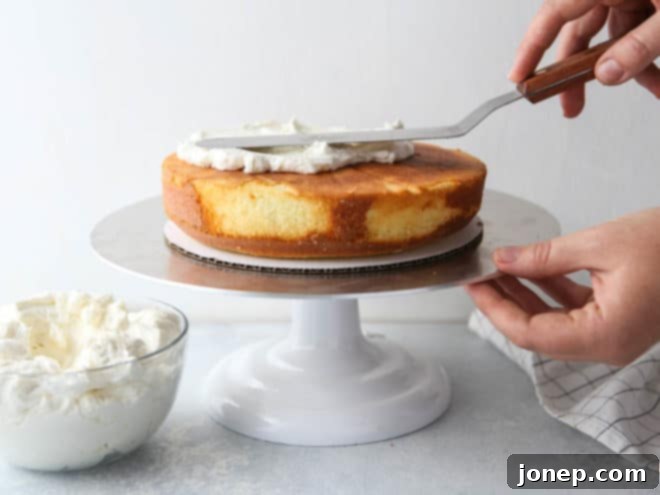
Begin by placing your first chilled cake layer, top-side down, onto a cardboard round. The flat, cut side (which was originally the bottom) now faces up, providing a perfectly level surface for your filling. If you’re using a turntable, place the cardboard round with the cake layer directly onto it. If you don’t have a turntable, you can place the cake layer directly on your chosen cake stand or serving plate. The key here is to start with a stable and level base.
Step 2: Apply Frosting or Filling
Using an offset spatula, spread an even layer of your prepared frosting or filling over the top of the first cake layer. Aim for about a 1/2-inch thick layer for most fillings. If you’re using a soft filling, such as fruit preserves, lemon curd, or a light whipped cream, it’s crucial to create a “frosting dam” first. To do this, pipe or spread a ring of thicker frosting around the very edge of the cake layer. This dam acts as a barrier, preventing the softer filling from oozing out the sides when subsequent layers are added, ensuring both stability and a clean appearance. You can use a piping bag with a round tip for precision, or simply use an offset spatula to build up a small wall of frosting.
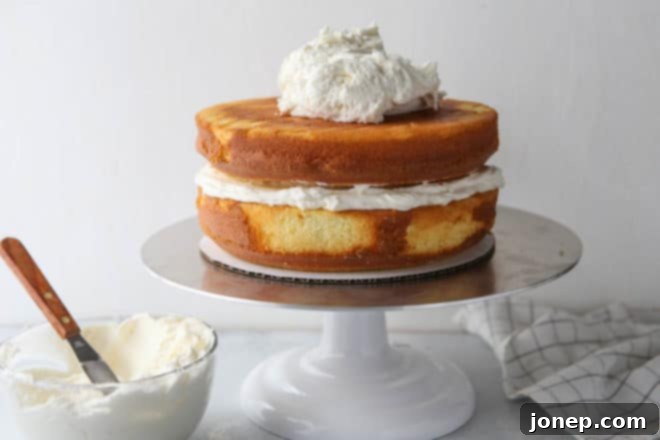
Step 3: Continue Stacking Your Layers
Carefully place the next cake layer on top of the filling, again, ideally top-side down for stability. Gently press down to ensure it’s level and makes good contact with the filling. Repeat the process of filling and stacking with all remaining cake layers. You can keep it simple with a classic two-layer cake, or create an impressive multi-layered masterpiece. For taller cakes, consider slicing your existing layers horizontally (a technique known as torting) to create more, thinner layers. This not only adds visual height but also allows for more delicious filling in every bite. When building a taller cake (three layers or more), consider chilling your cake briefly after two or three layers to firm up the frosting and ensure stability before adding more weight.
The Game-Changer: Applying a Crumb Coat
If you take away just one tip from this entire guide, let it be this: always, always apply a crumb coat. This simple, often overlooked step is the secret weapon of professional bakers and will instantly elevate your cakes to the next level. A crumb coat is a thin layer of frosting applied to the entire cake, serving as a protective barrier. Its primary purpose is to trap any loose crumbs from the cake, sealing them into this initial layer so they don’t contaminate your final, pristine frosting coat. Beyond crumb control, it also helps to even out any minor imperfections in your stacked cake layers, providing a smooth canvas for your decorative frosting.
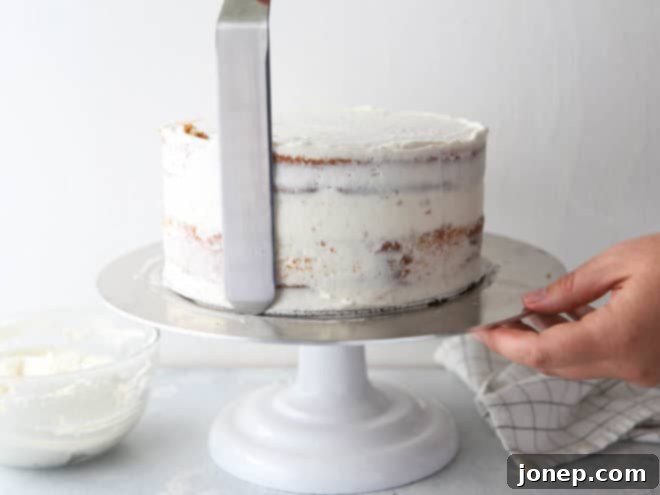
Step 4: Smooth On a Thin Layer
Using an offset spatula, apply a very thin, almost translucent layer of frosting over the entire cake – both the top and the sides. Don’t worry about perfection here; the goal is simply to cover every surface and pick up those loose crumbs. If your frosting is particularly thick, you might find it helpful to thin 1-2 cups of it (depending on your cake size) with a teaspoon or two of milk or cream. This creates a more pliable consistency that’s easier to spread thinly. I like to start by spreading a thin layer on the top of the cake, then working my way down the sides, filling in any visible gaps between layers and gently evening out the overall shape. For the sides, hold your offset spatula perpendicular to your turntable or cake stand and gently glide it around the cake, removing excess frosting and smoothing the surface. Don’t press too hard, as this can dig into the cake itself.
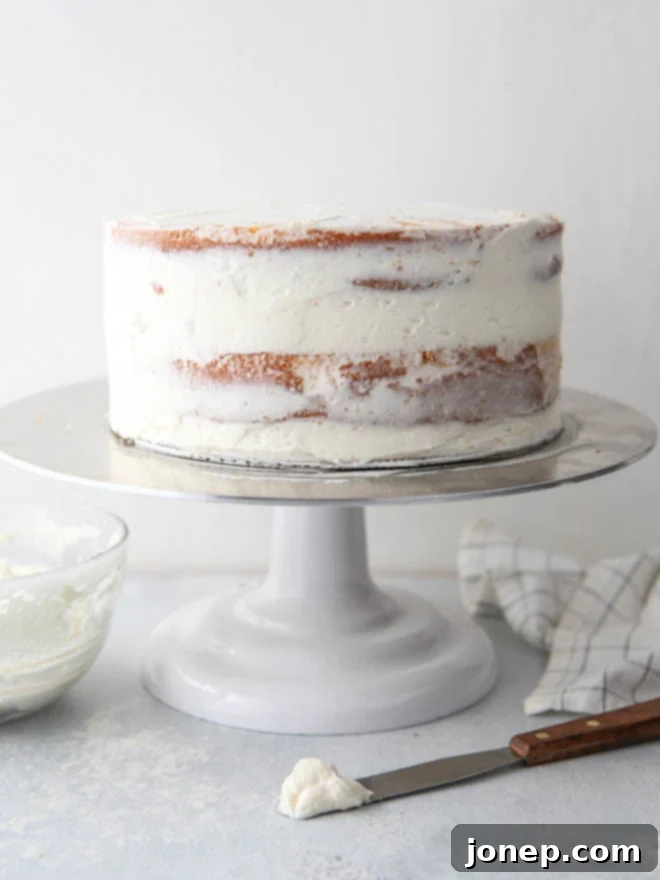
Note: If you’re aiming for the popular rustic “naked cake” aesthetic, where the cake layers are partially visible through a very thin layer of frosting, then your crumb coat is essentially your final coat! Once you’ve achieved the desired translucent look, simply chill the cake to set the frosting, and it’s ready to be served or decorated minimally.
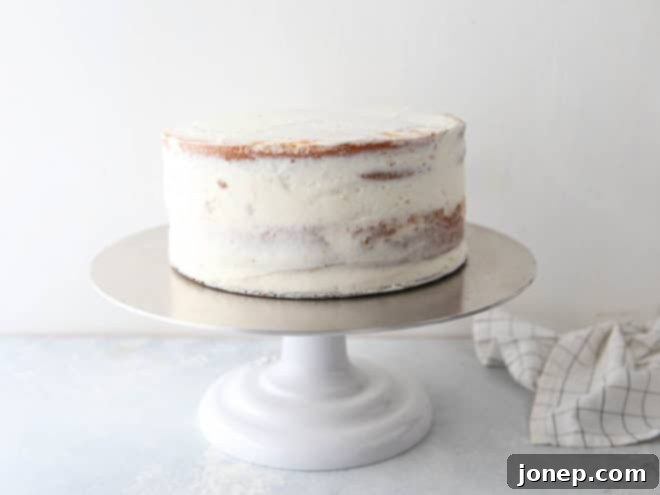
Step 5: Chill to Set the Crumb Coat
This step is non-negotiable for a truly professional finish. Once your crumb coat is applied, place the cake in the refrigerator to chill for at least 20 to 30 minutes, or until the frosting is firm to the touch. This crucial chilling period allows the frosting to set completely, effectively locking in all those crumbs and providing a stable, firm base for your final layer of frosting. When you apply the second coat, you won’t drag any crumbs, and the new frosting will glide on smoothly. If your fridge space is limited, this is where those cardboard cake rounds truly shine, making it much easier to transfer the cake without needing to fit an entire cake stand.
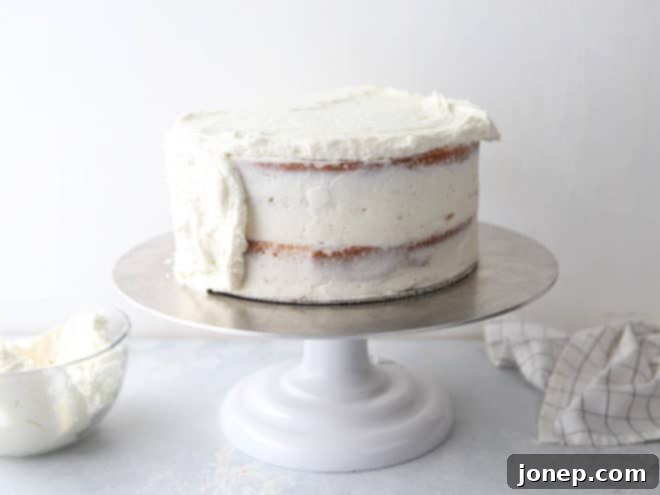
The Grand Finale: Applying the Final Frosting Coat
With a perfectly chilled and crumb-coated cake as your canvas, you’re now ready to apply the final, generous layer of frosting that will define your cake’s aesthetic. This is where precision and technique come into play to achieve that smooth, bakery-quality finish. Take your time, and remember that practice makes perfect.
Step 6: Generously Apply and Smooth the Final Coat
Begin by applying a generous amount of your prepared frosting to the top of the cake. Unlike the thin crumb coat, this layer should be thick enough to allow for ample smoothing without exposing the cake or crumb coat beneath. I typically start by spreading a good dollop on top and gently working it outwards. Then, apply ample frosting to the sides of the cake. Don’t be shy with the frosting; it’s easier to remove excess than to add more and risk disturbing the layers.
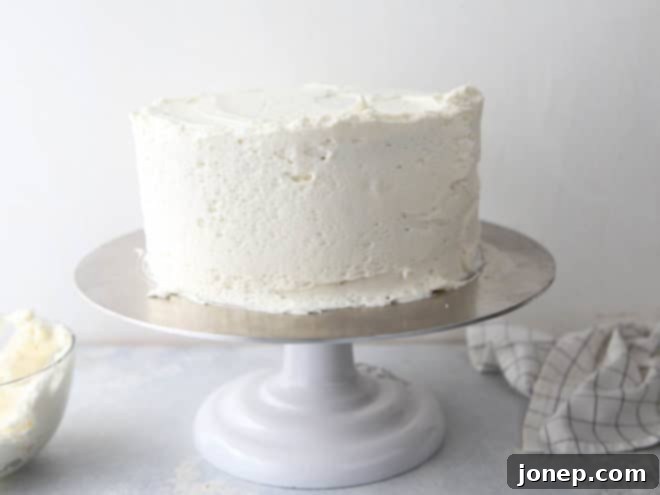
Once the cake is fully covered with a thick layer of frosting, it’s time to smooth it out. For the sides, hold your offset spatula (or a bench scraper, if you prefer) perpendicular to your turntable or cake stand. With a steady hand and consistent pressure, slowly rotate the cake while holding the spatula in place, gently skimming off excess frosting and creating a smooth, even surface. Wipe your spatula clean frequently to avoid re-applying excess frosting. The goal is to achieve a consistent thickness and a clean, vertical side. Many bakers prefer a bench scraper for the sides because its rigid, wide surface makes achieving sharp edges and perfectly flat sides incredibly efficient. While I personally often use an offset spatula, don’t hesitate to try a bench scraper if you’re struggling to get that pristine finish.
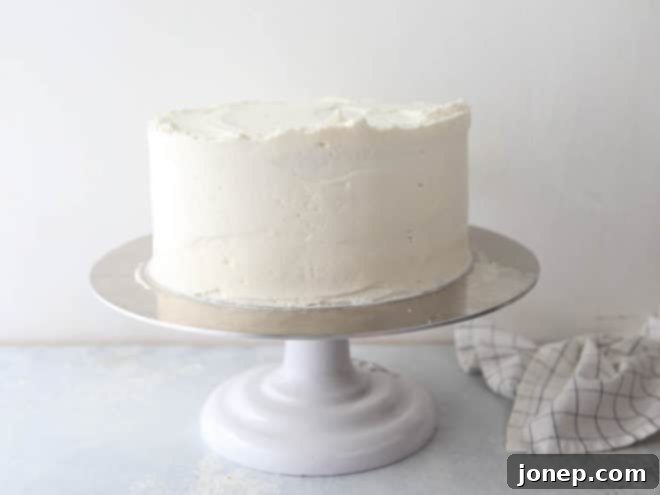
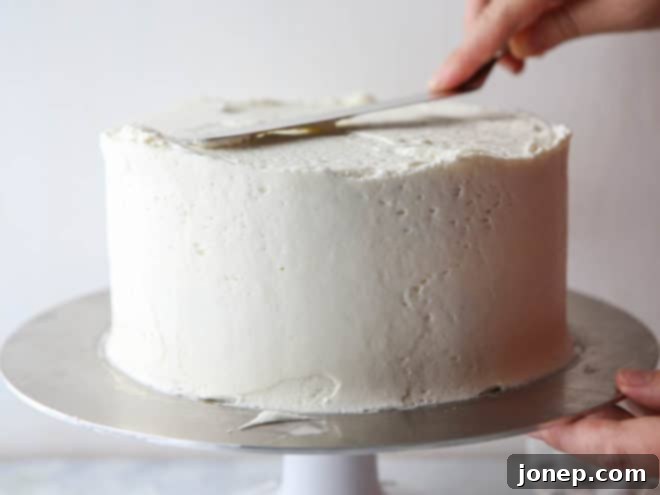
To smooth out the top of your cake and create clean, sharp edges, take the edge of your offset spatula and position it just at the outer edge of the cake’s top surface. With a light, steady hand, gently drag the spatula inward towards the center. This motion pulls any excess frosting from the sides inward, creating a crisp edge. Wipe your spatula clean after each swipe, rotate the cake slightly, and repeat this process all the way around the cake until the top is perfectly smooth and the edges are defined. Patience and a clean spatula are your best friends here.
Decorate, Chill, and Serve Your Masterpiece
You’ve successfully frosted your cake to perfection! Now comes the fun part: making it uniquely yours and ensuring it’s ready to impress when served.
Step 7: Unleash Your Creativity with Decorations
This is where you can truly let your personality shine! Decorate your freshly frosted cake however you desire. Options are limitless: a scattering of colorful sprinkles, elegant piped borders or rosettes using different tips, fresh berries, delicate edible flowers, chocolate shavings, a simple dusting of cocoa powder, or even an intricate fondant design if you’re feeling ambitious. If you used a turntable and a cardboard round for frosting, now is the ideal time to carefully transfer your cake to its final serving vessel – a beautiful cake stand or a sturdy presentation plate. The cardboard round makes this transfer effortless and safe.
Step 8: Chill Before Slicing and Serving
Before you slice into your magnificent creation, give it one final, essential chill. Place the decorated cake in the refrigerator for at least 30 minutes. This allows the final layer of frosting to firm up completely, which is crucial for achieving clean, neat slices without smudging or pulling the frosting. If you plan to transport your cake, chilling is even more vital. Aim for at least 1 hour of refrigeration to ensure the frosting is as firm and stable as possible. When traveling, keep the cake cool and take it out of the fridge just before you head out.
For general storage, I always recommend keeping most layer cakes in the refrigerator. This not only preserves the freshness of the cake and filling but also ensures the frosting maintains its structure and appearance, protecting it from ambient warmth. About 20-30 minutes before you plan to serve, take the cake out of the fridge to allow the frosting to soften slightly to a more palatable, room-temperature consistency. This enhances the flavor and texture of both the cake and the frosting, making every bite a delight.
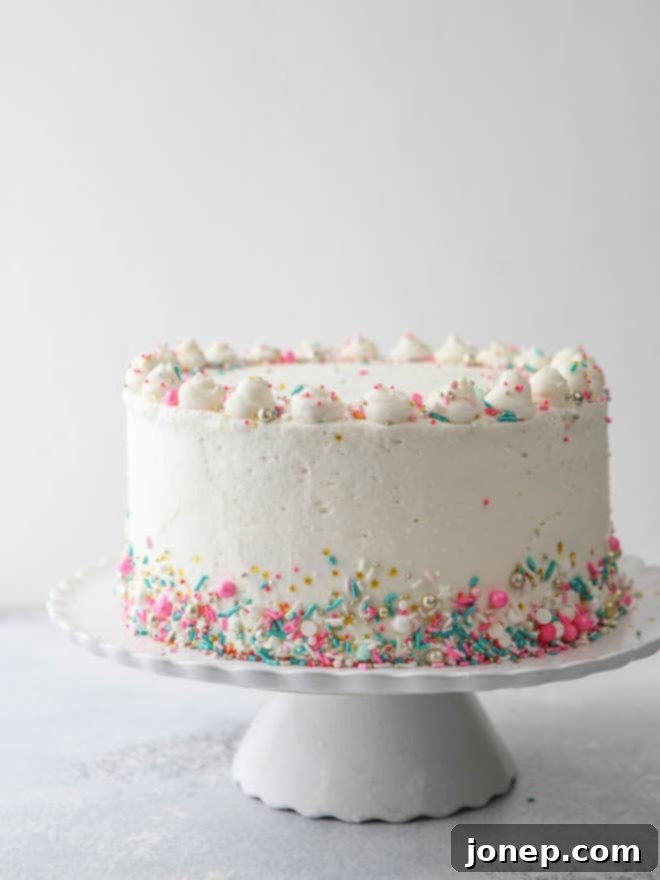
Congratulations! You’ve successfully frosted a beautiful, bakery-worthy layer cake right in your own kitchen. This achievement is a testament to your patience and newfound skills. No more fear, just fantastic cakes!
Do you have any tried-and-true frosting tips or creative decoration ideas that weren’t covered here? I’d absolutely love to hear about your experiences and wisdom in the comments below. Share your secrets and let’s inspire each other to bake even more beautiful cakes!
My Favorite Cake Decorating Tools
Investing in quality tools can truly transform your baking experience, making the process smoother and the results more impressive. Here are some of my go-to items that I rely on for consistently excellent cake frosting results:
