The Ultimate Guide to Easy, Flaky Homemade Buttermilk Biscuits: Your Secret to Perfection
Imagine the warm, comforting aroma of freshly baked biscuits filling your home. Now, picture sinking your teeth into one – light, fluffy, and with perfectly flaky layers that practically melt in your mouth, rich with buttery flavor and a hint of tangy buttermilk. What if we told you that creating these culinary masterpieces at home is not only achievable but surprisingly simple? Forget those disappointing store-bought options in a cardboard tube! Our ultimate recipe for homemade buttermilk biscuits promises flaky, buttery perfection every single time. All you need is one bowl, six common ingredients, and approximately 30-35 minutes from start to finish. If you’ve ever felt intimidated by the idea of baking biscuits from scratch, prepare to be completely won over. This isn’t just a recipe; it’s your invitation to elevate any meal with truly exceptional homemade goodness.
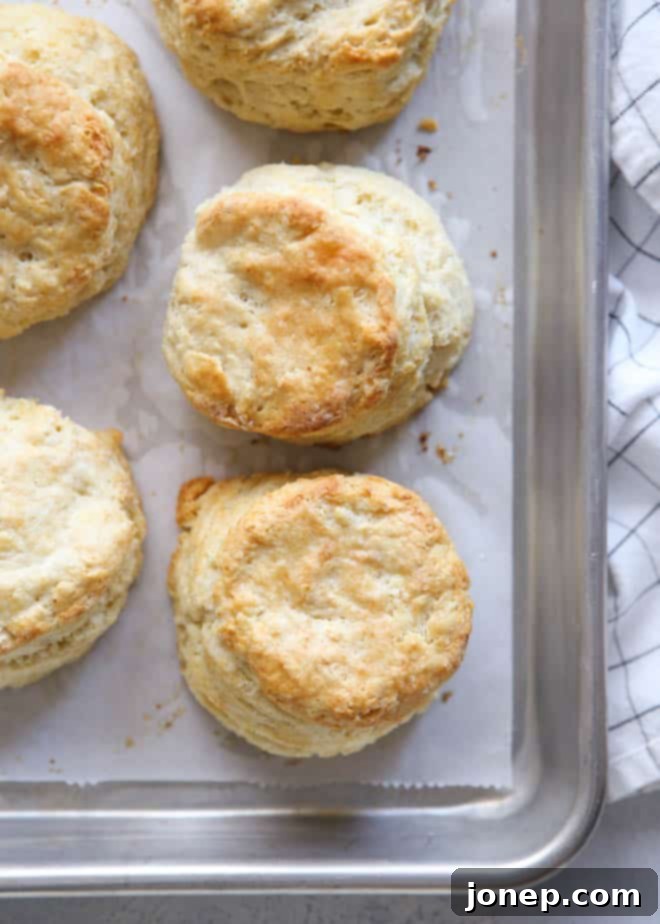
For over a decade, this specific recipe has been my unwavering go-to for buttermilk biscuits, and I can confidently declare it the very best. There’s an undeniable magic that happens when you bake from scratch – the satisfying process, the delightful aroma, and the sheer joy of serving something so incredibly delicious that you made yourself. Store-bought biscuits, while convenient, simply cannot replicate the tender crumb, the distinctive flaky layers, and the rich, authentic flavor that only homemade can offer. This comprehensive guide will walk you through every step, from selecting ingredients to mastering the folding technique, ensuring your biscuits rise tall, boast abundant layers, and are irresistibly tender. Believe me, you have what it takes to make these; and once you do, you’ll be baking them endlessly!
Table of Contents
- Essential Buttermilk Biscuit Ingredients
- Key Equipment You’ll Need
- How to Achieve Tall, Flaky Biscuits
- The Fold and Flatten Method Explained
- More Expert Tips for Perfect Homemade Biscuits
- How to Make and Freeze Biscuits in Advance
- Delicious Ways to Serve Your Homemade Biscuits
- Explore More Biscuit Recipes
- Get the Full Buttermilk Biscuit Recipe
Essential Buttermilk Biscuit Ingredients
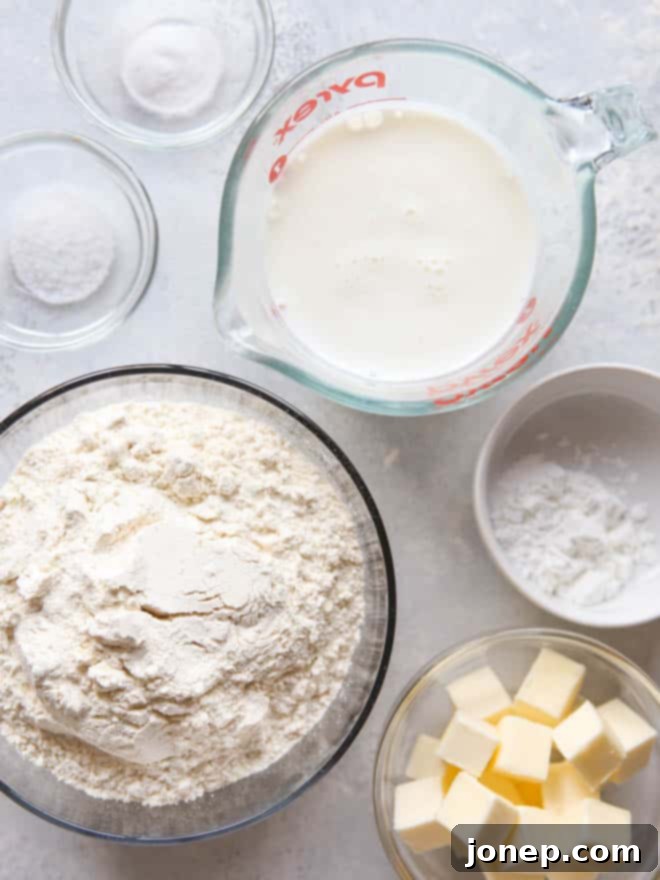
The beauty of this easy buttermilk biscuit recipe lies in its elegant simplicity. You only need a handful of basic ingredients, most of which are staples in any well-stocked kitchen. Each plays a crucial, distinct role in creating those coveted tall, flaky, and tender biscuits that everyone raves about.
- All-purpose flour: This forms the primary structure of your biscuits. While some recipes call for self-rising flour, using all-purpose flour allows for precise control over the leavening. Always measure it by spooning it into the measuring cup and leveling it off, rather than scooping directly, to avoid a dense biscuit.
- Baking Powder: A critical leavening agent that activates with heat, causing your biscuits to rise beautifully and become light and airy. Double-check its freshness, as expired baking powder is a common culprit for flat biscuits.
- Baking Soda: This powerful leavening agent reacts with the acidity present in the buttermilk. This chemical reaction produces carbon dioxide gas, which further aids in the biscuit’s rise and contributes to an incredibly tender crumb.
- Salt: Far from just a seasoning, salt is essential for balancing and enhancing all the flavors in the biscuit, making them taste richer and more complex, especially alongside the butter.
- Cold unsalted butter: This is, without a doubt, the most important ingredient for achieving flaky layers. When tiny, cold pieces of butter are incorporated into the dough, they create pockets. As these pockets of butter melt in the hot oven, they release steam, which pushes apart the layers of dough, resulting in that signature flaky texture. Using unsalted butter gives you control over the overall salt content of your biscuits.
- Cold buttermilk: The star ingredient that gives buttermilk biscuits their distinctive, subtle tang and contributes significantly to their incredibly tender texture. Its inherent acidity is vital for activating the baking soda, working in tandem with the baking powder to ensure maximum lift and a soft interior.
Baking Tip: Clever Substitutes for Buttermilk
While buttermilk is a secret weapon in my baking arsenal and always stocked in my fridge, I understand it’s not always readily available for everyone. Don’t worry, a lack of buttermilk shouldn’t derail your biscuit-baking plans! You can easily whip up a homemade substitute in a pinch:
- Milk and lemon juice or vinegar: For every 1 cup of buttermilk specified in the recipe, pour 1 tablespoon of fresh lemon juice or white distilled vinegar into a liquid measuring cup. Then, fill the rest of the cup with 2% milk (or whole milk) until it reaches the 1-cup line. Give it a gentle stir and let it sit undisturbed for 5-10 minutes. You’ll notice the milk beginning to curdle and thicken slightly – this indicates it’s ready to be used as a buttermilk substitute.
- Plain yogurt or sour cream and water: If you have plain yogurt or sour cream, you can create a thicker substitute. Whisk together 1/2 cup of full-fat plain yogurt or sour cream with 1/2 cup of water until the mixture is smooth and uniform. This will yield approximately 1 cup of a buttermilk-like consistency and can be used immediately in your recipe.
Key Equipment You’ll Need for Perfect Biscuits
While this recipe is fundamentally simple, having the correct tools can significantly streamline the process and contribute to better results. You won’t need any highly specialized gadgets, just a few kitchen essentials to ensure your homemade biscuits turn out beautifully:
- Mixing bowl: A generously sized mixing bowl is crucial. It provides ample space to comfortably combine your dry ingredients and then effortlessly incorporate the cold butter and buttermilk without making a mess or restricting your movements.
- Sheet pan: A sturdy baking sheet is, of course, essential for baking your biscuits. Opt for a light-colored sheet pan, as it helps prevent the bottoms of your biscuits from browning too quickly and encourages even baking throughout.
- Parchment paper or a silicone baking mat: These are invaluable for preventing the biscuits from sticking to the pan, ensuring easy release, and making cleanup a breeze. They also contribute to a more evenly baked bottom crust.
- Spatula: A rubber or silicone spatula is perfect for mixing the wet and dry ingredients and for gently folding and handling the delicate biscuit dough.
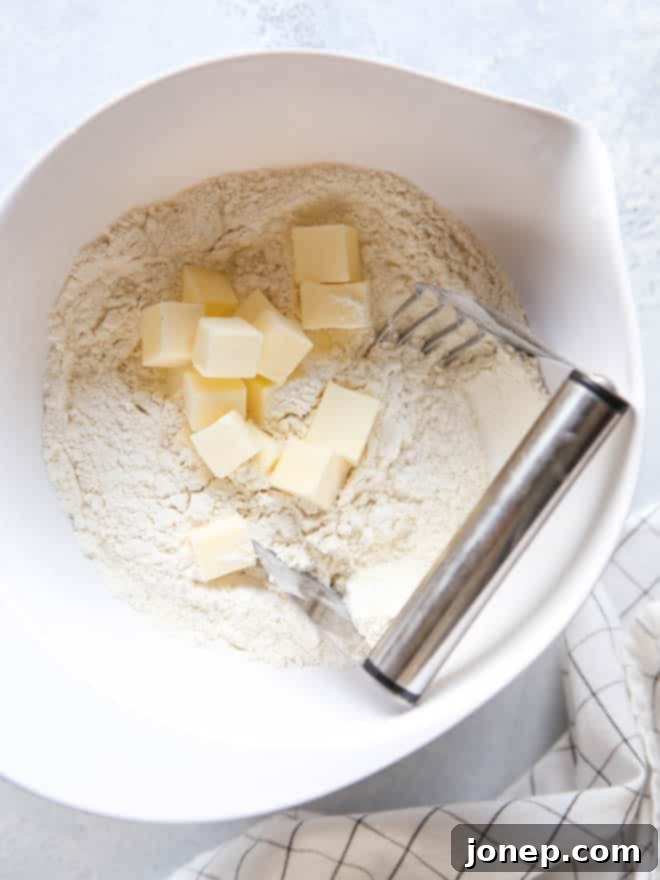
- Pastry blender: This is truly your secret weapon for making perfectly flaky biscuits! A pastry blender allows you to cut the cold butter into the flour quickly and efficiently, creating those crucial pea-sized pieces without warming the butter with your hands. If you don’t own one, you can achieve a similar result by using two knives, cross-cutting the butter into the flour mixture until the desired consistency is reached.
- Round cutter: For perfectly shaped, uniform biscuits. A 3-inch or 3.5-inch round cutter is typically ideal for this recipe. If a dedicated biscuit cutter isn’t available, the rim of a sturdy drinking glass or jar with a thin edge will work just as effectively!
How to Achieve Tall, Flaky Biscuits: The Secret to Success
One of the most common frustrations aspiring biscuit bakers face is ending up with flat, dense results instead of the lofty, layered beauties they crave. The key to consistently baking tall, genuinely flaky biscuits lies in understanding how to properly handle the dough and strategically develop those distinct, buttery layers. This technique, often called the “fold and flatten method,” is far easier to master than it sounds and will revolutionize your biscuit baking.
The Fold and Flatten Method Explained for Maximum Flakiness
This method is truly a game-changer for the ultimate biscuit texture. After you’ve poured in the buttermilk and the dough has just begun to clump together in the bowl, gently turn the entire mixture out onto a lightly floured, clean work surface. At this stage, it’s perfectly normal – and desirable – for the dough to appear quite dry, shaggy, and a bit crumbly. Do not be tempted to add more buttermilk! Over-hydrating the dough can lead to a tough biscuit. Instead, use your hands to carefully bring the shaggy pieces together, gently pressing and gathering them until a cohesive mass starts to form. The goal is minimal handling; work it just enough so it holds together.
Once the dough is mostly smooth and has come together (it doesn’t need to be perfectly uniform, some dry spots are fine), gently flatten it with the palms of your hands or a rolling pin until it forms a rectangle or circle roughly 1 to 2 inches thick. Now, for the crucial step that creates those magnificent layers: carefully lift one half of the dough and fold it directly over on top of the other half. This simple action begins to create distinct layers within the dough. Gently flatten the folded dough again to its original 1-2 inch thickness. Repeat this folding and flattening process approximately 5 times. Each repetition adds more layers without overworking the gluten, which is essential for tenderness. Finally, after your last fold and flatten, lightly press the dough to a uniform thickness of about 1 inch before you proceed to cut your rounds. This methodical layering technique ensures maximum rise and those coveted, beautiful, buttery layers everyone adores.
More Expert Tips for Making Perfect Homemade Biscuits
Beyond the fundamental fold and flatten method, a few crucial details and smart techniques can make all the difference, transforming good biscuits into truly extraordinary ones. Keep these expert tips in mind for consistently perfect, tall, and flaky results every time you bake:
- Always keep your butter and buttermilk ice cold: This is a non-negotiable rule for flaky biscuits! Both your butter and buttermilk should be used straight from the fridge, or even colder. The visible bits of cold butter embedded throughout the dough are what create pockets of steam as they melt rapidly in the hot oven. This steam pushes apart the layers of dough, resulting in that signature flaky texture. If your butter is too warm, it will incorporate into the flour mixture, leading to dense, flat biscuits instead of light, airy ones. Some even advocate freezing the butter and grating it for optimal coldness and distribution.
- Do not overwork the dough: This is paramount for tenderness. Over-mixing or excessive kneading develops gluten, which is excellent for bread’s chewiness but completely undesirable for soft, tender biscuits. After adding the buttermilk, mix the dough with a spatula just until it barely comes together, then use your hands only as much as necessary to perform the fold and flatten method. A very light touch is the secret to a delicate, melt-in-your-mouth crumb.
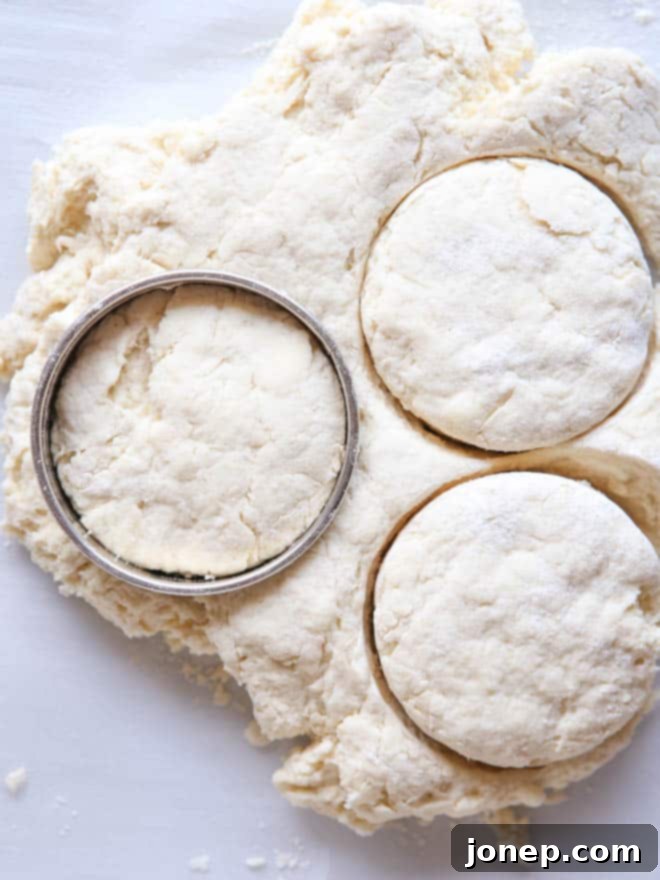
- Press, don’t twist, the biscuit cutter: When cutting out your biscuit rounds, press the cutter straight down firmly into the dough and then pull it straight back up. Twisting the cutter can “seal” the edges of the biscuit dough layers, preventing them from separating and rising fully in the oven. This simple action ensures maximum lift and flakiness. If a biscuit piece sticks inside the cutter, gently use a finger to pop it out.
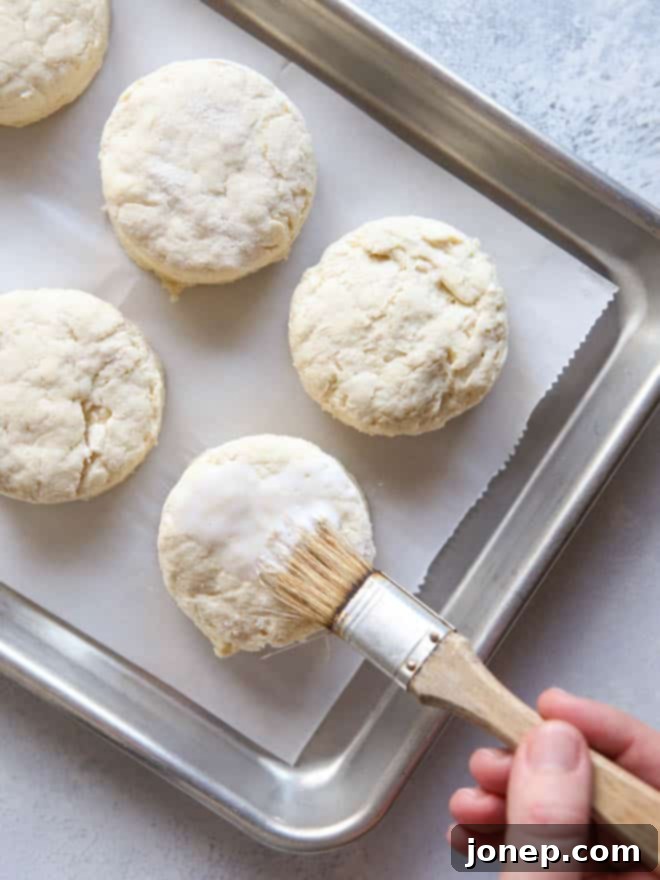
- For a beautifully golden-brown top: For an added touch of color and a slightly crispier top, brush the tops of your cut biscuits with a little extra cold buttermilk (or even an egg wash) just before placing them in the oven. This small step encourages a lovely golden hue and enhances their visual appeal.
- Adjust spacing for desired texture: How you arrange your biscuits on the baking sheet can affect their final texture. For softer-sided biscuits that remain moist and tender, place them fairly close together on the pan (about 1/2 to 1 inch apart). This allows them to rise taller as they lend support to each other. If you prefer a crispier exterior on all sides of your biscuits, space them out more generously, allowing air to circulate freely around each one.
- Ensure your leavening agents are fresh: Baking powder and baking soda are not eternal; they lose their potency over time. If you’ve followed all other tips diligently and your biscuits still consistently come out flat, it’s highly likely that your leavening agents have expired. Always check the expiration dates, as fresh baking powder and soda are absolutely vital for a good, impressive rise.
- Accurate flour measurement is key: Especially when using all-purpose flour, avoid scooping directly from the bag with your measuring cup, as this compacts the flour and can result in using too much. Instead, fluff the flour with a spoon, then spoon it into your measuring cup and level it off with the back of a knife. This ensures you’re using the correct amount for a tender, not dry, dough.
How to Make and Freeze Biscuits in Advance (Baked & Unbaked)
While homemade biscuits are undeniably at their peak when served warm, fresh from the oven, their deliciousness can still be enjoyed with a bit of foresight. Both baked and unbaked biscuits freeze remarkably well, making them an excellent option for meal prepping, entertaining, or simply having a homemade treat ready for unexpected cravings!
To freeze unbaked biscuits: Follow the recipe instructions to prepare your biscuit dough and cut your rounds. Instead of baking them immediately, arrange the unbaked biscuit rounds in a single layer on a parchment-lined baking sheet, ensuring they do not touch each other. Cover the entire sheet pan tightly with a double layer of plastic wrap, then place it in the freezer. Freeze until the biscuit rounds are completely solid, which usually takes about 30-60 minutes depending on your freezer. Once frozen solid, transfer the unbaked biscuit rounds to a freezer-safe ziplock bag or an airtight container. Label them clearly with the date. They can be stored in the freezer for up to 2 months.
When you’re ready to bake, you can cook them straight from frozen! Simply place the frozen biscuits on a prepared baking sheet and bake as directed, adding an additional 5-10 minutes to the specified baking time (or until they are beautifully golden brown and cooked through). There’s no need to thaw them first, making impromptu biscuit baking incredibly easy.
To freeze baked biscuits: Allow your freshly baked biscuits to cool completely on a wire rack after they come out of the oven. Once thoroughly cooled, arrange them in a single layer on a baking sheet and freeze for 30-60 minutes until they are firm. Then, transfer the frozen baked biscuits to a freezer-safe ziplock bag or an airtight container, again labeling with the date. They will maintain their quality in the freezer for up to 2 months.
To rewarm frozen baked biscuits: Preheat your oven to 350°F (175°C). Place the frozen biscuits on a baking sheet, cover them loosely with aluminum foil to prevent them from drying out, and heat for about 15-20 minutes, or until they are warmed through to the center. While you can briefly warm them in a microwave, the oven method is recommended as it helps retain a much better texture and crispness.
Delicious Ways to Serve Your Homemade Buttermilk Biscuits
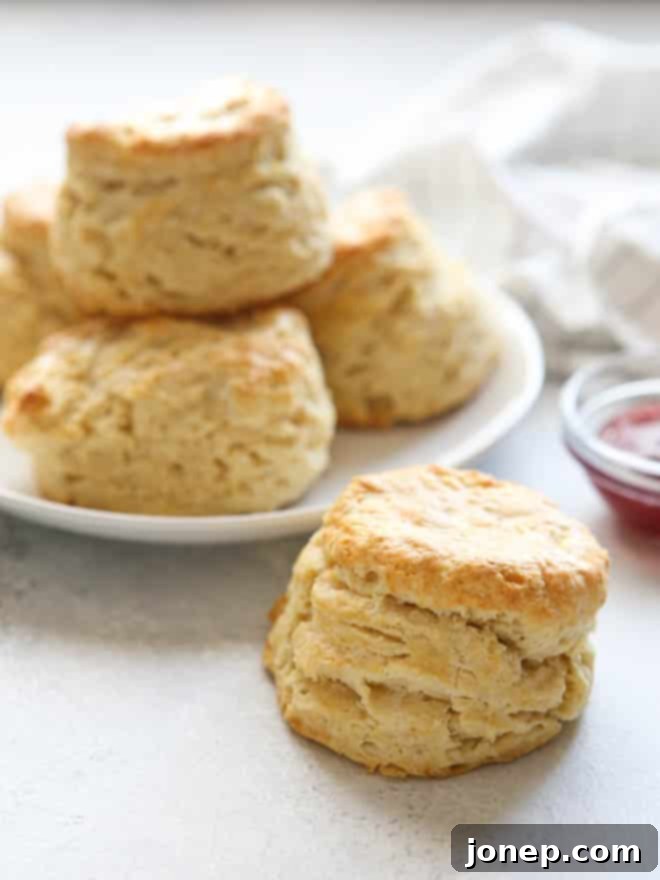
These easy, flaky buttermilk biscuits are incredibly versatile and truly perfect for any meal of the day. At our house, they’ve become an absolute necessity for lazy weekend mornings, often served quite simply with a generous slather of butter and a dollop of homemade jam or sweet honey. For a truly indulgent and classic Southern breakfast, we absolutely love to smother them with rich, creamy sausage gravy. But the delicious possibilities extend far beyond breakfast!
Consider incorporating them into other meals or serving them alongside:
- Hearty soups or stews: Their comforting, flaky texture makes them the quintessential accompaniment to robust bowls of soup, chili, or stew. They’re perfect for dipping and soaking up every last drop of flavorful broth.
- Classic fried chicken: A timeless, unbeatable Southern pairing that provides the perfect balance of savory and satisfying.
- Holiday feasts: These biscuits make a truly wonderful and appreciated addition to your Thanksgiving, Christmas, or any holiday dinner table, especially when served with a dollop of cranberry sauce or a savory spread.
- Quick and easy sandwiches: Split them open and fill them with scrambled eggs, crispy bacon, a slice of cheese, or even thin slices of ham or turkey for a delicious and satisfying breakfast or lunch sandwich.
- Sweet dessert treats: Drizzle warm biscuits with maple syrup, a sprinkle of cinnamon sugar, or split them and top with fresh berries and a dollop of whipped cream for a delightful, rustic dessert.
From breakfast and brunch to lunch, dinner, and even dessert, these homemade biscuits genuinely shine at any time of day, proving their incredible adaptability!
Explore More Delicious Biscuit Recipes
Once you’ve confidently mastered this fundamental easy buttermilk biscuit recipe and experienced the sheer joy of homemade flakiness, you’ll feel empowered to explore other exciting variations. Here are a few more fantastic biscuit recipes from our collection that we highly recommend adding to your baking repertoire. Each offers a unique twist while retaining that beloved biscuit comfort:
- Butternut Squash and Rosemary Biscuits: A delightful savory and earthy twist, these are especially perfect for autumn meals or alongside roasted meats.
- Whole Wheat Cheddar Biscuits: For a heartier, incredibly cheesy, and utterly satisfying biscuit experience that’s great with chili or soup.
- Cream Cheese Biscuits: Made with cream cheese in the dough, these offer an extra layer of richness and an incredibly tender, almost cake-like texture.
- Cinnamon Roll Biscuits: A sweet, pull-apart treat that ingeniously combines the best qualities of a fluffy biscuit with the sugary, spiced goodness of a cinnamon roll – perfect for brunch!
Get the Full Easy Buttermilk Biscuit Recipe Here
Ready to bake the most delicious, flaky, and tender biscuits of your life? Below, you’ll find the complete, easy-to-follow recipe for these homemade buttermilk biscuits. It includes precise ingredient measurements, detailed step-by-step instructions, and all the essential tips you need for success. Gather your ingredients, apply the techniques we’ve covered, and prepare to enjoy an unforgettable batch of homemade goodness!

Easy Buttermilk Biscuits
Pin Recipe
Leave a Review
Ingredients
- 2 cups (240 grams) all-purpose flour
- 1 tablespoon baking powder
- ½ teaspoon baking soda
- ½ teaspoon coarse salt
- 6 tablespoons (85 grams) cold unsalted butter , cubed
- ¾ – 1 cup (175-250 ml) cold buttermilk, plus additional for brushing
Instructions
-
Preheat oven to 400 degrees Fahrenheit (200°C). Line a large sheet pan with parchment paper to prevent sticking and ensure easier cleanup after baking.
-
In a spacious mixing bowl, combine the all-purpose flour, baking powder, baking soda, and coarse salt. Whisk these dry ingredients thoroughly for about 30 seconds to ensure they are evenly distributed. Add the very cold, cubed unsalted butter to the mixture. Using a pastry cutter or two forks, quickly cut the butter into the dry ingredients until the mixture resembles coarse meal, with some pea-sized pieces of butter still visible. Avoid overworking the butter, as it needs to remain cold.
-
Pour in 3/4 cup of cold buttermilk. Stir gently with a spatula, just until the dough begins to come together. The dough will likely still look somewhat dry and shaggy; this is normal. If it appears excessively dry and isn’t forming a cohesive mass, add more buttermilk one tablespoon at a time, stirring briefly after each addition, until the dough just barely holds together. (From experience, 3/4 cup plus 2 additional tablespoons often achieves the perfect consistency without over-hydrating.)
-
Carefully dump the dough mixture out onto a clean, lightly floured work surface. Using your hands, gently bring the dough together into a rough ball, kneading it very lightly just until the dry bits are mostly incorporated. Remember the golden rule: minimal handling is absolutely key for tender, flaky biscuits.
-
Pat the dough down with your hands until it forms a rectangle or circular shape about 1-2 inches thick. Lift one half of the dough and fold it directly over onto the other half. Gently flatten it again to its original 1-2 inch thickness. Repeat this “fold and flatten” process approximately 5 times. This crucial step creates numerous distinct layers within the dough, which translate to extreme flakiness when baked.
-
After the final fold, roll or pat the dough to a uniform thickness of about 1 inch. Use a lightly floured round cutter (a 3 or 3½-inch cutter typically yields 8 biscuits for this recipe) to cut out your biscuit rounds. Press the cutter straight down without twisting, then pull it straight back up. Gently gather any dough scraps, lightly press them together (avoid over-kneading), and cut a few more rounds until all the dough is used.
-
Place the cut biscuits on your prepared baking sheet. For softer-sided biscuits that rise taller, arrange them about 1/2 inch to 1 inch apart. For biscuits with crispier edges, space them further apart. For an enticing golden finish, brush the tops of the biscuits with a little additional cold buttermilk before baking.
-
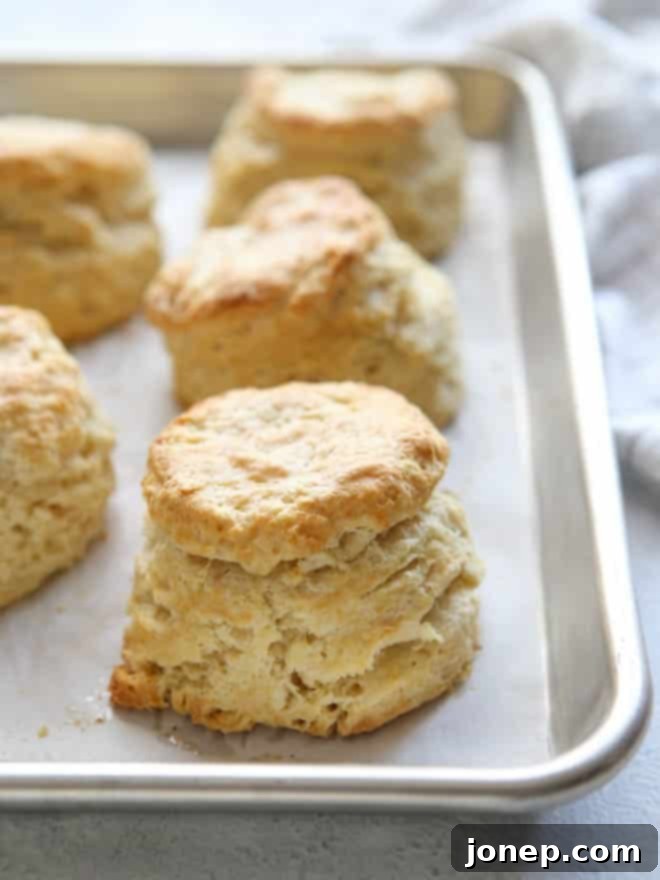
Bake in the preheated oven for 15-20 minutes, or until the tops are beautifully golden brown and the biscuits have risen significantly. Serve them immediately, ideally warm from the oven, for the best experience. Store any leftover biscuits in an airtight container at room temperature for up to 3 days, or follow the freezing instructions above for longer storage.
Video Tutorial
Note: This post was originally published in March 2011. It has since been updated with fresh photography, enhanced instructions, and expanded expert tips to ensure you achieve the best possible homemade buttermilk biscuits.