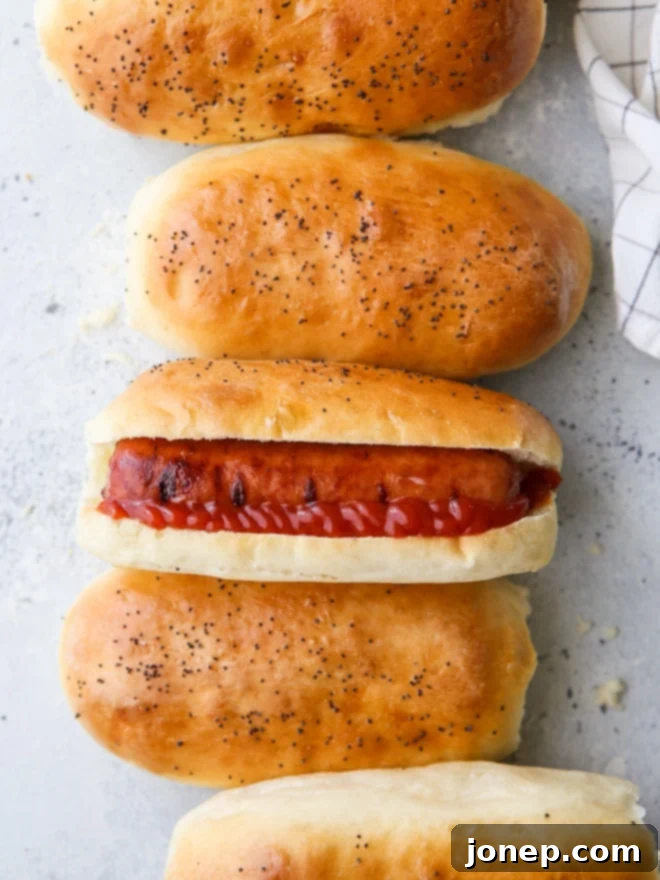
The Ultimate Guide to Soft & Delicious Homemade Hot Dog Buns: A Recipe Better Than Store-Bought!
Imagine biting into a perfectly grilled hot dog or a juicy bratwurst, nestled in a bun that’s incredibly soft, slightly sweet, and boasts a rich, homemade flavor. That’s the experience awaiting you when you ditch the bland, crumbly store-bought options and embrace the simple joy of baking your own hot dog buns from scratch. These aren’t just any buns; they’re an upgrade to your entire summer grilling experience, making every bite of your favorite cookout classic utterly delightful.
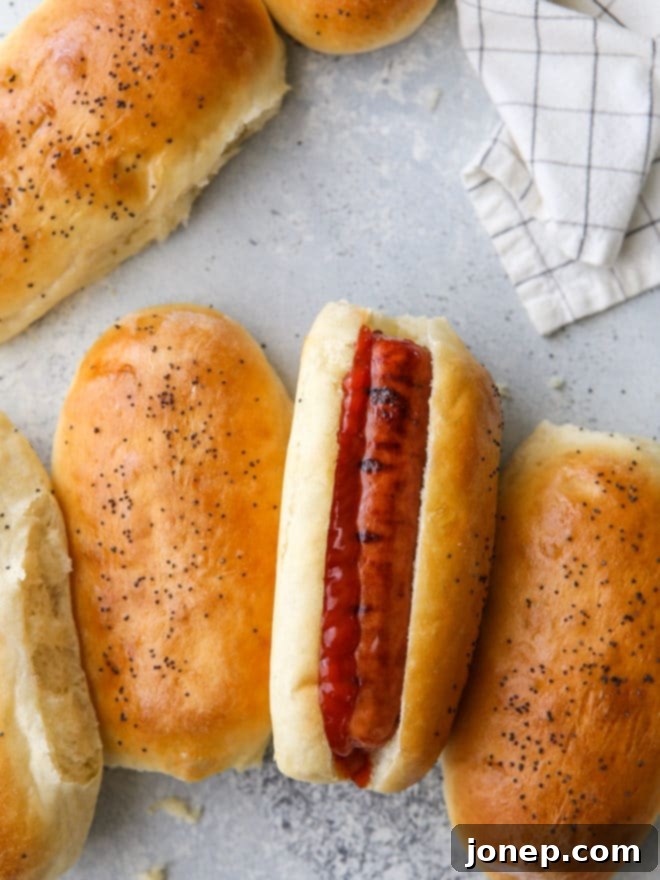
For many, hot dogs and brats are synonymous with summer – the smell of the grill, backyard gatherings, and casual meals with friends and family. However, the bun often plays a supporting role that’s, quite frankly, a little underappreciated and often underwhelming. Generic grocery store buns tend to be dry, lack substantial flavor, and can detract from an otherwise fantastic hot dog. This is precisely why making your own homemade hot dog buns is a game-changer. Once you experience the superior taste and texture, there’ll be no going back to the mass-produced variety.
Don’t let the idea of baking yeast dough intimidate you. Crafting homemade hot dog buns is no more complex than baking a simple loaf of bread. If you’ve ever successfully made any yeasted dough, you already possess the skills needed to create a batch of these incredibly soft and flavorful buns. And even if you haven’t, this recipe is designed to be straightforward and achievable for bakers of all levels. The reward for your minimal effort will be a batch of buns that are wonderfully tender, slightly sweet, and imbued with a richness that complements your frankfurter perfectly. They are, quite simply, awesome!
This beloved recipe for hot dog buns is adapted from a tried-and-true formula for homemade burger buns, a recipe so fantastic it easily transitioned from supporting juicy patties to cradling savory hot dogs. The result is a bun that truly shines: exceptionally soft, tender, and packed with significantly more delicious flavor than the average store-bought option. Forget those bland, crumbly rolls – prepare for a bun that elevates every bite and will have your guests asking for your secret!
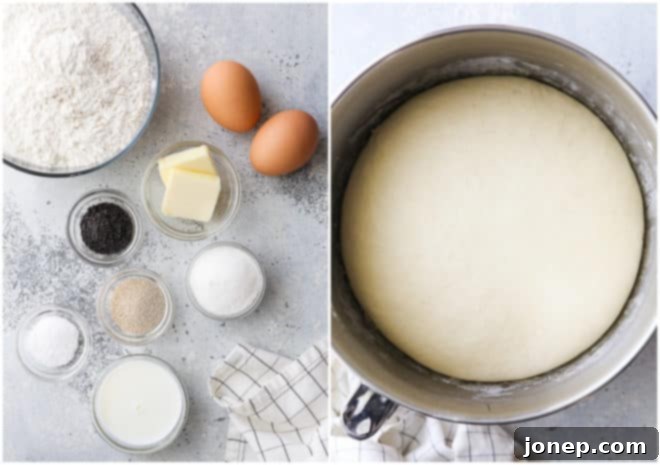
Essential Ingredients for Your Perfect Hot Dog Buns
Ready to embark on your baking journey? Gathering your ingredients beforehand ensures a smooth and enjoyable process. Here’s a detailed look at what you’ll need to create these irresistible hot dog buns, along with a little insight into each component’s role:
- Bread flour: The higher protein content in bread flour is key to developing gluten, which gives these buns their desirable chewiness and structure, preventing them from falling apart when loaded with toppings.
- Eggs: Eggs contribute to the richness, color, and tenderness of the buns. They also act as a binder, helping to create a stable dough.
- Whole milk: Unlike water, whole milk adds a lovely richness and softness to the dough due to its fat content, resulting in a more tender crumb.
- Granulated sugar: Sugar isn’t just for sweetness; it feeds the yeast, helping the dough to rise beautifully, and contributes to the golden-brown crust.
- Butter: Unsalted butter adds incredible flavor, tenderness, and richness. It helps to keep the buns soft and moist for longer.
- Active-dry yeast: The star of any risen bread! Active-dry yeast is what makes these buns light and airy. Ensure your yeast is fresh for the best rise.
- Salt: A crucial ingredient that balances the flavors, strengthens the gluten structure, and controls the yeast activity. Don’t skip it!
- Poppy seeds (for topping, optional): These add a classic visual appeal and a subtle nutty flavor and texture to the top of your baked buns.
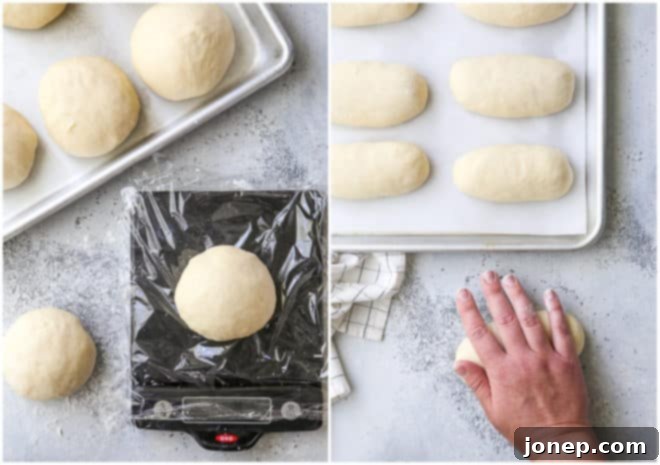
Step-by-Step: How to Make the Best Homemade Hot Dog Buns
Don’t let the thought of making bread from scratch intimidate you. This recipe breaks down the process into simple, manageable steps, making homemade hot dog buns surprisingly basic and incredibly rewarding to create. Follow these instructions for perfect results every time:
- Prepare the Dough: Begin by gently heating the butter, water, and milk in a small saucepan until the butter is just melted. Allow this mixture to cool slightly until it reaches a temperature between 120-130°F (49-54°C) – warm enough to activate the yeast but not so hot that it kills it. In the bowl of your stand mixer (fitted with a dough hook), combine 2 cups of the bread flour with the active-dry yeast, granulated sugar, and salt. Pour in the warmed liquid mixture and the lightly beaten eggs, mixing on low speed until everything is just combined. Gradually add the remaining flour, a little at a time, until the dough starts to pull away from the sides of the bowl. The dough should still be soft and sticky to the touch but should hold together when you grasp it, not fall apart. Continue kneading for several minutes until the dough is smooth and elastic.
- First Rise: Transfer the prepared dough to a lightly greased bowl, turning it once to coat. Cover the bowl tightly with plastic wrap or a clean kitchen towel. Place it in a warm, draft-free spot and let it rise until it has doubled in size, which typically takes about 1 hour. A good warm spot could be near a sunny window, in a slightly warm oven (turned off, with just the light on), or a microwave with a cup of hot water placed inside. Here are a few suggestions for ideal places to let your dough rise.
- Portion and Shape Buns: Once the dough has completed its first rise, gently punch it down to release the air. Turn the dough out onto a lightly floured surface. Now it’s time to portion and shape! (See the detailed shaping tips below for best results). For accuracy, use a digital kitchen scale to divide the dough into 10 equal pieces.
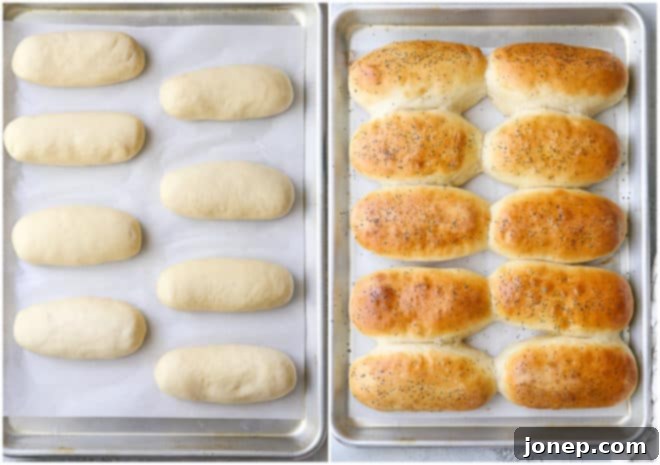
- Second Rise (Proofing): After shaping, arrange the buns on a baking sheet lined with parchment paper, leaving some space between them. Loosely cover the shaped buns with greased plastic wrap (this prevents them from sticking as they rise) and let them rise again until they are noticeably puffy and appear lighter, about 30 minutes. This second rise, known as proofing, is crucial for developing a light and airy texture. While the buns are proofing, preheat your oven to 400°F (200°C).
- Add Egg Wash and Toppings: In a small bowl, whisk together 1 large egg with 1 tablespoon of water to create an egg wash. Gently brush the tops and sides of each risen bun with this egg wash. This will give them a beautiful golden-brown color and a slightly shiny crust. If desired, sprinkle with poppy seeds for that classic hot dog bun finish.
- Bake: Transfer the baking sheet to your preheated oven. Bake the hot dog buns for approximately 12-15 minutes, or until they are puffed up and gloriously golden brown. Keep an eye on them towards the end of the baking time, as oven temperatures can vary.
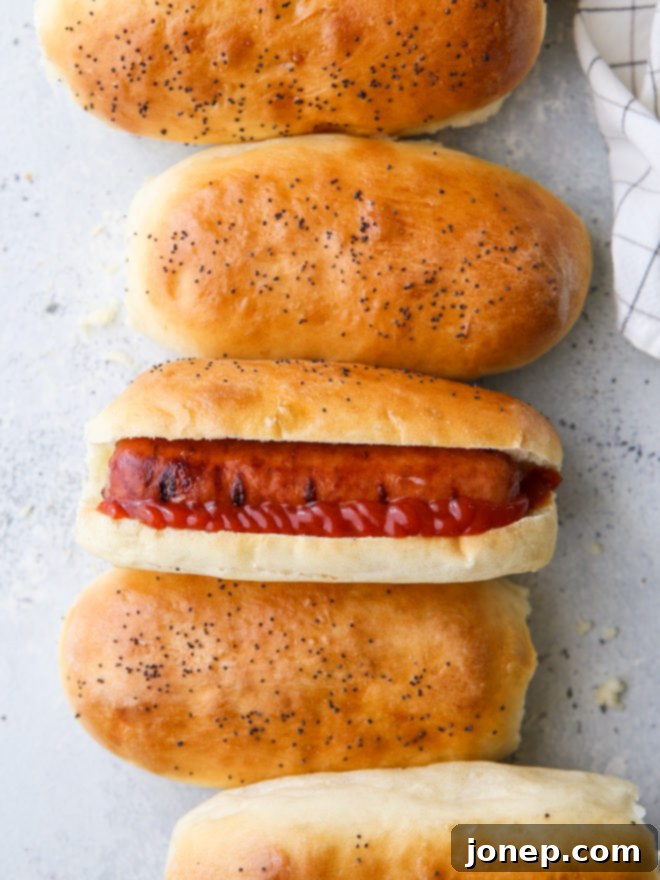
Once baked, remove them from the oven and let them cool slightly on a wire rack before slicing. Then, enjoy these magnificent homemade hot dog buns with your favorite grilled hot dog or brat, piled high with your preferred toppings! Get ready for a taste sensation that will redefine your summer cookouts.
Mastering the Art: How to Shape Homemade Hot Dog Buns Perfectly
Shaping your hot dog buns correctly is key to achieving that classic oblong shape and ensuring they hold your hot dogs beautifully. Follow these steps for consistently well-formed buns:
- Divide the Dough: After the first rise, gently punch down the dough and turn it out onto a clean, lightly floured surface. For precise and uniform buns, use a digital kitchen scale to divide the risen dough into 10 equal pieces. Aim for consistency, as this ensures even baking.
- Form into Balls: Take each individual piece of dough and gently use your fingers to gather it into a tight ball. Pinch the seams together firmly at the bottom of the ball. This technique creates a smooth, taut surface on top of the bun, which results in a nicer appearance and helps prevent tearing during rising.
- Roll into Logs: On your lightly floured surface, take each dough ball and roll it into an oblong log shape, approximately 5 inches (12-13 cm) long. This length is ideal for a standard-sized hot dog, providing ample space for the frankfurter and toppings without being too bulky. Aim for an even thickness throughout the log.
- Flatten Slightly: Carefully place each shaped bun on a sheet pan that has been lined with parchment paper, ensuring there’s about an inch or two of space between them. Using the palm of your hand or your fingertips, gently pat down the tops of the buns to flatten them slightly. This subtle flattening is important because yeast dough tends to rise most significantly in the center during baking. By pre-flattening, you encourage a more traditional, elongated hot dog bun shape rather than a rounded, dome-like roll.
With these shaping tips, your homemade hot dog buns will not only taste incredible but will also look professionally made, ready to cradle any hot dog or sausage with perfection.
Pro Tips & Expert Advice for Your Best Homemade Hot Dog Buns
Achieving bakery-quality hot dog buns at home is easier than you think, especially with a few expert tips and tricks up your sleeve. These insights will help you navigate common baking challenges and ensure your buns turn out perfectly soft, fluffy, and flavorful every single time.
- Instant vs. Active Dry Yeast: This recipe uses active dry yeast, which typically requires activation in warm liquid. If you prefer to use instant yeast, you can reduce the amount slightly to 1 ¾ teaspoons. Instant yeast doesn’t require prior proofing and can be mixed directly with the dry ingredients. However, if you’re unsure about your yeast’s freshness, it’s always a good idea to proof it first by letting it sit in a portion of the warm milk/water mixture with a pinch of sugar for 5-10 minutes until foamy.
- The Flour Factor: The amount of flour needed for your hot dog buns is not an exact science and can vary significantly due to several factors. Humidity in your climate, how you measure flour (scooping vs. spooning and leveling), and even the brand of flour can all play a role. I’ve provided a range (3-4 cups) as a guide. The key is to stop adding flour when the dough begins to pull away from the sides of the bowl at the top, but still remains slightly sticky towards the bottom. It should be sticky enough that you’ll need floured hands to work with it, but strong enough to stretch without tearing. Remember, a softer dough yields softer rolls, so err on the side of slightly too wet rather than too dry. For detailed guidance on accurate flour measurement, check out how I measure flour.
- All-Purpose Flour Substitute: While bread flour is recommended for its higher protein content that creates a chewier bun, you can certainly use all-purpose flour. Just be aware that you’ll likely need to add more than the recommended 3-4 cups – potentially up to ½ cup more, depending on its protein content. Adjust as necessary until you achieve the desired dough consistency.
- Don’t Stress Over Shapes: Baking is an art, not always a perfect science! If your hot dog bun shapes come out a little quirky or not perfectly uniform, don’t worry about it. This happens to even experienced bakers. The most important thing is that they will still taste absolutely delicious, and that’s what truly matters for a fantastic homemade hot dog.
- Make Ahead and Storage Solutions: These homemade hot dog buns are undoubtedly at their absolute best on the day they are baked, offering peak freshness and softness. However, you can plan ahead!
- Unbaked Dough: After shaping the buns, instead of letting them proof for the second rise, cover them tightly with greased plastic wrap and refrigerate for up to 12-18 hours. When you’re ready to bake, remove them from the fridge and let them come to room temperature and proof for about 45-60 minutes (or until puffy) before proceeding with the egg wash and baking.
- Baked Buns: Once baked and fully cooled, store your hot dog buns in an airtight container at room temperature for up to 3 days. For longer storage, freeze the baked buns for 1-2 months. To use, simply thaw them at room temperature for several hours or gently warm them in a low oven for a few minutes. They truly taste just as good as fresh, making them perfect for meal prep or unexpected grilling sessions!
- Serving Beyond Hot Dogs: While perfect for hot dogs and brats, these versatile buns are also fantastic for sliders, pulled pork sandwiches, or any small deli sandwich filling. Their soft texture and rich flavor make them a great canvas for many culinary creations.
Don’t Stop Here! More Delicious Homemade Buns to Try
If you’ve fallen in love with the magic of homemade bread, especially for your burgers and sandwiches, then you’re in luck! There’s a whole world of delicious bun recipes waiting to be explored. Once you experience the superior flavor and texture that homemade offers, you’ll find it hard to go back to store-bought. Expand your baking repertoire with these fantastic recipes that will elevate any meal:
- Homemade Burger Buns: The perfect companion for your juicy hamburgers, these soft and fluffy buns will take your burger night to the next level.
- Whole Wheat Brioche Burger Buns: For a slightly healthier twist without sacrificing flavor or tenderness, these whole wheat brioche buns offer a rich, buttery taste with added fiber.
- Cheesy Herb Burger Buns: Infuse incredible flavor into your burger buns with a delightful combination of cheese and fresh herbs. A fantastic way to add an extra layer of gourmet taste to your burgers.
Each of these recipes brings its own unique character to the table, ensuring that your sandwiches, no matter the filling, are always served on the freshest, most delicious homemade bread.
Shop Tools for this Recipe
This recipe was originally published June 2014.

Homemade Hot Dog Buns
Pin Recipe
Leave a Review
Ingredients
- ¼ cup whole milk (60 ml)
- 1 cup water (237 ml)
- 2 tablespoons unsalted butter (28 grams)
- About 3-4 cups bread flour (420 grams, amount you’ll need will vary)
- 2 ¼ teaspoons active dry yeast (1 envelope, 7 grams)
- 2 tablespoons granulated sugar (25 grams)
- 1 ½ teaspoon salt
- 2 large eggs , lightly beaten
- 1 large egg + 1 teaspoon water , for egg wash
- Poppy seeds , for sprinkling (optional)
Instructions
-
In a small saucepan set over medium low heat, warm the milk, water and butter until butter is melted. Set aside to cool slightly to 120-130° F.
-
In the bowl of a stand mixer fitted with a dough hook, combine 2 cups of the flour, yeast, sugar and salt. Add the warm milk mixture, followed by the eggs and mix until combined.
-
With the mixer on medium low speed, continue to add more flour ¼ cup at a time until the dough clears most of the bowl but is still sticky to the touch. Continue to knead dough on medium speed until smooth and elastic, a few minutes more.
-
Place dough in a greased bowl and cover with plastic wrap. Let rise in a warm place until doubled, about 1 hour.
-
Gently punch down dough and knead a few times. Cover with plastic wrap to keep from drying out and let rest for about 10 minutes.
-
Divide the dough into 10 equal pieces and roll into an oblong roll 4 ½ inches long. Place on a sheet pan lined with parchment paper. Let rise until doubled again, about 30 minutes. Meanwhile, preheat oven to 400° F.
-
Brush rolls with egg wash and sprinkle with poppy seeds, if desired. Let bake until golden, about 10-12 minutes.
-
Buns are best the day they are baked but will keep in an airtight container at room temperature for up to 3 days.
