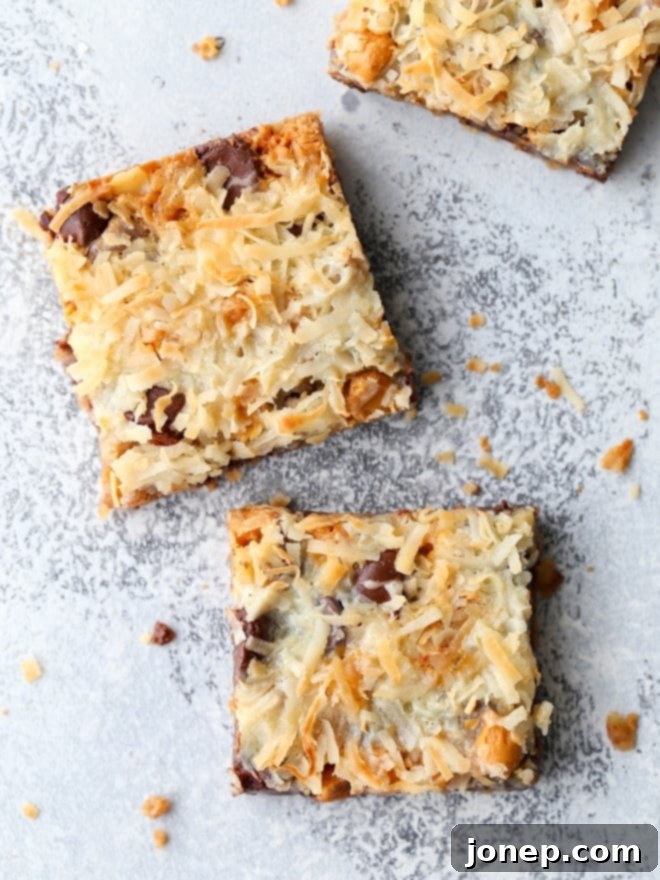
Irresistible 7 Layer Magic Bars: The Ultimate Easy Dessert Recipe
Prepare to be enchanted by the sheer simplicity and undeniable deliciousness of these “magic” cookie bars. Made with a golden graham cracker crust, a medley of baking chips, crunchy nuts, and chewy coconut, all bound together by luscious sweetened condensed milk, these bars are a guaranteed crowd-pleaser. Whether you’re a seasoned baker or a kitchen novice, this recipe promises a dessert that is as easy to make as it is impossible to resist!
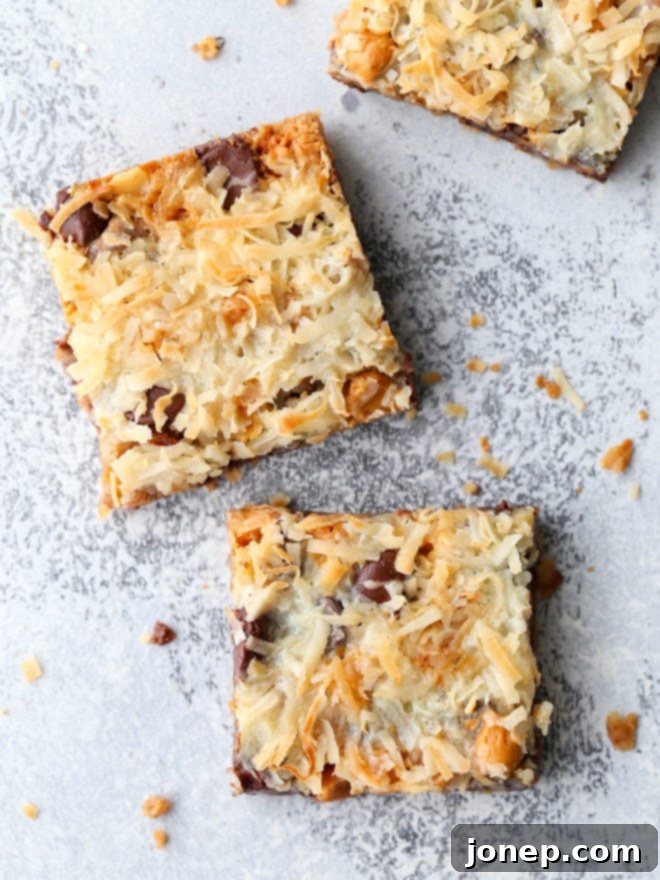
The Unveiling of a Magical Dessert
It’s funny how some of the most beloved classic recipes can completely elude you. Not long ago, a friend asked if I had a recipe for “7 Layer Magic Cookie Bars” on my blog. I had to confess my complete ignorance – I had no idea what she was talking about! But curiosity, as it often does, quickly led me down a delicious rabbit hole. I immediately googled them, devoured countless articles and reviews, and made a mental note to stock up on all the necessary ingredients during my very next grocery run. What I discovered was a revelation: a dessert so straightforward, yet so profoundly satisfying, it truly feels like magic.
For those of you who, like me, might be new to the wonderful world of magic bars, allow me to introduce you. These iconic bars are a symphony of textures and flavors, created by layering just seven simple ingredients in a baking dish. The true brilliance lies in their effortless preparation. You simply arrange the layers, pop them into the oven, and watch as they “magically” transform into an irresistible, gooey, and perfectly chewy treat. They are an absolute dream for anyone looking for a simple, yet dangerously addictive, dessert. Their make-ahead nature also makes them the perfect companion for parties, picnics, potlucks, and any occasion where you need a delightful dessert without the fuss.
What Makes Them So “Magic”? A Deep Dive into the 7 Layers
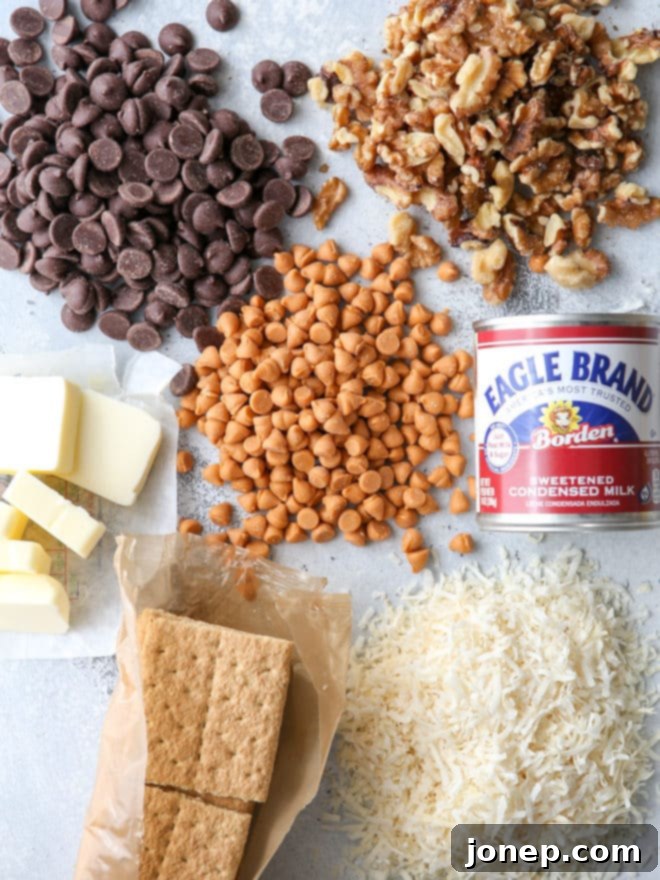
The secret to these bars’ enchanting appeal lies in the clever combination and interaction of its seven humble ingredients. Each layer plays a crucial role, contributing to the ultimate symphony of flavor and texture that makes these bars truly unforgettable:
- The Foundation: Graham Cracker Crust: This is where it all begins. Finely crushed graham crackers provide a sweet, slightly spiced, and perfectly crisp base that holds everything together. It’s the sturdy, flavorful canvas for our masterpiece.
- The Binder: Melted Butter: Simple, yet essential. Melted butter mixes with the graham cracker crumbs to form a cohesive crust that presses easily into the pan and bakes up golden and fragrant. It adds richness and ensures the crust stays intact.
- The Sweet Indulgence: Chocolate Chips: A universal favorite! Semi-sweet or bittersweet chocolate chips melt into pockets of pure bliss, providing that classic, comforting chocolatey goodness that everyone loves. They balance the sweetness and add a delightful gooey texture.
- The Caramel Kiss: Butterscotch Chips: Often the defining flavor of a traditional magic bar, butterscotch chips offer a unique, rich, and slightly salty-caramel note. They melt beautifully, adding an extra layer of complexity and chewiness. Feel free to explore other chip varieties if butterscotch isn’t your favorite, but don’t underestimate its charm here!
- The Crunch Factor: Chopped Nuts: Whether you choose walnuts or pecans, chopped nuts add a welcome textural contrast and an earthy, nutty flavor that complements the sweetness of the other layers. They provide a satisfying crunch in every bite.
- The Tropical Chew: Flaked Coconut: Shredded or flaked coconut toasts in the oven, intensifying its flavor and adding a lovely chewiness. It contributes a subtle tropical note and a beautiful golden-brown top layer when baked.
- The Golden Elixir: Sweetened Condensed Milk: This is truly the “magic” ingredient that ties everything together. Poured evenly over the layered ingredients, it seeps down, caramelizing as it bakes. It creates that signature gooey, chewy, and intensely sweet texture that is the hallmark of a perfect magic bar. It not only binds all the elements but also infuses them with moisture and rich, caramelized flavor.
Elevating a Classic: My Tips for Perfect Magic Bars
While the beauty of 7 Layer Magic Bars lies in their straightforward nature, a few minor adjustments and considerations can truly elevate them from good to absolutely phenomenal. Having pored over dozens of reviews and conducted some delicious experiments in my own kitchen, I’ve compiled these essential tips to ensure your magic bars are the best they can be:
- Pre-Mix Your Crust for Ease: Many classic recipes suggest melting butter directly in the pan and then adding graham crackers, which means working with a hot pan. Save yourself the trouble and potential burns! Follow my advice: combine the graham cracker crumbs and melted butter in a separate bowl first. This ensures an even mixture and allows you to press the crust into the baking dish without haste or heat.
- Optimize Butter Quantity for Texture: I found that a full stick of butter for the crust can sometimes make the bars a little too greasy. Slightly reducing the butter amount (as specified in my recipe below) results in a perfectly firm, crisp, and less oily crust that provides an ideal foundation without being heavy.
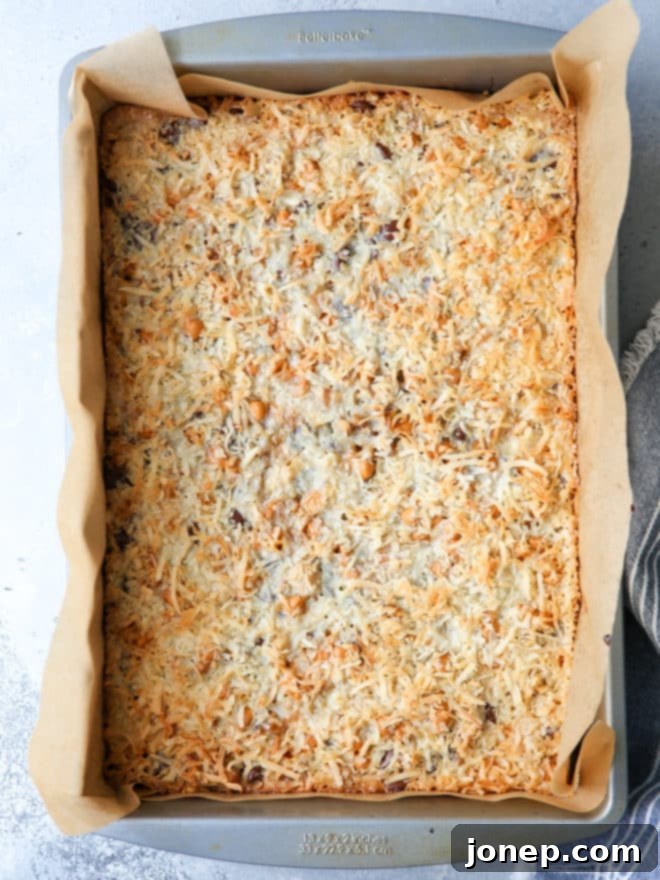
- Embrace the Power of Parchment Paper: This is a game-changer! These bars, with their gooey, caramelized condensed milk, can be incredibly sticky. Lining your baking dish with parchment paper is a non-negotiable step. It not only prevents the bars from sticking to the pan but also allows you to easily lift the entire slab of cooled bars out for clean, effortless slicing. A little overhang on the sides acts as convenient handles.
- Balance the Sweetness: Magic bars are, by nature, a sweet treat. If you prefer a less intensely sweet dessert, I highly recommend using semi-sweet or bittersweet chocolate chips instead of milk chocolate. Additionally, opting for unsweetened shredded coconut can further temper the overall sweetness, allowing the other flavors to shine through without being overwhelmed.
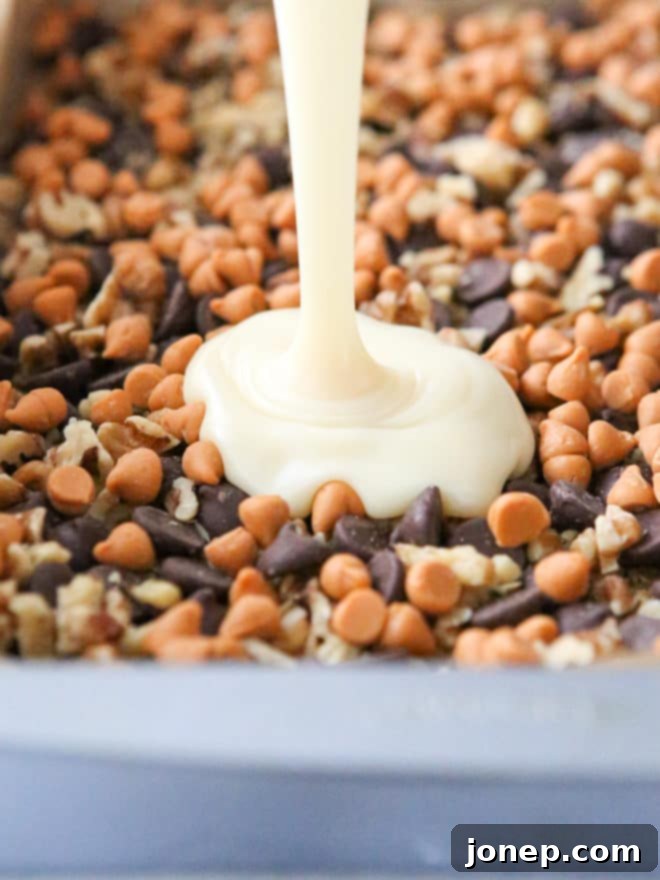
- Warm Your Condensed Milk (If Needed): Sweetened condensed milk can sometimes be quite thick, making it challenging to pour evenly. If you find yours too viscous, a brief warming in the microwave (in a heatproof dish) for 15-30 seconds can thin it out perfectly, ensuring an even coating over all the layers.
- Patience is a Virtue: Cool Completely: This is arguably the most crucial step for perfect slices. Resist the urge to cut into the bars while they’re warm. Allow them to cool completely to room temperature – ideally for several hours, or even chill them in the refrigerator. This allows the condensed milk to set properly, resulting in clean, firm, and beautifully layered bars.
Shop tools for this recipe
7 Layer Magic Bars
Pin Recipe
Leave a Review
Ingredients
- 6 tablespoons butter , melted
- 1 ½ cup graham cracker crumbs (1 sleeve graham crackers), crushed
- 1 cup semi-sweet or bittersweet chocolate chips
- 1 cup butterscotch chips
- 1 cup chopped walnuts or pecans
- 14 oz can sweetened condensed milk
- 1 ⅓ cup unsweetened shredded coconut
Instructions
-
Preheat oven to 350°F (175°C). Line a 9×13 inch baking dish with parchment paper, leaving an overhang on the sides for easy removal, or grease it very well with nonstick spray.
-
In a medium bowl, combine the graham cracker crumbs and melted butter. Mix until the crumbs are thoroughly moistened. Press this mixture evenly and firmly into the bottom of the prepared baking dish to form the crust.
-
Evenly layer the chocolate chips, butterscotch chips, and chopped nuts over the graham cracker crust. Spread them out to cover the entire surface.
-
Pour the sweetened condensed milk evenly over all of the layered ingredients in the baking dish. Ensure a good, even coating for optimal binding and caramelization.
-
Generously sprinkle the flaked coconut over the top of the condensed milk layer. This will toast beautifully during baking.
-
Bake in the preheated oven for 25 minutes, or until the coconut is nicely toasted and golden brown, and the edges of the bars are set.
-
Allow the bars to cool completely to room temperature in the pan before attempting to slice them. This step is crucial for clean, well-formed bars. Once cooled, use the parchment paper overhang to lift the bars out of the pan, then slice into squares or rectangles.
Notes
- Chip Variations: You can easily substitute the butterscotch chips for other varieties like white chocolate chips, caramel chips, peanut butter chips, or even cinnamon chips, depending on your preference.
- Coconut Choice: Feel free to use either unsweetened or sweetened shredded coconut. For a less sweet bar, opt for unsweetened.
- Thinning Condensed Milk: If your sweetened condensed milk is too thick to pour evenly over the baking dish, warm it briefly in the microwave (in a heatproof dish) for 15-30 seconds to thin it out. This ensures better distribution.
- Nut Substitutions: If you don’t have walnuts or pecans, almonds, cashews, or even macadamia nuts would work wonderfully. You can also lightly toast them before adding for extra depth of flavor.
- Storage: Store cooled magic bars in an airtight container at room temperature for up to 3-4 days, or in the refrigerator for up to a week. They also freeze beautifully for up to 3 months; simply thaw at room temperature before serving.
Adapted slightly from All Recipes.
Endless Variations: Make These Magic Bars Your Own
One of the most delightful aspects of 7 Layer Magic Bars is their incredible versatility. While the classic combination is perfect as is, they serve as a fantastic canvas for your creativity. Don’t hesitate to experiment with different ingredients to customize them to your taste or for special occasions:
- Different Chips: Beyond butterscotch and chocolate, consider white chocolate chips, peanut butter chips, dark chocolate chunks, or even a mix of holiday-themed chips like mint or peppermint for seasonal treats.
- Alternative Nuts: Instead of walnuts or pecans, try slivered almonds, chopped cashews, or luxurious macadamia nuts. For an extra layer of flavor, lightly toast your nuts before adding them to the layers.
- Crust Adventures: While graham crackers are traditional, you can also use crushed Oreos for a chocolatey base, shortbread cookies for a buttery foundation, or even ginger snaps for a spicy twist.
- Extra Add-ins: Get creative with additional layers! Mini marshmallows, dried cranberries or cherries, a drizzle of caramel sauce before baking, or even a sprinkle of sea salt after they cool can add exciting new dimensions.
- Themed Bars: For specific holidays, you can swap out chip colors (e.g., red and green M&Ms for Christmas, pastel chips for Easter) or add sprinkles on top for a festive touch.
Serving and Storing Your Delicious Magic Bars
These bars are incredibly versatile, making them suitable for a wide range of occasions. Serve them as a comforting dessert after a family meal, bring them to a potluck or picnic, or package them up as homemade gifts for friends and neighbors. Their rich, satisfying flavor pairs beautifully with a cup of coffee, tea, or a glass of cold milk.
To keep your magic bars at their best, store them in an airtight container at room temperature for up to 3-4 days. If you want them to last longer or prefer a firmer texture, they can be stored in the refrigerator for up to a week. For longer-term enjoyment, magic bars freeze exceptionally well. Wrap individual bars or the entire slab tightly in plastic wrap, then again in aluminum foil, and store in a freezer-safe bag or container for up to 3 months. When ready to enjoy, simply thaw them at room temperature.
Why These Magic Bars Will Become Your New Go-To Dessert
In a world of complicated recipes, the 7 Layer Magic Bar stands out as a beacon of simplicity and pure deliciousness. It’s a testament to how humble ingredients, thoughtfully layered, can create something truly extraordinary. With minimal effort, pantry staples, and just one pan, you can conjure up a dessert that’s chewy, crunchy, gooey, and utterly satisfying. Whether you’re making them for a crowd or simply to treat yourself, these magic bars are destined to become a beloved staple in your recipe repertoire. Give this classic a try with my updated tips, and prepare to be amazed by the delicious magic!
