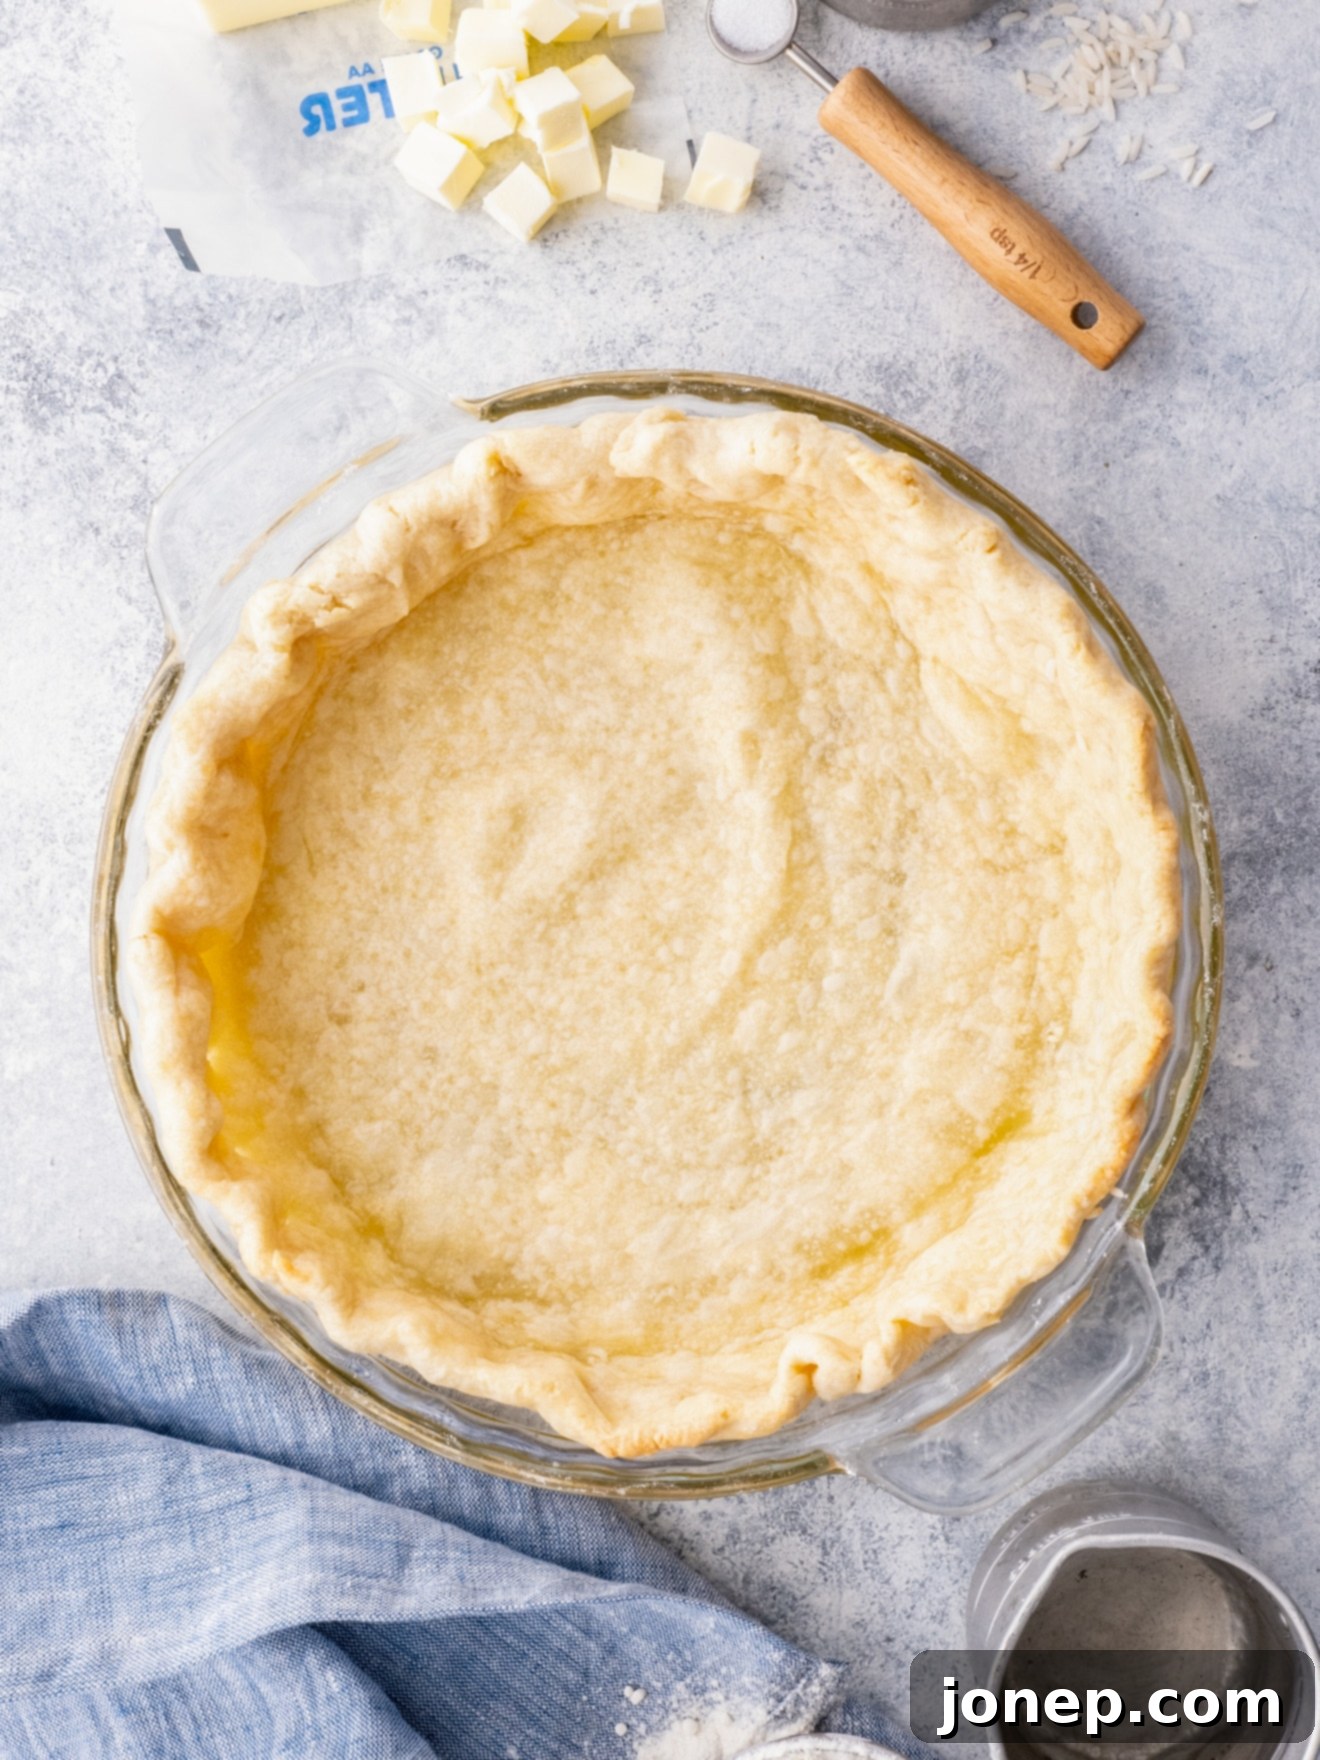
Foolproof Guide: How to Blind Bake Pie Crust Perfectly (No Shrinking!)
Mastering the art of blind baking a pie crust is a fundamental skill for any baker, ensuring your pies have a crisp, perfectly structured foundation every single time. There’s nothing quite as disheartening as pulling a beautiful pie crust from the oven, only to find it has shrunk, slumped, or developed a soggy bottom. But fear not! This comprehensive guide provides my tried-and-true, foolproof method for how to blind bake or par-bake pie crust without any shrinking—guaranteed. And the best part? You won’t need any fancy tools. Learn from common mistakes and follow this simple, step-by-step tutorial to achieve baking success and consistently stunning pie crusts.
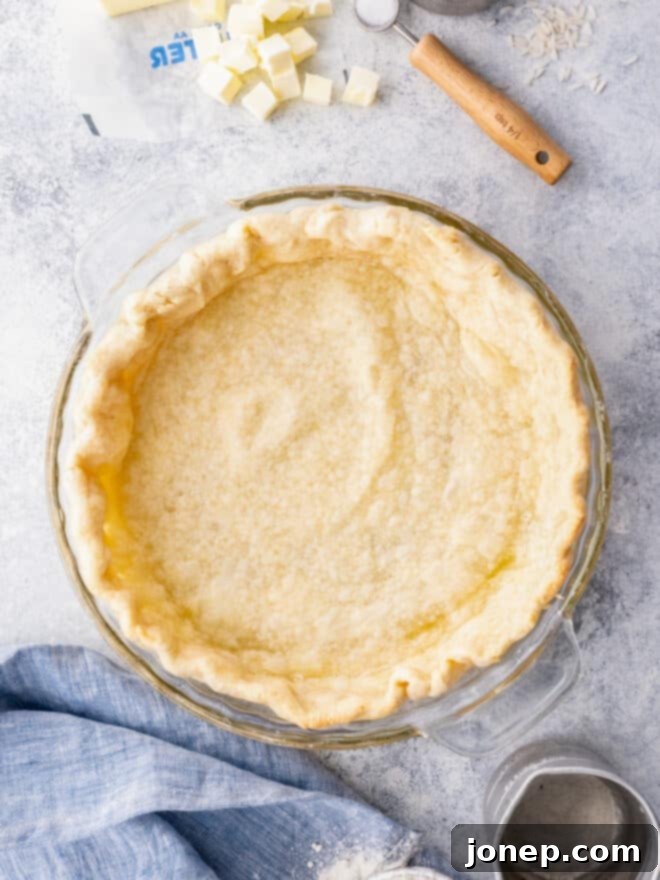
Over the years, like many enthusiastic home bakers, I’ve encountered my fair share of kitchen mishaps. From collapsed cakes to burnt cookies, I’ve seen it all. But among all the baking fails, a shrunken or slumped pie crust always felt like the most frustrating. All that meticulous effort in preparing the dough, rolling it out, and carefully crimping the edges, only to have it deform in the oven – it felt like a complete waste!
In the early days of my baking journey, I scoured countless blind-baking tutorials from various sources. While many offered good advice, I often found their methods inconsistent or incomplete, leading to continued disappointment. It was through persistent trial and error, experimenting with different techniques and temperatures, that I finally developed this reliable method. This approach consistently delivers a beautifully baked, perfectly shaped pie crust, ready for any filling.
By following these detailed steps, along with my invaluable tips and tricks, I am confident that you too will achieve impeccable results. Say goodbye to shrunken crusts and hello to perfectly blind-baked pies!
Table of Contents
- Blind-bake and Par-bake: What Do They Mean?
- How to Blind Bake Pie Crust: A 4-Step Method
- Step 1: Prepare Your Pie Crust
- Step 2: Chill or Freeze Your Pie Crust
- Step 3: Properly Fill with Pie Weights
- Step 4: Bake Pie Crust (Fully or Partially)
- Essential Tips for Blind Baking Success
- Common Blind Baking Questions (FAQ)
- Delicious Pie Recipes to Try
“Thanks so much! I did make this crust and it’s the first time I ever made a pie crust without shrinkage 🙂 I love this method.” — reader Patricia
Blind-bake and Par-bake: What Do They Mean?
Before diving into the “how-to,” it’s important to understand the two main terms associated with pre-baking pie crusts: blind baking and par-baking. While often used interchangeably, they refer to slightly different levels of doneness, each suited for specific pie recipes, and understanding the distinction is key to pie perfection.
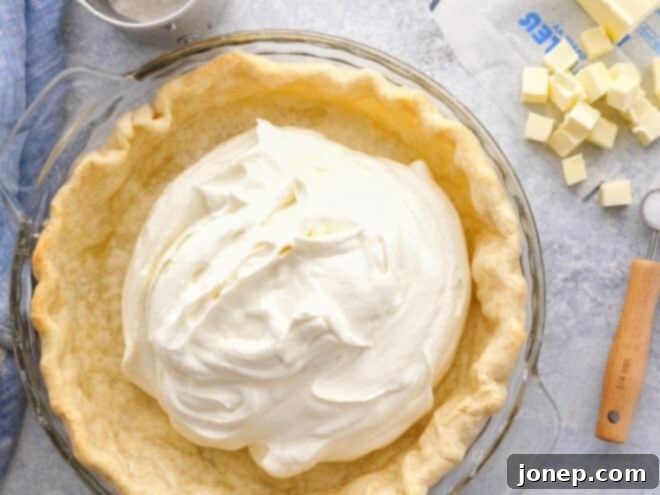
Blind baking refers to the process of baking a pie crust completely on its own, without any filling. This method is typically employed for pies that feature a no-bake filling, which will be added to the crust after it has cooled. The goal is to achieve a fully cooked, golden-brown, and crisp crust that can stand up to a wet or delicate filling without becoming soggy. Think of desserts where the filling requires no oven time at all, allowing the crust to be the star of the baked component. A fully blind-baked crust should be sturdy enough to hold its shape and the weight of the filling without collapsing.
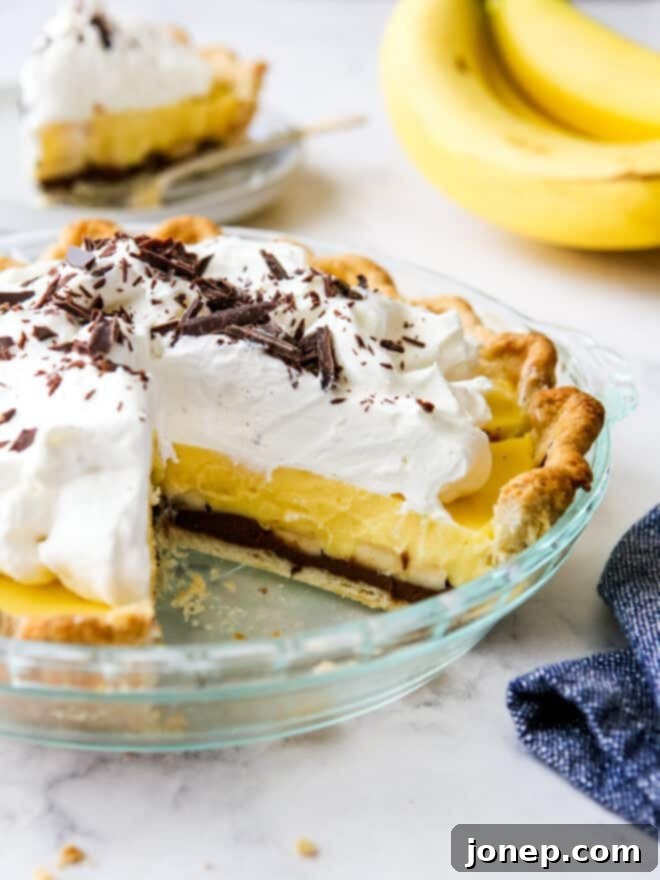
Examples of pies that require a completely blind-baked crust include: any kind of cream pie (like banana cream pie or coconut cream pie), French silk pie, chocolate mousse pie, lemon icebox pie, and certain fresh fruit tarts where the fruit is arranged post-baking.
Par-baking, also known as partial blind-baking, means that you only partially bake the pie shell before adding a filling and returning it to the oven to finish cooking. This technique is crucial for pies with wet, runny, or custard-like fillings that require additional baking time. The initial bake helps to set the crust, preventing it from absorbing too much moisture from the filling and becoming a dreaded soggy bottom. It also ensures the crust has a head start in cooking, as some fillings might cook faster than the raw dough would. This pre-baking firms up the base and sides, creating a barrier against moisture, but leaves the crust pliable enough to complete its bake with the filling.
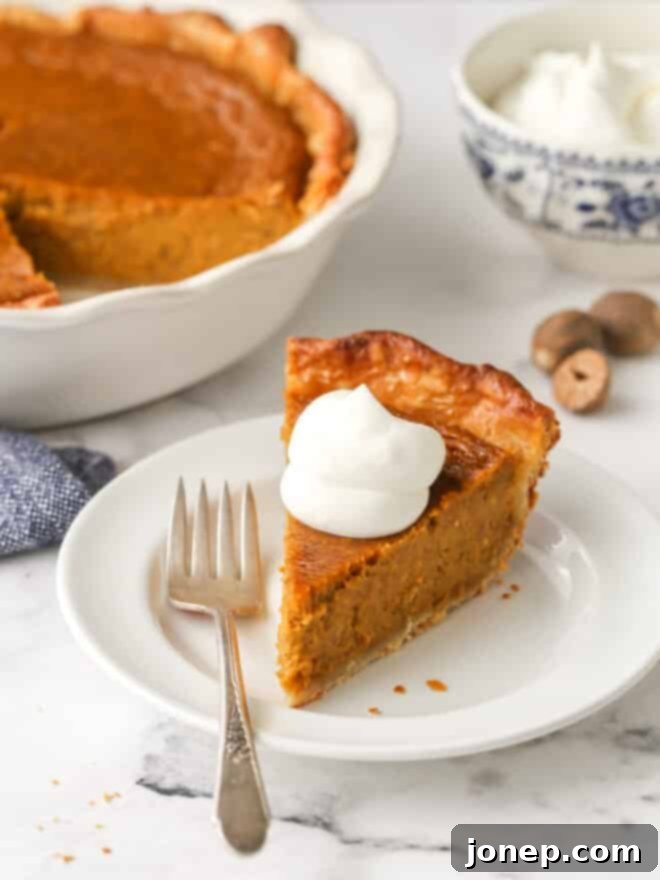
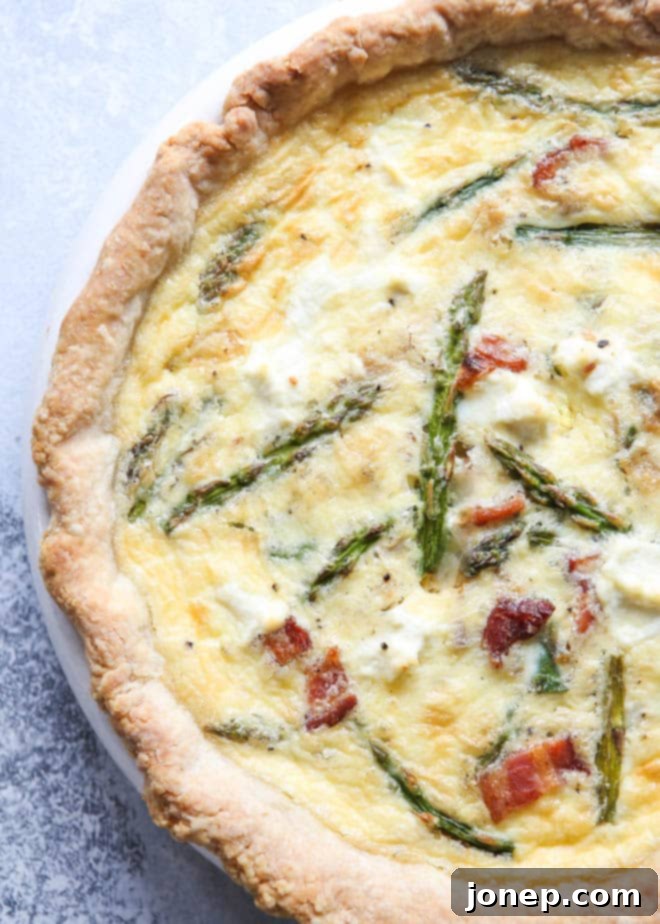
Pies that commonly benefit from a par-baked crust include: rich custard pies, classic pumpkin pie, dense pecan pie, tangy lemon meringue pie, and savory quiches. For these, the crust needs to be firm enough to support the filling but still have enough raw interior to meld with the filling during the final bake.
How to Blind Bake Pie Crust: A 4-Step Method
Blind baking might seem intimidating, but it’s actually quite straightforward when you follow these four essential steps. Each step plays a crucial role in preventing shrinkage, ensuring even baking, and achieving that perfect golden, flaky crust. We’ll delve deeper into each one below, providing all the details you need for success. Here’s a quick overview of the method:
- Prepare Pie Dough: Start with a well-made, thoroughly chilled pie crust.
- Freeze: A crucial step! Freezing the crust solidifies fats and relaxes gluten, helping it maintain its precise shape during baking.
- Add Baking Weights: These provide essential support, holding the crust’s sides up and preventing it from slumping.
- Bake: Precise baking times and temperatures ensure the crust is set and beautifully golden, whether partially or fully baked.
Step 1: Prepare Your Pie Crust
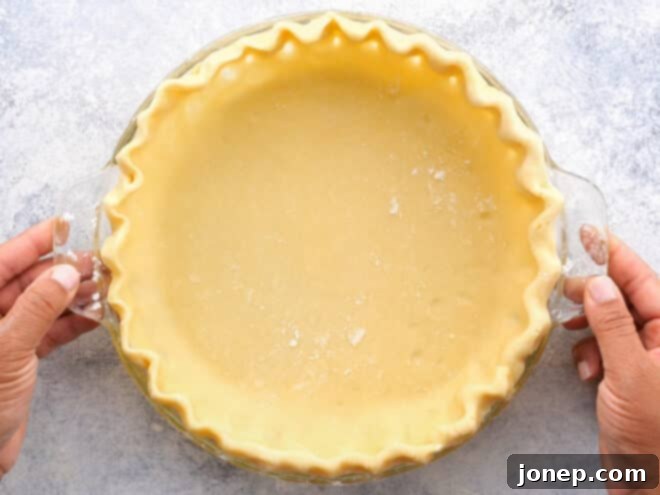
The foundation of any great pie is its crust, and proper preparation is the first step to blind-baking success. You can certainly use your preferred pie crust recipe or even a good quality store-bought crust for convenience. However, for truly flaky and flavorful results, I highly recommend exploring my go-to perfectly flaky pie crust recipe or its delicious buttermilk pie crust variation. If you’re short on time but still want homemade, you can even make pie crust quickly in a food processor!
Once your dough is ready, whether homemade or store-bought, roll it out evenly on a lightly floured surface. Aim for a thickness of about 1/8 to 1/4 inch, ensuring it’s large enough to comfortably fit your pie dish with at least a 1-inch overhang. Carefully transfer the rolled dough into your pie dish or pie plate, gently pressing it into the contours without stretching it. Overstretching the dough is a primary cause of shrinkage during baking. Finally, trim any excess dough, leaving a small overhang, and crimp the edges as desired, creating a decorative and functional border that will help hold the crust’s shape.
Step 2: Chill or Freeze Your Pie Crust
This step is absolutely critical and often overlooked or underestimated by many bakers. Once your pie crust is neatly fitted into its dish and the edges are beautifully crimped, it’s time to chill it thoroughly. Place the entire pie dish with the prepared crust into the freezer for at least 30 minutes, or even up to an hour. The colder the dough, the better, as this freezing process serves a few vital purposes:
- Solidifies the Butter/Fat: Pie crusts get their signature flakiness from cold butter or fat, which creates pockets of steam in the oven. Freezing the dough ensures these fat particles remain solid for longer in the oven, creating steam that lifts the layers of dough, resulting in a tender, flaky texture. If the butter melts too quickly, the crust will sag and become greasy.
- Relaxes the Gluten: Rolling out dough inevitably develops gluten strands, which have an elastic memory and can cause the crust to snap back and shrink when exposed to heat. Chilling or freezing allows these gluten strands to relax, making the crust more stable and significantly less prone to shrinking during baking.
- Holds Shape: A thoroughly frozen crust enters the hot oven as a rigid, stable structure. This rigidity gives it a much better chance of holding its carefully crimped shape and vertical sides before the fat begins to melt and the dough softens.
For an excellent make-ahead option, you can freeze the prepared, unbaked pie crust right in its pie dish for up to 1 month. Just make sure it is tightly double-wrapped with plastic wrap and then aluminum foil to prevent freezer burn and absorption of any unwanted freezer odors. When ready to bake, you can often bake directly from frozen, adding a few extra minutes to the initial bake time.
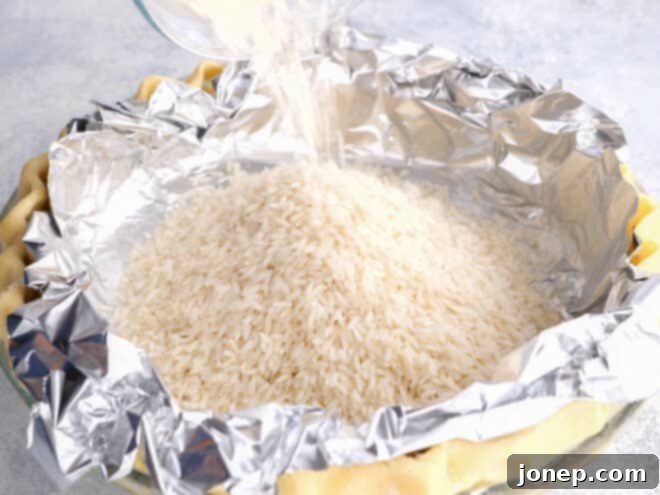
Step 3: Properly Fill with Pie Weights
This is another non-negotiable step if you want to prevent your pie crust from shrinking, collapsing, or turning out misshapen. Without something to hold its shape, the sides of the pie crust will inevitably collapse and slump down the sides of the pan as the butter melts and the dough softens in the oven’s heat. The steam from the melting fat can also cause the bottom to bubble up. Do not skip the pie weights! They provide the necessary support to maintain the crust’s structure.
While you can certainly buy dedicated ceramic pie weights made specifically for this purpose (and they are reusable indefinitely), you can also easily and effectively use inexpensive, readily available alternatives like dried rice or dried beans. These are my preference because they’re cheap, easy to find, and work just as well, acting as excellent heat conductors. Just avoid using popcorn kernels, as they might pop!
First, take a sheet of heavy-duty aluminum foil or crinkled parchment paper (crinkling it first helps it conform better to the crust’s shape). Grease one side of this liner lightly with non-stick cooking spray. This greased side should face down, against the pie crust. Carefully press the foil or parchment into the frozen pie crust, ensuring it’s flush with the bottom and sides, and generously covers the crimped edges. This barrier prevents the weights from directly touching the dough, keeps the crust clean, and makes the weights incredibly easy to remove. Use more than one sheet if necessary to ensure all areas of the crust are covered, especially the sides and edges.
Next, fill the lined crust all the way to the top with your chosen pie weights. Yes, all the way to the top! This is crucial. Filling the weights to the very brim of the crust ensures maximum support, leaving no room for the crust to shrink, slump, or bubble up excessively. If you only partially fill the crust, the unsupported upper portion will likely shrink down to the level where the weights begin, leading to an uneven and unsightly crust.
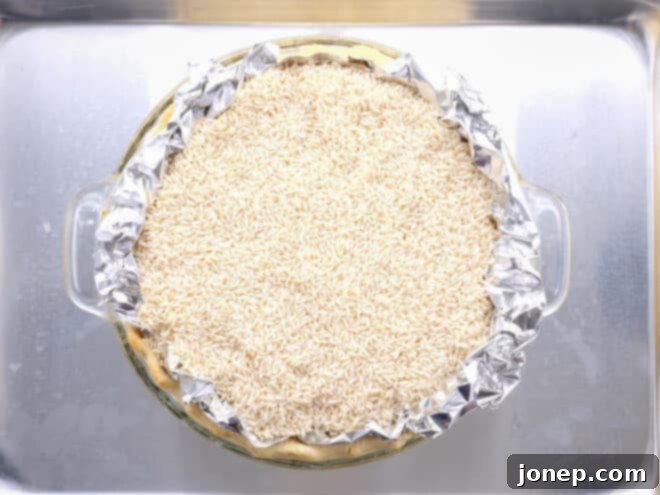
Step 4: Bake Pie Crust (Fully or Partially)
With your weighted crust ready, place the entire pie dish on a sturdy baking sheet pan. This baking sheet serves two important purposes: it makes transferring the hot pie in and out of the oven much easier and safer, and more importantly, it helps conduct heat more evenly to the bottom of the pie crust, promoting a crisper, more uniformly baked base and reducing the risk of a soggy outcome. Preheat your oven to a relatively high temperature of 425°F (220°C).
Bake the weighted pie crust for about 20-25 minutes. During this initial bake, you want the edges of the crust to appear completely baked and just beginning to turn a light golden brown. Many tutorials suggest baking for only 10-15 minutes, but in my extensive experience, this is rarely enough time. A shorter bake often means the sides of the crust haven’t fully set and stabilized, making them susceptible to shrinking or slumping when the weights are removed. A longer initial bake ensures the crust’s structure is firm and stable, and the fat has had enough time to render and create that flaky texture.
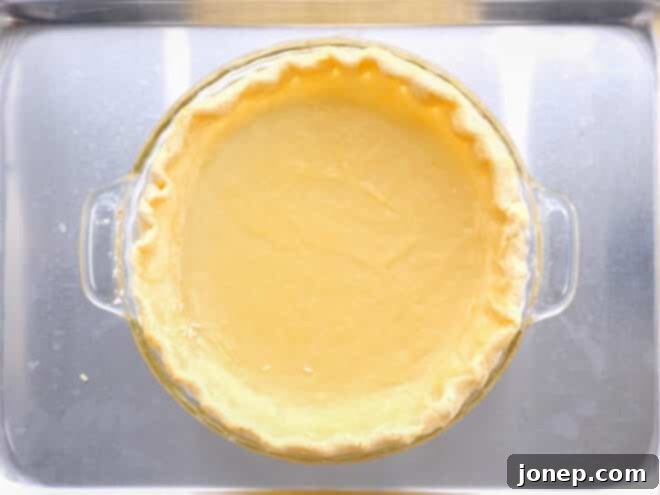
After this first bake, carefully remove the pie dish from the oven. Using the edges of the foil or parchment paper liner, gently lift the pie weights out of the crust. Set them aside in a heat-proof bowl to cool before storing. Now, you have a choice depending on your recipe’s requirements:
- If you only need a partially baked crust: This crust is now ready for your filling. The edges are set, and the bottom has had a head start. Add your pie or quiche filling mixture immediately and return the pie to the oven, baking according to your recipe’s specific instructions. The partial bake has given the crust a significant defense against a soggy bottom.
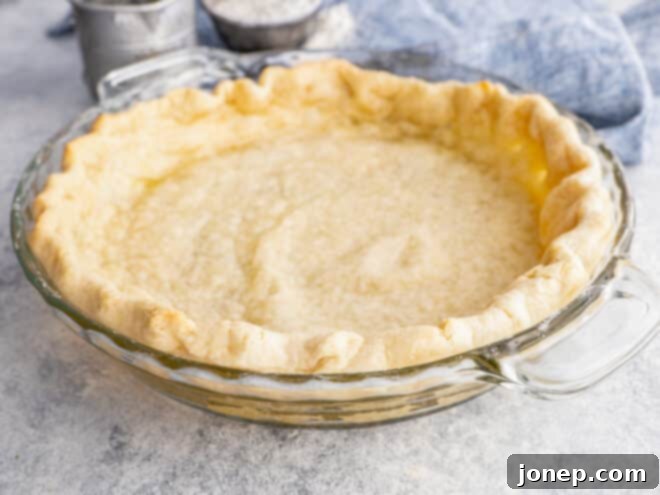
- If you need a fully baked crust: For recipes with no-bake fillings, the crust needs to be fully cooked and golden all over. To prevent the bottom from puffing up unevenly (which can happen once the weight is removed), gently dock the entire bottom of the pie crust several times with the tines of a fork. Then, return the crust to the oven (still at 425°F / 220°C, or sometimes reduced to 375°F / 190°C if the edges are already quite golden, but typically I keep it at 425°F for quick browning) for another 5-10 minutes. Bake until the bottom of the crust is thoroughly set, appears dry, and is uniformly golden brown. It should sound hollow when tapped lightly. Once fully baked, let it cool completely on a wire rack before adding your filling.
Essential Tips for Blind Baking Success
Beyond the core steps, these additional tips and tricks will further enhance your blind baking results, helping you achieve perfection and troubleshoot common issues:
- Store and Reuse Pie Weights: Dried rice and beans are fantastic for blind baking because they are incredibly cost-effective and can be used over and over again. After baking, let them cool completely on a baking sheet or in a bowl, then transfer them to an airtight container. I’ve personally used the same batch of rice for years without any issues or imparting any flavor! If you’ve invested in ceramic pie weights, ensure they are clean and thoroughly dry before storing them in a cool, dry place.
- Foil vs. Parchment Paper for Lining: I generally prefer using heavy-duty aluminum foil for lining the pie crust. Its malleability allows it to be easily molded to fit the contours of the crust perfectly, including pressing firmly against the crimped edges to prevent them from burning. If you opt for parchment paper, measure out a sheet large enough to cover the crust, then crumple it into a tight ball, then smooth it out again. This softening process makes it more pliable and easier to press into the pie dish without tearing, helping it conform better to the curves.
- Watch Edges to Prevent Burning: Sometimes, especially during the second bake for a fully blind-baked crust, the delicate crimped edges can brown too quickly. If you notice this happening during the initial weighted bake, ensure your foil or parchment liner is pressed firmly over the edges. For the second baking phase (after removing weights and foil), you can shield the edges by creating a foil pie shield. This is a simple ring of aluminum foil, shaped to fit over the rim of your pie dish, placed gently over the edges to protect them from direct heat.
- Do Not Skip Any Step: Every single step in this method — from chilling the dough sufficiently, to using enough pie weights, and baking for the recommended time — is designed to contribute to a perfect, shrink-free, and flaky crust. If you’re tempted to skip freezing time, or think you can get away with fewer pie weights, resist the urge! The small extra effort is well worth the successful outcome. Consistency is key!
- For a Golden, Shiny Crust: To give your pie crust edges a beautiful golden sheen and a slightly crispier texture, brush them lightly with an egg wash before the initial bake (after crimping, before adding foil and weights). An egg wash is typically made by whisking one large egg with about one tablespoon of water or milk until well combined. This not only adds shine but can also help with even browning.
- De-Puff While the Crust is Still Hot: Occasionally, despite diligent docking, the very bottom of the crust might puff up slightly after its second baking (when fully blind baking). If this happens, don’t worry! As soon as you remove the hot crust from the oven, gently push down the puffed area with the back of a spoon or a flat spatula. This needs to be done while the crust is still hot and pliable, before it cools and sets into its new, uneven shape.
- Don’t Stress if Crust is a Little Misshapen: Even with the most meticulous care, sometimes a pie crust might still slump slightly in one or two spots, or the crimping might come out a bit uneven. It’s perfectly okay! These minor imperfections are part of the charm of homemade baking. Once you add your delicious filling and your beautiful pie is complete and adorned, these small flaws will be far less noticeable, and truthfully, no one will likely care. Embrace the rustic beauty!
- Storage and Make-Ahead Instructions: A completely blind-baked pie crust is surprisingly versatile for make-ahead convenience. It can be stored at room temperature, loosely covered, for up to 3 days. For longer storage, you can freeze a fully baked crust for up to 1 month. Ensure it’s thoroughly cooled before wrapping it tightly in plastic wrap and then foil to prevent freezer burn. Thaw at room temperature before adding your filling.
- Use a Metal Pie Dish for Best Results: While ceramic and glass pie dishes are beautiful for serving, metal pie dishes (especially aluminum or steel) are generally superior for blind baking. Metal conducts heat more efficiently and evenly, leading to a crisper, more uniformly baked bottom crust, significantly reducing the risk of a soggy outcome. Dark metal pans may require a slight reduction in oven temperature or baking time.
- Preheat Your Oven Thoroughly: Always allow your oven to fully preheat to the specified temperature (425°F/220°C in this case), and ideally, let it hold that temperature for an additional 10-15 minutes before placing your pie crust inside. A properly preheated oven ensures the crust starts baking immediately at the correct temperature, which is key for setting its shape quickly and preventing shrinkage.
Common Blind Baking Questions (FAQ)
Here are answers to some frequently asked questions about blind baking pie crusts, offering quick solutions and clarifications for common concerns:
- Why does my pie crust always shrink? The most common reasons for shrinking are: not chilling the dough long enough (or at all) before baking, stretching the dough too much when fitting it into the pie dish, or not using enough pie weights (or any at all). Cold dough and proper weighting are your best defenses, as they help relax gluten and provide structural support against the heat.
- What can I use as pie weights if I don’t have any? Dried beans (like navy, kidney, or pinto), dried rice, or even small, clean metal ball bearings work perfectly as effective substitutes for ceramic pie weights. The key is to use enough of them to completely fill the crust to the top, providing maximum support.
- Can I skip lining the crust with foil/parchment? It’s highly recommended not to skip this step. The foil or parchment liner creates a barrier that prevents the weights from sticking to the dough and makes them much easier to remove in one go. Without it, your weights will likely become embedded in the crust, making removal tedious and potentially damaging to your crust.
- My crust still puffed up on the bottom after removing the weights, what went wrong? This usually indicates that the dough wasn’t sufficiently docked, or the weights didn’t cover the entire bottom adequately during the initial bake. Don’t fret! Gently pushing the puffed area down with the back of a spoon while the crust is still hot from the oven usually fixes this.
- How do I know if my crust is fully baked? A fully blind-baked crust will be uniformly golden brown all over, including the bottom. It will look dry and feel firm when gently tapped. If it looks pale or feels soft, it needs more time in the oven. For a par-baked crust, the edges should be golden, but the bottom can still be slightly paler.
- Can I prepare pie crusts ahead of time? Absolutely! You can prepare and freeze the unbaked, weighted crust right in the pie plate for up to a month (double-wrapped for protection). Alternatively, you can fully blind-bake the crust, let it cool, and then freeze it for up to a month. This is a fantastic time-saver, especially during busy holidays.
Delicious Pie Recipes to Try
Now that you’ve mastered the art of blind baking, it’s time to put your perfect crust to good use! Here are some delightful pie and tart recipes that will benefit immensely from your newly acquired skills, ensuring a crisp foundation for every delectable bite:

How to Blind Bake Pie Crust
Pin Recipe
Leave a Review
Ingredients
- 1 prepared pie crust (homemade or good quality store-bought)
- 1 pie dish or pan (preferably metal for best results)
- Heavy-duty aluminum foil or parchment paper
- Pie weights, dried beans, or dried rice (enough to completely fill the crust to the top)
- Non-stick cooking spray
- (Optional) 1 large egg + 1 tbsp water for egg wash (for a golden, shiny crust)
Instructions
-
Preheat Oven & Prepare Crust: Preheat your oven to 425°F (220°C). Roll your chosen pie crust out evenly on a lightly floured surface to about 1/8 to 1/4 inch thick. Carefully transfer it to your pie dish or pan, gently pressing into the contours without stretching. Trim excess dough, leaving a small overhang, and crimp edges as desired. If using an optional egg wash for a golden sheen, brush it lightly over the crimped edges now.
-
Freeze the Crust: Place the prepared pie crust (in its dish) in the freezer for at least 30 minutes. This critical step solidifies the butter and relaxes the gluten, effectively preventing shrinkage during baking. For make-ahead convenience, you can freeze it for up to 1 month, ensuring it’s tightly double-wrapped in plastic wrap and foil.
-
Line with Foil & Spray: Grease one side of a large sheet of heavy-duty aluminum foil (or crinkled parchment paper) with non-stick cooking spray. Press the greased side down into the frozen pie crust, ensuring it covers the entire surface, including the crimped edges. Use more than one sheet if necessary to ensure full coverage and support.
-
Fill with Pie Weights: Fill the foil-lined crust all the way to the top with your chosen pie weights, dried beans, or dried rice. Filling it completely provides maximum support, preventing the crust from slumping or bubbling up during baking.
-
First Bake (with weights): Place the prepared pie crust (in its dish) onto a baking sheet pan. Bake at 425°F (220°C) for about 20-25 minutes. During this time, the edges of the crust should appear fully baked and will have just started to turn a very light golden brown. This initial, longer bake is crucial for setting the crust’s structure and preventing later shrinkage.
-
Remove Weights: Carefully remove the pie dish from the oven. Using the edges of the foil liner, gently lift all the pie weights out of the crust. Transfer the weights to a large, heat-proof bowl to cool completely, then store them for future use.
If you need a partially blind baked crust (for pies with wet or runny fillings like pumpkin, pecan, or quiche):
-
Once the weights are removed (from step 5), your crust is now par-baked and ready for its filling. Immediately add your pie or quiche filling mixture and bake the pie according to your recipe’s specific instructions. The partial bake significantly helps in preventing a soggy bottom.
If you need a fully blind baked pie crust (for pies with no-bake creamy fillings like cream pies, chocolate mousse, or fresh fruit tarts):
-
After removing the weights (from step 5), gently dock the entire bottom of the pie crust several times with a fork to prevent it from puffing up unevenly. Return the crust to the oven (you can keep it at 425°F/220°C for quicker browning, or reduce to 375°F/190°C if the edges are already quite golden) and bake for another 5-10 minutes. Bake until the bottom of the crust is thoroughly set, appears dry, and is uniformly golden brown. If the bottom puffs up slightly, gently push it down with the back of a spoon while it’s still hot and pliable.
-
Allow the fully baked pie crust to cool completely on a wire rack before adding your no-bake filling. A completely baked pie crust can be stored at room temperature, loosely covered, for up to 3 days, or in the freezer for up to 1 month (ensure it’s well-wrapped after cooling).
Video
This tutorial was originally published November 2016, and has been extensively updated and expanded for clarity, comprehensiveness, and improved SEO in [Current Month] [Current Year].
