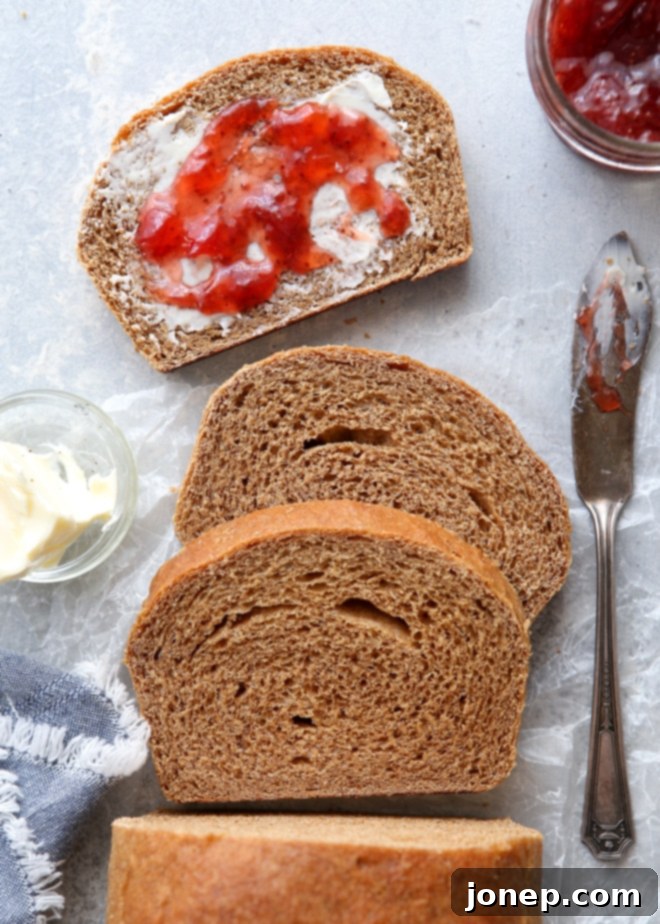
Bake the Best 100% Whole Wheat Bread: Soft, Fluffy, and Easy Homemade Loaf
Discover the joy of baking with this incredibly simple, hearty, and delicious 100% whole wheat bread recipe. Made exclusively with whole wheat flour, this loaf delivers a rich, nutty flavor and a wonderfully soft, chewy texture that defies common expectations of whole grain bread. Say goodbye to dense, dry loaves, and welcome a perfectly light and fluffy homemade bread that’s as wholesome as it is delicious.
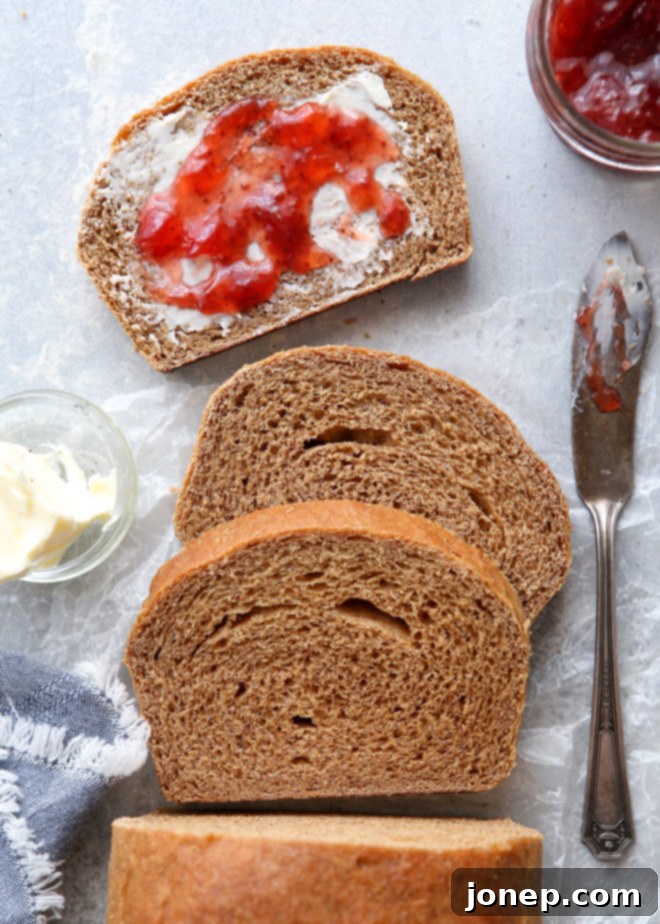
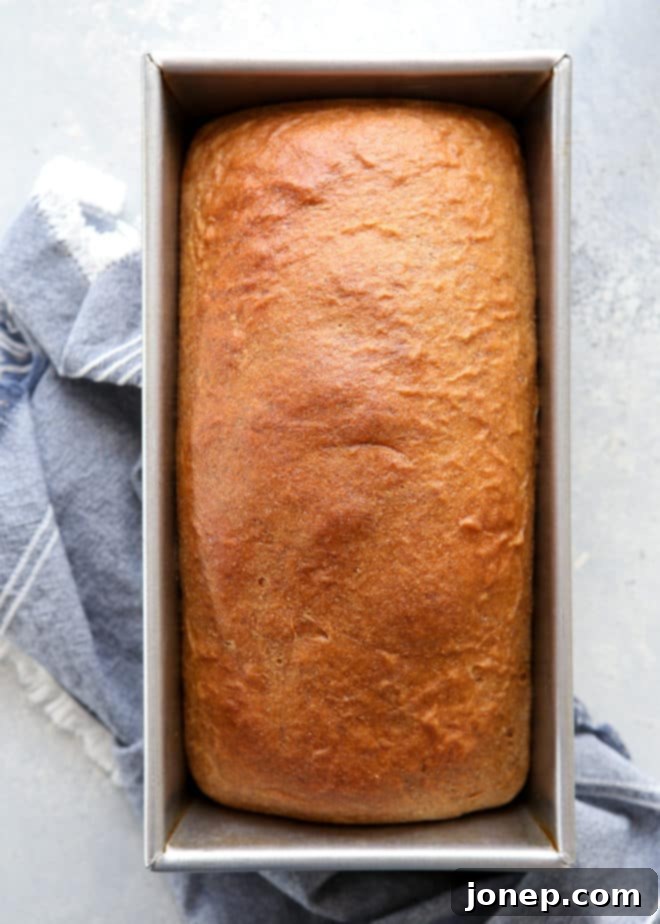
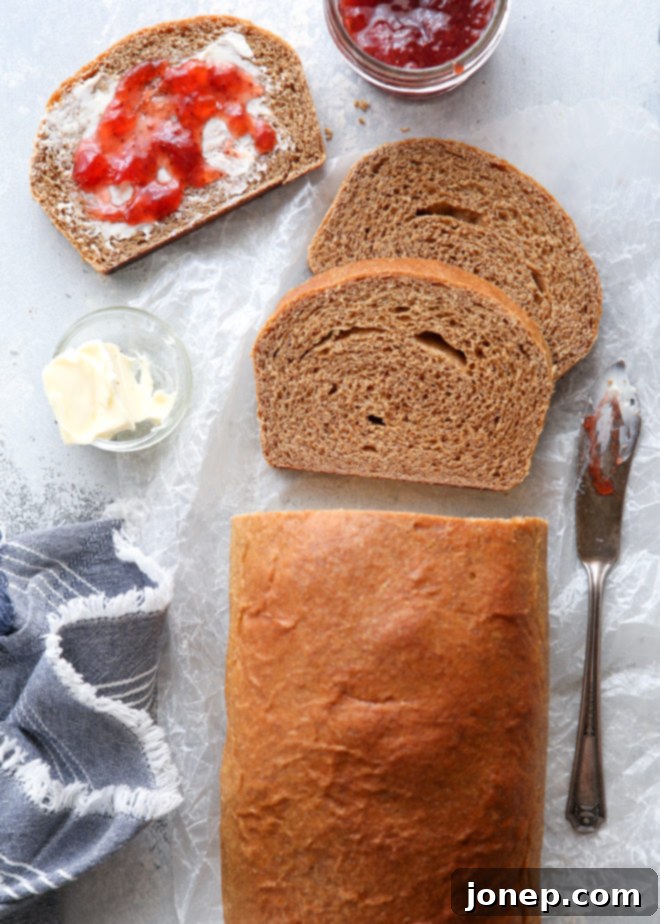
This remarkable 5-ingredient 100% whole wheat bread is a testament to how simple ingredients can create something extraordinary. It’s not only nutty and subtly sweet but also incredibly soft and never dense or dry. It’s absolutely divine when slathered with butter or your favorite jam, and equally fantastic for crafting wholesome sandwiches that will elevate your lunch game.
If the thought of baking bread from scratch feels intimidating, rest assured this recipe is designed for ease. Even beginner bakers will find success with this straightforward guide, proving that a truly delicious and healthy loaf of bread is well within your reach!
Table of Contents
- What Does “100% Whole Wheat” Mean?
- The Health Benefits of 100% Whole Wheat Bread
- Key Ingredients for This Whole Wheat Bread
- How to Make 100% Whole Wheat Bread (Step-by-Step Guide)
- Pro Tips for a Perfect Rise: Helping Your Dough Rise Faster
- Bread Baking FAQs
- More Whole Wheat Bread Recipes to Try
- 100% Whole Wheat Bread Recipe Card
What Does “100% Whole Wheat” Mean?
When a recipe specifies “100% whole wheat,” it signifies that the bread is made exclusively with whole wheat flour, without the inclusion of any refined flours like all-purpose or traditional bread flour. Many whole wheat bread recipes incorporate these other flours to achieve a lighter texture and milder flavor, which can sometimes lead to a less authentic whole grain experience.
However, this recipe breaks that mold! While it’s true that whole wheat flour can sometimes lead to heavier baked goods, this particular loaf is an exception. It’s crafted to be soft, incredibly fluffy, and rich in the distinct, wholesome flavor of whole grains. By using only whole grains, this bread not only offers a deeper, more satisfying taste but also delivers enhanced nutritional benefits compared to breads that mix in refined flours. You get the full goodness of the grain in every slice.
The secret to achieving this soft and tender (and exceptionally tasty!) loaf lies in carefully following the recipe’s instructions: using just enough flour to reach the right consistency and kneading the dough thoroughly to properly develop the gluten. This meticulous approach ensures a light and airy texture, proving that 100% whole wheat bread can be everything you desire and more.
The Health Benefits of 100% Whole Wheat Bread
Choosing 100% whole wheat bread is a fantastic decision for your health. Whole wheat flour retains all parts of the wheat kernel – the bran, germ, and endosperm – unlike refined flours, which remove the bran and germ. This means you’re getting a powerhouse of nutrients with every bite.
- Rich in Fiber: The high fiber content aids digestion, promotes gut health, and helps maintain stable blood sugar levels, which can be beneficial for weight management.
- Packed with Nutrients: Whole wheat is a great source of essential vitamins and minerals, including B vitamins (folate, thiamine, riboflavin, niacin), iron, magnesium, selenium, and zinc. These play crucial roles in energy production, immune function, and overall well-being.
- Heart Health: Regular consumption of whole grains has been linked to a reduced risk of heart disease, lower cholesterol levels, and improved blood pressure.
- Increased Satiety: The fiber and protein in whole wheat bread help you feel fuller for longer, reducing the urge to snack and supporting healthy eating habits.
By making this 100% whole wheat bread, you’re not just enjoying a delicious treat; you’re also making a nutritious choice for yourself and your family.
Key Ingredients for This Whole Wheat Bread
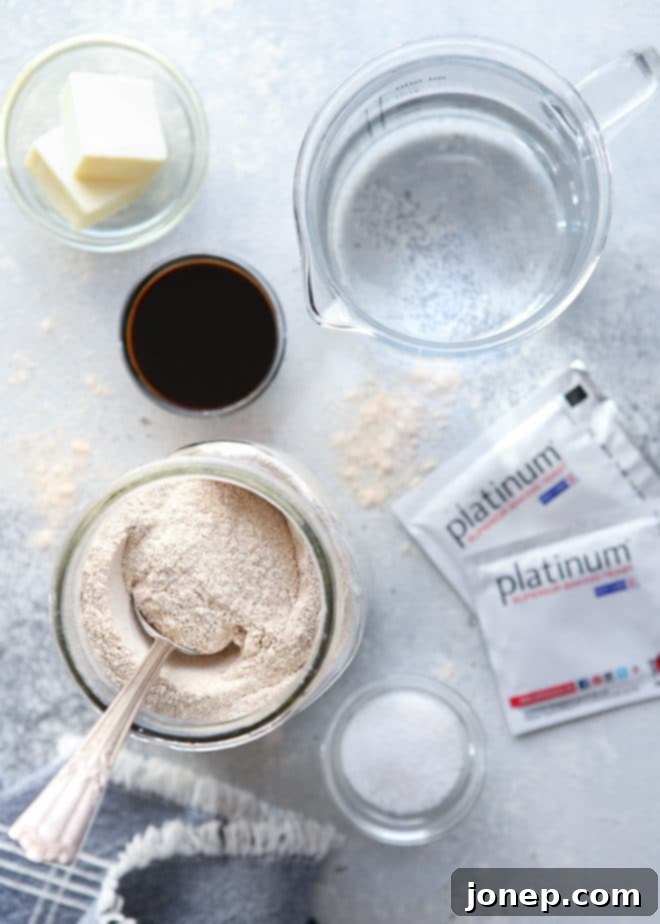
You’ll be amazed that only 5 essential ingredients are needed to create this incredibly flavorful and wholesome bread! (Find the full detailed recipe with measurements at the bottom of this article).
- Whole Wheat Flour: The star of our recipe. Using 100% whole wheat flour ensures maximum nutrition and that distinct earthy, nutty flavor. Choose a good quality flour for the best results.
- Butter: Adds richness and tenderness to the bread, contributing to its soft crumb. If you prefer, vegetable oil can be used as a dairy-free alternative, though it may subtly alter the flavor.
- Molasses: This is my secret ingredient for a truly unique and delicious whole wheat bread. Its dark, smoky, and slightly bitter-sweet notes wonderfully complement the whole wheat flavor, giving the bread a deeper color and complex taste. If molasses isn’t available or preferred, honey or maple syrup are good substitutes; just note that the bread will be milder in flavor and lighter in color.
- Active-Dry or Instant Yeast: The leavening agent that makes our bread rise. Both active-dry and instant/quick-rise yeasts work effectively in this recipe. Ensure your yeast is fresh and active for optimal rising.
- Salt: Essential for enhancing the flavor of the bread and also plays a role in regulating yeast activity and gluten development. Don’t skip it!
These simple ingredients, when combined thoughtfully, create a bread that is not only delicious but also incredibly satisfying.
How to Make 100% Whole Wheat Bread (Step-by-Step Guide)
While you can certainly prepare this whole wheat bread by hand, I highly recommend using a stand mixer fitted with a dough hook if you have one. A stand mixer simplifies the kneading process, prevents accidental over-flouring, and ensures the dough is kneaded long enough to develop the gluten, resulting in that wonderfully light and fluffy texture.
- Warm the Liquids: In a small saucepan, gently combine water, butter, and molasses. Heat over medium heat until the butter is just melted. It’s crucial not to overheat! Remove from heat and let the mixture cool to a temperature between 120-130°F (about 5 minutes). This temperature is ideal for activating yeast; anything hotter can kill it. Use a thermometer to be precise.
- Combine Dry Ingredients (Initial): In the bowl of your stand mixer (or a large mixing bowl if kneading by hand), add about 2 cups of the whole wheat flour, salt, and yeast. Give them a quick whisk to combine.
- Add Wet to Dry & Form a Wet Dough: Pour the cooled liquid mixture into the dry ingredients in the mixer bowl. Mix on low speed (using the dough hook) until all the ingredients are just moistened and form a wet, shaggy dough.
- Knead While Adding Remaining Flour: Continue kneading with the dough hook on low speed. Gradually add the remaining whole wheat flour, about ¼ cup at a time. Watch your dough carefully! You want it to become firm and mostly clear the sides of the bowl, but still feel slightly tacky to the touch. It shouldn’t be dry or stiff. You might not need all 4 cups of flour, as flour absorption can vary. Knead for an additional 2-4 minutes until the dough is smooth and elastic. To test for elasticity, pinch a small piece of dough and gently pull it – if it stretches without immediately tearing, the gluten is well-developed.
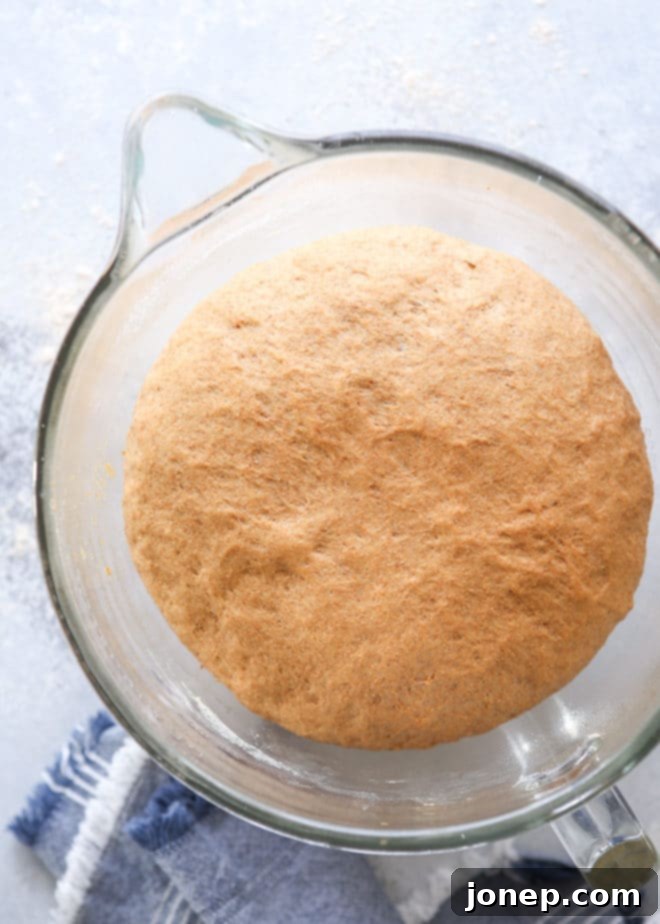
- First Rise (Proofing): Shape the dough into a smooth ball. Place it in a lightly greased bowl, turning once to coat. Cover the bowl tightly with plastic wrap or a clean kitchen towel. Let it rise (or “proof”) in a warm place until it has doubled in size. This usually takes about 1 hour for active dry yeast, or about 30 minutes if you’re using instant/quick-rise yeast. A warm environment is key for a successful rise.
- Shape the Loaf: Gently “punch down” the risen dough to release the air. Turn it out onto a lightly floured surface and let it rest for 10 minutes. Then, roll the dough into a rough rectangle, approximately 10 inches wide and 12 inches long. Starting from one of the shorter sides, roll the dough up tightly into a log. Pinch the seam closed and tuck in the ends. Carefully transfer the shaped dough seam-side down into a greased 9×5-inch loaf pan.
- Second Rise: Cover the loaf pan with plastic wrap or a towel. Let it rise again in a warm place for about 30 minutes, or until it has nearly doubled in size again. While it’s rising, preheat your oven to 375°F (190°C).
- Bake to Golden Perfection: Bake the loaf in the preheated oven for 30-40 minutes, or until it’s beautifully golden brown on top and sounds hollow when tapped. For an extra shiny, golden crust, you can lightly brush the top with melted butter immediately after it comes out of the oven.
- Cool & Enjoy!: Allow the loaf to cool in the pan for at least 10 minutes before carefully transferring it to a wire rack to cool completely. Slicing warm bread too soon can affect its texture, as it needs time to finish setting up. If you simply can’t wait for warm bread, wait at least 15 minutes, but for best results, let it cool entirely. Enjoy your fresh, homemade 100% whole wheat bread!
Pro Tips for a Perfect Rise: Helping Your Dough Rise Faster
Dough rising is a crucial step in bread baking, and it largely depends on ambient temperature. If your kitchen tends to be a bit cooler, especially during the fall and winter months, your dough’s rise might slow down considerably. Here are a few warmer suggestions to help your dough proof more efficiently:
- Warm Oven Method: Briefly heat your oven to its lowest setting (usually around 150-200°F or 65-95°C) for just a few minutes. Then, turn the oven off completely. Place your covered dough on the center rack and close the oven door. The residual warmth creates a cozy environment for yeast activity.
- Microwave Method: Heat 1 cup of water in your microwave for 2 minutes until it’s steaming. Remove the water, and immediately place your covered dough into the microwave (do not turn the microwave back on). Close the door. The steamy, warm environment is perfect for proofing.
- Other Warm Spots: Don’t underestimate other warm areas in your home! I’ve successfully risen bread on top of a running oven (using the residual heat), on a running dryer machine, or even on a chair positioned over a heater vent. Just ensure the heat isn’t too intense, as extreme temperatures can kill the yeast.
Bread Baking FAQs
Any brand of whole wheat flour will work well in this recipe. However, be aware that different brands can vary in the intensity of their flavor and the coarseness of their grind. For consistently excellent results, I highly recommend varieties like King Arthur Whole Wheat Flour or Bob’s Red Mill Whole Wheat Flour, both of which I’ve used and loved for their quality and consistency. Opt for fresh flour for the best flavor.
While a stand mixer makes it easier, kneading bread by hand is a rewarding experience and not as difficult as it might seem! It’s more hands-on, requiring a good rhythm. You typically push the dough away from you with the heels of your hands, fold it back over, turn it a quarter turn, and repeat. There are many excellent tutorials online; I find visual guides particularly helpful for mastering the technique. The goal is to develop the gluten, making the dough smooth and elastic.
There are a couple of common culprits for dough that fails to rise:
1) Expired Yeast: Your yeast might have expired. Always check the expiration date on the packaging. If you’re unsure, you can easily test its viability. In a cup, combine 1 packet (2 ¼ teaspoons) of yeast with ½ cup warm water (around 105-115°F or 40-46°C) and 1 teaspoon of sugar. Let it sit for 10 minutes. If the mixture foams and noticeably increases in size, your yeast is still active and good to go. If not, it’s likely expired and won’t work.
2) Temperature Issues: It’s possible you “killed” the yeast by adding liquids that were too hot. Yeast is a living organism, and temperatures above 140°F (60°C) will destroy it. It’s incredibly helpful to use a kitchen thermometer to ensure your liquids are precisely between 120-130°F (49-54°C), which is the sweet spot for activating yeast without harming it.
If your bread turns out dense or doesn’t rise well, consider these points:
1) Yeast Issues: First, revisit the solutions for “Why didn’t my dough rise?” above, as inactive or dead yeast is a primary cause.
2) Too Much Flour: This is a very common mistake! Be sure to add only enough flour to achieve a firm but still slightly tacky dough. During kneading, the dough should mostly clear the sides of the bowl, and when touched, it should feel tacky without actually sticking to your fingers and pulling away. Adding too much flour results in a dry, stiff dough that won’t rise properly, leading to a dense and dry loaf.
3) Insufficient Proofing Time: Give your dough ample time to rise before baking. It should visibly almost double in size during each rise. Refer to my tips above for creating a warm and ideal environment for proofing your dough to ensure a light and airy final product.
For the freshest flavor and best texture, I recommend enjoying homemade bread within 1-2 days of baking. However, if stored correctly, this delicious loaf will maintain its quality for 5-7 days.
To keep your homemade bread fresh, store it at room temperature in an airtight container. Good options include a clean plastic bag, plastic wrap, or a dedicated bread box. Avoid storing bread in the refrigerator, as the cold temperature actually causes it to stale more quickly. Freezing is an excellent option for longer storage; slice the loaf first, then freeze in an airtight bag for up to 3 months, toasting slices as needed.
baking tip:How to Know When Bread is Fully Baked
Determining when your homemade bread is perfectly baked through can sometimes be tricky! The crust might look beautifully golden, but how do you ensure the inside is thoroughly cooked? Here are three reliable ways to test your bread:
- Tap for a Hollow Sound: Gently tap the top or bottom crust of the loaf. If it produces a hollow sound, it’s a good indication that the bread is baked all the way through.
- Toothpick Test: Insert a clean wooden toothpick or a thin skewer into the very center of the loaf. If it comes out clean with no wet dough attached, your bread is done.
- Internal Temperature Check: For the most accurate result, use an instant-read thermometer. Insert it into the center of the loaf. When the internal temperature reaches 190°F (88°C) to 200°F (93°C), the bread is fully baked and ready to be removed from the oven.
More Whole Wheat Bread Recipes to Try
If you love the wholesome goodness of whole wheat flour, you might also enjoy exploring these other fantastic bread recipes that incorporate whole grains:
- Honey Whole Wheat and Oat Sandwich Bread: A delightful blend of whole wheat, oats, and a touch of honey for a perfectly soft and flavorful sandwich loaf.
- Rustic Multigrain Bread: For those who enjoy a variety of textures and flavors, this bread combines multiple grains for a hearty and satisfying loaf.
- Honey Whole Wheat Dinner Rolls: Light, fluffy, and slightly sweet dinner rolls made with whole wheat flour, perfect for any meal.
100% Whole Wheat Bread Recipe Card

100% Whole Wheat Bread
Pin Recipe
Leave a Review
Ingredients
- 1 ½ cups (355 ml) water
- 2 tablespoons (28 grams) butter
- ¼ cup (60 ml) molasses
- About 4 cups (450 grams) whole wheat flour
- 2 teaspoons (8 grams) salt
- 2 ¼ teaspoon (7 grams) active dry yeast or instant/quick rise yeast
Instructions
-
In a small saucepan, heat the water, butter, and molasses over medium heat until the butter is just melted. Remove from heat and let cool for about few minutes (to 120-130°F or 49-54°C). This ensures the liquids are warm enough to activate the yeast but not so hot that they kill it.
-
In the bowl of a stand mixer fitted with a dough hook, combine 2 cups of the whole wheat flour, the salt, and the active dry or instant yeast. Add the cooled liquids and mix on low speed until all the ingredients are thoroughly moistened and a shaggy dough forms.
-
Continue to mix on low speed, adding the remaining flour ¼ cup at a time. Mix until the dough becomes firm and almost clears the sides of the bowl, but still feels tacky to the touch. You may not need all 4 cups of flour, as flour absorption varies. Avoid adding too much flour, which can lead to a dense loaf.
-
Increase the mixer speed slightly and continue to knead the dough for an additional 2-4 minutes until it is smooth and elastic. To check for proper gluten development, gently pull a small pinch of dough; it should stretch without immediately breaking.
-
Form the dough into a smooth ball. Place it in a lightly greased bowl, turning once to coat the entire surface with oil. Cover the bowl tightly with plastic wrap or a clean kitchen towel and let it rise in a warm place until it has doubled in size. This typically takes about 1 hour with active dry yeast, or approximately 30 minutes if you’re using instant/quick-rise yeast. Once risen, gently punch down the dough to release the air, and let it rest for 10 minutes.
-
On a lightly floured surface, roll the rested dough out into a rough rectangle, approximately 10 inches wide and 12 inches long. Starting from one of the shorter sides, roll the dough up tightly into a log. Pinch the seam closed and tuck in the ends to create a neat loaf. Carefully transfer the shaped dough, seam-side down, into a greased 9×5-inch loaf pan.
-
Cover the loaf pan with plastic wrap or a clean towel and let the dough rise again in a warm spot until it has nearly doubled in size, about 30 minutes. While the dough is undergoing its second rise, preheat your oven to 375°F (190°C).
-
Bake the loaf for 30-40 minutes, or until the crust is a rich golden brown and the loaf sounds hollow when tapped on the bottom. If desired, immediately after removing it from the oven, brush the top with a bit of melted butter to give it a beautiful shine and a softer crust. Let the loaf cool in the pan for 10 minutes, then transfer it to a wire rack to cool completely before slicing. This allows the internal structure to set properly.
Video
Notes
Recipe adapted from Red Star Yeast.
