Homemade No-Churn Chocolate Chip Cookie Dough Ice Cream: Your Easy Recipe Guide
Prepare to delight your taste buds with this incredibly fun and utterly delicious no-churn chocolate chip cookie dough ice cream. Imagine a generously rich and velvety smooth vanilla ice cream base, studded throughout with an abundance of perfectly sized, chewy chocolate chip cookie dough chunks. This is not just any ice cream; it’s a homemade masterpiece designed to satisfy every craving for that classic, beloved flavor combination, all without the need for an ice cream maker!

This recipe is sponsored by Go Bold with Butter.
Why Make Homemade No-Churn Cookie Dough Ice Cream?
Chocolate chip cookie dough ice cream has long been a favorite dessert for many, myself included. However, a common frustration often arises when purchasing store-bought versions: the scarcity of that glorious cookie dough! You eagerly scoop out a spoonful, only to find a few meager pieces, leaving you longing for more. This homemade recipe puts an end to that disappointment. We’re talking about an ice cream truly packed to the brim with buttery, sweet, and unbelievably tender homemade cookie dough, along with an extra shower of mini chocolate chips, ensuring every single bite is an absolute delight.
The Magic of No-Churn: Creamy Ice Cream Without a Machine
One of the most appealing aspects of this recipe is its “no-churn” nature. This means you don’t need any specialized equipment like an ice cream machine taking up precious counter space. The secret lies in the simple, yet brilliant, technique of whipping heavy cream. When heavy cream is whipped, it incorporates air, creating a light and airy texture. This aerated cream then mimics the texture of traditionally churned ice cream once frozen, resulting in a remarkably creamy, smooth, and utterly scoopable dessert that rivals its machine-made counterparts. It’s an effortless path to homemade ice cream perfection, proving that you don’t need fancy gadgets to create culinary magic.
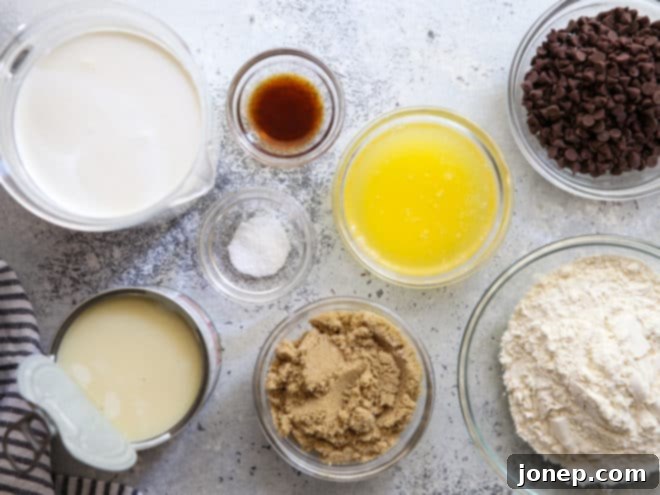
Essential Ingredients for This Irresistible No-Churn Treat
Crafting this incredible no-churn chocolate chip cookie dough ice cream requires a handful of common ingredients, each playing a vital role in achieving its rich flavor and creamy texture. Here’s a closer look at what you’ll need and why:
- Melted Salted Butter: While unsalted butter can certainly be used, I highly recommend salted butter for an enhanced depth of flavor in the cookie dough. The touch of salt perfectly balances the sweetness and brings out those irresistible caramel and nutty notes inherent in classic chocolate chip cookies. Melting it also simplifies the mixing process, eliminating the need for a mixer to cream butter and sugar.
- Light or Dark Brown Sugar: Brown sugar is essential for both flavor and texture. Its molasses content contributes to the cookie dough’s signature soft, chewy texture and adds a deep, rich, slightly caramel-like flavor that is crucial for authentic cookie dough taste. Either light or dark brown sugar will work beautifully.
- Vanilla Extract: A good quality vanilla extract is paramount. It brightens and rounds out all the flavors in both the cookie dough and the vanilla ice cream base, providing that classic, comforting sweetness.
- All-Purpose Flour: The structural backbone of our edible cookie dough. Please see our tips section below regarding how to safely consume raw flour, as this recipe does not involve baking the cookie dough.
- Salt: Just a pinch of salt enhances all the other flavors, particularly the chocolate and butter, preventing the cookie dough from tasting flat or overly sweet.
- Mini Chocolate Chips: Mini chocolate chips are preferred for the cookie dough and the ice cream base because their smaller size ensures a more even distribution throughout the ice cream, guaranteeing chocolate in every bite without being overwhelmingly large or hard when frozen.
- Heavy Whipping Cream: This is the star of our no-churn ice cream base. When whipped to medium peaks, it incorporates air, which then freezes to create that light, airy, and creamy texture reminiscent of traditionally churned ice cream. Ensure it’s very cold for optimal whipping.
- Sweetened Condensed Milk: This magical ingredient provides the sweetness and incredible creaminess to the ice cream base without requiring any heating or dissolving of sugar crystals. Its thick consistency also helps create a smooth, dense ice cream that resists ice crystal formation.
The Essential Role of Butter in Your Edible Cookie Dough
In traditional baked cookies, butter contributes to both structure and flavor. However, for this edible cookie dough, which remains uncooked, butter’s primary purpose is pure, unadulterated flavor. The distinct, comforting taste of chocolate chip cookies is largely attributed to the harmonious combination of butter, brown sugar, and vanilla. Butter infuses the dough with a rich, nutty, and slightly toffee-like essence that is simply irreplaceable. By using melted salted butter, we not only achieve maximum flavor intensity but also streamline the preparation. There’s no need for an electric mixer to cream butter and sugar together; a simple stir is all it takes. This ensures you get that quintessential cookie dough taste with minimal effort, making for a truly delicious and satisfying experience in every spoonful of ice cream.
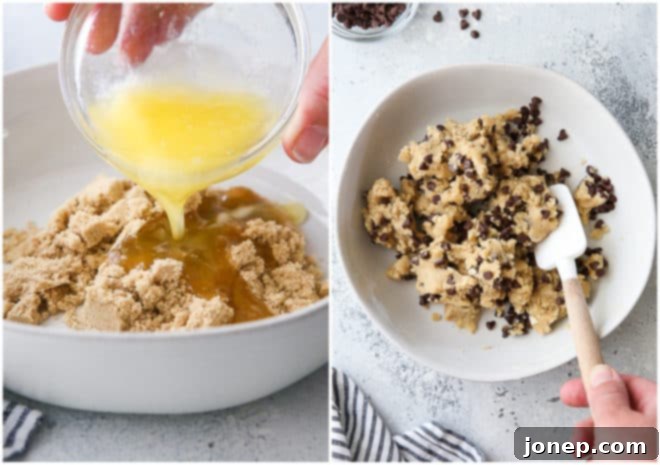
Step-by-Step Guide: How to Make No-Churn Chocolate Chip Cookie Dough Ice Cream
Making this delightful dessert is a two-part process: first, preparing the edible cookie dough, and then assembling the creamy vanilla ice cream base. Start with the cookie dough, as it needs time to chill while you prepare the base.
Crafting Your Edible Cookie Dough Chunks
This edible cookie dough is intentionally different from cookie dough designed for baking. It omits eggs and baking soda, making it perfectly safe and enjoyable to eat raw. (A note on raw flour safety is included in our tips section below for those with concerns.) The beauty of this cookie dough lies in its simplicity; it comes together in just a few minutes using only a small bowl and a spoon – no electric mixer required!
- Combine Wet Ingredients: In a small bowl, thoroughly stir together the melted butter, brown sugar, a tablespoon of heavy cream, and vanilla extract. The mixture will appear slightly grainy, which is completely normal at this stage.
- Integrate Dry Ingredients and Chocolate Chips: Add the all-purpose flour and a pinch of salt to the wet mixture. Stir until a soft, pliable cookie dough forms. Finally, fold in the mini chocolate chips, ensuring they are evenly distributed throughout the dough.
- Shape and Chill: Transfer the freshly made cookie dough onto a sheet of plastic wrap. Gently press and shape it into a thin disk, approximately ½ to ¾ inch thick. Wrap the disk completely and place it in the freezer to chill while you proceed with preparing the vanilla ice cream base. Chilling the dough makes it easier to chop into neat pieces later.
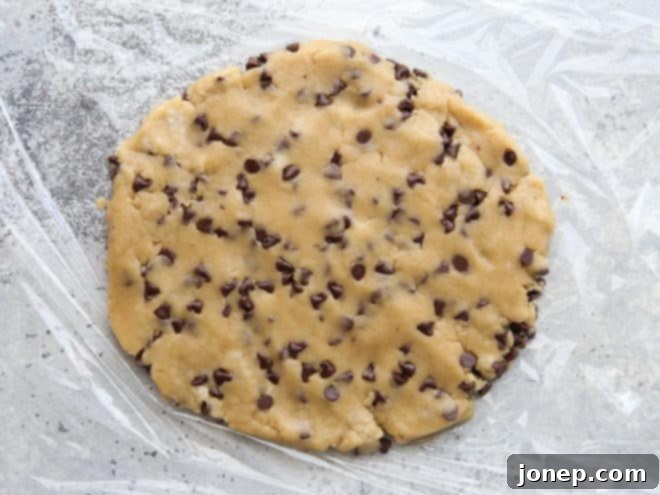
Preparing the Dreamy Vanilla Ice Cream Base
The ingenuity of no-churn ice cream shines brightest in its base. By whipping heavy cream, you’re essentially incorporating the air that would typically be churned into ice cream by a machine. This method creates a light, airy, and stable base that, once frozen, transforms into a wonderfully creamy texture, just as satisfying as traditional ice cream.
- Whip the Heavy Cream: Using either a stand mixer fitted with a whisk attachment or a hand-held electric mixer, whip the very cold heavy cream on medium-high speed until it forms medium peaks. Medium peaks hold their shape but still have a slight curl at the tip. Be careful not to over-whip into stiff peaks.
- Gently Fold in Sweeteners and Flavor: With a spatula, delicately fold in the sweetened condensed milk and the remaining vanilla extract. The key here is to be gentle to avoid deflating the beautiful air you’ve incorporated into the whipped cream. This step sweetens the base and adds to its luxurious, smooth texture.
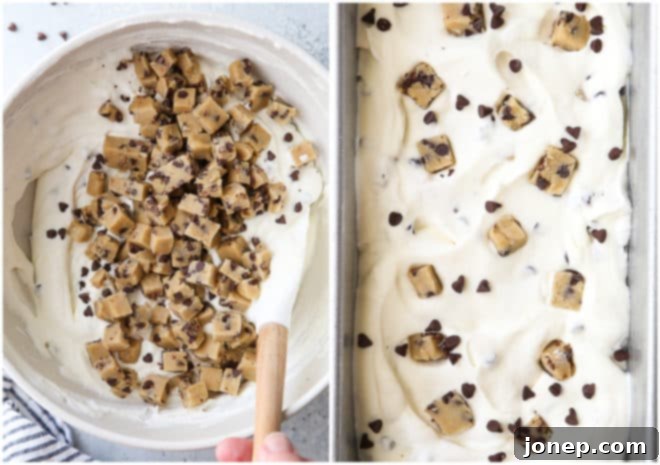
- Incorporate Cookie Dough and More Chocolate: Retrieve your chilled cookie dough from the freezer. Chop it into small ½-inch pieces. Gently fold these delightful cookie dough chunks into the whipped cream mixture, along with the additional mini chocolate chips. Again, fold carefully to maintain the lightness of the base.
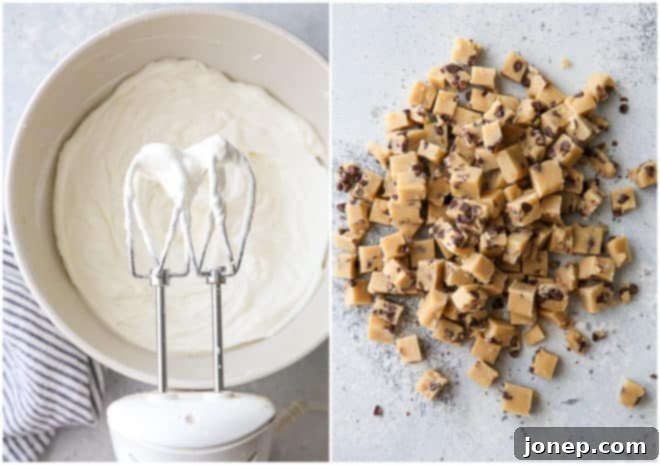
Freezing for Perfection: The Final Step
Once your creamy mixture is ready and filled with delectable cookie dough pieces, it’s time for the final, crucial step: freezing. Spoon the entire mixture into a 9×5-inch loaf pan, a large freezer-safe bowl, or a plastic tub. Spread it out into an even layer to ensure consistent freezing. Cover the container tightly with plastic wrap, pressing it directly onto the surface of the ice cream to prevent ice crystals from forming, or use a secure lid.
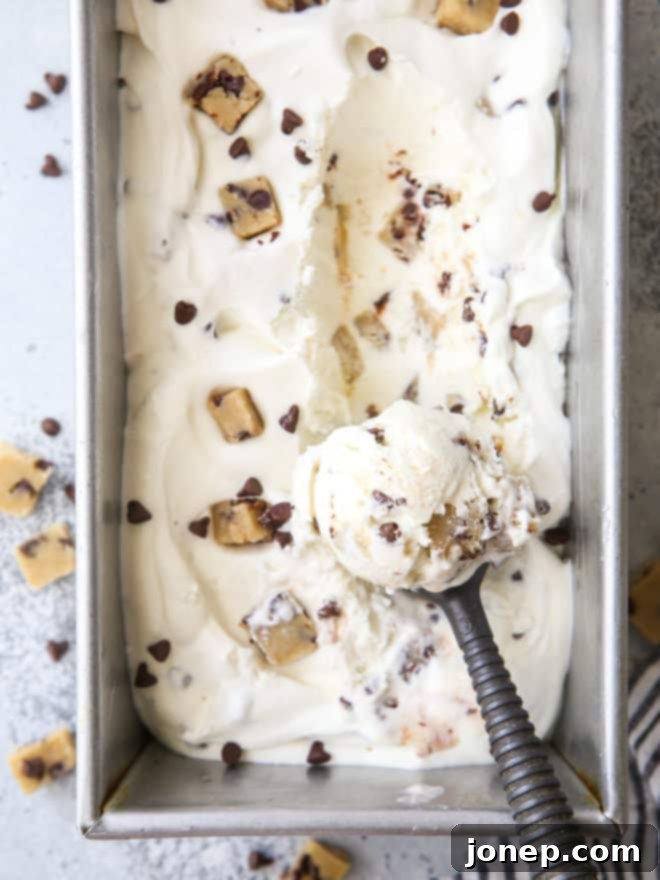
Just like all homemade ice creams, this chocolate chip cookie dough creation requires ample time in the freezer to set up properly and achieve its perfectly firm, scoopable consistency. Allow it to freeze for a minimum of 6 hours. For the best results and ultimate firmness, I highly recommend preparing it the night before you plan to serve it, or first thing in the morning. Once it’s completely frozen and ready, prepare for an explosion of flavor and texture! Enjoy generous scoops in classic ice cream bowls or nestled in crisp ice cream cones for a truly satisfying treat.
Expert Tips for the Best No-Churn Chocolate Chip Cookie Dough Ice Cream
- Raw Flour Safety: While I’ve never encountered issues, raw flour can sometimes contain bacteria that are typically destroyed during baking. If you’re concerned about consuming raw flour in your cookie dough, you can easily heat-treat it beforehand. Simply spread the flour onto a baking sheet and bake it at 350°F (175°C) for 5 minutes. Allow it to cool completely before incorporating it into your cookie dough mixture. This small step ensures peace of mind without compromising flavor or texture.
- The Brilliance of Sweetened Condensed Milk: The reason sweetened condensed milk is a staple in no-churn recipes is ingenious. Unlike granulated sugar, which needs to be dissolved (often requiring heat), condensed milk is already liquid and perfectly sweet. This eliminates an extra step of cooking a sugar syrup, saving you time and effort while contributing to the ice cream’s characteristic smoothness and preventing ice crystal formation.
- Mastering the Art of Folding: The creamy texture of this no-churn ice cream relies heavily on the air incorporated into the whipped cream. When adding the sweetened condensed milk, vanilla, cookie dough, and extra chocolate chips, it’s crucial to use a gentle “folding” technique. This method helps to combine ingredients without deflating the whipped cream, ensuring your ice cream remains light and airy. If you’re new to this technique, watching a quick video on how to “fold” ingredients can be very helpful.
- Invest in a Reusable Ice Cream Container: If you find yourself frequently making homemade ice cream (and once you try this recipe, you might!), consider investing in a high-quality reusable plastic ice cream container. These containers are specifically designed to minimize freezer burn and keep your ice cream fresher for longer. This one comes highly recommended!
- Perfect Scooping Temperature: For the most satisfying scoops, allow your frozen ice cream to sit at room temperature for about 10 minutes before serving. This brief resting period slightly softens the ice cream, making it much easier to scoop and providing a more pleasant, melty texture.
- Optimal Storage for Longevity: To maximize the lifespan and quality of your homemade ice cream (if it even lasts that long!), store it in an airtight container at the very back of your freezer. The back of the freezer typically has the most consistent temperature, reducing the risk of freezer burn and preserving its creamy texture for weeks.
- Customization Options: Feel free to experiment with your cookie dough! You could add a sprinkle of sea salt to the dough for a salted caramel effect, or mix in other chopped candies, nuts, or even different types of chocolate chips (white chocolate, milk chocolate) for a unique twist on this classic.
More No-Churn Ice Cream Delights to Explore
If you’ve fallen in love with the simplicity and deliciousness of no-churn ice cream, there’s a whole world of flavors to discover! Here are a couple more fantastic no-churn recipes that are just as easy and delightful:
- No-Churn S’mores Ice Cream
- No-Churn Peanut Butter Chocolate Chunk Ice Cream

Recommended Tools for Your Homemade Ice Cream Journey
Having the right tools can make your ice cream making experience even smoother. While this recipe is truly no-fuss, a few essentials can elevate your process:
A good set of mixing bowls, a sturdy spatula, and a reliable electric mixer (either stand or hand-held) will be your best friends in the kitchen, making quick work of whipping cream and combining ingredients. Don’t forget a durable loaf pan or freezer-safe container for freezing!

No-Churn Chocolate Chip Cookie Dough Ice Cream
Pin Recipe
Leave a Review
Ingredients
For the cookie dough:
- ¼ cup salted butter , melted (4 tablespoons, 56 grams)
- ⅓ cup light or dark brown sugar (140 grams)
- 1 tablespoon heavy cream
- ½ teaspoon vanilla extract
- ⅔ cup all-purpose flour (80 grams)
- Pinch of salt
- ¼ cup mini chocolate chips (44 grams)
For the vanilla ice cream base:
- 2 cup heavy whipping cream , cold (455 grams)
- ⅔ cup sweetened condensed milk (½ can, 205 grams)
- 1 teaspoon vanilla extract
- 2 tablespoons mini chocolate chips (22 grams)
Instructions
To make the cookie dough:
-
Combine melted butter, brown sugar, heavy cream and vanilla in a small bowl, mixture will be grainy.
-
Stir in flour and salt to make a soft cookie dough, then stir in mini chocolate chips.
-
Transfer the cookie dough to a sheet of plastic wrap and shape into a thin disk. Wrap completely and freeze while you prepare the vanilla ice cream base.
To make the ice cream:
-
Use a stand mixer or hand-held mixer to whip the cold cream to medium peaks.
-
Use a spatula to gentle fold in the sweetened condensed milk and vanilla, careful not to deflate the whipped cream.
-
Chop chilled cookie dough into small ½-inch pieces and fold carefully into the whipped cream mixture along with more mini chocolate chips.
-
Spoon mixture into a 9×5-inch loaf pan, bowl, or plastic tub and spread into an even layer.
-
Freeze for at least 6 hours until firm. Let rest at room temperature for 10 minutes before serving for easier scooping.
Disclosure: This recipe was created in partnership with Go Bold With Butter. Thank you for supporting partnerships with brands I love and believe in, which make Completely Delicious possible. All opinions are always 100% my own. To learn more about Go Bold With Butter, you can visit their website here. You can also find them on facebook, instagram, and pinterest.
