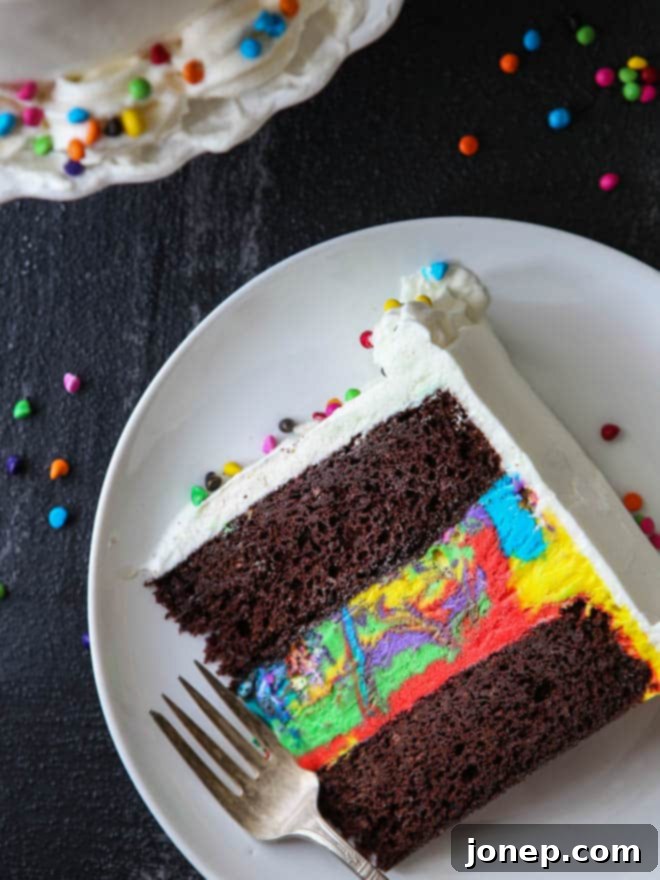
This fun, festive, and easy chocolate rainbow ice cream cake is perfect for celebrating!
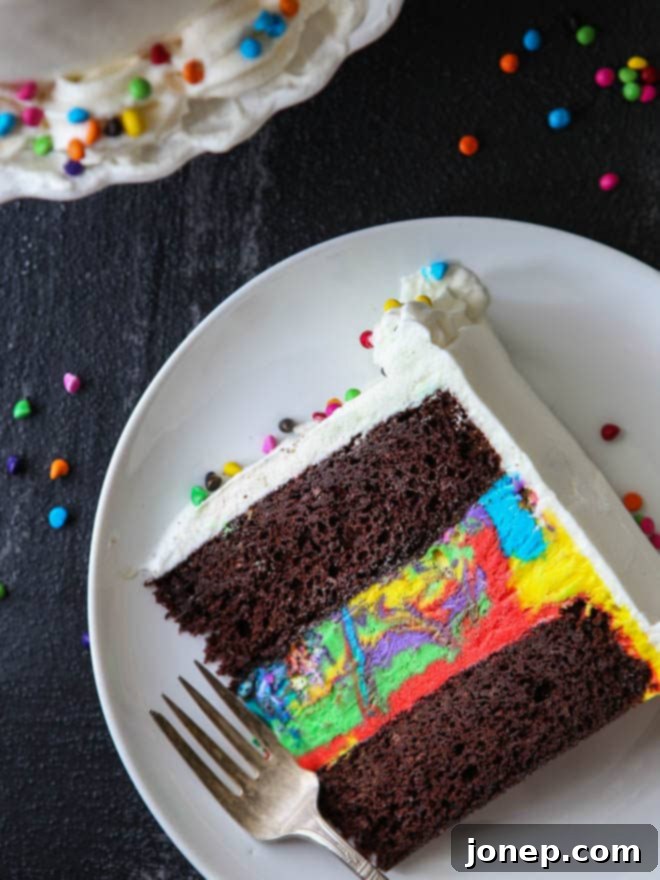
Easy Homemade Chocolate Rainbow Ice Cream Cake for Unforgettable Celebrations
There’s nothing quite like a homemade dessert to mark a special occasion, and this Chocolate Rainbow Ice Cream Cake truly takes the celebratory spirit to a new level! Combining the best of two worlds – rich, moist chocolate cake and vibrant, no-churn rainbow ice cream – this showstopper is surprisingly simple to make, yet impressive enough to be the centerpiece of any party. Whether it’s a birthday, an anniversary, or just a joyful gathering, this cake promises smiles and delicious memories.
The Inspiration Behind a Dream Cake: A Birthday Wish Come True
Just recently, my oldest son turned five. Five! It feels like only yesterday he was a tiny tot, and now he’s making sophisticated dessert requests. When I asked him what kind of cake he envisioned for his birthday party, I rattled off all the usual suspects. But his imagination, far more creative than mine, took over. He thoughtfully combined a few of my suggestions, declaring his desire for a “chocolate rainbow ice cream cake.” At first, I was a little daunted, but then the excitement kicked in. What a brilliant, fun-sounding combination!
The idea immediately captivated me. A decadent chocolate cake base, layered with a whimsical, colorful ice cream filling, all crowned with fluffy whipped cream and a generous scattering of rainbow sprinkles – it sounded like pure joy on a plate. The challenge, however, was that I couldn’t find a single recipe online that perfectly matched my vision. This meant I had the exciting opportunity to create my own masterpiece from scratch, blending beloved elements into something new and spectacular. I embraced the challenge, hoping to bring my little boy’s dream cake to life.
Crafting the Perfect Chocolate Layers: A Foundation of Flavor
For the cake component, I knew I needed a reliable, moist, and intensely chocolatey base that could stand up to the creamy ice cream layer. My go-to chocolate sour cream cake recipe was the obvious choice. Its rich flavor and tender crumb make it an absolute winner every time, providing the perfect counterpoint to the sweet, vibrant ice cream. The secret to its incredible texture lies in the sour cream, which adds an irresistible tang and keeps the cake wonderfully moist for days.
Baking perfectly flat cake layers is also key for an elegant ice cream cake assembly. Nobody wants a wobbly, uneven stack! This recipe, when followed with a few simple techniques, ensures your chocolate cake layers are beautifully uniform, minimizing the need for tedious trimming. The goal is two beautiful, even discs of chocolate perfection, ready to embrace their colorful filling. By using a tried-and-true cake recipe, I ensured the foundation of this celebratory dessert was nothing short of delicious.
The Magic of No-Churn Rainbow Ice Cream: Simplicity Meets Spectacle
The star of this cake, beyond the delicious chocolate, is undoubtedly the homemade rainbow-swirled ice cream. In the past, I confess, I was a bit skeptical of the “no-churn” ice cream trend – those recipes that combine whipping cream with sweetened condensed milk. I thought, “Can it really be as good as the real thing, made with an ice cream machine?” Well, I’m here to tell you, I’m a complete convert! This method is an absolute game-changer for homemade ice cream, delivering incredibly creamy, rich results without any special equipment.
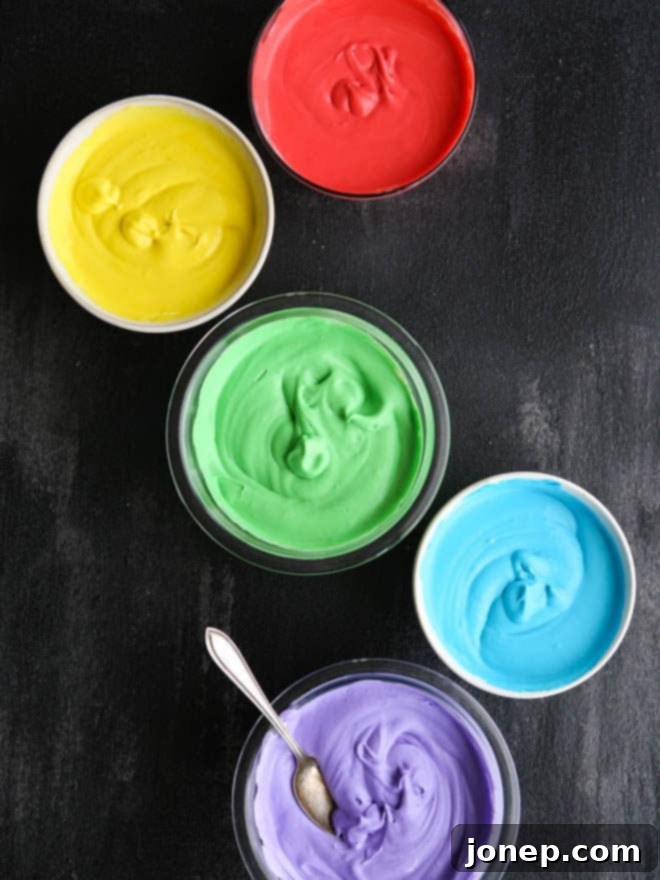
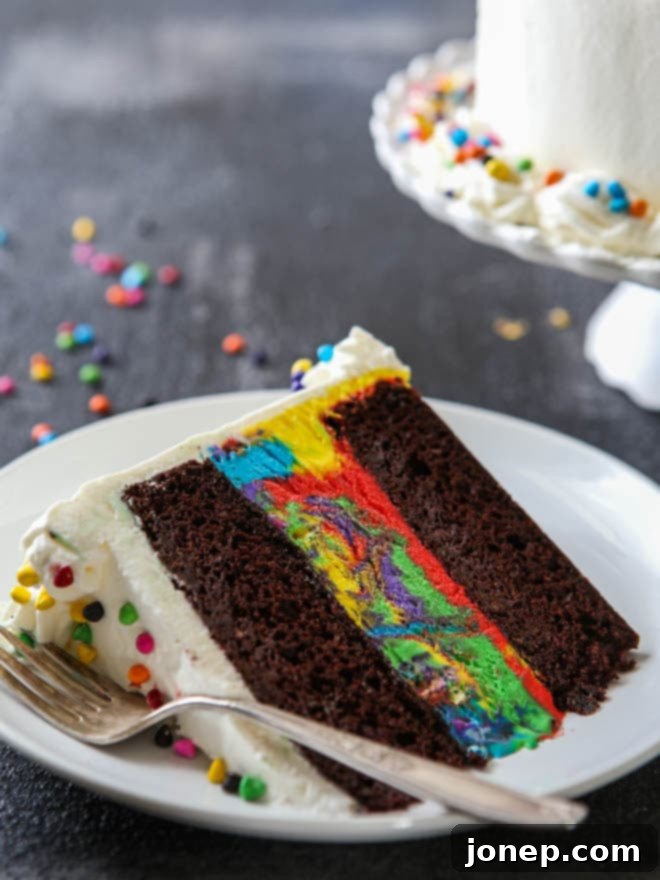
The process is unbelievably simple: whip heavy cream to stiff peaks, then gently fold in sweetened condensed milk and a touch of vanilla. The magic truly happens when you divide this creamy base into separate bowls and tint each with vibrant gel food coloring – think bold reds, sunny yellows, lush greens, serene blues, and majestic purples. Layering these colorful dollops into a prepared pan and then gently swirling them creates that mesmerizing rainbow effect that delights both children and adults. Not only does it taste amazing, but the ease of preparation means you can focus more on the fun of decorating and less on complicated machinery. It’s perfect for those who want homemade goodness without the fuss, and it delivers on both flavor and visual appeal, creating an unforgettable filling for our special cake.
Assembling Your Masterpiece: Layers of Joy
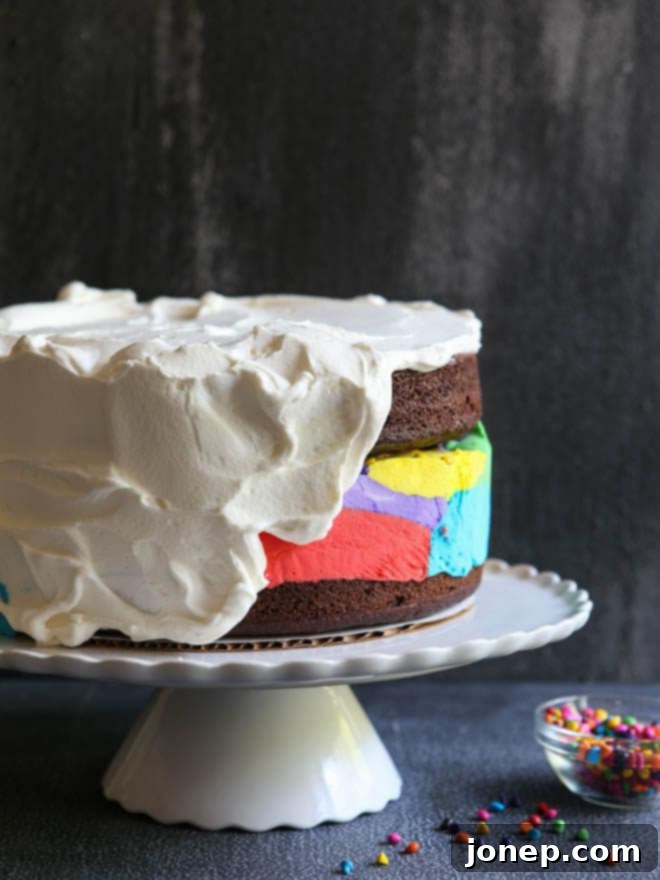
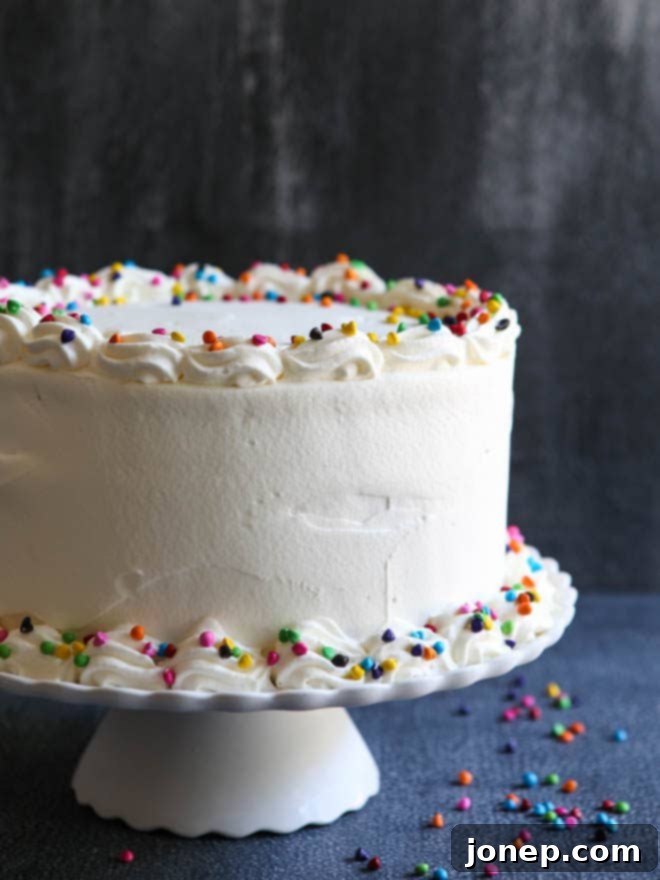
Bringing all these delightful components together is the most exciting part! Once the chocolate cake layers are perfectly cooled and the rainbow ice cream has frozen solid, it’s time for assembly. A simple layer of cake, followed by the vibrant ice cream disc, and then topped with the second cake layer creates a harmonious balance of texture and flavor. The final touch is a generous slathering of freshly whipped cream, providing a light, airy contrast to the dense cake and rich ice cream. And, of course, no rainbow cake is complete without a shower of colorful sprinkles or rainbow chips – they add that extra sparkle and crunch that makes this cake truly festive.
When it finally came time to slice the cake at the party, I was genuinely thrilled. Each slice revealed distinct layers of dark chocolate and swirls of every color imaginable, exactly as I had pictured. The birthday boy’s eyes lit up with pure joy – a priceless moment that confirmed all the effort was worth it. We had a large crowd, so I also served a few dozen cupcakes alongside, ensuring everyone got a taste of the celebration. If individual servings are more your style, don’t worry – I’ve included instructions below for adapting this recipe into equally delightful cupcakes.
A Cake for Every Celebration: Why This Recipe is a Must-Try
If you have a birthday, a holiday, or any special celebration on the horizon, I cannot recommend this Chocolate Rainbow Ice Cream Cake enough. It was an undeniable hit, drawing gasps of delight and many requests for the recipe. Its stunning appearance makes it a fantastic focal point for any dessert table, and the combination of rich chocolate and creamy, colorful ice cream ensures there’s a flavor everyone will love. Plus, the sheer joy it brings, especially to children, is truly magical.
Beyond its festive appeal, this cake offers a delightful texture experience – the soft, moist cake perfectly complements the smooth, cold ice cream. The freshness of homemade whipped cream adds another layer of indulgence, making each bite a symphony of flavors and sensations. It’s a dessert that not only tastes incredible but also creates wonderful memories. So, if you’re looking for a dessert that’s fun, delicious, and guaranteed to impress, this Chocolate Rainbow Ice Cream Cake is your perfect choice. Give it a try – you won’t be disappointed!
baking tip:How to bake flat cake layers
Achieving flat, even cake layers is a secret weapon for beautiful, stable layer cakes. Say goodbye to excessive trimming and uneven stacks – and the best part is, you don’t need any fancy tools!
- Measure your cake batter precisely for each pan. For consistent results, use a spring-loaded scoop to portion out even amounts, or for ultimate accuracy, my preferred method is a digital kitchen scale. Even distribution ensures even baking.
- Bake the cakes at a slightly lower temperature for an extended period. A lower oven temperature slows down the leavening process, which helps prevent the cake from doming in the center. Reduce your oven temperature to 325°F (160°C) and increase the baking time by approximately half. This allows the cake to rise more gradually and evenly.
For more in-depth details and helpful photos, be sure to check out my full tutorial on how to bake flat cake layers.

Chocolate Rainbow Ice Cream Cake
Pin Recipe
Leave a Review
Ingredients
For the cake:
- 1 ¼ cup hot coffee (295 ml)
- 1 cup unsweetened cocoa powder (110 grams)
- 2 ½ cup all-purpose flour (300 grams)
- 1 ¼ teaspoon salt (5 grams)
- 2 ½ teaspoon baking soda (11 grams)
- 2 cups granulated sugar (400 grams)
- 3 large eggs
- 1 ¼ cups sour cream (282 grams)
- 1 cup + 2 tablespoons vegetable oil (267 ml)
For the ice cream:
- 2 cups heavy whipping cream (500 ml)
- 14 oz can sweetened condensed milk (400 grams)
- 1 teaspoon vanilla extract
- Red, yellow, green, blue and purple gel food coloring , see Note
For the whipped cream:
- 2 cups heavy whipping cream (500 ml)
- ½ cup granulated sugar (100 grams)
- 1 teaspoon vanilla extract
- Rainbow chips or sprinkles
Instructions
To make the cake:
-
To make the cake, preheat oven to 350 degrees F (175°C). Butter and flour two 8-inch or 9-inch cake pans, then line the bottoms with parchment paper for easy release.
-
In a medium bowl, whisk together the hot coffee and cocoa powder until the mixture is smooth and no lumps remain. Set this rich cocoa mixture aside. In a separate, larger bowl, sift together the all-purpose flour, salt, and baking soda to ensure they are well combined and free of clumps.
-
In a generously sized mixing bowl, use an electric mixer to beat the granulated sugar and large eggs together until the mixture is smooth, fluffy, and a pale yellow color. This step is crucial for incorporating air and creating a tender crumb. Next, gently stir in the sour cream, followed by the vegetable oil, mixing until just combined. Add the dry flour mixture to the wet ingredients all at once, stirring gently until everything is just incorporated. Be careful not to overmix. Finally, stir in the reserved cocoa mixture until the batter is smooth and uniformly chocolatey.
-
Divide the prepared cake batter evenly between your two buttered and floured cake pans. Bake in the preheated oven for approximately 25-35 minutes, or until a wooden toothpick inserted into the center of each cake comes out clean. Let the cakes cool in their pans for 10 minutes before carefully inverting them onto a wire rack to cool completely. For convenience, these cake layers can be made in advance: cover them tightly in plastic wrap and store in the fridge for up to 5 days, or double-wrap and freeze for up to 2 months.
To make the ice cream:
-
In a large, chilled bowl, whip the heavy whipping cream until it forms stiff peaks. Gently fold in the sweetened condensed milk and vanilla extract until just combined. Divide this creamy mixture evenly into 5 separate bowls. Use the gel food coloring to tint each bowl a different vibrant color: red, yellow, green, blue, and purple. Mix each color thoroughly until a uniform hue is achieved.
-
Line an 8-inch or 9-inch cake pan (the same size you used for your cake layers) with plastic wrap, ensuring plenty of overhang on all sides to help with removal. Dollop alternating spoonfuls of each colored cream mixture into the prepared pan. Once all the colors are in, take a knife and gently run it through the mixture a few times to create a beautiful, swirled rainbow effect – avoid overmixing to keep the colors distinct. Gently flatten the top with a spatula. Place the pan in the freezer for at least 4 hours, or until the ice cream layer is completely solid.
To assemble the cake:
-
Prepare the whipped cream topping: In a clean, chilled bowl, whip the remaining heavy whipping cream, granulated sugar, and vanilla extract until stiff peaks form.
-
Place one cooled chocolate cake layer on your desired serving plate or cake stand. Carefully remove the frozen rainbow ice cream layer from its pan using the plastic wrap overhang, then peel off the plastic wrap. Gently place the solid ice cream disc directly on top of the first cake layer. Crown with the remaining chocolate cake layer.
-
Generously cover the entire cake with the freshly whipped cream, smoothing it with an offset spatula or decorating as desired. Finish by decorating with a festive scattering of rainbow chips or sprinkles. Freeze the assembled cake for at least 1 hour to ensure it’s firm before serving. Before slicing, allow the cake to sit at room temperature for a few minutes to soften slightly, then use a sharp, warm knife for clean cuts. Store any leftovers tightly wrapped in the freezer.
Notes
- For the brightest, most vivid rainbow colors, it’s highly recommended to use gel food coloring. These are much more concentrated than liquid food coloring and will not thin out your ice cream mixture. You can find gel food coloring in craft stores, specialty kitchen shops, a well-stocked grocery store, or easily online. To achieve truly intense and vibrant hues, you might need to use a significant portion, or even an entire small container, of each gel food coloring.
- Make into cupcakes: If cupcakes are more your preference for a party, you can easily adapt this recipe. Fill greased or paper-lined muffin tins with the chocolate cake batter, about 2/3 full. Bake for approximately 15 minutes, or until a toothpick comes out clean. Let them cool completely. For the ice cream filling, layer the prepared rainbow ice cream mixture into a 9×5-inch loaf pan and freeze for at least 4 hours until solid. Once frozen, use a small ice cream scoop or spoon to carefully place small portions of the rainbow ice cream into the centers of the cooled cupcakes (you may need to cut out a small center from each cupcake first). Top each with a swirl of whipped cream and a sprinkle of rainbow chips. This recipe yields approximately 36 delightful cupcakes.
Ice cream recipe inspired by Big Bear’s Wife.
Tools for this recipe
Having the right tools can make all the difference in your baking endeavors, especially when creating a multi-layered masterpiece like this Chocolate Rainbow Ice Cream Cake. Here are some essentials that will help you achieve perfect results with ease:
- 8 or 9-inch Cake Pans: Essential for baking your moist chocolate cake layers. Using good quality pans ensures even baking.
- Parchment Paper: A must-have for lining cake pan bottoms to prevent sticking and make removal effortless.
- Mixing Bowls: Several sizes for whisking dry ingredients, combining wet ingredients, and separating your colorful ice cream mixtures.
- Electric Mixer (Stand or Handheld): Indispensable for whipping heavy cream to stiff peaks for both the ice cream and the final frosting.
- Digital Kitchen Scale: (Optional but highly recommended) For precise measurement of ingredients, especially flour and sugar, ensuring consistent results every time. It’s also great for dividing batter evenly between pans.
- Rubber Spatulas: Useful for folding in ingredients gently, scraping down bowls, and spreading batters and creams.
- Offset Spatula: Perfect for smoothly spreading the whipped cream frosting over your assembled cake.
- Gel Food Coloring: Key for achieving those vibrant, distinct rainbow hues in your no-churn ice cream.
- Plastic Wrap: Crucial for lining the ice cream pan and tightly wrapping leftover cake for freezing.
- Wire Cooling Rack: For allowing your cake layers to cool completely and evenly.
- Sharp Knife: For clean slices, especially after the cake has slightly softened out of the freezer.
