Easy No-Bake Strawberry Cheesecake Bars: Your Perfect Summer Dessert
Prepare to fall in love with these incredible no-bake strawberry cheesecake bars! They are the epitome of a fun, easy, and absolutely delicious dessert, especially during the sun-drenched summer months when fresh, ripe strawberries are at their peak sweetness. Imagine indulging in a treat that’s bursting with vibrant berry flavor and luxuriously creamy, all without ever having to turn on your oven. These bars are not just a dessert; they’re a summer experience waiting to happen.
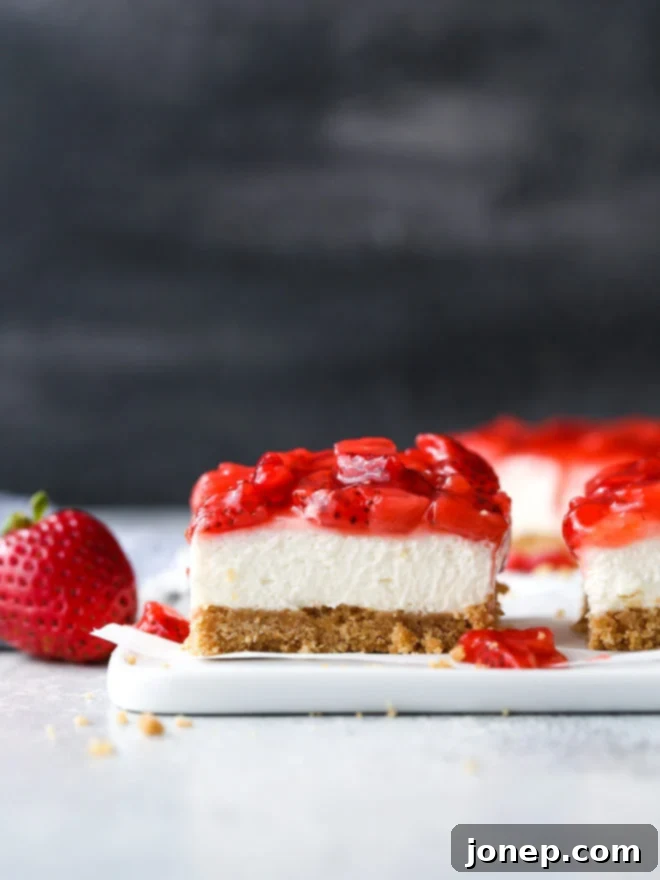
Indulgent, creamy, and undeniably bursting with fresh strawberry goodness, this dessert is your go-to for any summer gathering. Whether you’re hosting a casual backyard barbecue, heading to a lively potluck, or simply craving something sweet and refreshing at home, these bars fit the bill perfectly. While they truly shine in summer, their irresistible charm makes them a fantastic dessert option any time of the year. One thing is certain: these no-bake strawberry cheesecake bars are guaranteed to be a sensational hit with everyone who tastes them.
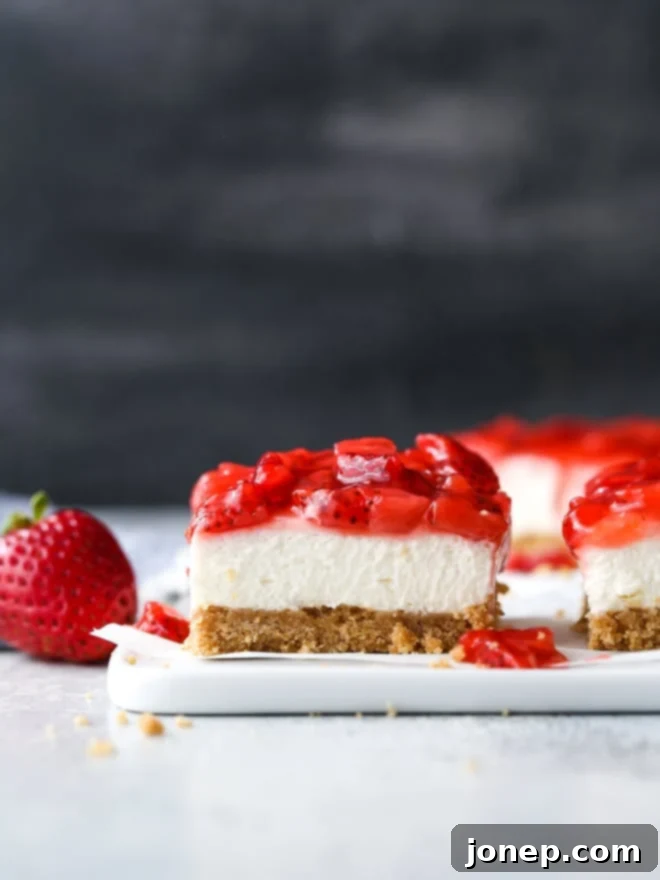
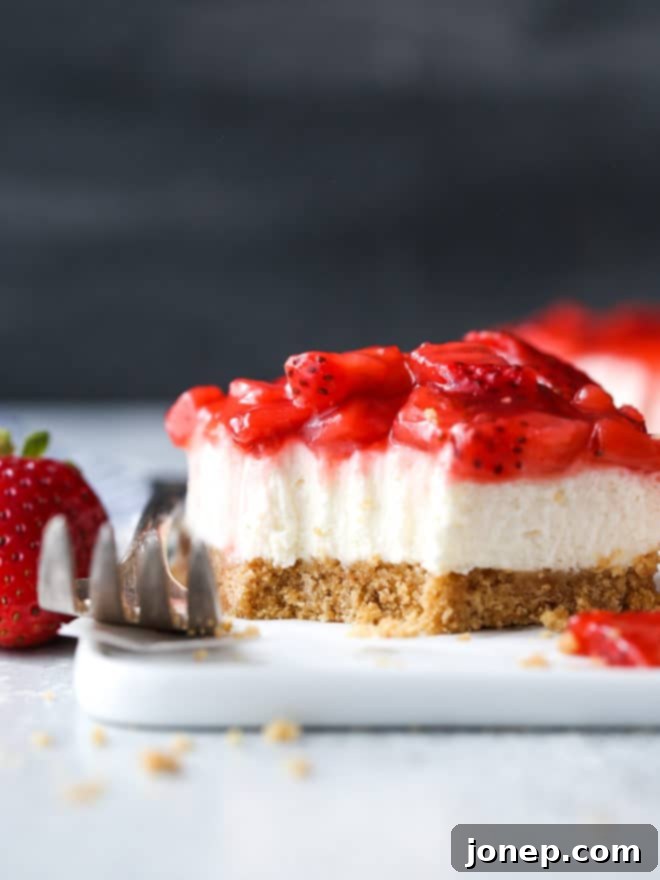
The magic starts with a simple, buttery graham cracker crust that forms the perfect foundation. Layered on top is an incredibly easy-to-make yet SUPER creamy no-bake cheesecake filling that simply melts in your mouth. The grand finale is a bright, summery topping made from fresh strawberries simmered into a quick, luscious jammy sauce. The best part? Your refrigerator does all the hard work, chilling these beauties to perfection while you enjoy your day!
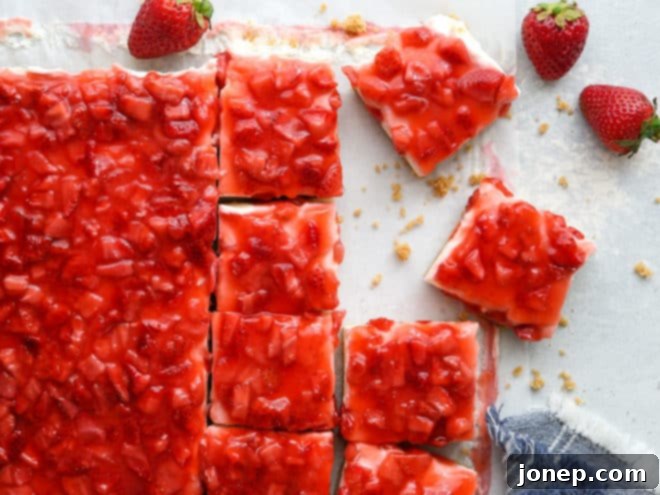
“I made this recipe for the holidays and it was a HIT!! This recipe was very thorough and easy to follow, thank you!!! ⭐⭐⭐⭐⭐” — reader Bria
Table of Contents
- Ingredients You’ll Need
- Step-by-Step Instructions
- Essential Recipe Tips for Success
- Why You’ll Love These No-Bake Strawberry Cheesecake Bars
- Serving and Storage Suggestions
- Don’t Wait, Make These Now!
- More Cheesecake Treats to Try
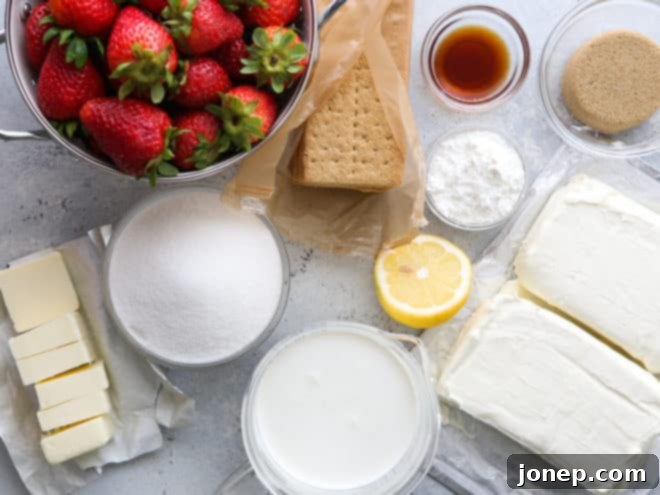
Ingredients You’ll Need for the Ultimate No-Bake Strawberry Cheesecake Bars
Ready to gather your essentials? Here’s a detailed look at the ingredients you’ll need to create these heavenly bars. For the precise measurements, remember to refer to the full recipe card located further down the page!
- Graham Crackers: These form the crunchy, buttery base that perfectly complements the creamy filling. You’ll want to crush them into fine crumbs.
- Brown Sugar: Adds a hint of caramel sweetness to the crust, enhancing its flavor profile.
- Butter: Essential for binding the graham cracker crumbs and creating that classic firm, rich crust. Melted butter works wonders here.
- Cream Cheese: The star of our cheesecake filling! Opt for full-fat cream cheese, softened to room temperature, for the best, creamiest texture and richest flavor.
- Vanilla Extract: A touch of pure vanilla elevates the overall taste of the cheesecake, adding a warm, aromatic note.
- Heavy Whipping Cream: When whipped, this creates the light, airy, and incredibly smooth texture of our no-bake filling. Make sure it’s very cold!
- Strawberries: The hero of our topping! Fresh, seasonal strawberries are highly recommended for their vibrant flavor and natural sweetness, but frozen strawberries (thawed and drained) can also work in a pinch.
- Granulated Sugar: Used in both the cheesecake filling and the strawberry topping to balance the tartness of the berries and add sweetness.
- Cornstarch: This acts as a thickener for the strawberry topping, transforming the fresh berries into a lovely, jammy sauce.
- Lemon Juice: A squeeze of fresh lemon juice brightens the strawberry topping, cutting through the sweetness and enhancing the natural fruit flavors.
baking tip:How to Quickly Bring Cream Cheese to Room Temperature
Cold cream cheese can be a nightmare for no-bake recipes, often leading to a lumpy, uneven filling that’s hard to spread. While letting it rest at room temperature for about 60 minutes is ideal, here are a few clever ways to speed up the process if you’re short on time:
- Cube it: Cut the block of cream cheese into small cubes and spread them out on its packaging or a plate. This increases the surface area, allowing it to soften much faster, usually within 20-30 minutes.
- Warm Water Bath: Remove the cream cheese from its cardboard box but keep it in the foil wrapper. Place it in a bowl and cover it with warm (not hot!) water for about 10 minutes. The foil protects it while the warm water gently softens it.
- Microwave Method: For a quick fix, remove all packaging from the cream cheese. Microwave it in short 10-second bursts, flipping it after each burst. Be careful not to melt it – you’re aiming for softened, not liquid. This typically takes 30-40 seconds total.
Step-by-Step Guide to Crafting Your Perfect Cheesecake Bars
While this recipe does require a bit of assembly and some chilling time, I promise you every bit of effort is immensely worth it! The process is actually quite straightforward and incredibly rewarding. We’ll break it down into three distinct, easy-to-follow parts:
-
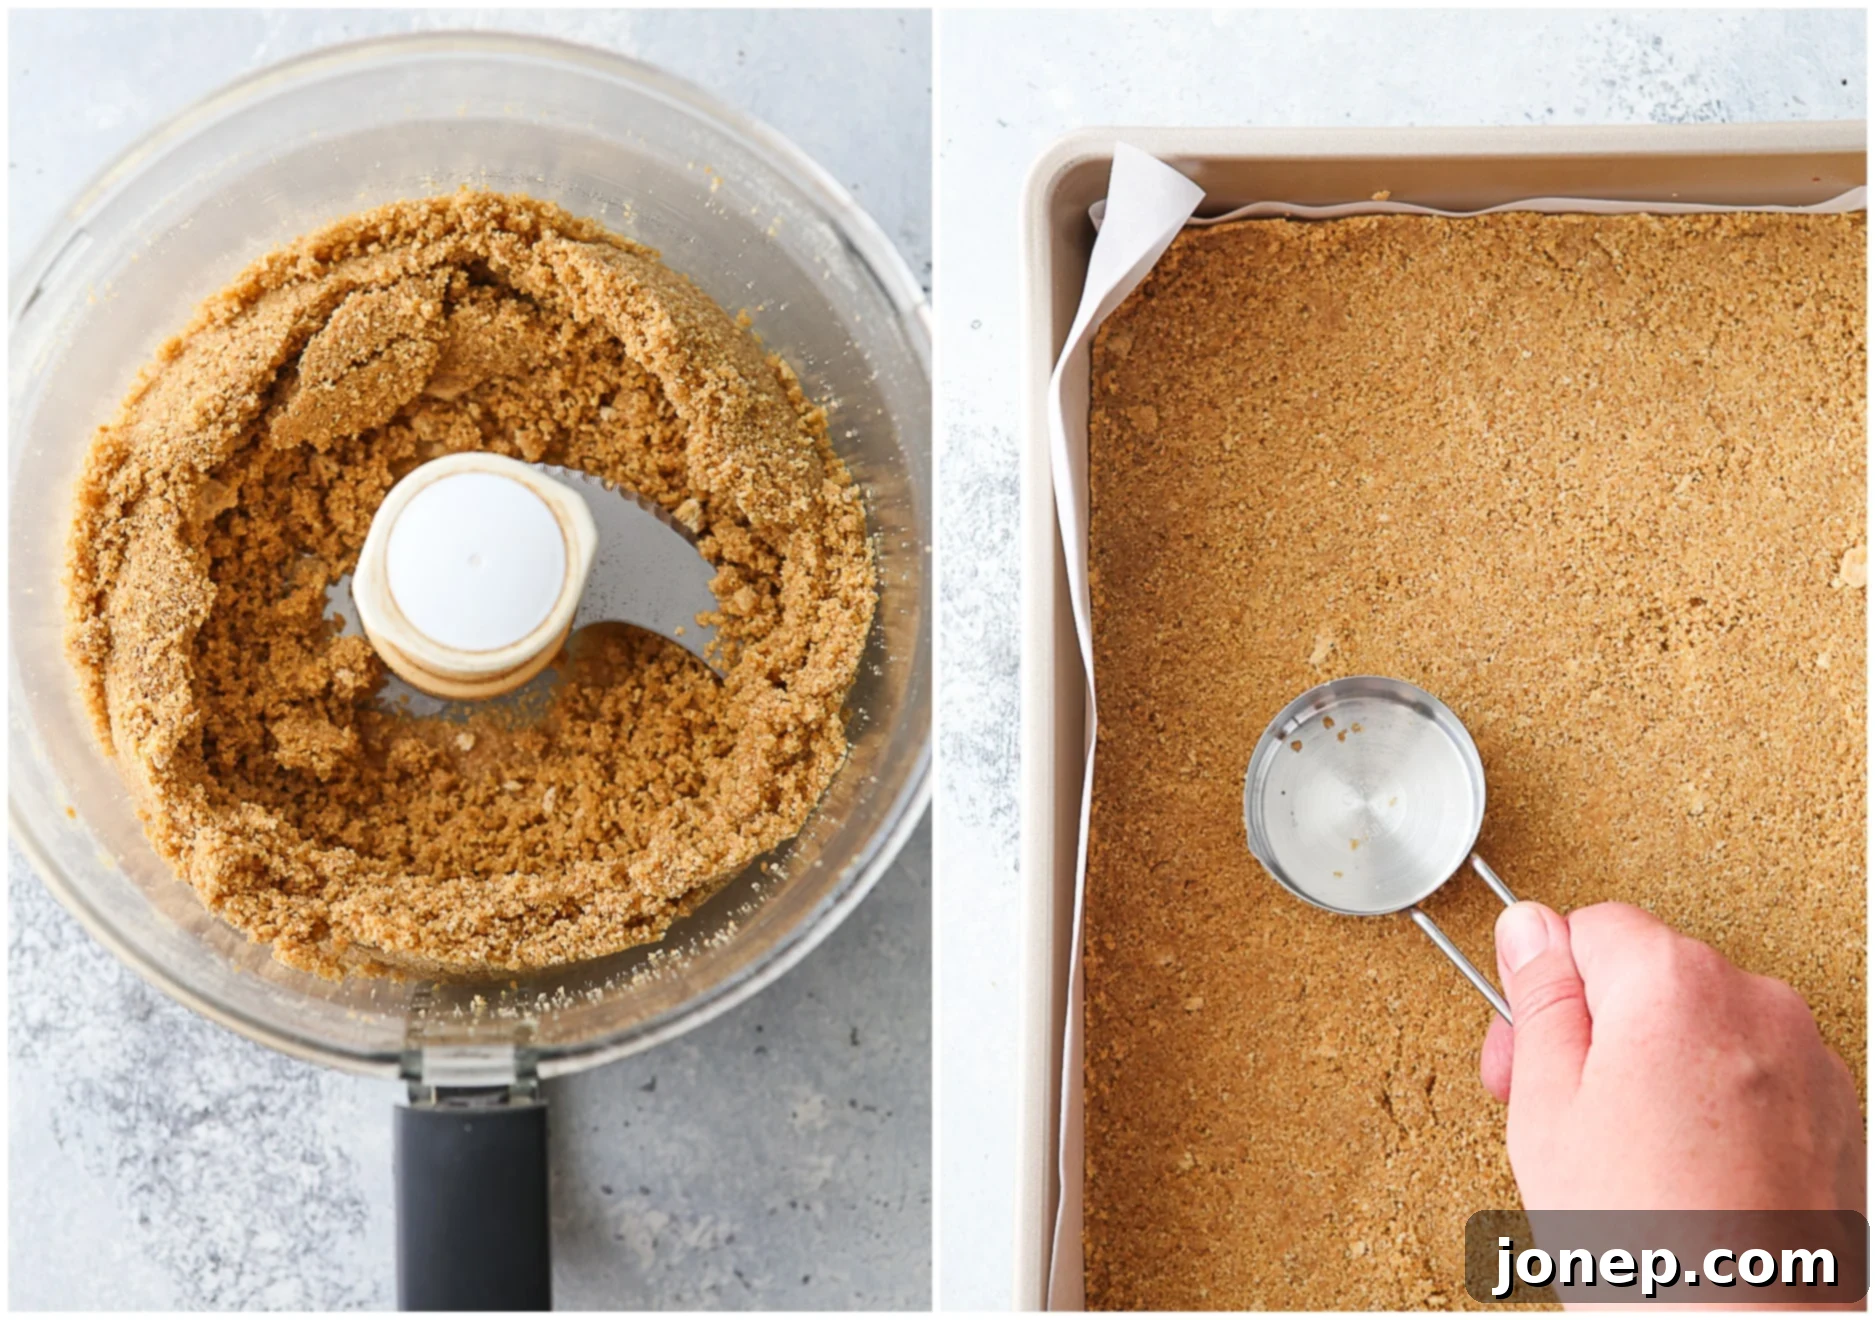
Prepare the Graham Cracker Crust. This forms the delightful base of our bars. In a medium bowl, combine your finely crushed graham cracker crumbs with brown sugar, a pinch of salt, and melted butter. Mix thoroughly until the crumbs are evenly moistened and resemble wet sand. Press this mixture firmly and evenly into the bottom of a 9×13-inch baking pan that you’ve lined with parchment paper (leaving an overhang on the sides for easy removal later). Once pressed, place the pan in the refrigerator to chill while you prepare the filling. No need for baking – your fridge will handle the setting!

-
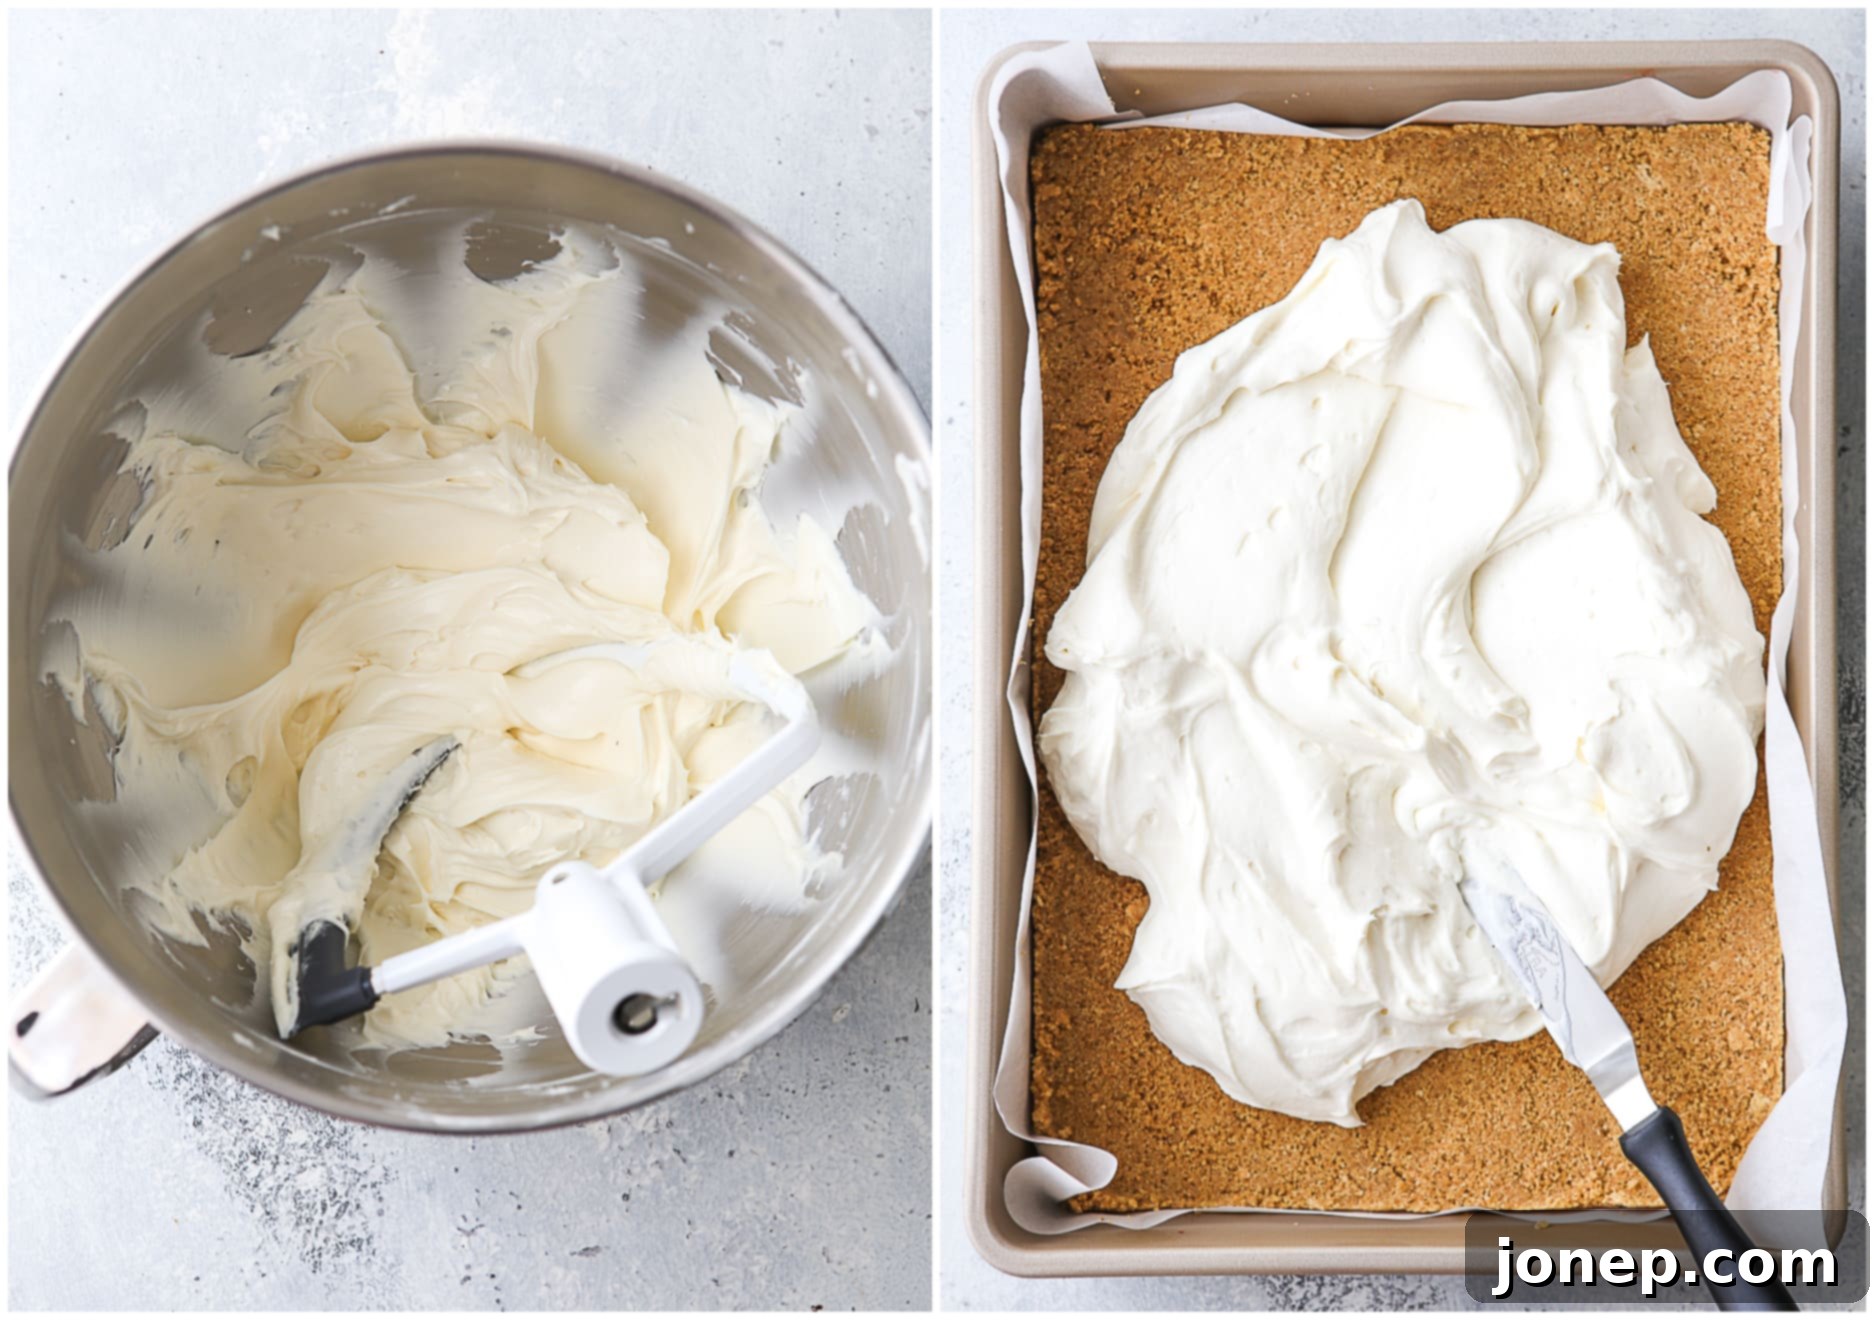
Make the Super Creamy Cheesecake Filling. This is where the magic happens! Using an electric mixer (stand or hand-held), beat your softened cream cheese in a large bowl for about 2 minutes until it’s perfectly smooth and lump-free. Gradually add the granulated sugar and vanilla extract, continuing to beat for another 2-3 minutes until the mixture is light, fluffy, and incredibly creamy. Remember to scrape down the sides of the bowl once or twice to ensure everything is thoroughly incorporated. In a separate, very clean bowl, beat the cold heavy whipping cream until it forms medium peaks – meaning it holds its shape but is still soft. Gently fold the whipped cream into the cream cheese mixture in two additions. Be careful not to overmix, as you want to preserve the airy texture of the whipped cream. Once smooth and combined, carefully spread this luscious filling over your chilled graham cracker crust. Return the pan to the fridge to chill again while you prepare the vibrant strawberry topping.

-
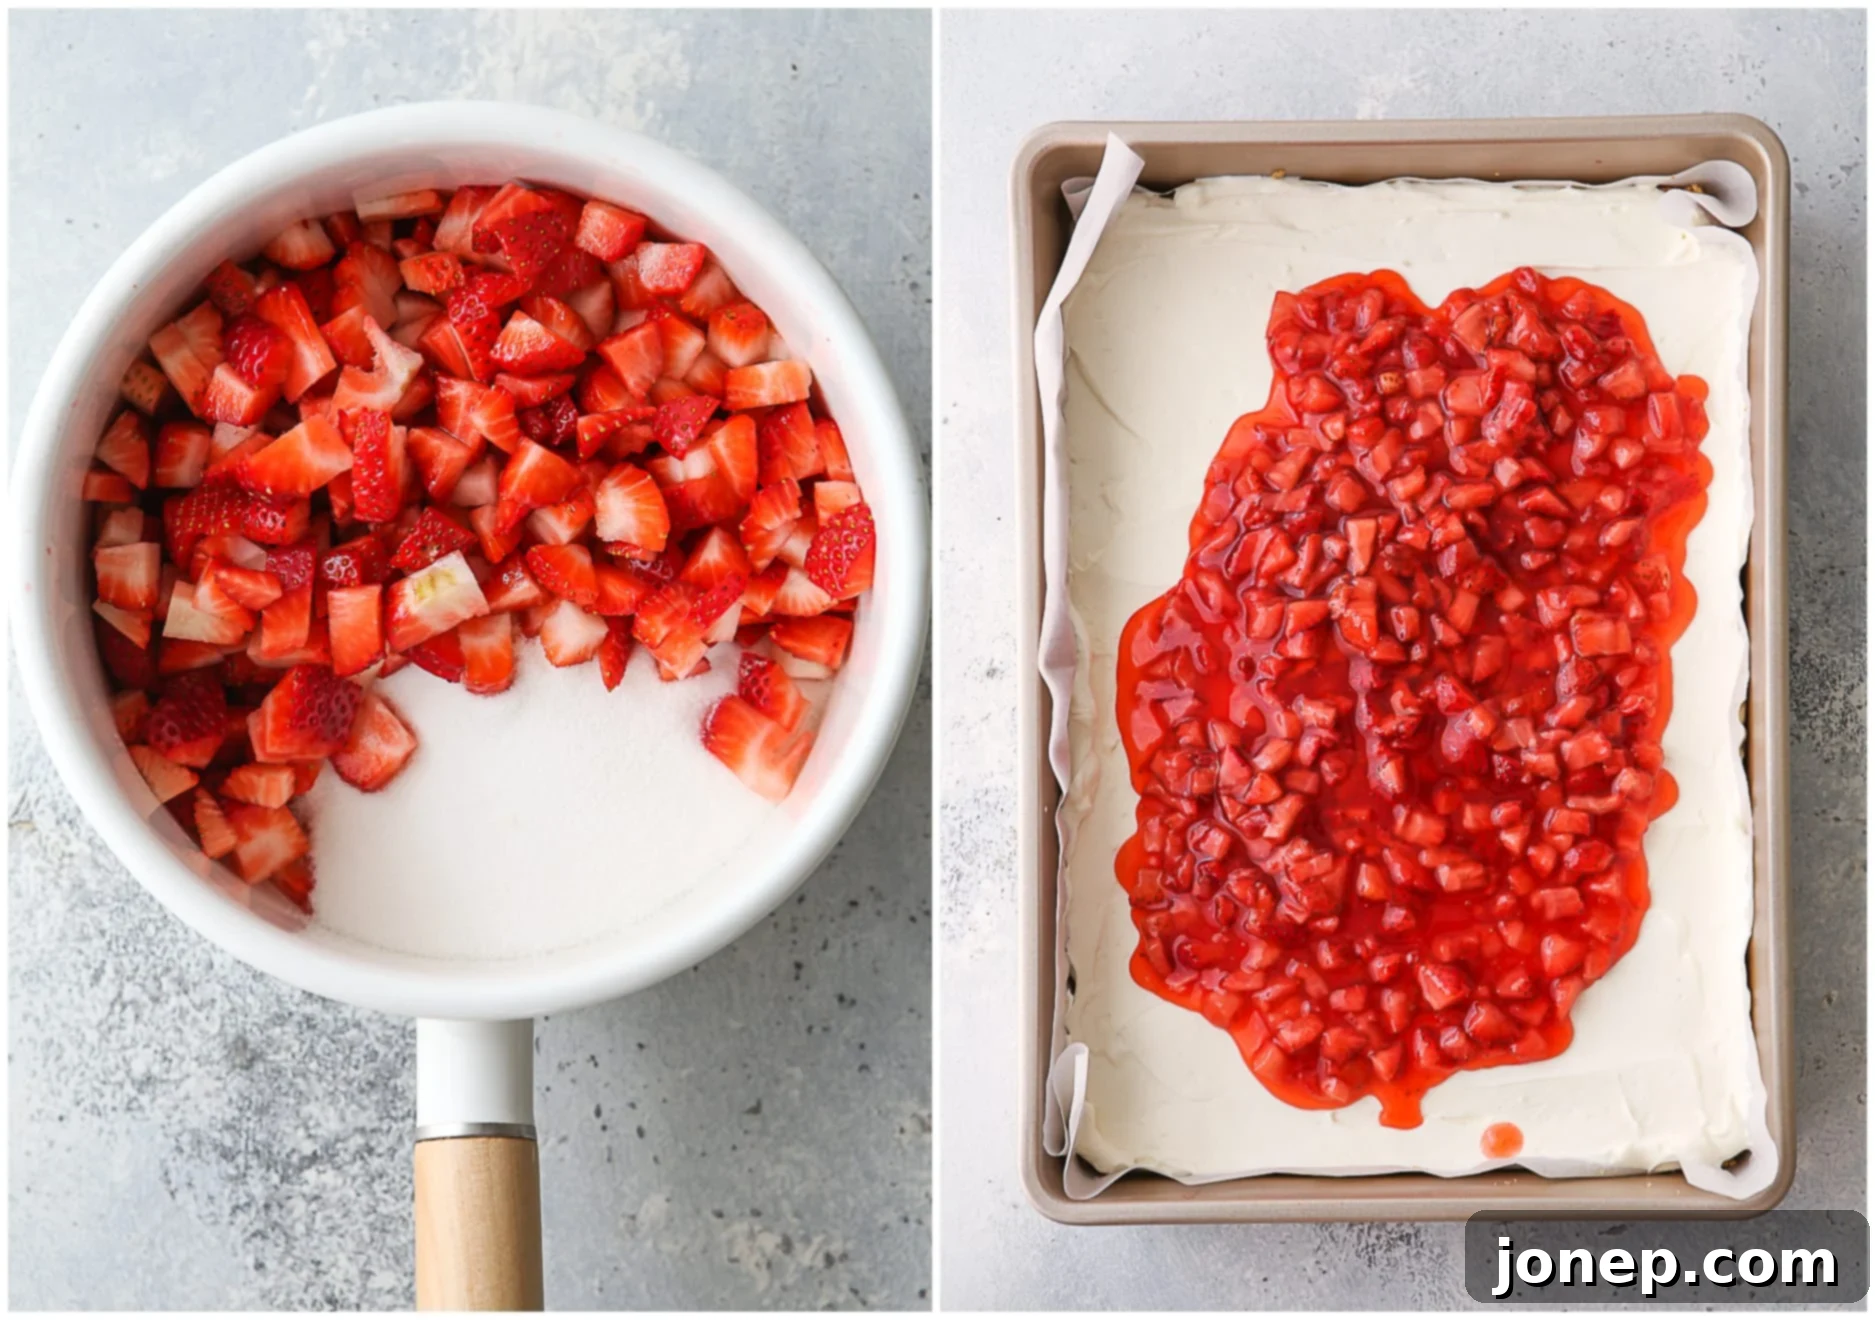
Cook the Fresh Strawberry Topping. In a medium saucepan, whisk together water and cornstarch to create a smooth slurry – this is crucial for preventing lumps. Add your chopped strawberries and granulated sugar to the saucepan. Place it over medium-high heat, bringing the mixture to a boil, then reduce heat and let it simmer gently for about 10 minutes. During this time, the strawberries will beautifully release their juices, and the sauce will gradually thicken into a wonderfully jammy consistency. Once thickened, stir in the fresh lemon juice. Allow the strawberry mixture to cool mostly to room temperature before applying it to your cheesecake. Using a slotted spoon, spread the jammy strawberries evenly over the chilled cheesecake filling. You’ll notice some liquid remaining in the pan; you can discard this extra liquid or save it for another delicious use, like flavoring drinks or yogurt.

- The Final & Most Important Step: Let it Chill! This step is non-negotiable for perfectly set, sliceable cheesecake bars. After assembling, return the pan to the refrigerator and allow the cheesecake bars to chill for at least 6-8 hours. For the very best results and a truly firm set, I highly recommend preparing this dessert the day before you plan to serve it, allowing it to chill overnight. This extended refrigeration time ensures the filling is completely firm and easy to cut into beautiful, clean slices.
Essential Tips for No-Bake Strawberry Cheesecake Bar Success
Achieving perfect no-bake cheesecake bars is easy with a few insider tips. Pay attention to these details, and you’ll be rewarded with a dessert that looks as good as it tastes:
- Line Your Pan for Effortless Slicing: This is a game-changer! Always line your 9×13-inch baking pan with parchment paper or foil, making sure to leave an overhang on two opposite sides. These overhangs act as convenient “handles,” allowing you to easily lift the entire slab of chilled cheesecake out of the pan and transfer it to a cutting board for neat, clean slicing. This prevents any messy digging in the pan!
- Ensure Cream Cheese is at Room Temperature (Crucial!): I cannot stress this enough! Starting with cream cheese that is fully at room temperature is absolutely vital to avoid a lumpy, inconsistent filling. Cold cream cheese will not cream smoothly, resulting in an unappealing texture. Pull your cream cheese out of the fridge 1-2 hours before you plan to start, or if you forget, refer to my helpful tips on how to quickly bring cream cheese to room temperature.
- Master the “Folding” Technique: The incredibly light and airy texture of this cheesecake filling comes from carefully folding whipped heavy cream into the cream cheese mixture. It’s important to be gentle! Overmixing at this stage can deflate the whipped cream, pressing out all the incorporated air and resulting in a dense, heavy filling. If you’re unsure about the technique, here’s a helpful little video on how to “fold” ingredients correctly.
- Understand the Strawberry Topping Consistency: The strawberry topping is intentionally designed to be loose and juicy, more akin to a vibrant fruit sauce than a thick, gelatinous layer. The exact consistency might vary slightly depending on the ripeness and juiciness of your strawberries (or if you’re using frozen). When spreading it over the cheesecake, use a slotted spoon to scoop up the strawberries along with some of their delightful liquid. You can then discard any excess liquid left in the pan or save it for other culinary uses – it makes a fantastic addition to cocktails, sparkling water, or drizzled over ice cream!
- Chill Completely for a Perfect Set: Patience is truly a virtue with no-bake cheesecakes! It is imperative that these bars chill completely in the refrigerator for the recommended time to set up properly. If you attempt to cut into them too soon, the filling will be soft, and your slices won’t hold their shape, leading to a messy presentation. I strongly advise against using the freezer to speed up the chilling process, as it can affect the texture. Instead, plan ahead and prepare this recipe the night before you intend to serve it.
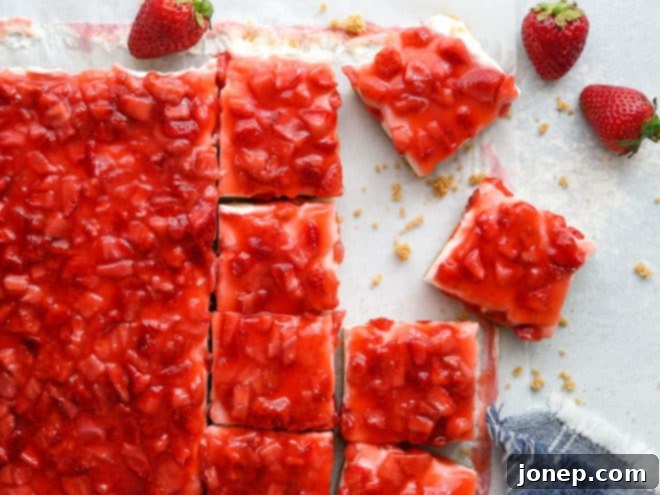
- For the Cleanest, Prettiest Slices: To achieve those picture-perfect, sharp-edged slices, a little trick goes a long way. Before each cut, heat a sharp knife under hot running water, then wipe it completely dry. Make your cut, and then repeat the process – heat, wipe, cut. Yes, it’s a bit repetitive, but the results are absolutely worth the extra few seconds for beautifully presented bars!
Why You’ll Love These No-Bake Strawberry Cheesecake Bars
Beyond their incredible taste and ease of preparation, there are countless reasons why these no-bake strawberry cheesecake bars will quickly become a favorite in your dessert repertoire:
- Effortlessly Elegant: They look sophisticated and impressive, yet require minimal effort. Perfect for surprising guests without spending hours in the kitchen.
- No Oven Required: Keep your kitchen cool, especially during those scorching summer days. The fridge does all the work!
- Fresh & Fruity: They celebrate the natural sweetness and vibrant flavor of fresh strawberries, making every bite a burst of summer.
- Crowd-Pleaser: The classic combination of sweet graham cracker crust, creamy cheesecake, and fruity topping is universally loved.
- Make-Ahead Friendly: Since they need to chill, these are ideal for preparing in advance, freeing up your time on the day of your event.
- Customizable: While strawberries are divine, you can easily adapt the fruit topping to other seasonal berries like blueberries, raspberries, or a mixed berry medley.
Serving and Storage Suggestions
- Serving: For the best experience, serve these bars well-chilled. They are fantastic on their own, but a dollop of extra whipped cream or a few fresh mint leaves can add an extra touch of elegance.
- Storage: Leftover no-bake strawberry cheesecake bars should always be stored in an airtight container in the refrigerator. They will keep well for up to 3-4 days. While technically you *can* freeze them, the texture of the strawberry topping can become a bit watery upon thawing, and the cream cheese filling might be slightly altered. If you must freeze, wrap individual slices tightly in plastic wrap and then foil, and thaw in the refrigerator.
Don’t Wait, Make These Now!
These no-bake strawberry cheesecake bars have easily become one of my most cherished dessert creations, and for very good reason—they are simply AMAZING! If you’re looking for a dessert that combines ease, elegance, and incredible flavor, look no further. Give these delightful bars a try and discover their magic for yourself. I have a feeling you, your family, and your friends will be thanking me later. Enjoy every delicious bite! 😊

No-Bake Strawberry Cheesecake Bars
Pin Recipe
Leave a Review
Ingredients
Graham Cracker Crust:
- 2 cups (200 grams) graham cracker crumbs (about 16 full cracker sheets)
- Pinch of salt
- ¼ cup (55 grams) packed light or dark brown sugar
- ½ cup (225 grams) butter , melted
Cheesecake Filling:
- 16 ounces (455 grams) full-fat cream cheese
- ½ cup (100 grams) granulated sugar
- 1 teaspoon vanilla extract
- 1 ½ cup (375 ml) heavy whipping cream
Strawberry Topping:
- 2 tablespoons water
- 2 tablespoons cornstarch
- 1 ½ lb (680 grams) strawberries , hulled and chopped small
- 1 cup (200 grams) granulated sugar
- 1 tablespoon lemon juice
Equipment
Instructions
To prepared the crust:
-
Combine graham cracker crumbs with salt, brown sugar, and melted butter until incorporated.
-
Press mixture evenly into a 9×13 inch baking pan lined with parchment or foil. Chill in the fridge while you prepare the filling.
To prepare the filling:
-
With an electric mixer, beat cream cheese for 2 minutes until smooth. Add sugar and vanilla and beat for another 2-3 minutes until light, smooth, and creamy. Scrape down the bowl once or twice to make sure all lumps are incorporated.
-
In a separate bowl (if using a stand mixer, transfer cream cheese mixture to another bowl), beat heavy whipping cream to medium peaks.
-
Gently fold whipping cream into the cream cheese mixture in 2 additions, mixing only until filling is smooth. Spread filling over the crust and chill in the fridge while you prepare the topping.
To make the topping:
-
Combine water and cornstarch together to make a slurry and add to a medium saucepan. Add sugar and strawberries and set over medium high heat.
-
Bring to a boil and then simmer for about 10 minutes. During this time the strawberries will release their juices and then thicken slightly. When thickened, stir in lemon juice. Let the strawberry mixture cool mostly to room temperature.
-
Use a slotted spoon to scoop strawberries out of the saucepan and spoon on top of the cheesecake into an even layer. Some liquid will still be in the pan once you’ve removed all the strawberries, discard it or save for another use.
-
Chill the cheesecake in the fridge completely until it’s set up, 6-8 hours or overnight.
-
To slice, use the edges of the parchment or foil to lift the cheesecake bars out of the pan and transfer them to a cutting board. Use a sharp knife, wiping it clean in between slices.
-
Cheesecake bars should be stored in the fridge.
Video
Notes
- You can use frozen strawberries. Thaw and drain away any excess liquid before making the strawberry topping. This ensures the topping doesn’t become too watery.
- The strawberry topping is supposed to be very loose and juicy, giving it a fresh, natural feel. Use a slotted spoon to scoop up the strawberries with most of the juices, and discard what’s left in the pan. You can also save the extra liquid for another use, like flavoring drinks, cocktails, or drizzling over pancakes.
- Do not try to rush chilling time! This is the most critical step for success. The cheesecake will need at least 6 hours to set up properly before slicing, but I highly recommend chilling it overnight for the firmest, most beautiful slices.
More Delectable Cheesecake Creations to Explore
