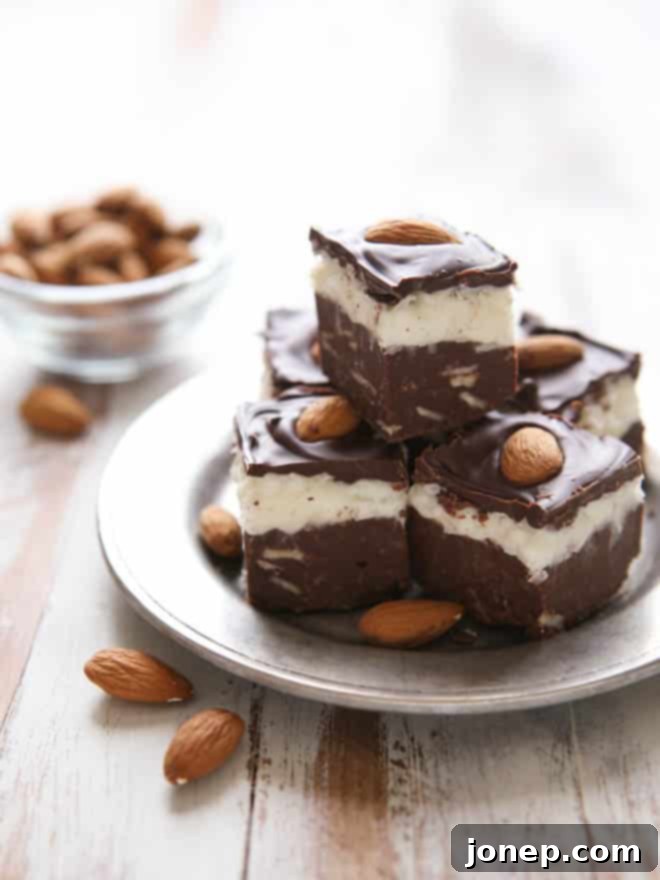
Decadent & Easy Coconut Almond Fudge Recipe: Your No-Bake Candy Bar Dream
Imagine your favorite coconut almond candy bar, but in a rich, creamy, and utterly irresistible fudge form – that’s exactly what this recipe delivers! This Coconut Almond Fudge is a quick and incredibly easy treat, bringing all those beloved flavors right to your kitchen with minimal effort. Perfect for satisfying a sweet tooth, holiday gatherings, or simply treating yourself, this no-bake wonder is destined to become a staple in your dessert repertoire.
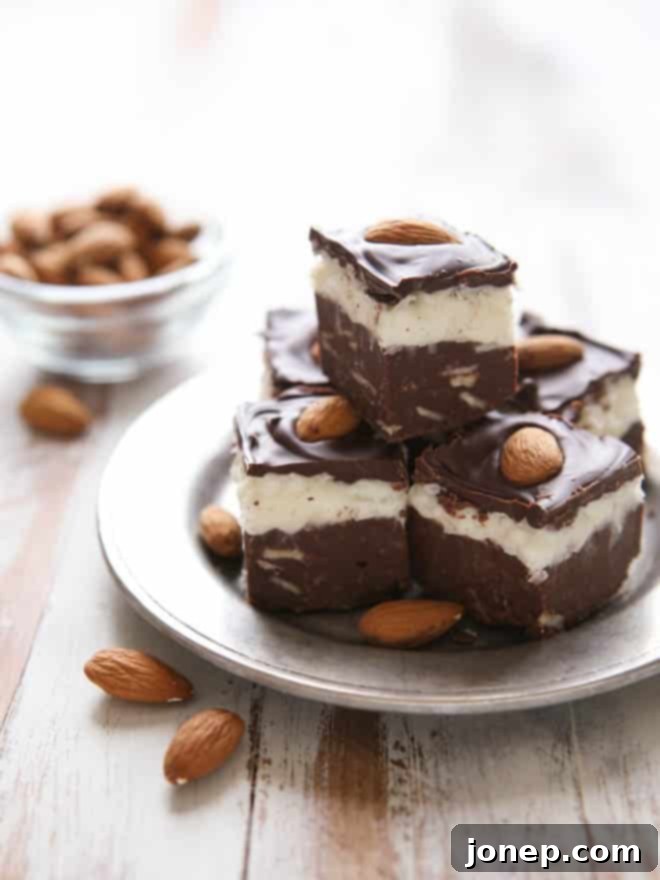
This recipe was developed in partnership with Diamond of California, a brand renowned for its high-quality nuts.
The holiday season, or any season really, often calls for an abundance of sweets. While cookies and candies are wonderful, there’s something uniquely satisfying about a beautifully crafted piece of fudge. But let’s be honest, traditional fudge can sometimes feel daunting with its specific temperatures and constant stirring. That’s where this recipe shines! It’s designed to be effortlessly simple, making it accessible for even novice bakers while still delivering a gourmet taste that will impress everyone. You get all the classic holiday flavors – rich chocolate, sweet, chewy coconut, and the delightful crunch of almonds – in a convenient, crowd-pleasing package. It’s truly got it all, providing that perfect balance of textures and tastes that makes a dessert truly memorable.
So, grab your apron (and maybe some stretchy pants for after!), because we’re about to make some incredibly delicious fudge!
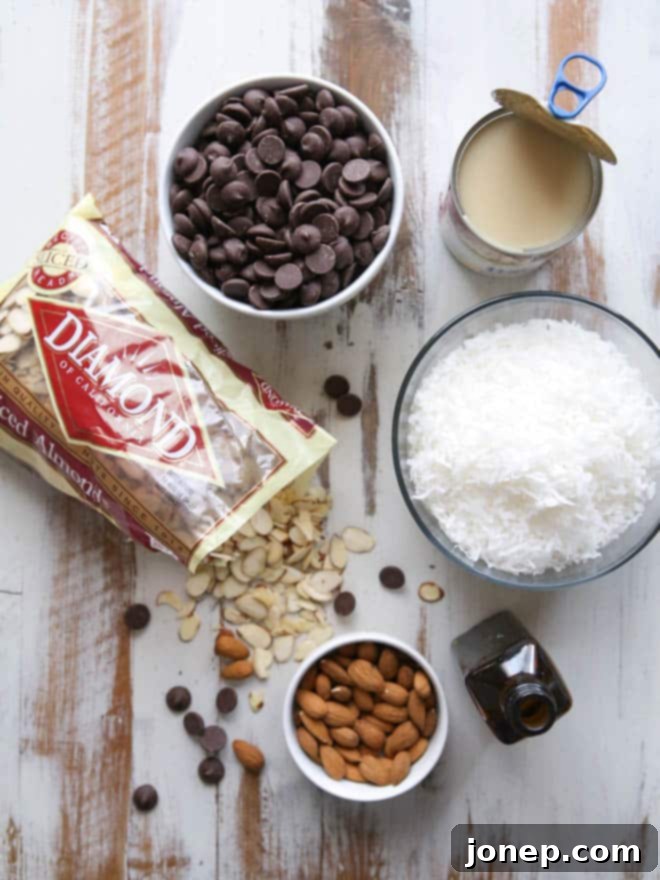
Crafting Your Perfect Coconut Almond Fudge: Layers of Deliciousness
The beauty of this Coconut Almond Fudge lies in its simplicity and its perfectly balanced layers. Each component plays a crucial role in creating the ultimate taste experience, reminiscent of your favorite chocolate and coconut bar.
The Decadent Dark Chocolate Base
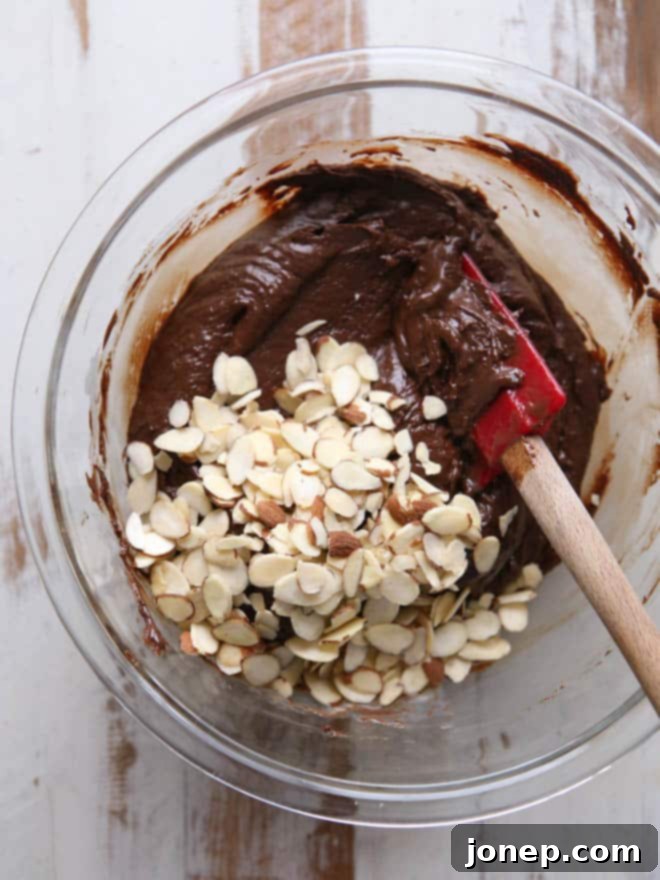
The foundation of this fudge is a rich, dark chocolate layer infused with crunchy sliced almonds. Making it couldn’t be easier: simply combine dark chocolate chips and sweetened condensed milk in a microwave-safe bowl. A few short bursts in the microwave, followed by a good stir, and you have a luxuriously smooth, thick, and sticky fudge mixture. The key here is not to overheat – just enough to melt the chocolate into the condensed milk. Once melted, stir in those delightful sliced almonds, adding a textural contrast and nutty flavor that complements the chocolate perfectly. This mixture is then spread evenly into a prepared square pan, forming the irresistible base.
The Creamy Coconut Center
While the chocolate base is amazing on its own, it’s the coconut filling that truly elevates this fudge to candy bar status. This layer is a dreamy blend of sweetened condensed milk, vanilla extract, a touch of coarse salt to balance the sweetness, powdered sugar, and, of course, sweetened flaked coconut. When combined, these ingredients create a soft, chewy, and intensely coconut-flavored layer. The initial mixture might seem a little dry, but with continued stirring, it transforms into a cohesive, spreadable consistency. You can adjust the amount of flaked coconut slightly to achieve your desired texture – a little more if you prefer a firmer, denser coconut layer, or slightly less for a softer, more pliable one. This coconut concoction is then carefully spread over the chilled chocolate base.
The Finishing Chocolate Topping & Almond Garnish
To complete this masterpiece, another thin layer of melted dark chocolate is spread over the coconut filling. This top layer not only adds another dimension of chocolatey goodness but also provides the perfect canvas for our final touch: whole almonds. These whole almonds are strategically placed, not just for their appealing look, but also to give a satisfying crunch with every bite, echoing the flavors of classic candy bars. Before the chocolate fully sets, a clever trick is to “score” the chocolate into individual serving pieces – this guides your almond placement and makes for cleaner cuts later on. After a final chill, your stunning, multi-layered Coconut Almond Fudge is ready to be unveiled and enjoyed!
Have I mentioned how incredibly *easy* this fudge is? There’s absolutely no need for constant stirring over a hot stove, and you can put away that candy thermometer. This recipe relies on the microwave and simple mixing, making it a stress-free experience from start to finish. It’s a truly no-fuss approach to a wonderfully rich and satisfying dessert.
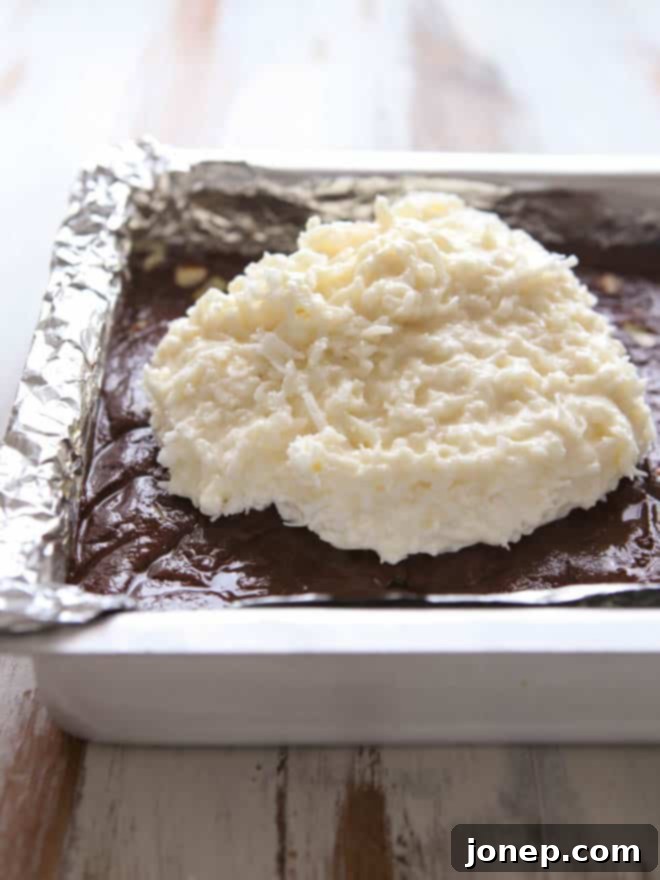
But please, don’t mistake “easy” for lacking in flavor or quality. This fudge is far from lackluster or mediocre. In fact, everyone who tries it is going to absolutely go nuts for it! It makes a generous batch, perfect for feeding a large gathering, bringing to a potluck, or gifting to friends and family. And if you’re like me, and you want to hoard it all for yourself (no judgment here!), it will keep beautifully in the fridge for quite a while, allowing you to savor each delectable piece over several days. Its firm texture when chilled makes it incredibly satisfying to bite into.
I wouldn’t blame you one bit if you kept every piece for yourself. It’s *that* good.
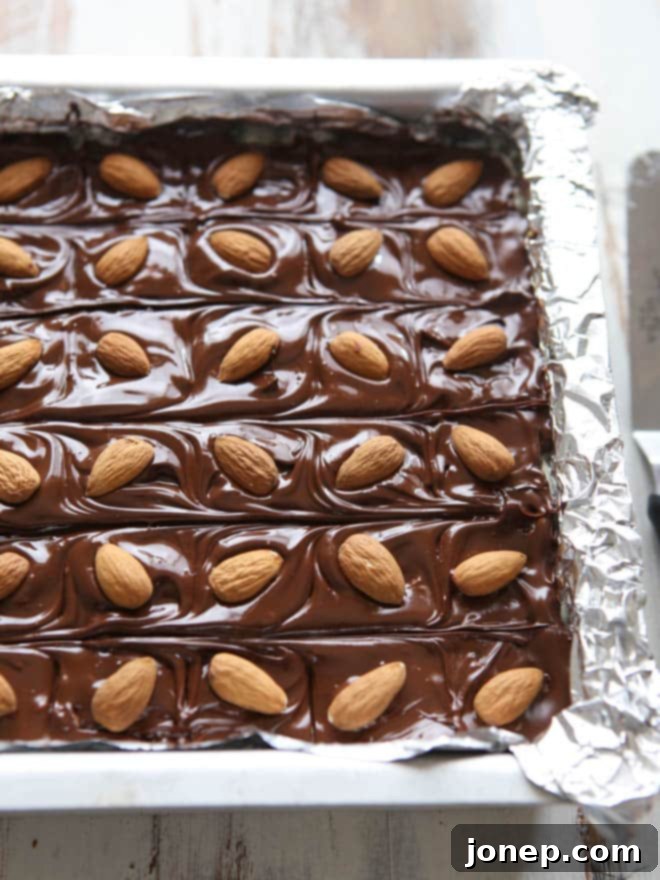
baking tip:How to melt chocolate in the microwave
Melting chocolate in the microwave is a fantastic shortcut for this easy fudge recipe, but it’s crucial to do it correctly to prevent it from overheating, seizing, and becoming unusable. Follow these simple tricks for perfectly smooth, melted chocolate every time:
- **Use a Microwave-Safe Bowl:** Always start with a clean, dry, microwave-safe bowl. Moisture is the enemy of melting chocolate.
- **Start with 50% Power:** Place your chocolate chips in the bowl and microwave at 50% power for 1 minute. This gentler heat prevents scorching.
- **Stir Thoroughly:** After the first minute, remove the bowl and stir the chocolate with a spatula. Even if it doesn’t look melted, stirring helps distribute the heat.
- **Short Intervals:** Continue to microwave at 50% power in 30-second intervals, stirring thoroughly after each interval. This is key to controlled melting.
- **Watch for Visible Chunks:** The chocolate is done when most of it is melted, but you can still see a few small chunks. The residual heat in the bowl and the act of stirring will melt these last few pieces, resulting in a perfectly smooth consistency.
- **Avoid Water at All Costs:** Ensure absolutely no water comes in contact with the chocolate at any stage. Even a tiny drop can cause chocolate to “seize,” turning it into a grainy, unworkable mess.
- **No Saving Seized Chocolate:** Unfortunately, once chocolate has seized, there’s no way to rescue it for this type of recipe. It’s best to discard it and start fresh. Always be patient and go slow when melting chocolate!
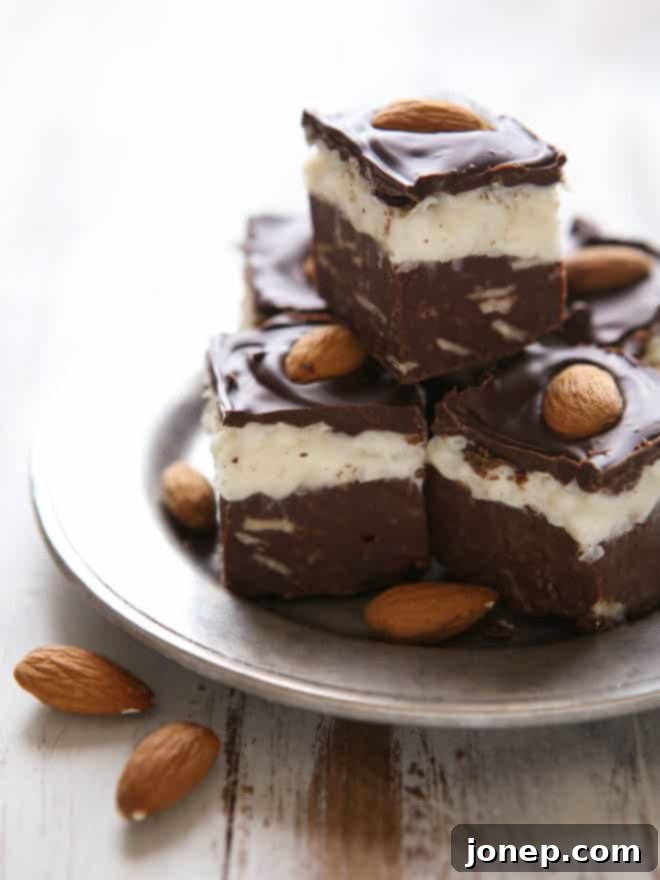
Coconut Almond Fudge
Pin Recipe
Leave a Review
Ingredients
Bottom fudge layer:
- 3 cups dark chocolate chips (510 grams)
- 14-oz can sweetened condensed milk (400 grams)
- 1 cup sliced almonds (86 grams)
Coconut layer:
- 14-oz can sweetened condensed milk
- 1 teaspoon vanilla extract
- ¼ teaspoon coarse salt
- 2 cups powdered sugar (227 grams)
- 2 – 2 ½ cups sweetened flaked coconut (170 – 190 grams)
Topping:
- 1 cup dark chocolate chips (170 grams)
- 36 whole almonds (about ¼ cup, 35 grams)
Instructions
Bottom fudge layer:
-
1. Line an 8-inch square pan with foil, allowing excess to hang over the sides for easy removal. Lightly grease the foil with non-stick spray to prevent sticking.
-
2. In a large microwave-safe bowl, combine the dark chocolate chips and 14-oz can of sweetened condensed milk. Microwave at 50% power for 1 minute, then remove and stir thoroughly with a spatula. Continue microwaving in additional 30-second intervals at 50% power, stirring after each, until the chocolate is almost completely melted and smooth (typically 2-3 minutes total, but this can vary depending on your microwave). The mixture will be thick and sticky; ensure not to overheat. Once smooth, stir in the sliced almonds until evenly distributed.
-
3. Spread this chocolate-almond mixture evenly into the bottom of the prepared pan. Use an offset spatula or the back of a spoon to smooth the top. Set aside.
Coconut layer:
-
1. In another large bowl, pour the second 14-oz can of sweetened condensed milk. Add the vanilla extract, coarse salt, and powdered sugar. Mix with a spoon or spatula until completely smooth. The mixture might appear quite dry and crumbly at first, but continue mixing for about a minute or two, and it will come together to form a thick, paste-like consistency.
-
2. Add 2 cups of the sweetened flaked coconut to the mixture and stir well until fully combined. If the mixture still seems a bit too wet or runny, incorporate the remaining ½ cup of flaked coconut to achieve a thicker, more manageable consistency for spreading.
-
3. Carefully spread this coconut layer evenly on top of the chocolate fudge layer in the pan. Gently press it down to ensure an even surface. Chill the pan in the refrigerator for at least 20 minutes to allow the layers to set slightly before adding the final topping.
Topping:
-
1. While the fudge is chilling, melt the remaining 1 cup of dark chocolate chips. Place them in a small microwave-safe bowl and melt on 50% power for 1-2 minutes, stirring every 30 seconds, until smooth. Once melted, spread this chocolate evenly over the chilled coconut layer, creating a smooth, glossy finish.
-
2. Immediately top with the whole almonds. For perfect placement, if desired, you can use a knife to gently “score” the melted chocolate into a 6×6 grid (to make 36 pieces) before adding the almonds. This provides guides for where to place each almond, ensuring even distribution and a beautiful presentation.
-
3. Chill the fudge in the refrigerator for at least 2 hours, or until completely firm. Once firm, remove the fudge from the pan by lifting the foil edges and peeling away the foil. Using a sharp knife (running it under hot water and wiping dry between cuts can help achieve clean slices), cut the fudge into 36 pieces. Serve immediately or store for later. Fudge will keep wonderfully in the fridge for up to 1 week in an airtight container.
Notes
NOTES:
- While this fudge does not strictly require refrigeration, I highly recommend storing it in the fridge. Chilling helps to keep it firm and gives it a delightful, chewy texture that many prefer.
- For easy, clean cuts, allow the fudge to warm up slightly at room temperature for 5-10 minutes before slicing. Use a large, sharp knife, and wipe the blade clean between each cut for perfect squares.
- If you prefer a milder chocolate flavor, you can use semi-sweet chocolate chips for both the base and the topping. However, the dark chocolate truly complements the sweetness of the coconut and condensed milk.
Top Tools for Making this Easy Fudge
To ensure your fudge-making experience is as smooth as the chocolate itself, here are some essential tools that will come in handy:
- **8-inch Square Baking Pan:** Essential for achieving the perfect thickness and shape for your fudge.
- **Parchment Paper or Aluminum Foil:** Makes lining the pan simple and allows for easy removal and cutting of the fudge.
- **Large Microwave-Safe Bowls:** You’ll need at least two, one for the chocolate base and one for the coconut layer, plus a smaller one for the topping.
- **Rubber Spatula:** Ideal for stirring the chocolate as it melts and for spreading the layers evenly.
- **Sharp Knife:** For cutting the chilled fudge into neat, uniform pieces. A hot knife can make this even easier!
Why Quality Ingredients Matter: A Partnership with Diamond of California
The success of any recipe often comes down to the quality of its ingredients, and this is especially true for something as simple yet impactful as fudge. That’s why I’m thrilled to partner with Diamond of California, a brand that consistently delivers exceptional nuts. For this Coconut Almond Fudge, the fresh, crisp flavor of Diamond of California’s sliced and whole almonds truly elevates the dessert, providing that perfect crunch and rich, nutty undertone that makes each bite incredibly satisfying.
Using premium nuts makes a noticeable difference in the overall taste and texture. Diamond of California has a long-standing commitment to quality, ensuring that every nut they provide is fresh and flavorful. When you’re making a treat like this fudge, where almonds are a star ingredient, choosing a trusted brand like Diamond of California ensures your results are nothing short of delicious.
Disclosure: This post is sponsored by Diamond of California as part of a long-term culinary ambassadorship. Thank you for supporting partnerships with brands I love and believe in, which make Completely Delicious possible. All opinions are always 100% my own.
To discover even more delightful holiday recipes that feature the incredible versatility of nuts, be sure to visit the Diamond Nuts website. You can also connect with them and find endless inspiration on their social media channels: Facebook, Twitter, YouTube, Pinterest, and Instagram. And right now, Diamond Nuts is celebrating their “25 Days of Cookies”! Don’t miss a single recipe, and make sure to enter for a chance to win the ultimate cookie prize pack, valued at $750!
Frequently Asked Questions About Coconut Almond Fudge
Q: How long does this Coconut Almond Fudge last?
A: When stored properly in an airtight container in the refrigerator, this fudge will stay fresh and delicious for up to 1 week. You can also freeze it for longer storage, typically up to 2-3 months.
Q: Can I use milk chocolate instead of dark chocolate?
A: Yes, absolutely! If you prefer a sweeter, milder chocolate flavor, semi-sweet or milk chocolate chips can be used for both the bottom layer and the topping. Just keep in mind that milk chocolate might be a bit softer, so ensure adequate chilling time.
Q: Why did my chocolate seize when melting?
A: Chocolate seizes when it comes into contact with even a tiny amount of water or is overheated. Always use a completely dry bowl and spatula. When microwaving, use 50% power and stir frequently in short intervals. Refer to our “How to melt chocolate in the microwave” baking tip above for detailed guidance!
Q: Can I add other ingredients or variations to this fudge?
A: Yes, this recipe is quite versatile! You could try adding a hint of almond extract to the coconut layer for an intensified almond flavor, or a sprinkle of sea salt flakes on top of the final chocolate layer for a sweet and salty contrast. Other chopped nuts, like pecans or walnuts, could also be incorporated into the base layer if you wish to experiment with different textures.
Q: Is this fudge gluten-free?
A: This recipe is inherently gluten-free, as all listed ingredients (chocolate chips, sweetened condensed milk, nuts, coconut, powdered sugar, vanilla, salt) are typically gluten-free. However, if you have a severe gluten allergy or intolerance, always double-check the labels of all packaged ingredients to ensure they are certified gluten-free and have not been cross-contaminated during processing.
