Master the Art of Homemade Rustic Herb Bread: Crispy Dutch Oven Loaf Recipe
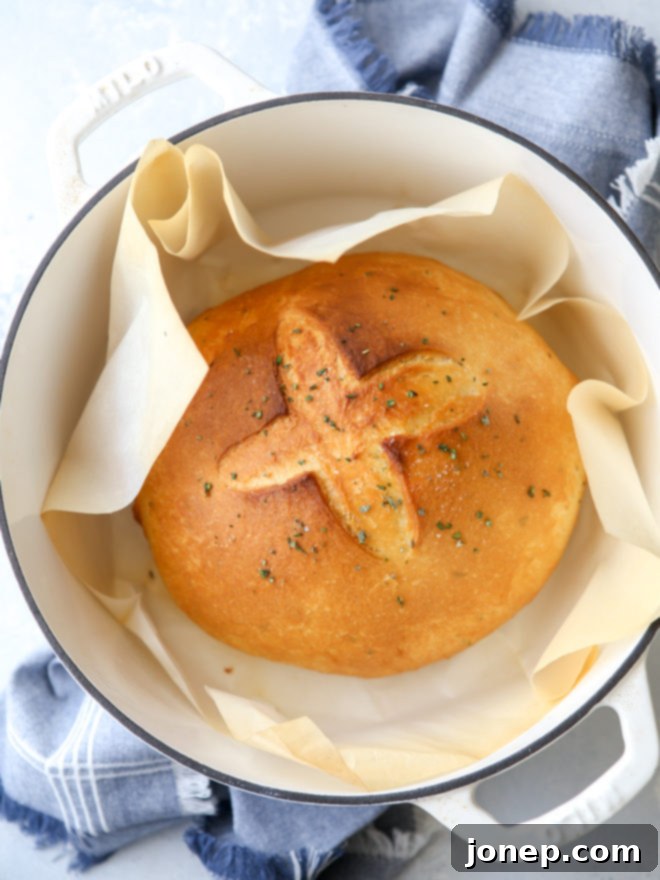
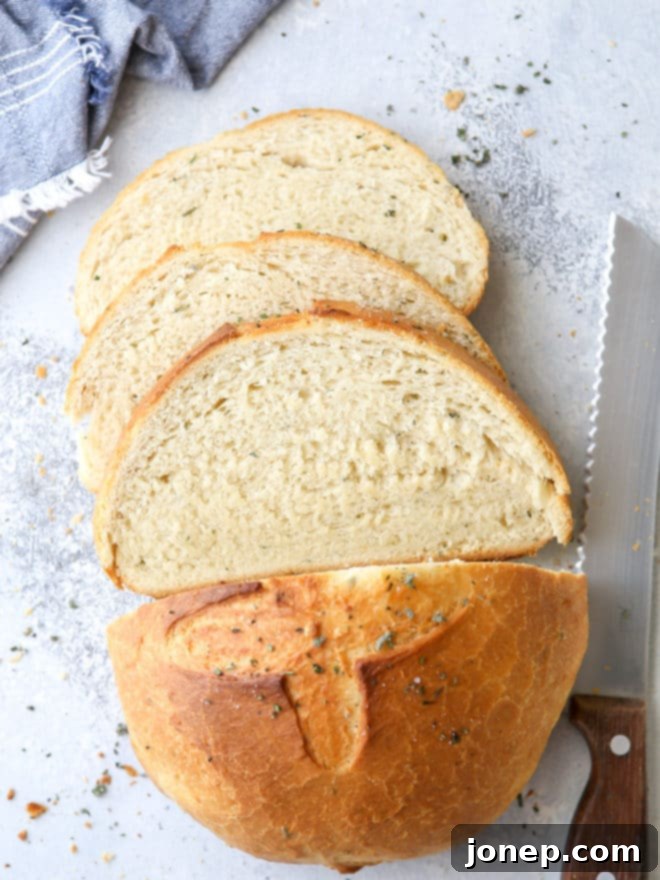
There’s nothing quite like the aroma of freshly baked bread filling your home. And when that bread is a rustic loaf infused with aromatic fresh herbs and baked to perfection in a Dutch oven, it truly becomes an experience. This recipe delivers exactly that: a loaf with an irresistibly crisp crust that gives way to a soft, tender, and flavorful interior.

This particular recipe holds a special place in my heart, as it was one of the first bread recipes I truly learned to master. Back in the early days of this site, the thought of baking with yeast was genuinely terrifying! The precision, the waiting, the fear of a flat, dense brick – it all felt incredibly daunting. However, I found immense inspiration from fellow bakers like Joy the Baker and The Pioneer Woman, which gave me the courage to finally give it a try. And oh, what a success it was! This loaf turned out so wonderfully that I’ve baked it countless times over the years. My initial fear of yeast has completely dissipated, and now, baking bread has become one of my absolute favorite culinary endeavors, especially during the cozy months of fall and winter.
What I love most about this bread is its beautiful simplicity. It calls for just a handful of staple ingredients: bread flour, water, yeast, butter, salt, and vibrant fresh herbs. These humble components come together effortlessly to create a loaf with unparalleled flavor and an exquisite texture. The secret to its signature crisp exterior lies in baking it within a heavy cast iron pot, often known as a Dutch oven. This method traps moisture inside, creating a steamy environment that allows the crust to develop a magnificent crunch, while the interior remains wonderfully soft and tender. The contrast between the pleasing crunch of the outside and the pillowy softness of the inside is simply divine.

Why a Dutch Oven is Your Secret Weapon for Perfect Bread
If you’ve ever wondered how to achieve that professional, artisanal bakery-quality crust at home, the answer often lies in using a Dutch oven. This heavy, lidded pot acts like a mini-oven within your main oven, creating the perfect environment for bread baking. Here’s why it works so well:
- Steam Generation: When the dough is placed into a preheated Dutch oven, the trapped moisture from the dough creates steam within the enclosed space. This steam keeps the crust soft and pliable for longer during the initial baking phase, allowing the bread to expand fully (the “oven spring”) before the crust hardens. Without this steam, the crust would set too quickly, restricting the loaf’s rise.
- Consistent, Even Heat: Cast iron is renowned for its ability to retain and distribute heat incredibly evenly. This means your bread bakes consistently from all sides, preventing hot spots that can lead to uneven cooking or burning.
- Superior Crust Development: Once the lid is removed later in the baking process, the remaining steam escapes, and the dry, intense heat of the Dutch oven works its magic, transforming the softened crust into that gloriously golden brown, crackly exterior we all crave.
Using a Dutch oven is a game-changer for homemade bread. It simplifies the process of creating a professional-quality loaf right in your kitchen.
baking tip:What is bread flour and why is it essential?
Bread flour is specifically milled to have a higher protein content, typically ranging from 12% to 14%, compared to all-purpose flour (around 10-12%). This higher protein level is crucial for yeast bread baking because protein forms gluten when hydrated and kneaded. More gluten means a stronger, more elastic dough, one that can better trap and hold the expanding gases (carbon dioxide produced by the yeast) released during fermentation and baking. Breads baked with bread flour will generally rise higher, have a more open, airy structure, and boast a wonderfully chewier and more elastic texture. It provides the structural integrity needed for a truly exceptional yeast bread.
If you don’t have bread flour, I strongly encourage you to get some for this recipe – the difference is noticeable! While you can substitute all-purpose flour, be aware that the results won’t be quite the same; your loaf might be slightly less chewy and might not achieve the same impressive rise and open crumb.
The Magic of Fresh Herbs in Your Bread
The addition of fresh herbs elevates this simple bread into something truly special. They infuse the loaf with an earthy, aromatic fragrance and a delicate, savory flavor that complements almost any meal. For this recipe, I’ve chosen a classic trio of rosemary, thyme, and sage. Rosemary offers a piney, slightly peppery note; thyme brings a subtle, earthy flavor; and sage contributes a warm, slightly musky aroma. This combination creates a sophisticated, comforting profile perfect for a rustic loaf.
However, don’t feel limited! Experiment with other fresh herbs that you love. Consider:
- Garlic and Chives: For a savory, oniony kick.
- Dill and Parsley: For a lighter, fresher taste, especially wonderful with seafood or salads.
- Oregano and Basil: For a Mediterranean flair, perhaps with a touch of sun-dried tomatoes.
The key is to use fresh herbs rather than dried, as they release their essential oils and flavors more vibrantly during baking. Chop them finely to ensure their flavor is evenly distributed throughout the dough.
Shop Tools for this recipe

Dutch Oven Rustic Herb Loaf
Pin Recipe
Leave a Review
Ingredients
- 1 cup warm water (250 ml)
- 2 ¼ teaspoons active dry yeast (1 envelope)
- ½ cup unsalted butter (113 grams)
- 1 heaping tablespoon fresh herbs , chopped (I used rosemary, thyme, and sage)
- 2 teaspoons coarse salt , plus more for sprinkling
- 3 – 4 cups bread flour , as needed (567 grams)
- Olive oil
Instructions
-
Combine warm water and yeast and let sit for 5 minutes.
-
Melt the butter in a small saucepan. Remove from heat and add fresh herbs. Let cool slightly.
-
In the bowl of a stand mixer fitted with a dough hook, combine 2 cups of the bread flour and salt. Add the yeast mixture and butter mixture and mix until dough comes together. Add remaining flour 1/4 cup at a time until dough clears the bowl and is just slightly sticky to the touch. You may not need all 4 cups of flour to achieve this, which is why there is a range of 3-4 cups.
-
Knead until smooth and elastic, about 5 minutes with an electric mixer and dough hook. You may also knead by hand, it will just take longer.
-
Cover and let rise until doubled, about 1 hour.
-
Preheat oven to 450 degrees F. Line a cast iron dutch oven with parchment paper or grease with olive oil.
-
Punch down the dough and knead a few times by hand. Reshape and place in the prepared dutch oven. Use a sharp knife to cut a fairly deep “x” into the dough. Drizzle with olive oil and sprinkle with coarse salt and more herbs.
-
Cover and let rise an additional 30 minutes.
-
Bake for 30 minutes with the lid of the dutch oven on. Remove the lid and bake for an additional 15-30 minutes until loaf is browned. Let cool completely before slicing.
Notes
- You can substitute all-purpose flour for the bread flour if you’d like, but I highly recommend using bread flour if possible. It yields a lighter texture.
Adapted from Joy the Baker.
Serving Suggestions for Your Aromatic Loaf
This rustic herb bread is incredibly versatile and can elevate almost any meal. Here are some ideas to enjoy your freshly baked loaf:
- With Soup or Stew: There’s nothing more comforting than tearing off a warm piece of this bread to soak up a hearty bowl of soup, chili, or a rich stew. Its robust flavor stands up beautifully to savory liquid dishes.
- Cheese and Charcuterie Boards: The herbaceous notes pair perfectly with a variety of cheeses, from sharp cheddar to creamy brie. Add some cured meats, olives, and fruit for an impressive appetizer spread.
- Dipped in Olive Oil: For a simple yet elegant starter, serve slices with a good quality extra virgin olive oil for dipping, perhaps with a sprinkle of red pepper flakes and a touch of balsamic.
- Sandwiches and Toast: While it’s delicious plain, this bread makes an amazing foundation for gourmet sandwiches or open-faced toasts. Imagine a grilled cheese with a flavorful herb crust, or a breakfast toast topped with avocado and an egg.
- Alongside Roasts: Serve it as a side with roasted chicken, pork, or beef to complement the rich flavors of a Sunday dinner.
Troubleshooting Common Bread Baking Challenges
Even seasoned bakers encounter hiccups. Here are some common issues and how to tackle them:
- Dense Bread: This is often due to not enough kneading, inactive yeast, or insufficient proofing (not letting it rise long enough). Ensure your yeast is fresh, your water temperature is correct, and give the dough ample time to develop gluten and rise.
- Loaf Spreads Out Too Much: If your dough is too sticky or wet, it won’t hold its shape. Gradually add more flour during kneading until the dough is slightly tacky but manageable. Over-proofing can also lead to a collapsed loaf.
- Crust is Too Hard: While we want a crispy crust, if it’s rock-hard, it might be due to overbaking or not enough steam. Ensure the Dutch oven lid is on for the initial bake, and avoid leaving it in the oven for too long after the lid is removed.
- Lack of Flavor: Ensure your herbs are fresh and you’re using enough salt. Salt is not just for flavor; it also controls yeast activity and strengthens gluten.
Don’t be discouraged if your first loaf isn’t perfect. Baking is a journey of learning, and each attempt brings you closer to mastery!
Storing Your Homemade Herb Bread
To keep your beautiful Dutch oven rustic herb loaf fresh for as long as possible, proper storage is key:
- Cool Completely: Always allow the bread to cool completely on a wire rack before storing or slicing. Slicing too early can release steam and make the interior gummy.
- Room Temperature: For 1-2 days, store the whole or unsliced loaf in a bread box or a paper bag at room temperature. This helps maintain the crust’s crispness. Avoid airtight plastic bags if you want the crust to stay crunchy; they trap moisture and soften the crust quickly.
- Plastic Bag for Longer: If you prefer to keep the bread soft and are willing to sacrifice some crispness, you can store it in an airtight plastic bag or container for up to 3-4 days at room temperature.
- Freezing: For longer storage, slice the cooled loaf and place slices in a freezer-safe bag or container. It will keep well for up to 2-3 months. Thaw slices as needed and toast them for a quick revival.
Baking this Dutch oven rustic herb bread is a truly rewarding experience. From the simple act of combining ingredients to the triumphant moment you pull a golden-brown, crackly-crusted loaf from the oven, every step is filled with satisfaction. This recipe not only demystifies yeast baking but also produces a loaf that is both impressive and deeply comforting. It’s perfect for sharing with loved ones or savoring on your own. Enjoy the process, and delight in the delicious results!
This recipe was originally published November 2012.
