Delightful & Easy Neapolitan Ice Cream Pops: Your Ultimate No-Bake Summer Treat!
As the days grow longer and the sun shines brighter, it’s that glorious time of year when our ovens take a much-needed break, and the spotlight shifts to refreshing frozen and no-bake treats. There’s simply no better way to beat the summer heat than with a frosty, homemade indulgence. That’s precisely where these incredibly fun and unbelievably easy Neapolitan Ice Cream Pops come into play, offering a perfect blend of classic flavors and delightful textures that everyone will adore.

Just a few weeks ago, I stumbled upon the brilliant concept for these Neapolitan ice cream pops in a magazine, and I knew instantly that I had to bring them to life in my own kitchen. The idea was simply too charming to resist! What truly sold me was their promise of simplicity – and they absolutely delivered. These layered delights proved to be just as straightforward to assemble as I had hoped. With only a handful of readily available ingredients, virtually no active preparation time, and the trusty freezer handling the bulk of the work, they are truly a dream dessert. Whether you’re planning a lively summer playdate, hosting a backyard party, or simply craving a cool, sweet escape on a scorching afternoon, these Neapolitan Ice Cream Pops are your go-to solution.
Embracing the No-Bake Summer Trend
Summer is synonymous with ease and enjoyment, and that philosophy extends perfectly to our culinary endeavors. The thought of turning on a hot oven when temperatures are soaring can be daunting, which is why no-bake desserts become a culinary savior. These Neapolitan Ice Cream Pops are the quintessential example, allowing you to create something spectacular without generating any extra heat in your kitchen. This approach not only keeps your home cool but also simplifies the entire dessert-making process, freeing up more of your precious time for relaxation and fun under the sun.
The beauty of a frozen treat like this lies in its ability to be prepared ahead of time, making it an ideal candidate for entertaining. Imagine pulling out a tray of these vibrant, layered pops, perfectly chilled and ready to impress, without any last-minute fuss. It’s a testament to the power of simple ingredients combined with smart preparation, transforming basic components into an extraordinary dessert experience that’s both visually appealing and incredibly satisfying. The delight on everyone’s faces, especially children, when they see these colorful layers, is truly priceless.
The Irresistible Allure of Neapolitan Flavors
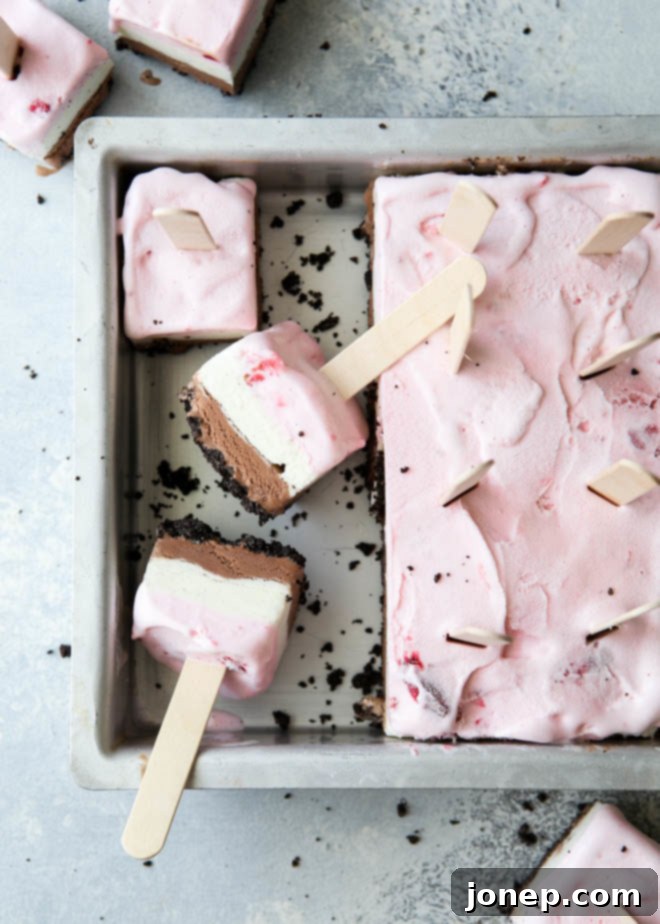
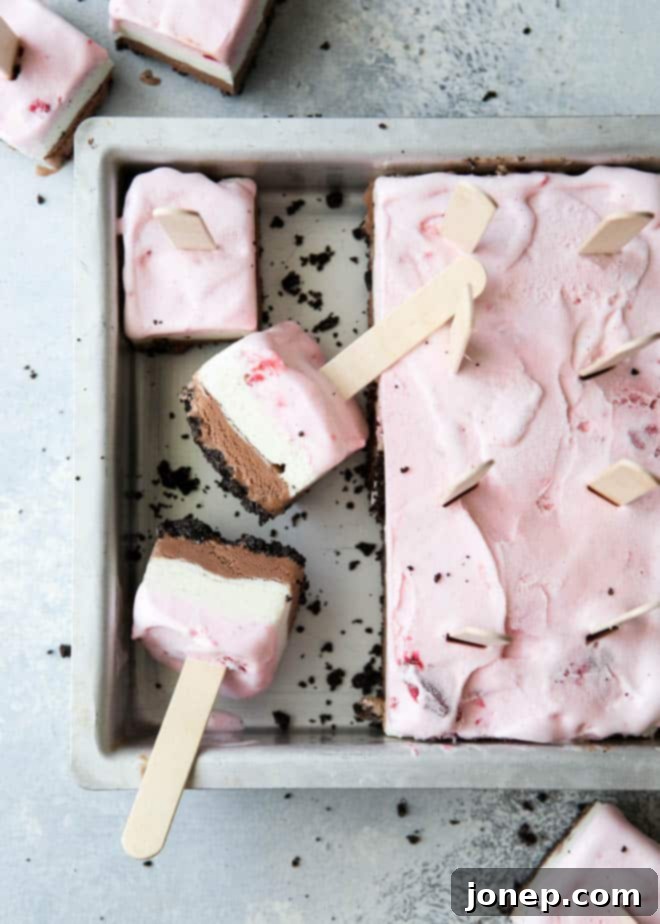
The Neapolitan combination of chocolate, vanilla, and strawberry has been a beloved classic for generations, and for good reason. Each flavor brings its unique character to the party, creating a harmonious symphony of tastes that delights the palate. Chocolate offers a rich, comforting depth; vanilla provides a smooth, creamy sweetness that acts as a perfect canvas; and strawberry adds a refreshing, fruity tang that brightens the entire experience. When these three iconic ice cream flavors are stacked together, they don’t just create a beautiful visual; they deliver a perfectly balanced taste in every single bite.
Adding an Oreo cookie crust to this classic trio takes these Neapolitan Ice Cream Pops to an entirely new level of deliciousness. The crushed chocolate cookies provide a delightful textural contrast with their slightly crunchy, crumbly base, offering a satisfying bite against the creamy smoothness of the ice cream layers. This innovative crust not only enhances the chocolatey notes but also provides a sturdy foundation for the pops, ensuring they are easy to hold and enjoy. It’s a modern twist on a timeless favorite that makes these frozen treats truly unforgettable.


Crafting Your Perfect Neapolitan Ice Cream Pops: A Step-by-Step Guide
Making these glorious ice cream pops is a straightforward process that anyone can master. The key is to work quickly with softened ice cream and allow adequate freezing time between layers to ensure crisp, clean lines and optimal texture. Here’s a detailed breakdown to guide you through each exciting step:
The Irresistible Oreo Cookie Crust
The foundation of these delightful pops is a simple yet incredibly flavorful Oreo cookie crust. To prepare it, you’ll need about 15 chocolate sandwich cookies, such as Oreos. You can crush these cookies effortlessly using a food processor, which will yield fine, even crumbs in a matter of seconds. If you don’t have a food processor, a large Ziploc bag and a rolling pin work just as effectively – just ensure the bag is sealed tightly to prevent crumbs from escaping. There’s absolutely no need to remove the creamy filling from the cookies; it contributes to the richness and helps bind the crust together beautifully. Once crushed, combine these delicious crumbs with 3 tablespoons of melted butter. Stir until the crumbs are evenly moistened, resembling wet sand. Then, press this mixture firmly into the bottom of an 8 or 9-inch square baking pan that has been lined with parchment paper or foil, leaving an overhang on the sides. This overhang will serve as convenient handles later for lifting the frozen dessert. Pop the pan into the freezer for about 10 minutes to set the crust while you prepare the first ice cream layer.
Layering the Classic Ice Cream Trio
Now for the fun part – the ice cream layers! For best results, allow each pint of ice cream (chocolate, vanilla, and strawberry) to sit at room temperature for a few minutes before you begin. This will soften it just enough to make it scoopable and spreadable, but not so much that it becomes a runny mess. The goal is a consistency similar to soft-serve ice cream, which will allow you to spread it evenly without mixing the colors.
- **Chocolate Layer:** Start with the chocolate ice cream. Scoop it onto the chilled Oreo crust and use an offset spatula or the back of a spoon to spread it into an even, smooth layer. Once you’re happy with the chocolate, return the pan to the freezer for another 10 minutes. This crucial step ensures the layer firms up slightly, preventing the next color from bleeding into it.
- **Vanilla Layer:** Repeat the process with the vanilla ice cream. Soften it briefly, then carefully scoop and spread it evenly over the set chocolate layer. Work gently to maintain distinct layers. Back to the freezer for another 10 minutes.
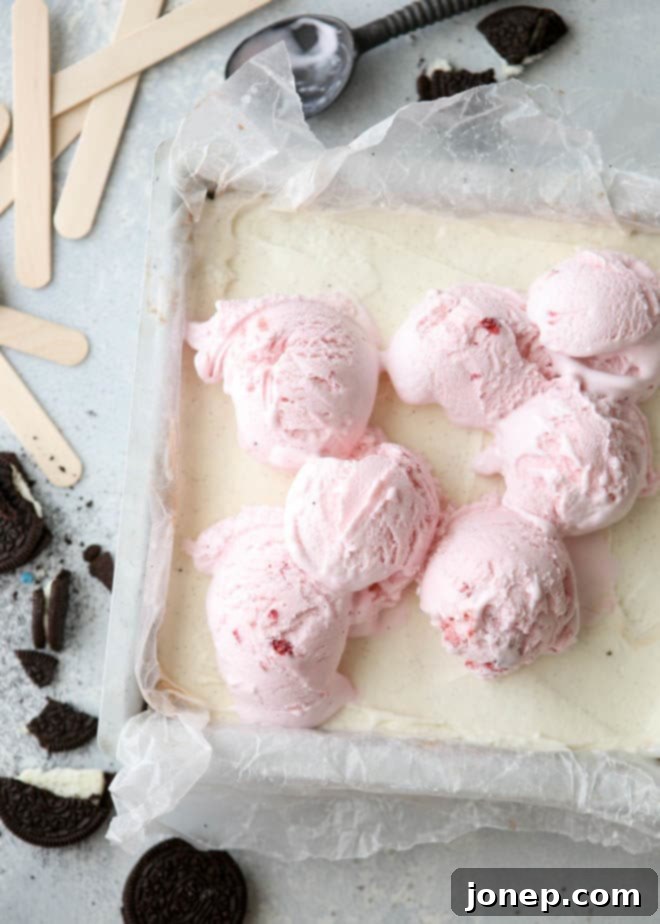
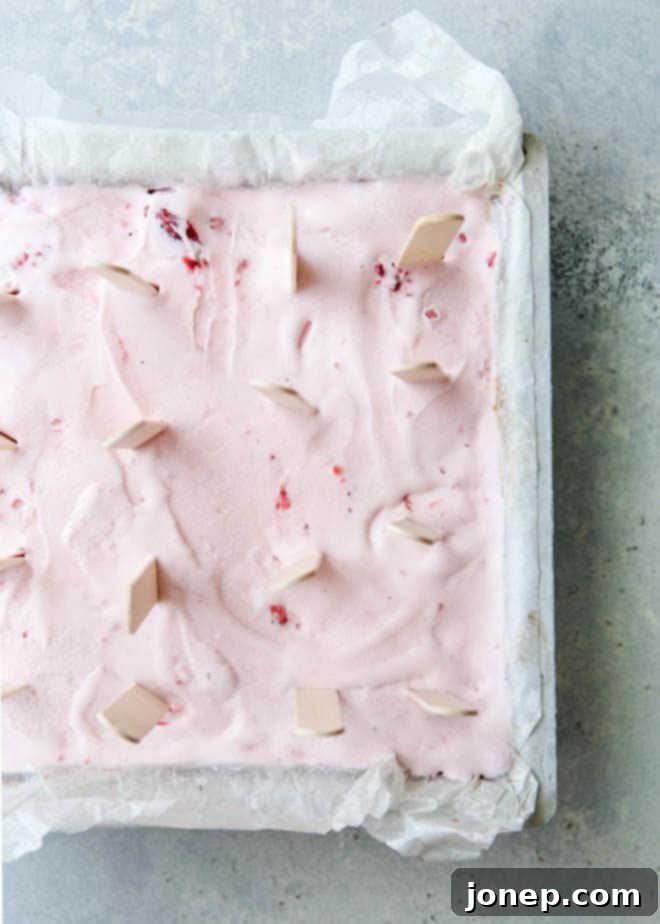
- **Strawberry Layer:** Finally, repeat with the strawberry ice cream. This will be your top layer. Once spread evenly, it’s time to insert the popsicle sticks. Press 16 craft popsicle sticks straight down into the ice cream, ensuring they reach all the way to the bottom crust, spaced at even intervals. This strategic placement ensures each pop has a sturdy handle. Once the sticks are in place, the entire pan goes back into the freezer for a more substantial freeze – at least 2 hours, or ideally, until completely firm.
Freezing for Perfection and Easy Serving
After the final freeze, your Neapolitan ice cream block will be solid and ready to be transformed into individual pops. Use the overhanging parchment paper or foil as handles to carefully lift the entire frozen block out of the baking pan. Now comes the trick for clean cuts: grab a sharp knife and dip it into hot water. Wipe it clean immediately, and then use the warm blade to slice through the ice cream. You’ll need to re-heat and wipe the knife often for each cut to ensure smooth, clean edges. This method helps the knife glide through the frozen layers without resistance, giving you perfectly shaped pops.
Once cut, these beautiful Neapolitan Ice Cream Pops are ready to be enjoyed! For best quality and to prevent freezer burn, store any uneaten pops tightly wrapped in individual plastic wrap, or place them in an airtight container. While they are best enjoyed within the first few days, proper storage can extend their deliciousness for up to a week. They make for a convenient grab-and-go treat that’s always there when a craving strikes.
Tips to Avoid Freezer Burn
Freezer burn can compromise the taste and texture of your delicious ice cream pops. Follow these simple tips to keep them fresh and flavorful:
- **Tight Wrapping is Key:** Always ensure your frozen treats are tightly wrapped. I recommend double-wrapping to create an airtight seal. You can use two layers of plastic wrap, or a layer of plastic wrap followed by a layer of foil for extra protection. This barrier prevents air from coming into contact with the ice cream, which is the main cause of freezer burn.
- **Maintain a Cold Freezer:** Keep your freezer consistently cold. Set the thermostat at 0ºF (-18ºC) or the lowest available setting. Fluctuating temperatures can cause ice crystals to form.
- **Strategic Storage:** If possible, store frozen treats near the back of the freezer and/or away from the door. The back of the freezer generally has the most consistent and coldest temperature. Also, try to open the freezer door minimally to avoid temperature fluctuations.
- **Enjoy Quickly:** While proper storage helps, frozen treats like these ice cream pops are truly at their best when enjoyed within the first few days of making them. The fresher, the more delicious!

Shop Tools for This Recipe
To make your Neapolitan Ice Cream Pops adventure even smoother, here are some helpful tools:
(Affiliate links below)

Neapolitan Ice Cream Pops
Pin Recipe
Leave a Review
Ingredients
- 15 chocolate sandwich cookies , such as Oreos
- 3 tablespoons butter , melted
- 1 pint chocolate ice cream
- 1 pint vanilla ice cream
- 1 pint strawberry ice cream
- 16 craft popsicle sticks
Instructions
-
Using a food processor or a rolling pin and a large ziplock bag, crush chocolate cookies. (No need to remove filling from cookies before crushing). Stir in butter.
-
Press cookie crumbs into a 8 or 9-inch square baking pan lined with parchment paper or foil with overhanging sides. Freeze for 10 minutes.
-
Let chocolate ice cream sit at room temperature for a few minutes to soften, then scoop on top of cookie crust and spread into an even layer. Freeze for 10 minutes.
-
Let vanilla ice cream sit at room temperature for a few minutes to soften, then scoop on top of chocolate ice cream and spread into an even layer. Freeze for 10 minutes.
-
Let strawberry ice cream sit at room temperature for a few minutes to soften, then scoop on top of vanilla ice cream and spread into an even layer. Press sticks straight down into the ice cream, all the way to the bottom, in even intervals. Freeze for at least 2 hours.
-
Using the overhanging sides as handles, life ice cream out of pan. Dip a knife into hot water and wipe clean. Cut ice cream into 16 pops. You will need to re-heat knife often.
-
Store in the freezer. To prevent freezer burn, tightly wrap and consume within a week.
Notes
These Neapolitan Ice Cream Pops are more than just a dessert; they’re a celebration of summer, a symbol of effortless entertaining, and a delightful treat that brings joy with every bite. The combination of the crunchy Oreo crust with the classic trio of chocolate, vanilla, and strawberry ice creams creates a symphony of flavors and textures that is simply irresistible. So, abandon your oven, embrace the chill, and whip up a batch of these vibrant, delicious pops. They’re guaranteed to become a favorite in your summer repertoire!
