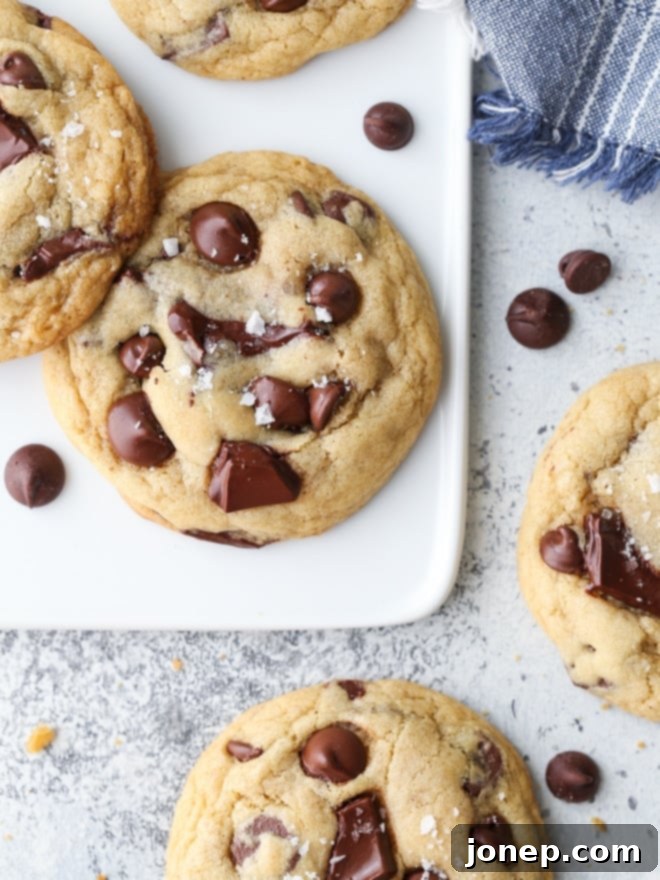
From Good to Great: Your Ultimate Guide to Baking Picture-Perfect Homemade Cookies
Are you ready to take your next batch of homemade cookies from simply good to absolutely phenomenal? This comprehensive guide reveals all my best tips and tricks for baking a truly perfect cookie – one that not only tantalizes your taste buds with incredible flavor and texture but also looks so amazing it could be featured in a professional bakery display. Forget cookies that spread too much or lack visual appeal; we’re about to unlock the secrets to consistent, beautiful results every single time.
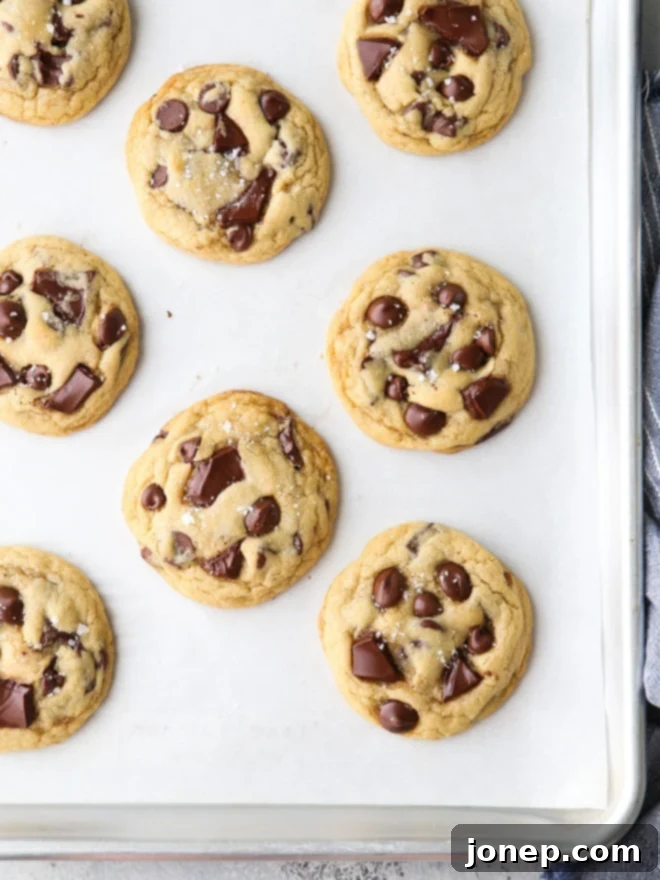
You’ve likely heard the phrase “we eat with our eyes first,” and when it comes to baking, this couldn’t be truer. Your homemade cookie might boast the best buttery flavor and a wonderfully chewy texture, but does it look good too? A visually appealing cookie simply enhances the overall experience, making it even more enjoyable to share and devour. It’s the difference between a delicious treat and a show-stopping dessert.
Whenever I share a plate of my cookies with friends, family, or at gatherings, I’m frequently asked how I manage to make them look so incredibly perfect. The secret isn’t some complex culinary school technique or a magical ingredient. Thankfully, it’s quick, easy, and completely achievable for anyone, regardless of their baking experience! Just a few simple, yet crucial, tricks can make all the difference, transforming your cookies from humble homemade treats into works of edible art.
Keep reading to discover exactly how I make the best, most reliable, and truly picture-perfect homemade cookies ever. Get ready to impress everyone with your baking prowess!
Table of Contents
- How to Bake Picture-Perfect Cookies: An Overview
- Step 1: Pick a Reliable Recipe and Follow It Precisely
- Step 2: Ensure Your Butter is at the Ideal Temperature
- Step 3: Master the Art of Measuring Flour Correctly
- Step 4: Portion and Shape Cookie Dough for Consistency
- Step 5: Garnish Your Cookie Dough with Mix-ins for Visual Appeal
- Step 6: Reshape Cookies into Perfect Rounds Immediately After Baking
- Other Essential Considerations for Flawless Cookies
- My Favorite Tried-and-True Cookie Recipes
How to Bake Picture-Perfect Cookies: An Overview
You’re just 6 straightforward steps away from baking your most impressive and delicious batch of cookies yet! These foundational techniques are game-changers, addressing common baking pitfalls and ensuring your cookies not only taste incredible but also look consistently beautiful. Let’s dive into the core principles:
- **Select a High-Quality Recipe and Adhere to It Rigorously**: The foundation of any great cookie is a well-tested recipe.
- **Begin with Butter at the Optimal Temperature**: This seemingly small detail profoundly impacts texture and spread.
- **Measure Flour with Precision**: Correct flour measurement prevents dry, crumbly, or cake-like cookies.
- **Portion Dough Evenly with a Scoop and Roll into Smooth Balls**: Uniform size ensures even baking and a professional appearance.
- **Strategically Garnish with Mix-ins Before Baking**: Enhance visual appeal by showcasing those delicious additions.
- **Gently Re-shape Cookies into Perfect Rounds Right Out of the Oven**: A simple trick to fix any minor imperfections.
By focusing on these key areas, you’ll elevate your baking and consistently achieve those coveted “bakery-style” results.
Step 1: Pick a Reliable Recipe and Follow It Precisely
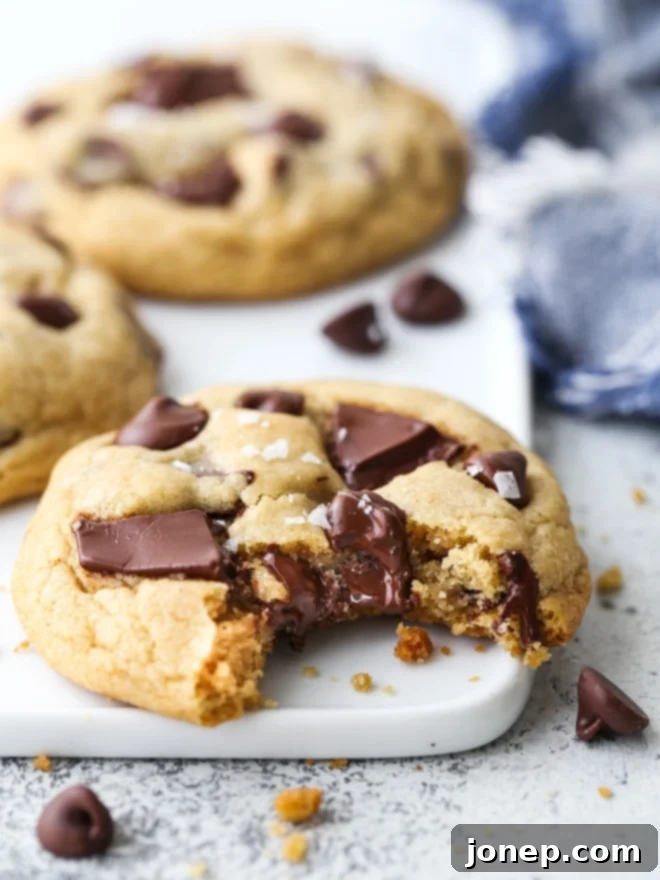
Every truly outstanding cookie experience begins with a stellar, well-tested recipe. If you already have a go-to recipe that you know, love, and trust, absolutely use it! Consistency is your best friend in baking. If you’re still on the hunt for that perfect foundation, I highly recommend starting with the Classic Chocolate Chip Cookies, which are beautifully pictured throughout this article. This recipe is a fantastic starting point for understanding texture, flavor, and visual appeal.
For the absolute best results—and to avoid any unwanted surprises—it’s crucial to stick to your chosen recipe exactly as written. Most of my own cookie blunders and less-than-perfect batches have occurred when I’ve tried to casually “play around” with ingredients, ratios, or baking times without fully understanding the underlying chemistry. While experimenting with a cookie recipe isn’t necessarily a bad thing (some of my favorite, most creative cookie variations have come about through playful experimentation!), it’s important to acknowledge that your first attempts at improvisation might not yield the most visually appealing or structurally sound cookies.
If you’re tasked with bringing cookies to a potluck, preparing a special treat for a holiday, or simply hoping to genuinely impress others with your baking prowess, it’s probably best to save the adventurous experimenting for another, less high-stakes day. Stick to the proven path for guaranteed success and picture-perfect results. A reliable recipe is your blueprint for perfection.
Step 2: Ensure Your Butter is at the Ideal Temperature
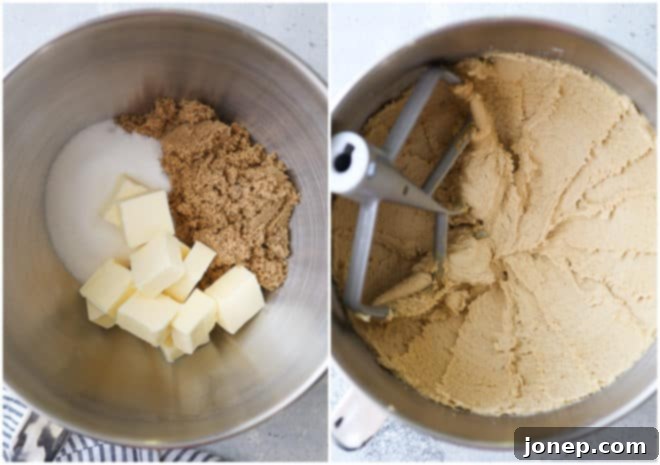
The softness and temperature of your butter when you begin the mixing process can truly make or break your cookies. This is one of the most frequently overlooked yet profoundly impactful details. “Room temperature” butter is often much colder than many people assume. If your butter is too soft – at all shiny, greasy-looking, or melted in spots – it will lead to a dough that is too slack. This excess softness means the butter will melt too soon in the oven, causing your cookies to spread excessively and lose their shape, resulting in thin, greasy, and often brittle cookies.
**The Goldilocks Zone for Butter:** Your butter should be soft enough that it will leave a slight, gentle indent when you press it with your finger, but not so soft that your finger can easily press all the way through the stick. It should feel cool to the touch, not warm or oily.
For optimal results, I typically let my butter sit out on the kitchen counter for about 30 to 60 minutes before I plan to use it. The exact timing will depend heavily on the ambient temperature of your kitchen. In warmer climates or during summer months, 30 minutes might be sufficient; in cooler environments, it could take an hour or slightly more. If you find yourself short on time and need to speed up this process, don’t worry! There are clever ways to achieve the perfect butter consistency quickly. Check out this helpful guide: 4 Ways to Quickly Bring Butter to Room Temperature.
Step 3: Master the Art of Measuring Flour Correctly
When a friend or reader reaches out for help troubleshooting a cookie recipe that didn’t turn out as expected, I always ask them two fundamental questions: “How soft was your butter?” (which we just covered) and “How do you measure flour?” These two factors are responsible for a vast majority of common cookie complaints. Using too much flour, a very common mistake, can lead to a host of problems including dry, crumbly cookies, cookies that don’t spread enough, or ones with an undesirable cake-like texture instead of that perfect chewiness.
The way you measure flour can make a monumental difference in the actual quantity that ends up in your cookie dough. Flour naturally compacts over time, especially if it’s been sitting in a bag or container. If you simply scoop your measuring cup directly into the flour container and then level it off, you’re likely compacting the flour further and inadvertently adding an extra tablespoon or two with each cup. This seemingly small excess can quickly add up in a recipe, drastically altering the flour-to-fat ratio and throwing off the entire balance of your dough.
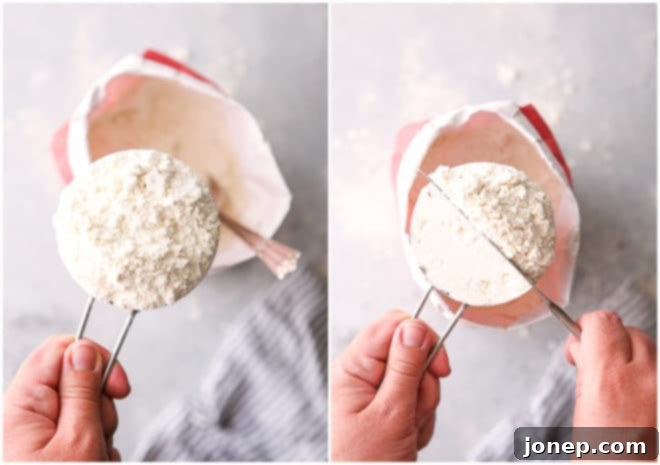
To measure flour correctly using the “spoon and level” method:
- **Fluff the Flour**: Before you even start, take a fork or spoon and gently fluff up the flour in its bag or container. This loosens any compaction and aerates the flour.
- **Spoon into the Cup**: Use a separate spoon to gently scoop the fluffed flour into your dry measuring cup. Continue scooping and filling until the flour overflows slightly above the rim of the cup. Do not pack it down.
- **Level Off**: Use the straight edge of a knife or another flat surface to scrape off the excess flour from the top of the measuring cup, ensuring it’s perfectly level.
Or, even better yet, use a kitchen scale! This is the most accurate and consistent method for measuring flour and virtually all other dry ingredients. It eliminates any variability due to compaction or technique. For this very reason, all of my baking recipes include gram measurements. For even more detailed help and comprehensive information on this crucial technique, be sure to see my full post on How to Measure Flour Correctly.
Step 4: Portion and Shape Cookie Dough for Consistency
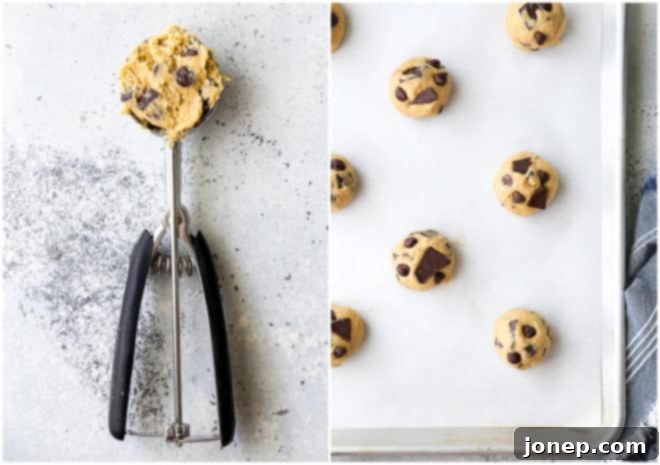
Achieving consistently baked, beautiful cookies starts with consistent portioning. To ensure all of your cookies bake evenly and look uniform on the plate, it’s essential to portion them to be the exact same size and shape. My preferred tool for this is a #20 (3 Tbsp) spring-loaded cookie scoop. This size is ideal for making substantial, attractive cookies that offer the perfect balance of crispy edges and a wonderfully soft, chewy texture in the middle. If you prefer smaller, more delicate cookies, a #40 (1.5 Tbsp) cookie scoop would be a better choice.
Once your cookie dough is precisely portioned using a scoop, don’t stop there! Take an extra moment to gently roll each portion into a smooth, even ball between your palms. This extra step helps prevent jagged edges and ensures a perfectly round cookie with a smooth top as it bakes. Place these perfectly shaped dough balls onto a baking sheet pan that has been lined with parchment paper or a silicone baking mat. Uniformity in size and shape is a foundational secret to bakery-quality cookies.
Step 5: Garnish Your Cookie Dough with Mix-ins for Visual Appeal
Have you ever baked a batch of chocolate chip cookies only to find that most of the delicious chips are hidden deep within the cookie, leaving the surface looking a bit plain? This is a common occurrence because heavier mix-ins like chocolate chips, nuts, or dried fruit tend to sink into the dough during the mixing process. The solution for a truly picture-perfect cookie is simple and visually impactful: strategic garnishing.
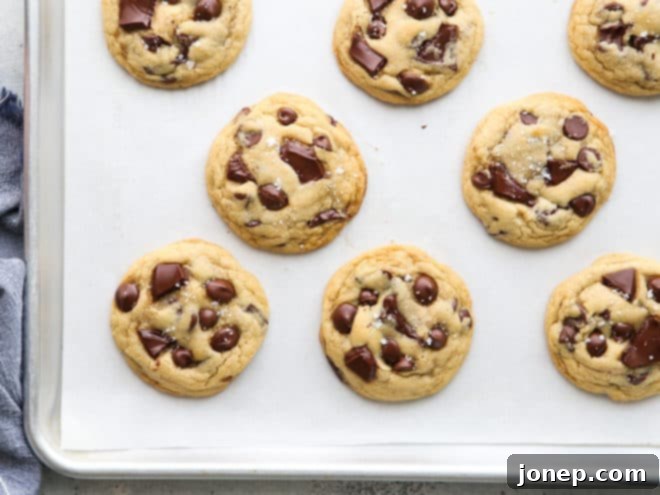
We want to know what deliciousness is actually in your cookie! So, make sure to save a handful of your mix-ins – whether it’s extra chocolate chips, chopped nuts, dried cranberries, or sprinkles – and meticulously place them on top of each cookie dough ball *before* it goes into the oven. This ensures that these tempting additions are prominently displayed on the baked cookie, enhancing its visual texture and signaling to anyone who sees it just how delightful it’s going to be. This small detail elevates your cookies from good to gourmet, making them look as irresistible as they taste.
Step 6: Reshape Cookies into Perfect Rounds Immediately After Baking
Even with the most careful portioning, cookies can sometimes bake up with slightly irregular edges or a less-than-perfect round shape. Don’t fret over these minor imperfections, because there’s an incredibly simple and effective trick to fix them! As soon as your cookies come out of the oven, while they are still piping hot and pliable, you have a brief window to reshape them.
Simply take a spatula and gently push the edges of each cookie inward to create a more perfectly round shape. Alternatively, and my personal favorite method, is to use a round cookie cutter that is slightly larger than your baked cookies. Place the cookie cutter around a warm cookie and gently swirl it in a circular motion. This coaxes the soft edges of the cookie into a beautiful, flawless circle. You’ll need to act fast, as cookies begin to set up and firm up quite quickly once removed from the oven. This quick action is the final polish that gives your homemade cookies that professional, bakery-quality look.
Other Essential Considerations for Flawless Cookies
Beyond the core six steps, there are several other critical factors that can significantly impact the outcome of your cookies. If your batches aren’t consistently turning out how they should, or if you simply want to take every possible measure to ensure your cookies are absolutely perfect, here are a few more important things to consider:
- Is your oven temperature really what it says it is? Often, oven thermostats are not perfectly calibrated and can be off by 10-50 degrees Fahrenheit. This inaccuracy can lead to cookies that spread too much, burn on the edges, or remain underbaked in the center. Invest in an inexpensive oven thermometer (they’re widely available and cheap!) to know the exact temperature of your oven. This simple tool is a game-changer for consistent baking results.
- The type of sheet pan you use matters significantly! Dark metal pans absorb more heat and will result in darker, sometimes crispier bottoms and edges, and can even contribute to over-browning. Lighter-colored, heavy-gauge aluminum pans reflect heat, promoting more even baking and a golden-brown finish. These Nordic Ware aluminum pans are my absolute favorite for achieving perfectly baked cookies every time.
- Always line your baking pans with parchment paper or silicone baking mats. This creates a non-stick surface, prevents sticking, and helps with even heat distribution. Crucially, **do not grease the cookie sheet directly**, as this introduces extra fat that will encourage cookies to spread excessively, leading to thin, flat results. Parchment paper or a good quality silicone mat provides the ideal surface for baking.
- Don’t underestimate the power of chilling the cookie dough, if needed. Some recipes explicitly require chilling, and you should always follow those instructions diligently as it often impacts flavor development and texture. However, even if a recipe doesn’t call for it, chilling can be your secret weapon! You can often save a too-soft cookie dough from spreading excessively in the oven by chilling the portioned cookie dough balls on the sheet pan for 15-30 minutes before baking. This firms up the butter, resulting in thicker, chewier cookies.
- Don’t underestimate the power of flaky salt! I almost always finish my baked cookies with a delicate sprinkle of flaky sea salt immediately after they come out of the oven. This simple act does wonders: not only does it enhance and balance the sweet flavors of the cookies with a delightful salty contrast, but it also adds beautiful visual texture and a sophisticated appeal. Simply put, it makes your cookies look incredibly fancy and gourmet with minimal effort.
- Cookies look their absolute best and taste freshest the day they’re baked. For this reason, I always make an effort to bake them fresh on the day I plan to serve them. However, meticulous planning can help! To prep dough ahead of time, you can store portioned cookie dough balls in an airtight container in the fridge for up to a week, or in the freezer for a month or even longer. When you’re ready to bake, simply thaw the frozen dough balls and allow them to come to room temperature before baking as usual. For more detailed instructions and helpful information on dough storage, see my comprehensive article How to Store Cookie Dough.
My Favorite Tried-and-True Cookie Recipes
Now that you’re armed with all the essential tips and tricks for baking perfect, picture-perfect cookies, it’s time to put your skills to the test! Here are some of my all-time favorite cookie recipes that consistently deliver amazing flavor and beautiful results. Whether you’re craving classic chocolate chip or something a little more adventurous, you’ll find a delightful option here to get started on your journey to cookie perfection.
With these comprehensive tips and a great recipe in hand, you’re well on your way to baking batches of cookies that are not only irresistibly delicious but also consistently beautiful. Happy baking!
