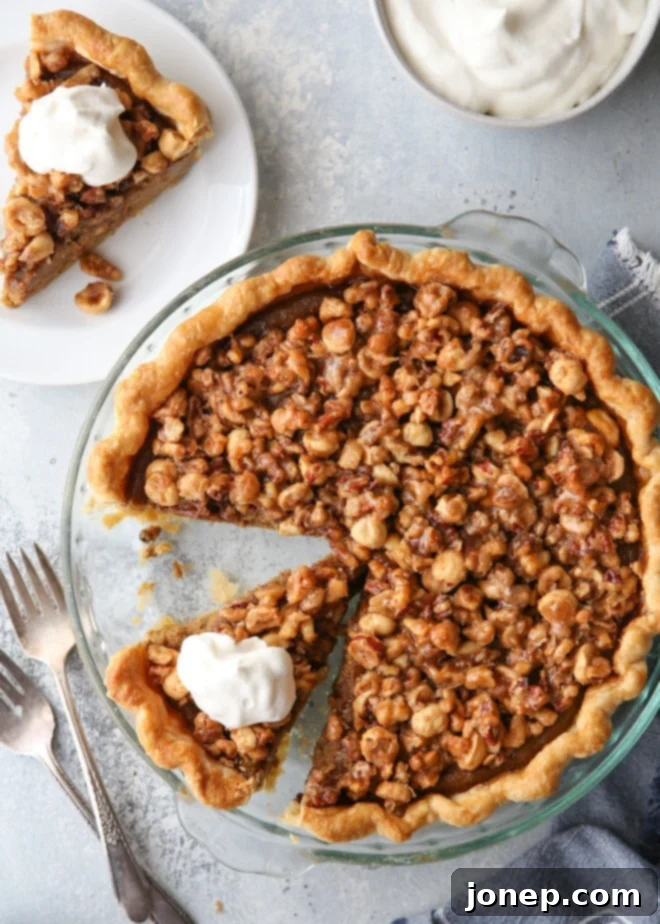
Elevate Your Holiday Feast with the Best Nut Praline Pumpkin Pie Recipe
Forget everything you thought you knew about classic pumpkin pie, because we’re about to embark on a culinary adventure that transforms this beloved holiday staple into an extraordinary dessert! While traditional pumpkin pie holds a special place in our hearts, imagine elevating its creamy, spiced goodness with an irresistible layer of crunchy, caramelized nuts. That’s precisely what our Pumpkin Pie with Nut Praline offers – a delicious, sophisticated twist that promises to be the star of your holiday table.
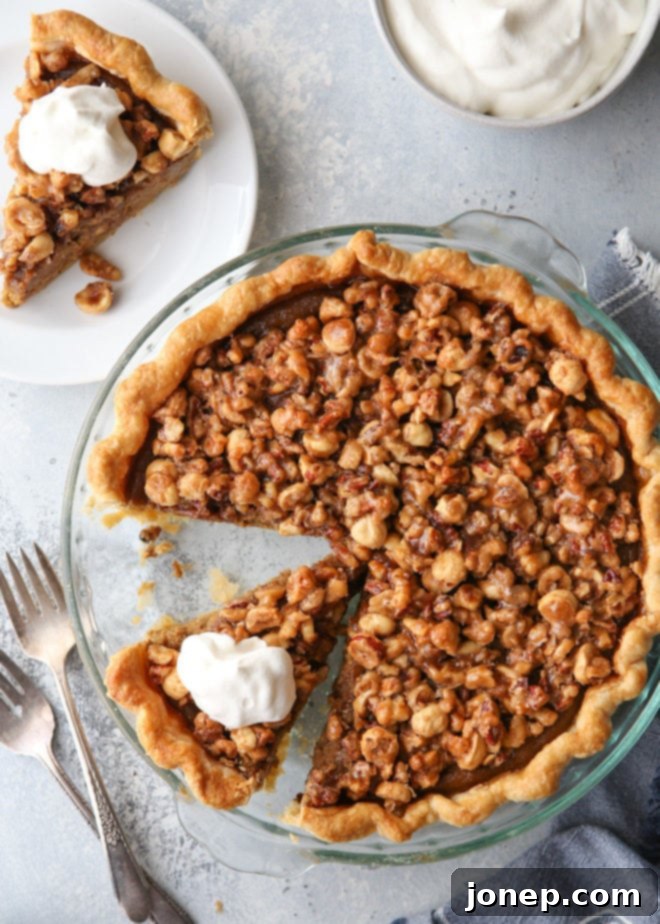
Why settle for a plain pumpkin pie when you can effortlessly infuse it with a touch of flair, transforming it into something truly unforgettable? We’ve explored exciting variations before, discovering the magic that happens when pumpkin pie meets chocolate – as seen in our delightful chocolate swirl pumpkin tart and the decadent pumpkin pie with ganache and gingersnap crust. (Spoiler alert: the pumpkin and chocolate combination is undeniably amazing.)
So, it was only natural to experiment with another beloved pairing: pumpkin pie and a chunky, caramelized nut topping. The results from this delicious experiment are unequivocally in, and this particular Pumpkin Pie with Nut Praline is an absolute triumph! It brings together the warmth and comfort of classic pumpkin pie with an exciting textural contrast and a rich, nutty flavor that will have everyone reaching for a second slice.
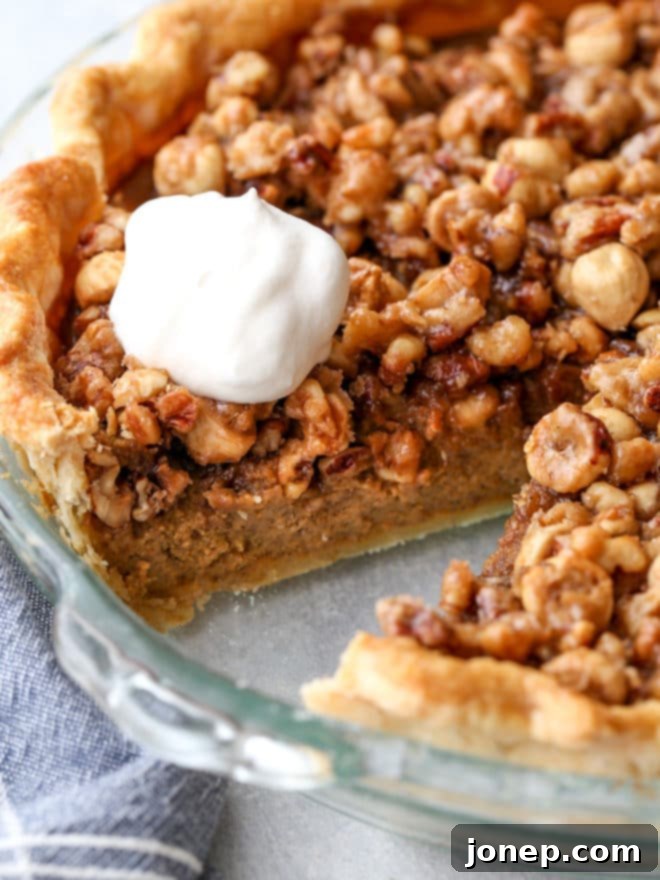
At its heart, this exceptional pie features a perfectly creamy pumpkin filling, generously spiced with a harmonious blend of cinnamon, ginger, nutmeg, cardamom, and cloves, creating an aromatic base that sings of autumn and celebration. This smooth, custardy filling is then crowned with a glorious topping of caramelized mixed nuts – a crunchy medley of pecans, hazelnuts, and walnuts, each bite offering a satisfying snap and a burst of sweet, nutty flavor. All of this delectable goodness is cradled within a beautifully flaky, all-butter pie crust, providing the perfect foundation. To truly complete the experience, we highly recommend topping each slice with a generous dollop of homemade vanilla whipped cream. Watch in awe as this exquisite dessert disappears from your holiday spread in record time!
Crafting Your Perfect Pumpkin Pie with Nut Praline: A Step-by-Step Guide
Creating this magnificent nut praline pumpkin pie is a rewarding process, broken down into three distinct yet harmoniously integrated components, plus an optional but highly recommended flourish:
- The Buttery Flaky Pie Crust: A truly exceptional pie begins with an exceptional crust. Our recipe calls for an all-butter crust, renowned for its rich flavor and delicate, flaky layers that practically melt in your mouth. This isn’t just a container for the filling; it’s an integral part of the pie’s textural and flavor profile, providing a satisfying counterpoint to the creamy interior.
- The Creamy Spiced Pumpkin Filling: This is the soul of our pumpkin pie. We create a velvety smooth, rich pumpkin custard, generously seasoned with the warming spices of the season. Think classic pumpkin pie, but with a nuanced depth of flavor that comes from a thoughtfully curated blend of cinnamon, ginger, nutmeg, cardamom, and cloves, all perfectly balanced with brown sugar and vanilla.
- The Irresistible Mixed Nut Praline: The crowning glory of this pie! This isn’t just a sprinkle of nuts; it’s a luscious, caramelized topping crafted from a delightful blend of pecans, hazelnuts, and walnuts. These nuts are coated in a buttery, sugary syrup that cooks down to a glorious, crunchy, and slightly chewy praline, adding an incredible texture and a rich, toasted nut flavor that perfectly complements the pumpkin.
While optional, a cloud of vanilla whipped cream transforms each slice into an even more luxurious experience. Its light, airy texture and subtle sweetness provide a delightful contrast to the rich pie, making it a highly recommended accompaniment for a truly decadent dessert experience!
Mastering the Creamy Pumpkin Filling
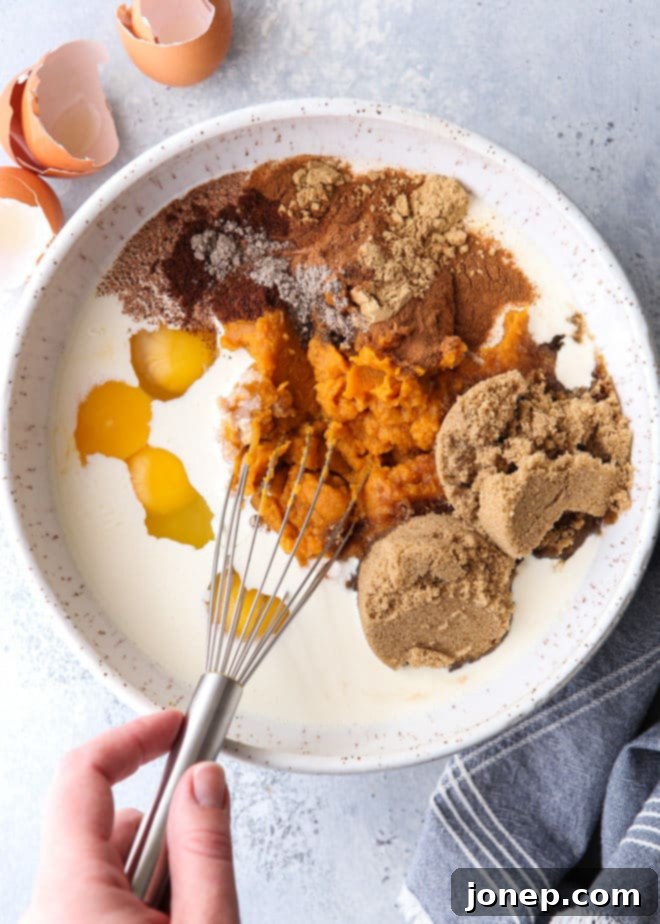
For consistent, perfectly textured pumpkin pies every time, I highly recommend using canned pumpkin puree. Unlike homemade pumpkin puree, which can vary significantly in water content and texture, canned puree offers a reliable consistency that ensures your pie filling sets beautifully and maintains that coveted smooth, creamy mouthfeel. This consistency is crucial for achieving a reliably delicious result.
The pumpkin filling itself follows a classic, well-loved formula. It combines the star ingredient, pumpkin puree, with large eggs and an extra egg yolk for richness and structure, heavy cream for unparalleled creaminess, and a generous amount of packed brown sugar for a deep, molasses-like sweetness. A splash of vanilla extract enhances all the flavors, while a robust blend of ground cinnamon, ginger, nutmeg, cardamom, and cloves infuses the filling with the quintessential warm spice profile we all adore in a holiday pumpkin pie. All these ingredients are simply whisked together until they form a smooth, homogenous mixture, ready to transform into a delightful custard.
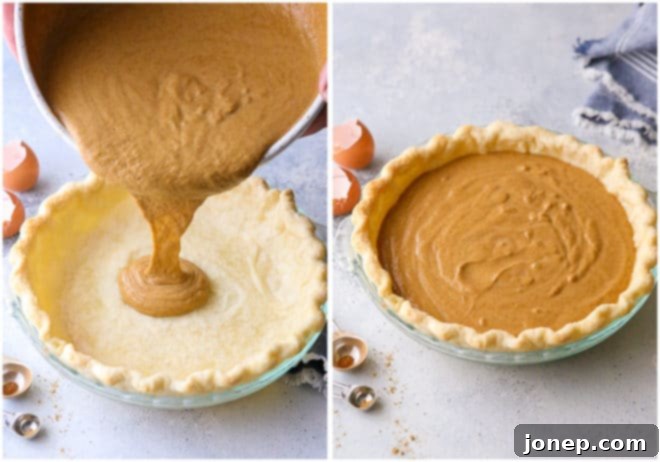
The Essential Step: Pouring into a Partially Baked Pie Crust
One of the most common pitfalls when baking a pumpkin pie is a soggy bottom crust – a problem that can easily be avoided with one simple, yet crucial, step: parbaking (or blind baking) your pie crust. This technique ensures that your pie crust bakes through completely before the wet filling is added, preventing it from becoming a damp, unappetizing layer at the bottom of your pie.
Parbaking is an easy process that makes a world of difference. For a comprehensive guide, refer to my full tutorial on how to parbake (or blind bake) pie crust. It covers everything you need to know to achieve a perfectly flaky and fully baked crust every time. Once your pie crust has been partially baked and cooled slightly, carefully pour the prepared pumpkin filling into the golden-brown shell. For an added touch of visual appeal and a rich, golden-brown edge, brush the exposed rim of the pie crust with a simple egg wash (one egg whisked with a tablespoon of water). This step will give your crust a beautiful, glossy finish. Then, without delay, place your pie back into the oven to bake immediately, allowing the filling to set beautifully while the crust finishes baking to perfection.
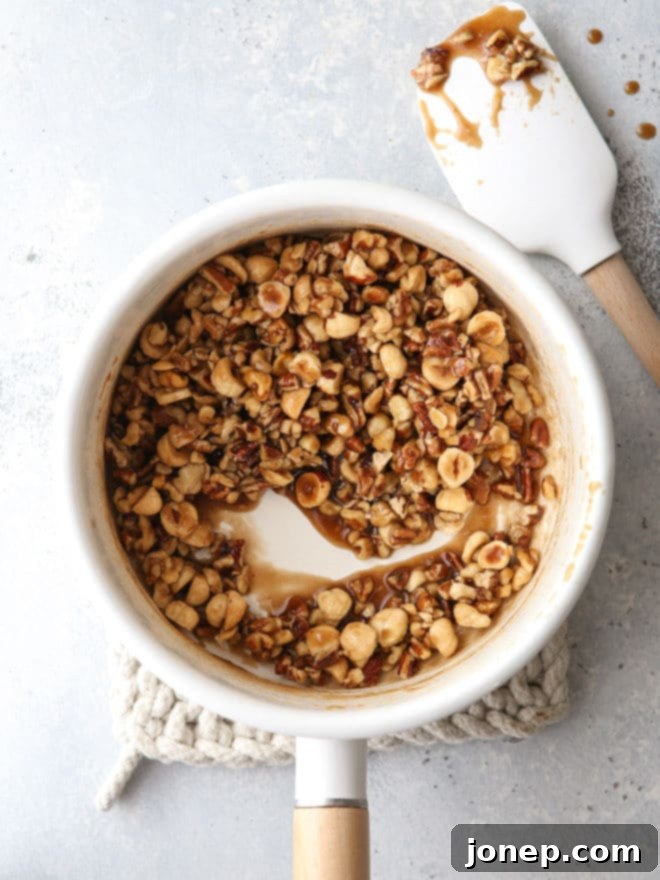
Creating the Crunchy Nut Praline Topping
The nut praline topping is what truly sets this pumpkin pie apart, adding an incredible crunch and depth of flavor. While your pie is in the oven, baking to a creamy perfection, it’s the ideal time to prepare this fantastic topping right on your stove. In a saucepan, combine the chopped mixed nuts (pecans, hazelnuts, and walnuts are a wonderful blend), brown sugar, rich maple syrup, butter, a pinch of salt to balance the sweetness, and a touch of vanilla extract for aromatic depth. Bring this mixture to a gentle boil over medium heat, stirring continuously to ensure the sugar dissolves and the ingredients combine thoroughly. Continue to cook for a few minutes, allowing the mixture to thicken slightly and the caramel flavors to develop, coating the nuts in a glossy, irresistible syrup.
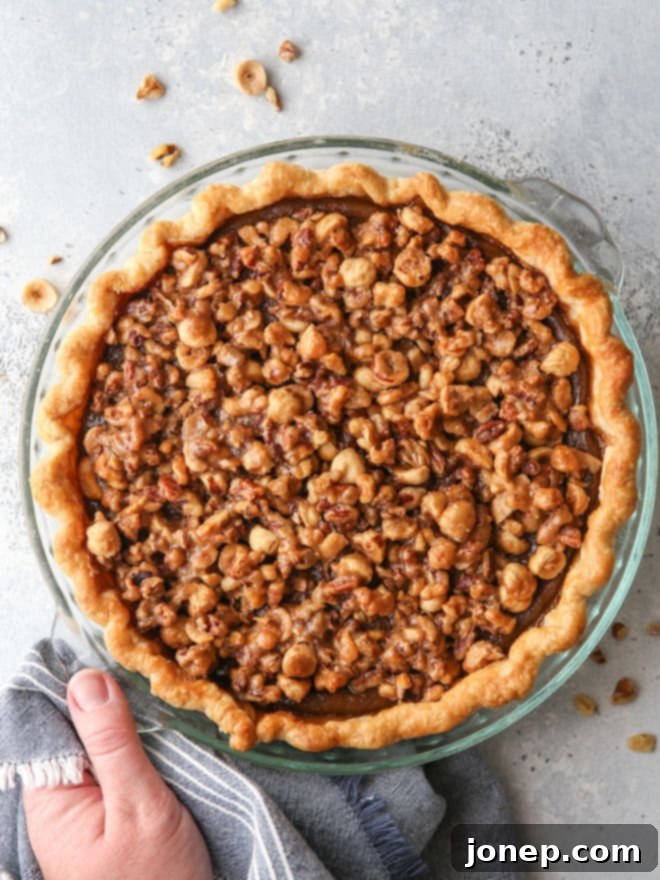
Timing is key when it comes to adding the praline. When your pumpkin pie is almost fully baked – you’ll know it’s ready when the edges are set but the very center still has a slight, delicate jiggle – carefully remove it from the oven. This is the moment to generously spoon the warm nut praline mixture over the top of the pie, spreading it evenly across the surface. Immediately return the pie to the oven for another 15 minutes. During this final bake, the praline will bubble, crisp up, and turn a beautiful golden brown, adhering perfectly to the pumpkin filling and creating that glorious crunchy texture. The very last step, and arguably the most challenging, is allowing the pie to cool completely. While the aroma will be tempting, resisting the urge to slice into it too soon ensures the filling sets properly and the praline achieves its optimal crispness. Trust us, it will be absolutely worth the wait!
Planning Ahead: Can This Delicious Pie Be Made in Advance?
Holiday baking can be hectic, which is why having make-ahead options is a lifesaver. Fortunately, this Nut Praline Pumpkin Pie is wonderfully adaptable and can be prepared in various stages in advance, helping you manage your holiday schedule with ease:
- The Pie Crust: You can prepare the pie dough up to 5 days in advance and store it tightly wrapped in plastic in the refrigerator. For even longer storage, double-wrap the dough and freeze it for up to 2 months. When you’re ready to bake, simply thaw it overnight in the fridge before rolling it out. You can also parbake the crust several days ahead and store it at room temperature, ready for filling.
- The Baked Pie: Once fully baked and cooled, the complete pumpkin pie with nut praline can be stored in the refrigerator for up to 1 week. However, for the absolute best flavor and texture, we recommend enjoying it within 3-4 days of baking. The praline will maintain its crunch better within this timeframe.
- Freezing the Pie: This pie freezes exceptionally well, making it a perfect candidate for holiday meal prep! Allow the pie to cool completely to room temperature after baking. Then, wrap it tightly first with plastic wrap, and then with aluminum foil, ensuring it’s double-wrapped to prevent freezer burn. It can be stored in the freezer for a month or even longer. To serve, thaw it overnight in the refrigerator, or for a warm slice, you can reheat it directly from frozen in the oven (remember to remove all plastic wrap first!).
To reheat a refrigerated pie, cover it loosely with aluminum foil to prevent the praline from over-browning, and warm it in a 350°F (175°C) oven for about 30 minutes. If reheating from frozen, increase the baking time to 35-40 minutes, or until warmed through and the filling is soft.
Expert Tips for Baking Your Best Pie Yet
Baking a pie, especially for a special occasion, can sometimes feel daunting, but with a few tried-and-true tips, you’ll achieve perfect results every time. Here’s how to ensure your Nut Praline Pumpkin Pie is nothing short of spectacular:
- Crimping the Pie Crust Edges: The crust edges offer a wonderful opportunity for a personal touch. You can keep it as simple as a classic 3-finger crimp (which I used for this pie) or get as elaborate as you desire! For more inspiration and easy options, check out this helpful video which demonstrates four different crimping techniques.
- The Magic of an Egg Wash: For a vibrant, golden-brown, and beautifully shiny pie crust, always brush the edges with a simple egg wash. This is made by whisking one large egg with one tablespoon of water. Without this crucial step, your pie crust can appear dull and pale, lacking that enticing, rich color.
- Patience is a Virtue: Cool Completely: We know it’s hard to resist, but for the cleanest slices and easiest serving, it is absolutely essential to let your pie cool completely to room temperature before attempting to slice into it. This allows the creamy pumpkin filling to fully set, preventing it from oozing out and ensuring each piece holds its perfect shape.
- Proper Storage for Safety: Because pumpkin pies contain eggs and cream, they are considered perishable. Always store your leftover pumpkin pie in the refrigerator to maintain its freshness and ensure food safety.
- Save Time with a Food Processor Crust: If making pie crust from scratch seems intimidating or you’re short on time, consider using a food processor. It’s a fantastic tool that can cut down on prep time significantly while still yielding a wonderfully flaky crust. Learn how to make pie crust in the food processor with our easy guide.
- Conquering Pie Intimidation: If you find pies challenging or they just don’t turn out as expected, don’t despair! I’ve compiled my best tips for making perfect pies, offering practical solutions for the most common pie baking problems. You’ll find answers to achieve that ideal flaky crust, perfectly set filling, and beautiful presentation.
- Essential Pie Tools: Having the right equipment can make pie baking much more enjoyable and successful. Explore a list of my favorite pie tools that can help you on your journey to becoming a pie master.
Discover More Irresistible Holiday Pies You’ll Love
The holidays are a time for indulgence, and a table laden with a variety of delicious pies is always a welcome sight. If you’re looking for more show-stopping desserts to complement your Nut Praline Pumpkin Pie, consider these other fantastic recipes from our collection:
- Cranberry Blueberry Pie: A vibrant, fruity pie bursting with seasonal flavors.
- Mile High Apple Pie: An iconic, generously filled apple pie with a towering presence.
- Chocolate Coconut Pecan Pie: A rich and decadent twist on a classic, perfect for chocolate lovers.
- Apple Pear Praline Pie: If you love the praline topping, this fruit pie offers another delightful application.
Shop Our Recommended Tools for This Recipe
Having the right kitchen tools can significantly enhance your baking experience and ensure the best results. Here are some of our top picks for making this Pumpkin Pie with Nut Praline a breeze:
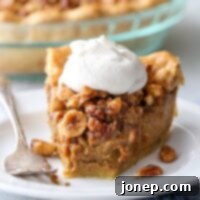
Pumpkin Pie with Nut Praline
Pin Recipe
Leave a Review
Ingredients
Pie Crust
- 1 ¼ cup all-purpose flour (150 grams)
- 1 teaspoon granulated sugar
- ½ teaspoon salt
- ½ cup unsalted butter , cold and cubed (113 grams)
- 2-4 tablespoons cold water
- 1 egg + 1 tablespoon water , for egg wash
Pumpkin Filling
- 15 oz can pumpkin puree , not pumpkin pie filling (425 grams)
- 3 large eggs
- 1 large egg yolk
- ¾ cup heavy cream (175 ml)
- 1 cup packed light or dark brown sugar (215 grams)
- 1 tablespoon vanilla extract
- 1 teaspoon ground cinnamon
- 1 teaspoon ground ginger
- ¼ teaspoon ground nutmeg
- ¼ teaspoon ground cardamom
- ⅛ teaspoon ground cloves
- ½ teaspoon salt
Nut Praline Topping
- ¼ cup butter (56 grams)
- 1 ½ cup mixed chopped nuts (I used pecan, hazelnut, and walnut, about 150 grams)
- ½ cup packed light or dark brown sugar (105 grams)
- 2 tablespoons maple syrup
- ¼ teaspoon salt
- 1 teaspoon vanilla extract
Instructions
To prepare crust
-
Combine flour, sugar, and salt in a large mixing bowl. Add the cold, cubed butter and use a pastry blender, a fork, or two knives to cut the butter into the dry ingredients until the largest pieces are the size of small peas. This creates pockets of butter that lead to a flaky crust.
-
Gradually add the cold water, one tablespoon at a time, mixing gently after each addition, until the mixture just starts to come together and stick. You may not need all 4 tablespoons.
-
Use your hands to gently bring the mixture into a cohesive ball. The dough should still have some dry, crumbly parts and visible pieces of butter; it should hold together when you shape it but not be overly wet. Overworking the dough or adding too much water will result in a tough crust.
-
Shape the dough into a flat disk, wrap it tightly with plastic wrap, and chill in the refrigerator for at least 2 hours. This chilling period allows the gluten to relax and the butter to firm up, crucial for a tender, flaky crust. It can be chilled for up to 5 days.
-
On a lightly floured surface, roll out the chilled dough into a large 13-inch circle. Carefully transfer the rolled dough into a standard 9-inch pie dish. Gently press the dough into the contours of the pan without stretching it. Trim the edges, leaving about a 1-inch overhang. Pinch and crimp the edges as desired to create a decorative finish.
-
For best results and to prevent shrinkage, freeze the pie crust in the pan for at least 30 minutes. This helps the butter stay cold and the crust hold its shape during baking.
-
Preheat your oven to 425°F (220°C). Line the frozen crust with aluminum foil, ensuring it covers the edges to prevent over-browning. Grease the foil lightly with nonstick spray to prevent sticking. Fill the foil-lined crust with pie weights, dry beans, or rice, distributing them evenly to weigh down the bottom and sides.
-
Bake the weighted crust at 425°F (220°C) for 20 minutes, or until it appears dry and is just beginning to turn golden brown at the edges. Carefully remove the foil and pie weights, then bake for another 5 minutes to ensure the bottom is fully cooked. If any part of the crust puffs up, gently press it back down with the back of a spoon while it’s still warm.
-
Set the partially baked crust aside to cool completely while you prepare the pumpkin filling. This cooling step prevents the filling from cooking too quickly around the edges. The parbaked crust can be made several days in advance and stored at room temperature, covered lightly.
To prepare filling
-
Reduce oven temperature to 350°F (175°C). In a large bowl, whisk together all of the pumpkin filling ingredients until completely smooth and well combined. Ensure there are no lumps of brown sugar.
-
Carefully pour the prepared pumpkin filling into the cooled, partially baked pie crust. For a beautiful, glossy finish and to prevent the crust from looking dull, brush the exposed edges of the pie crust with the egg wash (1 egg + 1 tablespoon water).
-
Bake at 350°F (175°C) for approximately 45 minutes, or until the filling is mostly set but still exhibits a slight, gentle jiggle in the very center when lightly tapped. If the pie crust edges begin to brown too quickly, loosely cover them with aluminum foil to protect them.
To prepare nut praline topping
-
While the pie is baking its initial stage, begin preparing the exquisite nut praline topping. This ensures it’s ready to be added at the perfect moment.
-
In a medium saucepan, melt the butter over medium heat. Once melted, add the mixed chopped nuts, packed light or dark brown sugar, maple syrup, salt, and vanilla extract. Stir everything together until well combined.
-
Bring the mixture to a gentle boil, then continue to cook for a few minutes, stirring frequently, until the sugar has dissolved, the mixture is smooth, and it has thickened slightly to coat the nuts. Be careful not to burn it.
-
Once the pie has reached its partially set stage (after about 45 minutes), remove it from the oven. Carefully spoon the warm nut praline mixture evenly over the top of the partially baked pie. Return the pie to the oven and bake for an additional 15 minutes, or until the topping is bubbly, golden brown, and delightfully crisp.
-
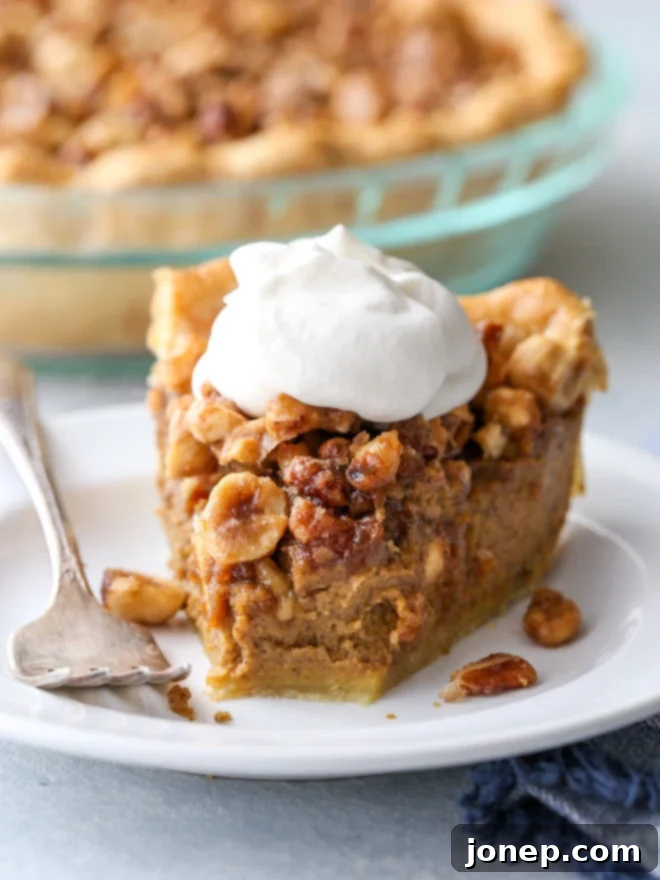
The hardest part! Let the pie cool completely to room temperature before slicing and serving. This allows the filling to fully set and the praline to firm up and become perfectly crunchy. Serve individual slices with a dollop of fresh vanilla whipped cream for an ultimate indulgence. Enjoy!
Notes
- For more detailed guidance on achieving a flawless crust, please refer to my full tutorial on how to partially bake pie crust.
- This spectacular pie is excellent for making ahead. Store it in the refrigerator for up to 1 week, or for longer freshness, double-wrap and freeze it for up to 1 month. Always thaw overnight in the fridge before serving or reheating.
- The provided nutrition information is an estimate based on standard calculations and may vary depending on specific brands and ingredient variations.
