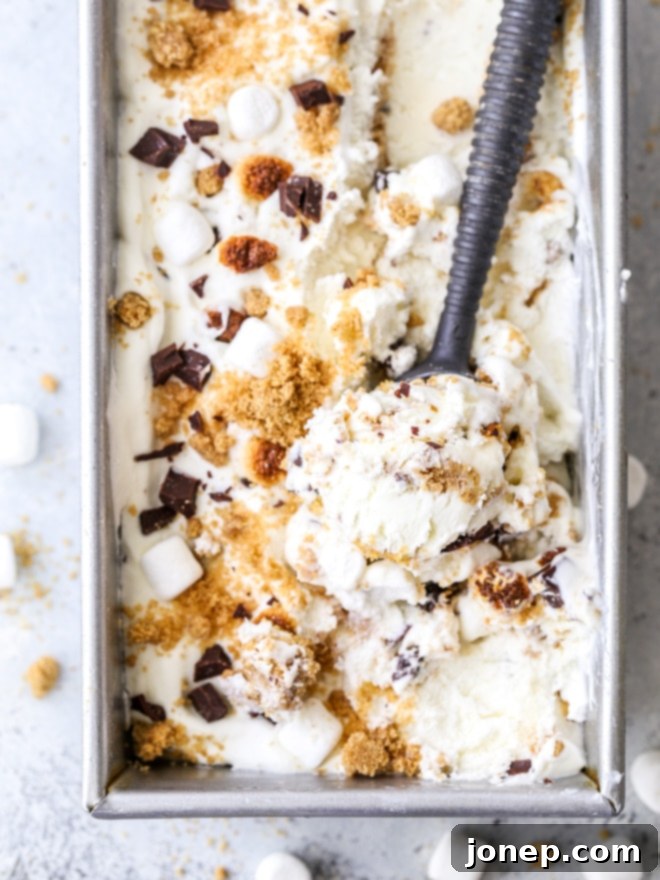
No-Churn S’mores Ice Cream: The Easiest Way to Enjoy a Classic Summer Treat
Imagine the nostalgic flavors of a campfire s’more – gooey toasted marshmallows, rich melting chocolate, and crisp graham crackers – all transformed into a creamy, dreamy ice cream. Now, imagine making this irresistible treat without the need for an expensive or cumbersome ice cream machine. Sound too good to be true? Not with this no-churn s’mores ice cream recipe!
This dessert is a true game-changer, perfectly blending the classic s’mores experience with the cool, refreshing delight of homemade ice cream. It’s packed with a delicious trifecta of textures and tastes: crunchy graham cracker crumble, generous chunks of your favorite chocolate, and tender, slightly charred toasted marshmallows folded into a light and airy marshmallow-infused ice cream base. It’s simple to make, incredibly satisfying, and guaranteed to be a hit at any gathering or as a sweet personal escape.
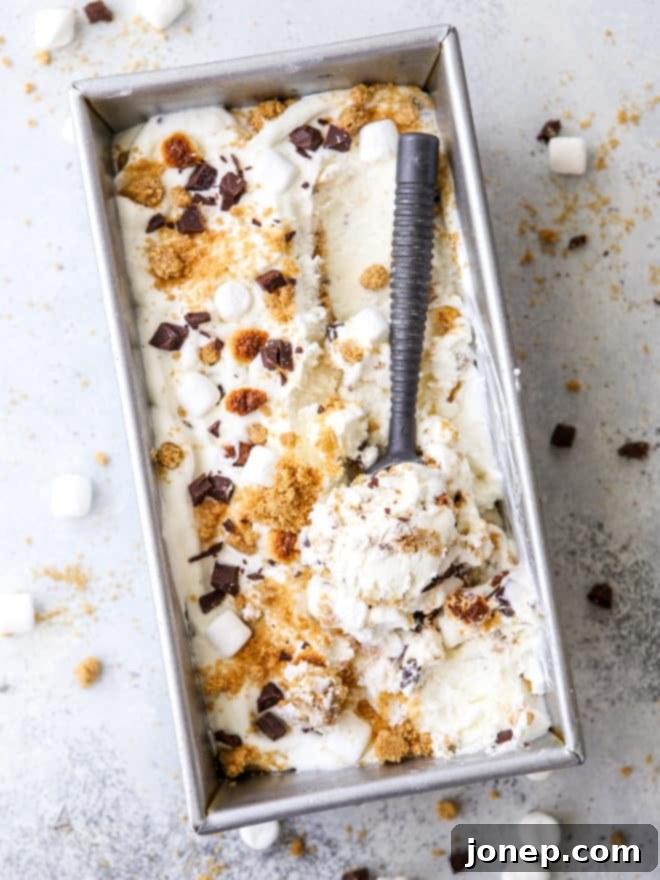
For years, I believed that truly delicious, homemade ice cream was only possible with a dedicated ice cream maker. But then I discovered the magic of no-churn recipes, and honestly, I haven’t looked back since. No-churn ice creams are not just incredibly easy to prepare; they deliver a rich, creamy texture and vibrant flavor that rivals traditional churned varieties. The simplicity is astonishing, making homemade ice cream accessible to everyone, regardless of their kitchen equipment.
This particular s’mores ice cream has been a labor of love over the past few summers. I’ve experimented, refined, and perfected it to capture every beloved element of a s’more. The result is a recipe I’m absolutely thrilled to share with you. Every spoonful is a journey back to warm summer nights by the fire, but with the added luxuriousness of a frozen dessert. It’s got all of our favorite s’mores flavors mixed right in—crispy graham crackers, luscious chocolate, and beautifully toasted marshmallow notes—and it’s simply irresistible!
What is No-Churn Ice Cream and Why is it So Easy?
The term “no-churn” literally means you don’t need an ice cream machine to make it. Traditional ice cream relies on a machine to continuously churn the mixture while it freezes. This process incorporates air and breaks down ice crystals, resulting in that smooth, creamy texture we all love. Without a churner, how does no-churn ice cream achieve this? The secret lies in one key ingredient: whipped cream.
No-churn ice cream recipes typically use heavy whipping cream that is beaten to stiff or soft peaks. This whipping process naturally incorporates a significant amount of air into the cream. When this aerated cream is gently folded with sweetened condensed milk and other flavorings, it retains its airy structure even as it freezes. The sweetened condensed milk plays a crucial role too, not just for sweetness, but its high sugar content and viscosity help prevent large ice crystals from forming, contributing to the smooth and creamy consistency. It’s a culinary marvel that simplifies the ice cream-making process dramatically, making it accessible for home cooks without specialized equipment.
Now that you understand the magic behind its simplicity, let’s dive into creating your own batch of this delightful s’mores ice cream!
Why This No-Churn S’mores Ice Cream Will Be Your New Favorite
Beyond its easy preparation, there are several reasons why this s’mores ice cream stands out:
- Effortless Preparation: No fancy gadgets, no constant monitoring. Just a few mixing bowls and a freezer.
- Unforgettable S’mores Flavor: It perfectly captures the smoky, sweet, and crunchy essence of a classic s’more, all in a cold, refreshing format.
- Rich and Creamy Texture: The whipped cream base ensures a luxuriously smooth and melt-in-your-mouth experience, without any icy bits.
- Perfect for Any Occasion: Whether it’s a summer barbecue, a birthday party, or just a weeknight treat, this ice cream is always a crowd-pleaser.
- Customizable: Easily adjust the type of chocolate or add extra mix-ins to suit your preferences.
Key Ingredients You’ll Need for S’mores Ice Cream
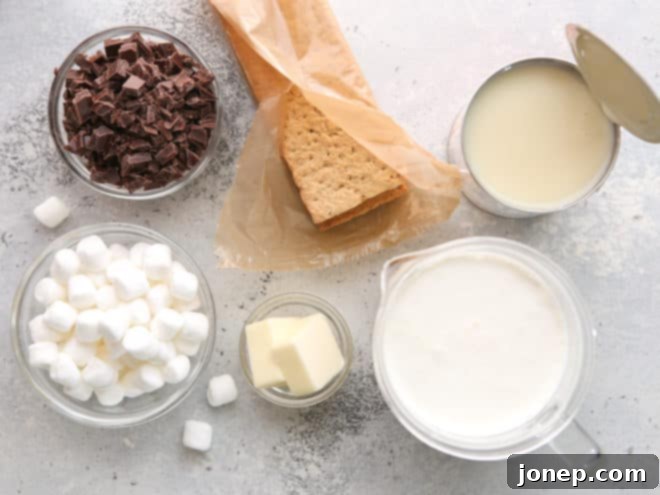
Gathering your ingredients is the first step to s’mores ice cream heaven. Here’s a closer look at what you’ll need and why each component is vital:
- Graham Crackers: These form the crunchy base of our s’mores crumble. Their subtle honey and whole wheat flavor is iconic. For the best texture, aim for fine crumbs with a few larger pieces for extra bite.
- Heavy Whipping Cream: This is the foundation of our no-churn ice cream base. When whipped, it creates the light and airy volume necessary for a creamy, scoopable ice cream without churning. Ensure it’s very cold for optimal whipping.
- Sweetened Condensed Milk: This sweet, thick milk provides the perfect level of sweetness and prevents the formation of large ice crystals, ensuring a silky-smooth texture. It’s also what gives the ice cream its dense, rich consistency.
- Marshmallow Cream (or Fluff): While mini marshmallows provide texture, marshmallow cream intensifies that distinct, gooey marshmallow flavor throughout the ice cream base itself, making every spoonful taste like a true s’more.
- Mini Marshmallows: Essential for that classic toasted marshmallow experience! Mini marshmallows are ideal as they toast quickly and provide delightful bursts of chewiness in the final product.
- Butter: Melted butter binds the graham cracker crumbs together, creating a rich, golden crumble that mimics the s’mores cracker.
- Milk or Semi-Sweet Chocolate: The chocolate element is crucial. Whether you prefer the classic sweetness of milk chocolate or the deeper notes of semi-sweet, choose a good quality bar that you can chop into satisfying chunks.
How to Make S’mores No-Churn Ice Cream: A Step-by-Step Guide
Making this s’mores ice cream is incredibly straightforward, breaking down into four simple yet flavorful components. Follow these steps for an amazing homemade dessert:
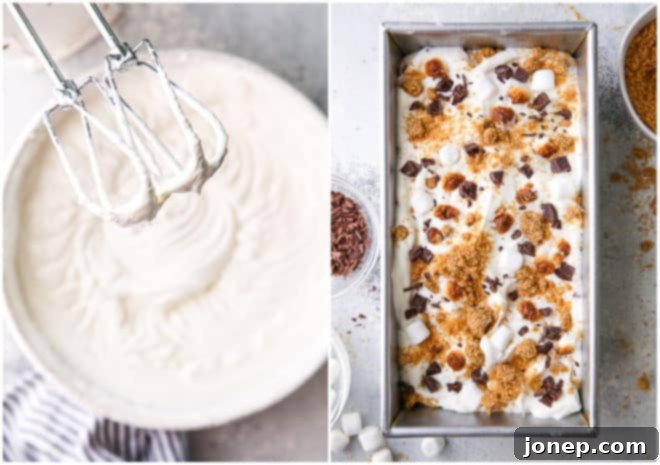
- Crafting the Marshmallow Ice Cream Base: This is where the magic of no-churn begins! Start by whipping your very cold heavy cream with an electric mixer until soft peaks form. Soft peaks are key; you want the cream to hold its shape but still be light and airy. Then, gently fold in about half a can of sweetened condensed milk along with a tub of marshmallow cream. The folding motion is important to maintain the airiness of the whipped cream, which gives the ice cream its smooth, creamy texture. Don’t worry if there are a few streaks of marshmallow cream; it adds to the visual appeal and ensures pockets of intense marshmallow flavor.
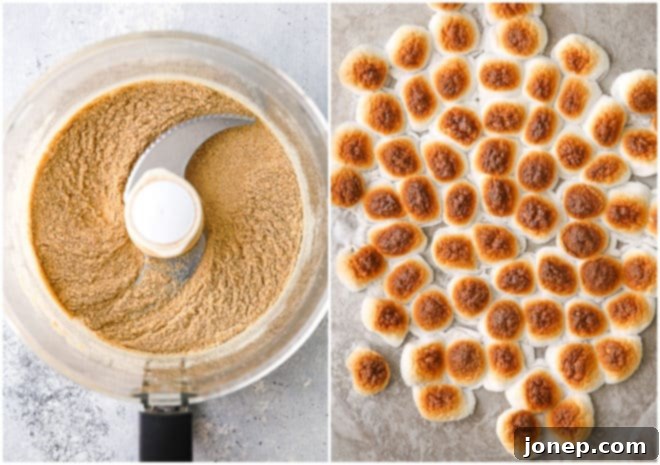
- Preparing the Graham Cracker Crumble: The crunchy element is vital for a true s’mores experience. Crush your graham crackers into fine crumbs. You can do this by placing them in a Ziploc bag and crushing them with a rolling pin, or for a finer consistency, use a food processor. Once crushed, combine them with melted butter. This mixture is then spread onto a sheet pan and toasted in a 350°F (175°C) oven for approximately 10 minutes. Toasting enhances the graham cracker flavor and gives the crumbs a delightful golden crispness. Allow the crumble to cool completely before adding it to the ice cream to prevent it from melting the base.
- Perfecting the Toasted Marshmallows: No s’mores is complete without toasted marshmallows! Spread your mini marshmallows in a single layer on a sheet pan. You have a couple of options here:
- Broiler Method: Place them under a broiler for just a few minutes, watching them *very* carefully. They can go from perfectly golden to burnt in seconds! Remove them as soon as they achieve a light golden-brown char.
- Kitchen Torch Method: For more precision and that authentic campfire look, use a kitchen torch to lightly char the tops of the mini marshmallows. This method gives you excellent control over the level of toastiness.
Ensure the marshmallows cool slightly before incorporating them.
- Chopping the Chocolate Chunks: The final flavor component is chocolate. Roughly chop a bar of your favorite chocolate – milk, semi-sweet, or even dark, depending on your preference. Large, irregular chunks work best, providing satisfying bites of chocolate throughout the ice cream. Gently fold these chopped chocolate pieces into your marshmallow ice cream base, distributing them evenly without deflating the cream.
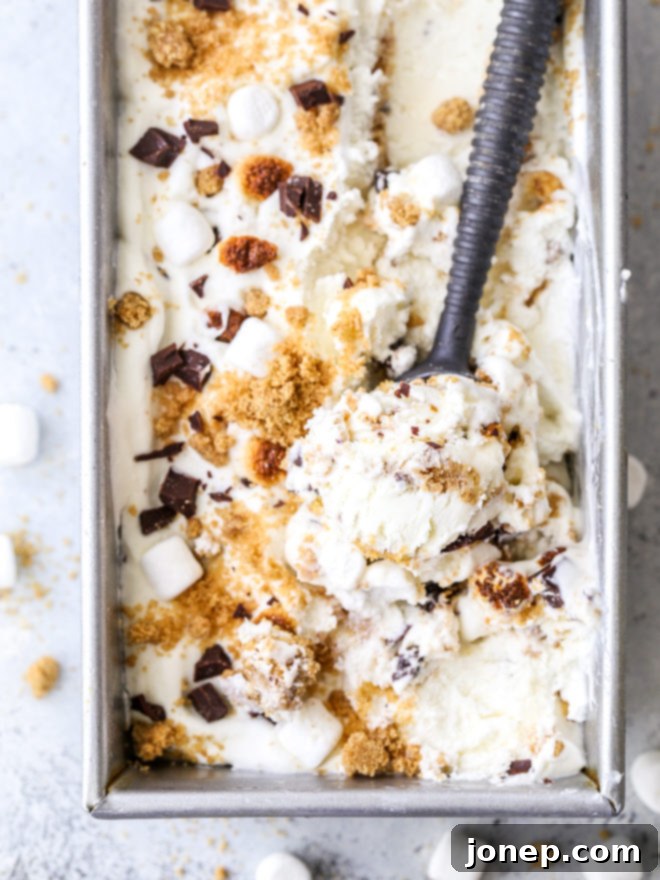
Once all your components are ready, the assembly is quick and easy. All you need to do now is layer everything into a standard loaf pan or a freezer-safe bowl. Start with a layer of the marshmallow whipped cream base, then sprinkle generously with graham cracker crumble and toasted marshmallows, and a few more chocolate chunks. Repeat these layers until all ingredients are used, finishing with a decorative top layer. Cover the pan tightly with plastic wrap or a lid and freeze for several hours, ideally overnight, until it’s firm enough to scoop. Then, dive in and enjoy!
Tips for Making the Best No-Churn S’mores Ice Cream
While this recipe is incredibly forgiving, a few tips can help you achieve perfection:
- Keep Cream Cold: Always start with very cold heavy whipping cream. This ensures it whips up properly and holds its volume.
- Don’t Overmix Whipped Cream: Whip the cream until it forms soft peaks. Overmixing can lead to a grainy texture in the final ice cream.
- Gentle Folding: When combining the sweetened condensed milk, marshmallow cream, and mix-ins with the whipped cream, use a gentle folding technique. This preserves the air in the whipped cream, which is crucial for the light, creamy texture of no-churn ice cream.
- Cool All Add-ins: Make sure your graham cracker crumble and toasted marshmallows are completely cooled before folding them into the ice cream base. Adding warm components will melt the cream and negatively affect the texture.
- Quality Chocolate: Use a good quality chocolate bar. The flavor will truly shine through in the ice cream.
- Freezing Time: Don’t rush the freezing process. Allow at least 4-6 hours, or preferably overnight, for the ice cream to set completely for the best scoopable consistency.
Storage Instructions
To keep your homemade no-churn s’mores ice cream fresh and delicious, store it in an airtight container in the freezer. This prevents freezer burn and keeps the flavors vibrant. It will stay good for up to 2-3 weeks, though it’s so tasty, it likely won’t last that long!
S’more Recipes to Love
If you’re as obsessed with s’mores as I am, then you absolutely must try these other fantastic s’mores-inspired recipes. They offer different ways to enjoy that classic flavor combination:
- S’mores Ice Cream Pie
- No-Bake S’mores Icebox Cake
- S’mores Ice Cream Sandwiches
- Chocolate Chip Cookie S’mores
Shop Tools for this Recipe
While this recipe is designed to be accessible without specialized equipment, a few tools can make the process even smoother. Here are some recommendations:
No-Churn S’mores Ice Cream
Pin Recipe
Leave a Review
Ingredients
- 1 sleeve graham crackers , crushed (about 1 cup crumbs)
- 2 tablespoons butter , melted
- 1 cup mini marshmallows
- 2 cups heavy whipping cream
- ½ can (⅔ cup) sweetened condensed milk
- 7 oz tub marshmallow cream
- 4 ounce chocolate bar (milk, semi-sweet or dark), roughly chopped
Instructions
-
Preheat oven to 350°F (175°C).
-
Combine graham cracker crumbs and melted butter. Spread out on a sheet pan and toast in the oven for 10 minutes. Let cool completely.
-
Place mini marshmallows in a single layer on a sheet pan and toast under the broiler for about 2 minutes till browned. Alternatively, use a kitchen torch to lightly char mini marshmallows. Let cool slightly.
-
With an electric mixer, beat heavy cream to soft peaks. Use a spoon or spatula to gently fold in the sweetened condensed milk and then the marshmallow cream. Be careful not to stir vigorously and deflate the whipped cream. It’s okay if some streaks of marshmallow cream remain.
-
Fold the roughly chopped chocolate carefully into the marshmallow whipped cream mixture.
-
Layer the marshmallow whipped cream, graham cracker crumbs, and toasted marshmallows into a 9×5-inch loaf pan or freezer-safe bowl. Repeat layers until all ingredients are used.
-
Cover tightly with plastic wrap or a lid and freeze until hard, at least 4-6 hours, or preferably overnight for best results.
Video
This no-churn s’mores ice cream isn’t just a dessert; it’s an experience. It brings together the beloved flavors of summer campfires with the cool, creamy indulgence of homemade ice cream, all with minimal effort. So, skip the ice cream maker and treat yourself and your loved ones to this delightful and easy-to-make frozen treat. You’ll be amazed at how simple it is to create something so utterly delicious.
