Mastering Homemade Roasted Garlic Ciabatta Bread: Your Ultimate Recipe Guide
There’s nothing quite like the aroma of freshly baked bread filling your home, and when that bread is a chewy, airy ciabatta infused with the sweet, mellow essence of roasted garlic, it’s truly a culinary revelation. This Roasted Garlic Ciabatta Bread recipe takes the beloved Italian classic and elevates it with a delightful garlicky twist, making it the ideal accompaniment for any meal. Its signature open crumb and rustic crust provide the perfect foundation for gourmet sandwiches, while its incredible flavor effortlessly mops up savory sauces from pasta dishes, stews, or even a simple olive oil dip. Prepare to transform your kitchen into a professional bakery with this detailed guide to creating irresistible homemade ciabatta.
My Journey to Becoming a Confident Bread Baker
For many years, the thought of baking yeast bread intimidated me. The precise measurements, the delicate balance of yeast, water, and flour, and the seemingly endless rising times felt like a daunting challenge. However, thanks to my wonderful partnership with Red Star Yeast over the last few years, my perspective has completely transformed. What once seemed like an insurmountable culinary task has become a joyful and almost intuitive process. The continuous practice and the reliable quality of Red Star Yeast have allowed me to make huge strides in my bread baking skills; I now feel like I can almost mix dough in my sleep!
This journey has been incredibly rewarding, proving that with consistent effort and quality ingredients, anyone can master the art of bread making. That being said, the world of baking is vast, and there’s always more to learn and many new recipes to explore. So, when Red Star Yeast approached me with the exciting opportunity to develop a ciabatta bread recipe, I enthusiastically accepted the challenge. It was the perfect chance to stretch my comfort zone even further and delve into a bread style I hadn’t tackled before. The experience was not just about creating a new recipe; it was about continuing my growth as a baker and sharing that learning journey with all of you.
Understanding Ciabatta: A Modern Classic with Italian Roots
As I began my research into ciabatta, I was genuinely surprised to discover that this iconic Italian bread is a relatively modern invention, first created in 1982—coincidentally, the same year I was born! While bread has been a staple of human civilization for millennia, it’s inspiring to know that culinary innovation continues to bring us new classics even in contemporary times. This particular bread, whose name literally translates to “slipper” in Italian, was specifically developed as an alternative to the French baguette, aiming for a bread that was equally delicious but uniquely Italian.
Ciabatta is instantly recognizable by its distinctive characteristics:
- Broad, Flat Loaves: Unlike tall, round loaves, ciabatta is typically wide and somewhat flattened, resembling a slipper.
- Chewy Texture: Its crust is delightfully crisp, giving way to an interior that is remarkably chewy and satisfying.
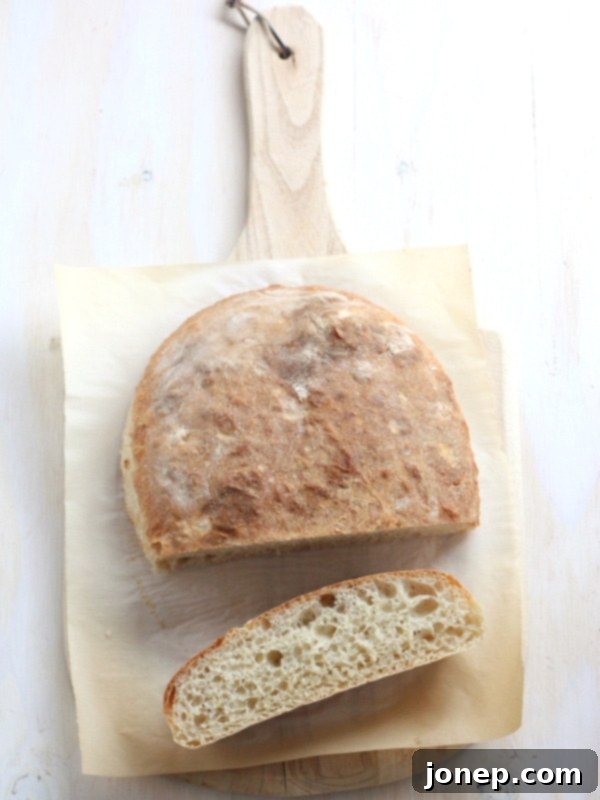
- Holey Interior (Open Crumb): Perhaps its most celebrated feature is the airy, irregular structure of its crumb, dotted with large, open holes. This “holey” nature is a testament to its high hydration and careful handling.
This bread has quickly become one of my absolute favorites, not just for its incredible versatility in sandwiches but also as a simple accompaniment to almost any meal. Despite my long-standing appreciation for ciabatta, this recipe marks the first time I’ve ever baked it myself. And I’m thrilled to report, the result was absolutely perfect!
The Irresistible Magic of Roasted Garlic in Ciabatta
What sets this particular ciabatta apart is the addition of roasted garlic. Roasting transforms raw garlic’s pungent, sharp flavor into something incredibly sweet, mellow, and nutty. When this softened, caramelized garlic is gently incorporated into the ciabatta dough, it almost melts in, infusing every bite with a subtle yet distinct depth of flavor. It’s not an overpowering garlic bread; instead, it’s a sophisticated hint of garlic that enhances the bread’s natural qualities, making it utterly scrumptious and uniquely addictive. This simple addition elevates the classic ciabatta to a whole new level of deliciousness.
Essential Tips for Perfect Homemade Ciabatta
While mastering ciabatta isn’t overly difficult, it does require a bit more attention and understanding than some simpler yeast breads. Don’t be discouraged; these tips will guide you to a successful bake:
-
Plan Ahead with a Biga (Pre-Ferment)
One of the keys to ciabatta’s incredible flavor and texture is the use of a pre-ferment, also known as a biga. This recipe requires you to start this starter the night before you plan to bake the bread. Allowing the biga to sit overnight at room temperature is crucial for developing deep, complex flavors and a more extensible dough structure. By the next day, your biga should have transformed into a soupy mixture with a visibly bubbly surface, indicating active fermentation. This step is absolutely worth the forethought and patience, contributing significantly to the final product.
-
Embrace the Wet Dough
Ciabatta is famous for its high hydration, meaning the dough is exceptionally wet—almost batter-like in consistency. This high water content is what contributes to its characteristic open, airy crumb. Because of its extreme stickiness, this dough cannot be effectively kneaded by hand. A stand mixer fitted with a dough hook is your indispensable tool here. It will handle the intense mixing required to develop the gluten without you getting completely covered in sticky dough.
-
Knead on a Higher Speed
Due to the dough’s very wet nature, it needs to be kneaded on a higher speed than you might typically use for a drier bread dough. This energetic mixing helps the gluten strands develop properly, creating the elasticity and strength needed for ciabatta’s structure. However, be vigilant! Keep a close eye on your stand mixer to ensure it doesn’t “walk” or wobble off the counter due to the high-speed action of the dough hook working with such a wet mass.
-
Gentle Handling is Key
Once the dough has risen and you begin to shape it, approach it with the utmost gentleness. You’ll notice many beautiful air bubbles just beneath the surface—these are the foundations of ciabatta’s signature open crumb. Rough handling will deflate these precious bubbles, resulting in a denser bread. Use generously floured hands and work swiftly and delicately to preserve as much of that airy structure as possible.
-
Adjust to Your Taste: Skip the Garlic if Preferred
While the roasted garlic truly makes this ciabatta special, if you’re not a fan of garlic or prefer a more classic flavor, feel free to omit it from the recipe. You’ll still end up with a wonderfully chewy and porous ciabatta that’s perfect in its simplicity.
-
Utilize Baking Resources
If you’re new to baking with yeast or simply looking to brush up on your skills, I highly recommend visiting the “Lessons in Yeast & Baking” section on Red Star Yeast’s website. It’s a fantastic resource filled with helpful tips, techniques, and answers to common baking questions, providing excellent support for bakers of all levels.

Roasted Garlic Ciabatta Bread
Pin Recipe
Leave a Review
Ingredients
Overnight starter:
- ½ cup water (118 ml)
- ½ teaspoon Red Star Active Dry Yeast
- ¾ cup bread flour (90 grams)
Bread:
- 1 head of garlic
- 2 cups water (475 ml)
- 1 teaspoon Red Star Active Dry Yeast
- Starter , from above
- 4 cups bread flour (480 grams)
- 2 teaspoons salt
- 1 teaspoon granulated sugar
Instructions
To make the starter:
-
Dissolve the yeast in the water. Add the bread flour and stir to make a wet dough. Cover with plastic wrap and let sit at room temperature for at least 8 hours and up to 15 hours. The next day the starter should be soupy with a bubbly surface.
To make the bread:
-
Preheat oven to 350°F. Wrap the garlic in foil and bake for about 30 minutes until fragrant. Let cool, then slip garlic cloves out of their skins and roughly chop.
-
In the bowl of a stand mixer fitted with a dough hook, dissolve the yeast in the water. Add all of the starter and use a dough whisk or spatula to break it up into the water. It doesn’t have to completely dissolve into the water.
-
Add the bread flour, salt, sugar, and chopped garlic. Knead the dough with the mixer on medium speed for about 12-15 minutes. At first the dough will be very wet, but eventually it will thicken somewhat and clear the sides of the bowl, and turn glossy and smooth. When you turn off the mixer, it will pool at the bottom of the bowl, and that’s okay.
-
Cover the bowl with plastic wrap and let rise in a warm place until tripled, about 1 ½ hours.
-
With generously floured hands, scoop the dough out of the bowl onto a floured surface. Divide the dough in two. Working very gently, and re-flouring your hands as necessary, shape dough into oblong loaves and place each on a sheet pan lined with parchment paper.
-
Let rise, uncovered, until doubled, about 45 minutes. Meanwhile, preheat oven to 475°F.
-
Bake until golden brown and sounds hollow when tapped, 20-25 minutes. Let cool slightly and serve warm or at room temperature. Store in an airtight container at room temperature for up to 3 days.
Disclosure: This recipe was developed in partnership with Red Star Yeast. All opinions are my own, as always. Thank you for supporting partnerships with brands I believe in.
Be sure to visit Red Star Yeast on their website for more baking inspiration and tips. You can also follow them on social media: Twitter, Facebook, Pinterest, and Google+.
