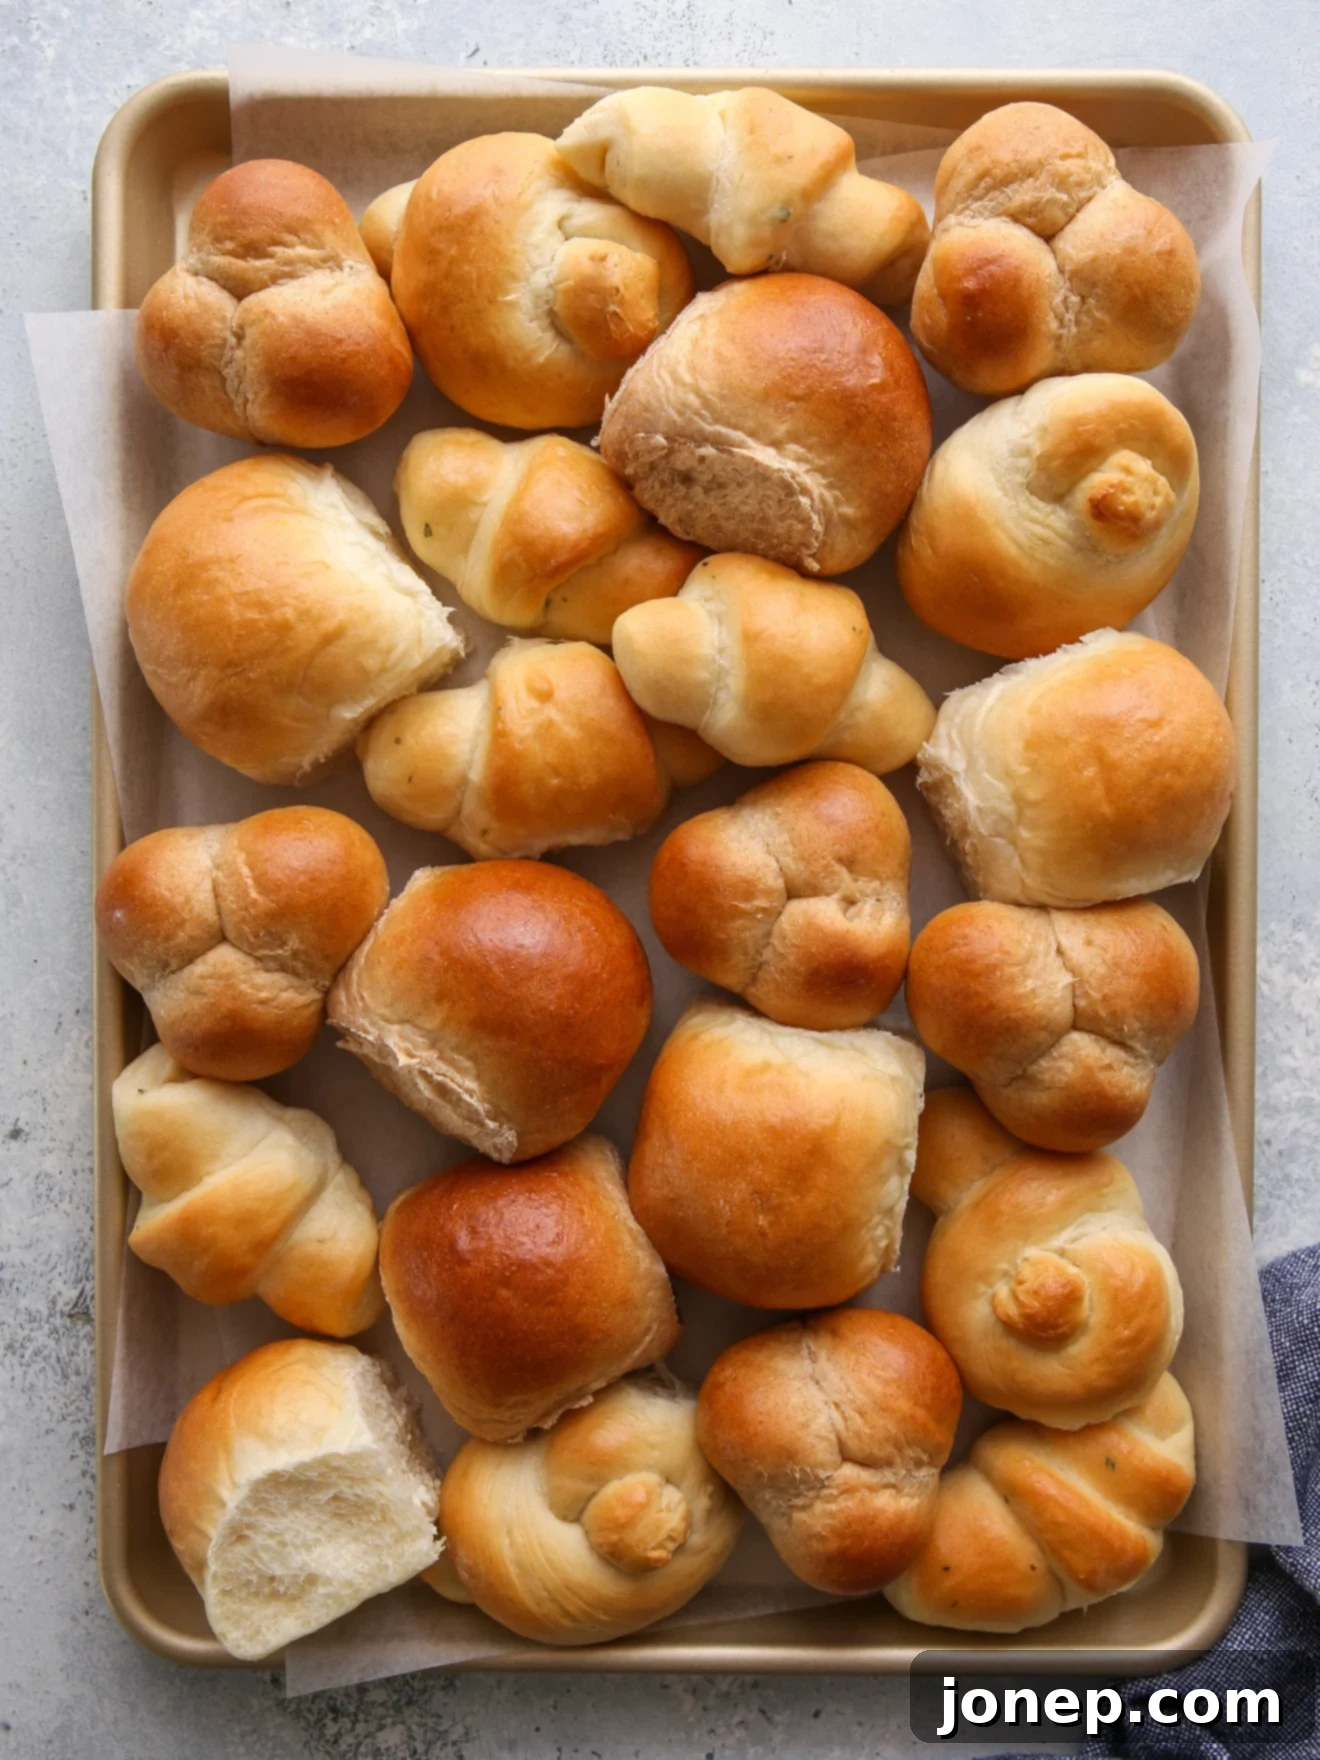
The Ultimate Guide to Homemade Dinner Rolls: Recipes, Shapes, and Make-Ahead Magic
Welcome to your comprehensive guide to baking homemade dinner rolls! This article will walk you through everything you need to know to create delightful, fluffy rolls right in your kitchen. From mastering the basic dough to exploring a variety of shapes and delicious flavors, and even smart make-ahead strategies, you’ll become a dinner roll expert in no time. Get ready to impress your family and friends with these irresistible, buttery creations!
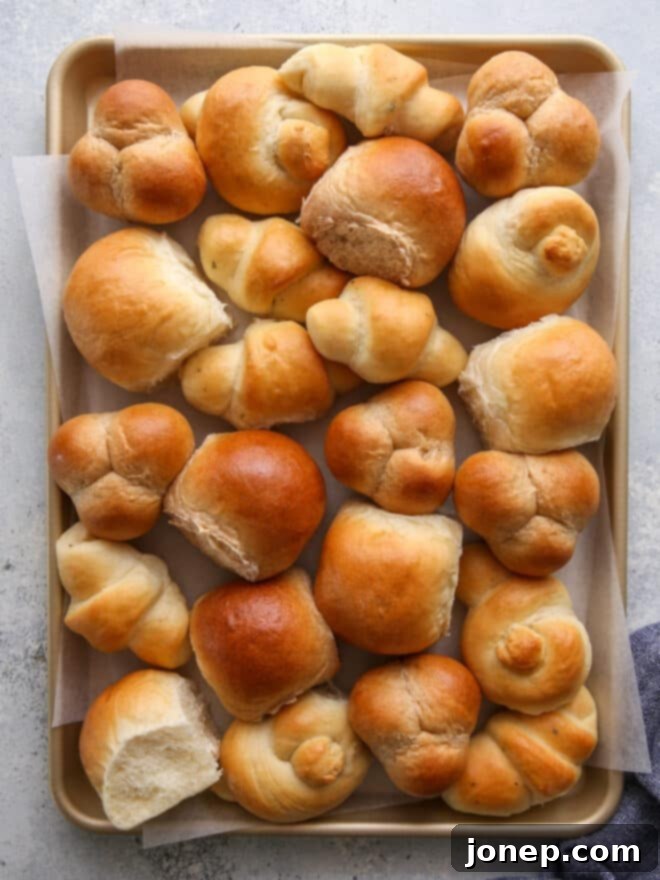
This recipe is proudly sponsored by Red Star Yeast, my trusted partner in baking success.
Imagine the aroma of freshly baked bread filling your home. That’s the magic of homemade dinner rolls! This guide empowers you to create the most incredibly soft, light, and tender rolls, bursting with rich, buttery flavor. They’re not just a side dish; they’re the star of any meal, whether it’s a cozy family dinner or a festive holiday feast.
Don’t let the idea of baking with yeast intimidate you. These rolls are surprisingly simple to make, requiring just seven fundamental ingredients. If you’ve ever thought homemade bread was too complicated, this detailed tutorial is precisely what you need to build confidence and achieve baking success!
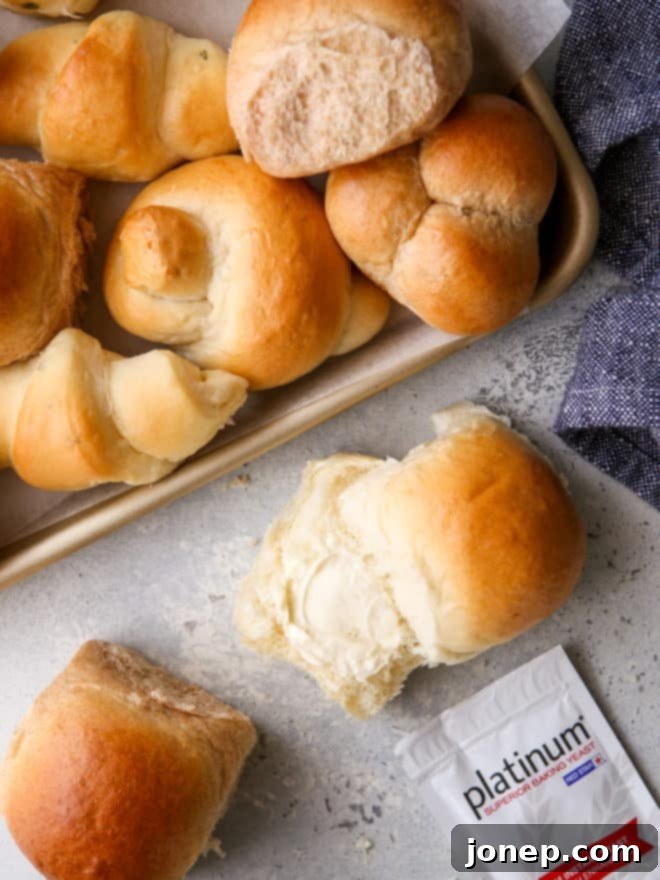
Mastering the Ultimate Dinner Roll Recipe
This isn’t just a single recipe; it’s a foundation for endless culinary creativity. This single, versatile dinner roll dough can be transformed into a myriad of shapes and flavors, making it the only recipe you’ll ever need for perfectly tender and delicious rolls. Whether you’re aiming for a classic look or an adventurous flavor, this guide has you covered.
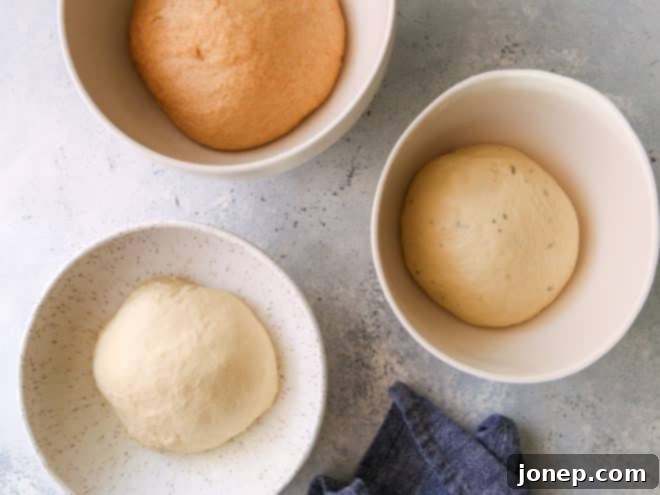
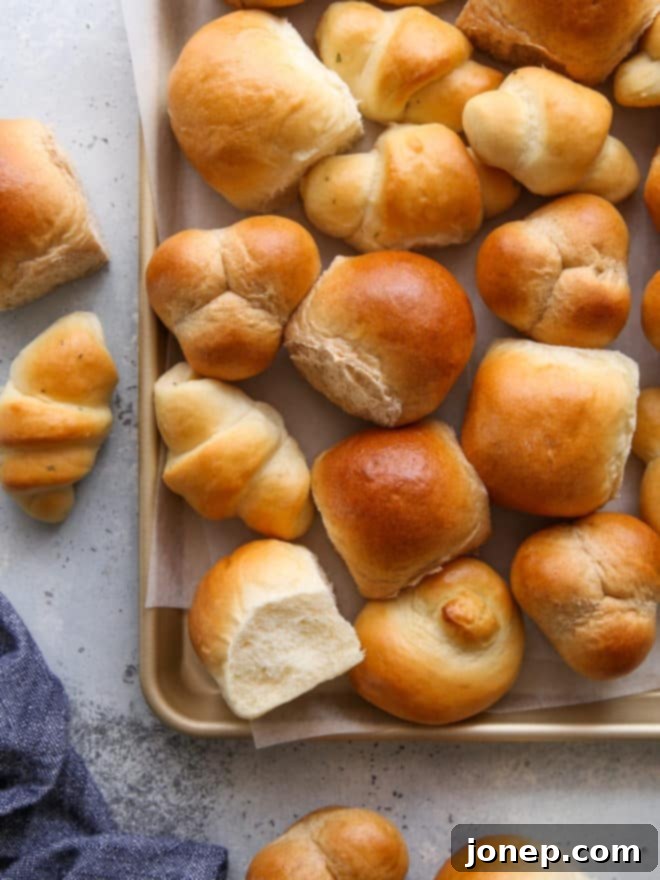
In this post, you’ll see examples of classic traditional white rolls, wholesome honey wheat rolls, and aromatic herb rolls. But the adventure doesn’t stop there! I also provide detailed instructions for additional irresistible flavor variations, including savory cheddar rolls, fragrant garlic rolls, and the incredibly popular “everything” spice rolls. And here’s a pro tip: feel free to mix and match these flavor combinations to create your own unique masterpieces!
While the timeless round dinner roll is always a crowd-pleaser, I’ll also guide you through shaping techniques for elegant crescent rolls, charming cloverleaf rolls, and fun knots. Each shape adds a special touch to your dinner table, proving that homemade rolls are as beautiful as they are delicious.
The Foundation: Essential Ingredients for Perfect Rolls
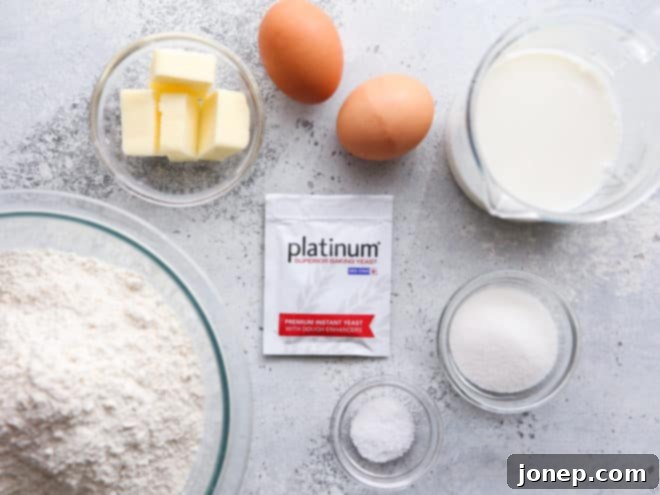
Ready to get your hands dusted with flour? Crafting the best dinner rolls starts with high-quality, basic ingredients. Below is a list of everything you’ll need. The full, detailed recipe with exact measurements can be found at the bottom of this post, but let’s briefly discuss what makes these ingredients crucial:
- Bread flour: Essential for its higher protein content, which develops strong gluten. This gluten structure is what gives your rolls their incredible chewiness, excellent rise, and light, airy texture.
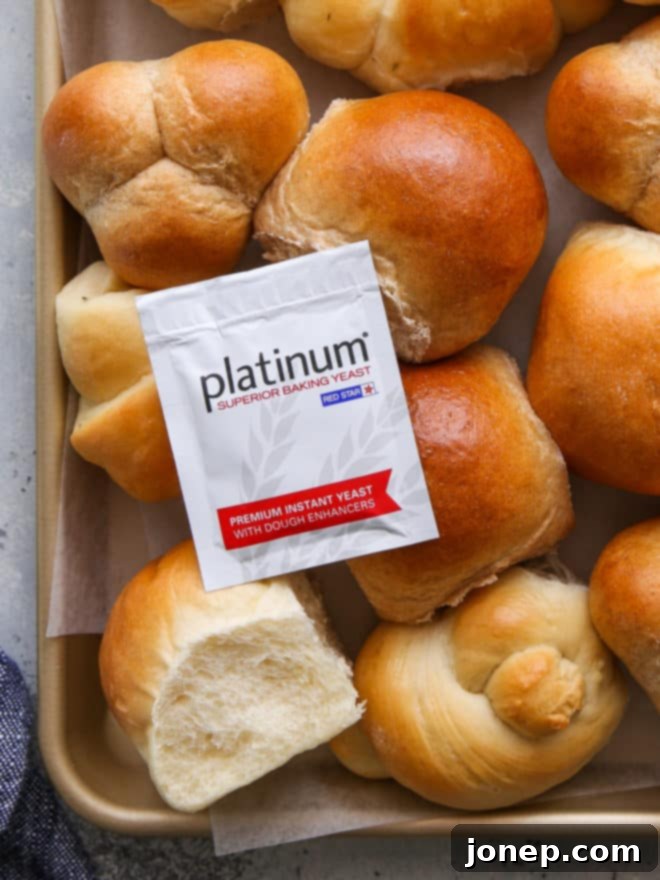
- Platinum Yeast from Red Star: My go-to for consistent, reliable results. This premium instant yeast includes natural dough improvers, ensuring a robust rise and superior volume in your finished rolls.
- Milk: Adds richness, tenderness, and a lovely golden crust to the rolls. It also contributes to the overall moisture content of the dough.
- Butter: Provides unparalleled flavor, richness, and keeps the rolls incredibly soft and tender. Unsalted butter is preferred to control the salt content.
- Eggs: Contribute to the dough’s structure, richness, and a beautiful golden color. They also help create a soft, delicate crumb.
- Granulated sugar: Feeds the yeast, helping it activate and produce carbon dioxide for rising. It also adds a subtle sweetness to the rolls, balancing the savory flavors.
- Salt: A crucial ingredient that enhances flavor, controls yeast activity, and strengthens the gluten network, resulting in a more manageable dough.
- Add-ins and substitutes for flavor variations: Get ready to experiment! Keep reading for exciting ideas to customize your rolls.
The Secret to Success: Why I Choose Red Star Yeast
For nearly a decade, Red Star Yeast has been my trusted partner in the kitchen, and I’ve shared countless recipes featuring their exceptional products. It’s the only yeast I confidently use in all my baking endeavors, and their Platinum® yeast holds a special place as my absolute favorite. There’s a good reason for this unwavering loyalty.
Platinum® yeast isn’t just any instant yeast; it’s a premium product expertly blended with natural dough improvers. This unique formulation ensures that your dough rises more effectively and often faster than with conventional yeasts. The result? A beautifully risen dough that translates into baked goods with impressive volume and an incredibly satisfying texture. Using Red Star Platinum® yeast takes the guesswork out of baking, allowing you to achieve consistent, professional-quality results every single time. Baking success has truly never been this easy or reliable!
Step-by-Step Guide to Crafting Your Dinner Roll Dough
The journey to perfect dinner rolls begins with preparing the dough. This foundational step is critical for achieving that light, airy texture we all love. You have the flexibility to use a stand mixer equipped with a dough hook, which makes the kneading process incredibly easy, or if you prefer a more hands-on approach, a large mixing bowl and your own two hands will work beautifully.
Note: These instructions detail the process for traditional white dinner rolls. If you’re incorporating other varieties or add-ins, there might be one or two additional, simple steps involved, which will be highlighted later in the flavor variations section.
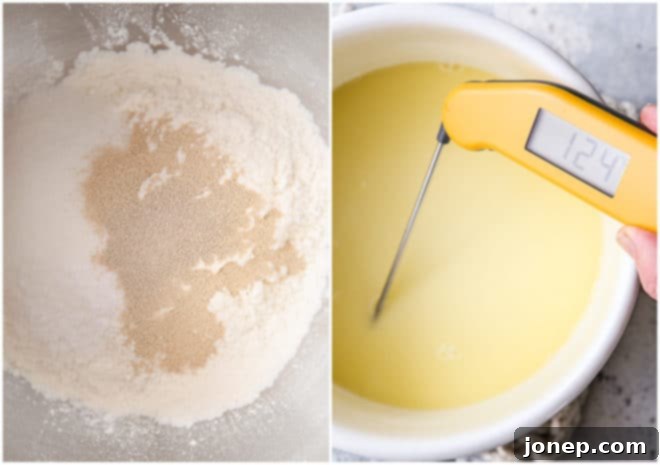
1. Gently Heat Butter and Milk. Combine your milk and butter in a small saucepan. Heat this mixture over medium-low heat, stirring occasionally, just until the butter is fully melted. It’s crucial not to overheat; the ideal temperature range is between 120-130°F (49-54°C). This warmth helps activate the yeast without killing it. Use an instant-read thermometer for accuracy.
2. Combine Dry Ingredients. In your mixing bowl (stand mixer or large bowl), thoroughly stir together a portion of the bread flour (as specified in the recipe), the Red Star Platinum yeast, granulated sugar, and salt. Whisk them together to ensure even distribution of the yeast and seasonings.
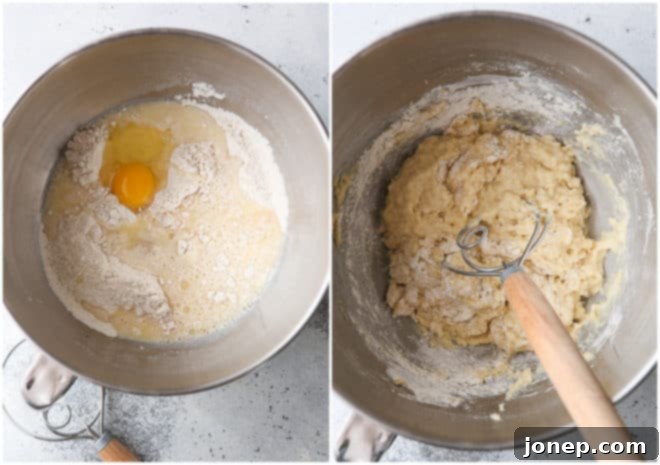
3. Incorporate Liquids and Eggs. Carefully pour the warmed milk and butter mixture, along with your beaten eggs, into the mixing bowl with the dry ingredients. Mix on low speed, or stir by hand, until these components are just combined, forming a very wet, shaggy dough. Don’t worry if it looks too sticky at this stage.
4. Gradually Add Flour While Kneading. Continue kneading the dough using your stand mixer with a dough hook, or by hand on a lightly floured surface. Gradually add the remaining bread flour, a small amount (about a tablespoon or two) at a time. Wait until each addition is fully incorporated into the dough before adding more. The goal is to add just enough flour until the dough begins to pull away from the sides of the bowl and is only slightly sticky to the touch. Over-flouring can lead to tough rolls, so err on the side of a slightly stickier dough.
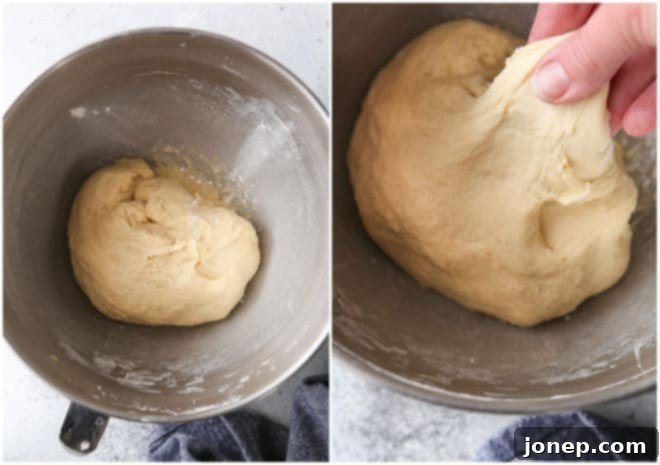
5. First Rise (Proofing). Once the dough is kneaded to perfection – smooth and elastic – cover the bowl tightly with plastic wrap to prevent it from drying out. Place it in a warm, draft-free spot. Allow the dough to rise until it has visibly doubled in size, which typically takes about 1 hour. A warm oven (turned off after briefly heating) is an excellent place for this.
With your dough perfectly prepped and risen, we’re now ready for the exciting part: shaping it into beautiful, individual rolls!
Unleashing Your Creativity: Shaping Dinner Rolls
While the classic round dinner roll is always a beloved choice, don’t hesitate to get creative with your shapes! Adding variety not only makes your bread basket more visually appealing but also adds a touch of gourmet flair. Regardless of the shape you choose, a crucial first step for even baking and consistent appearance is to portion your dough evenly. I highly recommend using a kitchen scale to ensure each roll is exactly the same size.
Once your dough has been precisely portioned, you can transform it into these delightful shapes:
- Traditional Round Dinner Rolls: This is the simplest and most common shape. Take a portion of dough and gently cup it in your hand, rotating and tucking the edges underneath to form a smooth, tight ball. This technique creates surface tension, which helps the roll rise beautifully and maintain its shape.
- Cloverleaf Rolls: For these charming rolls, take each portion of dough and divide it into three smaller, equal portions. Shape each of these smaller pieces into a tiny round ball. Then, place three of these small balls into each cup of a greased muffin tin. As they rise and bake, they’ll merge to form a distinctive three-leaf “clover” shape.
- Knotted Rolls: These elegant rolls are surprisingly easy to make. Roll and stretch each dough portion into a rope approximately 6-8 inches long. Then, simply tie the rope into a loose knot. Ensure the knot isn’t too tight, allowing room for the dough to expand during its second rise and baking.
- Crescent Rolls: To make classic crescent rolls, begin by dividing your entire dough mass in half (instead of into 12 individual portions). Roll each half into a large circle, approximately ½ inch thick. Using a pizza cutter or sharp knife, cut each circle into 6 triangular pieces, similar to how you’d cut a pizza. Starting from the wider end, roll each triangle tightly towards the point, then gently curve it into a crescent shape.
For even more detailed, step-by-step instructions and helpful photos for each shaping method, be sure to visit my full tutorial on How to Shape Dinner Rolls.
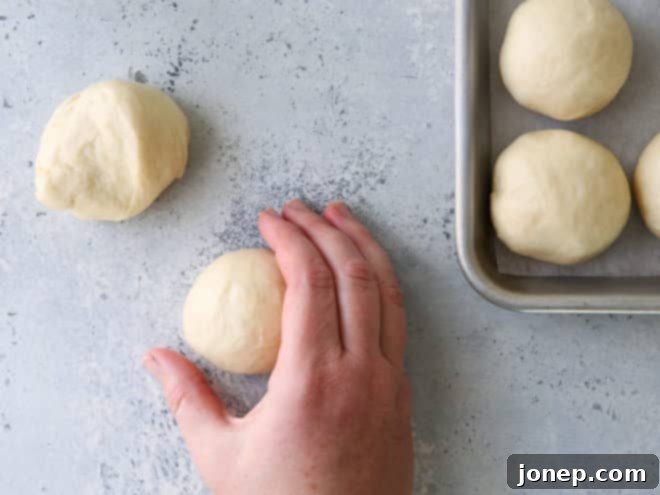
Once your rolls are beautifully shaped, arrange them in a prepared baking pan. Cover them loosely with a clean kitchen towel or plastic wrap (lightly sprayed with cooking spray to prevent sticking). Allow them to undergo their final rise (second proof) for an additional 30 minutes, or until they look visibly puffy and airy. This second rise is crucial for light and fluffy rolls.
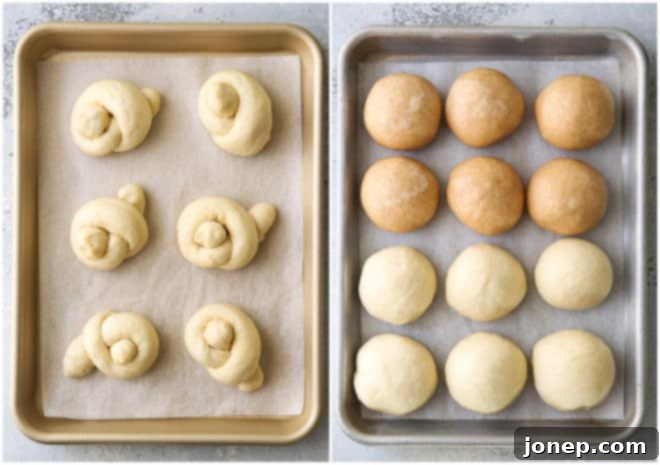
The final, most rewarding step is to bake these glorious rolls! Preheat your oven to 350°F (175°C). Bake for approximately 20 minutes, or until the tops are beautifully golden brown and the rolls sound hollow when tapped. For an extra golden sheen, you can brush them with an egg wash just before baking.
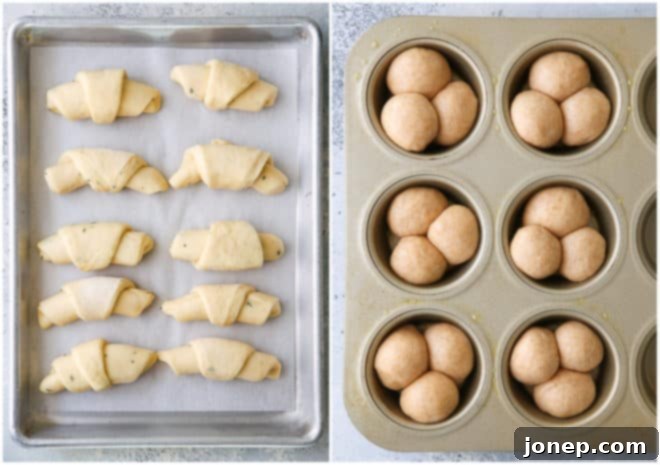
Endless Possibilities: Delicious Dinner Roll Flavor Variations
While the classic buttery dinner roll is always a hit, these variations allow you to customize your rolls to complement any meal or satisfy any craving. Experiment with these simple adjustments to transform your basic dough into something extraordinary:
- Honey Whole Wheat Rolls: For a slightly healthier and nuttier roll, replace 1½ cups of the bread flour with whole wheat flour. Instead of granulated sugar, use ¼ cup of honey, heating it with the milk and butter. The honey adds a subtle sweetness and helps keep the whole wheat rolls tender.
- Herb Rolls: Elevate your rolls with fresh, aromatic herbs. Add 1 tablespoon of finely chopped fresh herbs (such as rosemary, thyme, chives, or a blend) or 1 teaspoon of dried herbs to the dry ingredients before mixing. These are perfect for savory meals.
- Cheddar Rolls: Who doesn’t love cheese? Stir in 2 cups of shredded sharp cheddar cheese to the dough after it has been initially mixed and before you begin adding the additional flour. The cheese melts beautifully, creating pockets of savory goodness.
- Garlic Rolls: Infuse your rolls with the irresistible flavor of garlic. Add 2 cloves of minced garlic directly to the butter and milk mixture as it heats. The gentle warming will release the garlic’s fragrance and flavor into the liquid, permeating the entire dough.
- “Everything” Spice Rolls: For a trendy and flavorful twist, incorporate 1 tablespoon of everything bagel seasoning into your dry ingredients. For an extra burst of flavor and visual appeal, sprinkle additional seasoning over the shaped rolls just before baking.
Note: Don’t be afraid to unleash your inner chef! Feel free to mix and match these flavor variations to create truly unique combinations, such as garlic-herb rolls, whole wheat and cheddar rolls, or even a spicy cheddar-jalapeño (add minced jalapeño with the cheddar) variation.
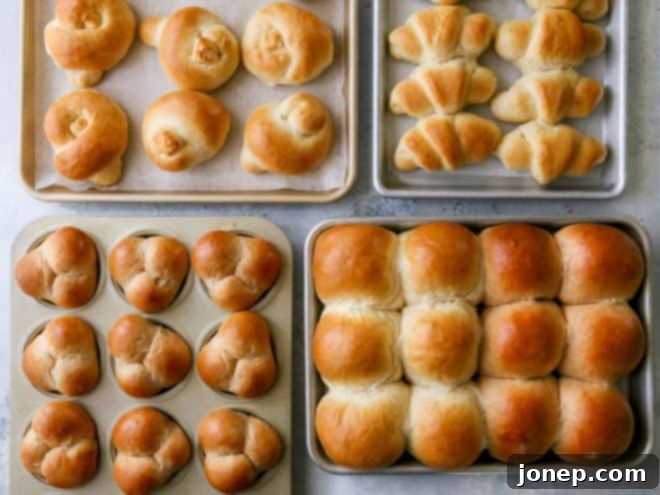
Plan Ahead: How to Make Dinner Rolls in Advance
One of the best things about homemade dinner rolls is the ability to prepare them ahead of time, making meal prep stress-free, especially for holidays or gatherings. Here are several effective strategies for making your rolls in advance:
- Rise the dough in the fridge overnight: This “cold proofing” method slows down yeast activity, allowing flavors to develop and making the process more manageable. After kneading, place the dough in a greased bowl, cover tightly with plastic wrap, and refrigerate overnight (or up to 24 hours). The next morning, simply portion and shape your rolls, let them rise at room temperature, and then bake as usual.
- Rise the shaped rolls in the fridge overnight: For even quicker baking on the day of, shape your rolls after the first rise. Arrange them in your prepared baking pan, cover tightly with plastic wrap (sprayed with non-stick spray to prevent sticking), and refrigerate overnight. The next morning, remove the pan from the fridge and let the rolls come to room temperature and complete their final rise for 1 to 1½ hours, or until puffy, before baking.
- Freeze shaped rolls up to 2 months in advance: This is an excellent option for long-term storage. After shaping the rolls, place them on a parchment paper-lined pan, ensuring they don’t touch. Cover with plastic wrap and freeze for about 1 hour until firm. Once frozen solid, transfer the rolls to a heavy-duty freezer-safe ziplock bag, squeezing out as much air as possible, and store for up to 2 months. When you’re ready to bake, place the frozen rolls in a prepared pan, thaw at room temperature for a few hours until soft, let them rise until doubled, and then bake.
- Freeze baked rolls up to 1 month in advance: If you prefer to have fully cooked rolls ready to warm, bake them as normal and let them cool completely on a wire rack. Once cooled, wrap them tightly in aluminum foil, then place the foil-wrapped rolls into a freezer-safe ziplock bag. Store for up to 1 month. To serve, remove from the bag and foil, and warm in a 350°F (175°C) oven for 20-25 minutes until heated through and soft.
Expert Tips for Fluffy, Flavorful Dinner Rolls Every Time
Achieving consistently perfect dinner rolls is all about understanding a few key principles. These expert tips will help you fine-tune your technique and ensure your rolls are always soft, flavorful, and beautifully risen:
- Mind the Temperature of Your Milk Mixture: Yeast is a living organism, and its activity is highly sensitive to temperature. Always use an instant-read thermometer to ensure your milk and butter mixture is precisely between 120-130°F (49-54°C) before adding it to the dry ingredients. If the temperature exceeds 140°F (60°C), it will kill the yeast, preventing your dough from rising. Conversely, a temperature that’s too low will significantly slow down the yeast’s activity, resulting in a much longer rise time.
- Choose the Right Flour for Optimal Structure: This recipe specifically calls for bread flour due to its higher gluten content compared to all-purpose flour. This increased gluten provides superior structure and elasticity, which allows the dough to better trap the expanding gases produced by the yeast during both rising and baking. This results in a taller, fluffier, and more tender roll. While you can substitute all-purpose flour, be aware that you may notice a slight difference in the final rise and overall fluffiness of your rolls.
- Understand Flour Variability and Adjust Accordingly: The exact amount of flour needed for any bread recipe, including these dinner rolls, can vary based on several factors, such as humidity levels, the brand of flour, and even how accurately you measure. This is why a range of 3 – 3½ cups is given. You’ll know you’ve added enough flour when the dough forms a cohesive ball that mostly clears the sides of the mixing bowl (or is manageable by hand). It should still be very soft and slightly tacky to the touch, but not overly sticky. Resist the urge to add too much flour, as this is a common mistake that leads to tough, dense, and dry rolls.
- Kneading Technique Matters: While I prefer the convenience of a stand mixer with a dough hook for its efficiency in developing gluten, kneading by hand is equally effective and a wonderfully therapeutic process. If you’re hand-kneading, ensure you develop the dough until it’s smooth and elastic. If you need a visual guide, this video provides excellent instruction on how to knead dough by hand.
- Create an Ideal Rising Environment: Yeast dough loves a warm, draft-free environment. My favorite trick for a perfect rise is to use a slightly warmed oven. Heat your oven to its lowest setting for just a few minutes, then turn it off completely. Place your covered dough bowl on the center rack and close the door. This creates a consistently warm and still environment ideal for proofing. For more detailed tips on rising and proofing yeast breads, you can find a comprehensive guide here.
- Achieve a Golden, Shiny Crust with Egg Wash: For a beautiful, glossy, golden-brown finish on your dinner rolls, brush them with a simple egg wash just before baking. To make it, whisk one large egg with 1 tablespoon of water until well combined. Apply this mixture gently and evenly over the surface of each roll using a pastry brush.
Essential Baking Tools for Your Dinner Roll Journey
Having the right tools can make all the difference in your baking experience, especially when it comes to making perfect dinner rolls. Here are a few recommended items that will help you achieve the best results:

The Ultimate Dinner Roll Recipe
Pin Recipe
Leave a Review
Ingredients
- ¾ cup (170 grams) milk
- ¼ cup (56 grams) unsalted butter
- 3-3 ½ cups (360-420 grams) bread flour
- 2 ¼ teaspoons (7 grams) Platinum Yeast from Red Star
- 2 tablespoons (25 grams) granulated sugar
- 1 teaspoon salt
- 2 large eggs
- 1 large egg , beaten with 2 tablespoons water, for egg wash
Instructions
-
In a small saucepan, combine the milk and butter. Warm over medium low heat until butter is melted. Cool for about 5 minutes, or until temperature is 120-130°F.
-
In the bowl of a stand mixer fitted with a dough hook (or in a large bowl if planning to mix by hand), combine 2½ cups of the bread flour, the yeast, sugar and salt. Add the warm water mixture, followed by the eggs, mixing on low speed until incorporated.
-
Add the remaining bread flour 2 tablespoons at a time while mixing on medium low speed until dough almost clears the bowl and is only a slightly sticky to the touch (It’s okay if some dough sticks to your fingers). You may not need all of the remaining flour, or you may need more than is called for. Knead until smooth and elastic, about 5-7 minutes more.
-
Cover with plastic wrap and put in a warm place and allow to rise until doubled, about 1 hour.
-
Punch down dough and let rest for a few minutes. Divide dough into 12 equal pieces and shape into balls or desired shape (see Notes).
-
Place in a 9×13-inch pan or quarter sheet pan lined with parchment paper. Spray some plastic wrap with non-stick cooking spray and place over the shaped buns/rolls. Return to a warm place and continue to rise for an additional 30 minutes until doubled.
-
When ready to bake, preheat oven to 350°F. Brush buns with egg wash. Bake until golden brown, about 20 minutes. Serve warm or cool completely on a wire rack.
Video
Notes
Flavor Variations:
- Honey Whole Wheat Rolls— replace 1½ cups of bread flour with whole wheat flour, sub granulated sugar for ¼ cup honey, and heat with milk and butter.
- Herb Rolls— add 1 tablespoon fresh (or 1 teaspoon dried) herbs like rosemary, thyme or a combination to the dry ingredients.
- Cheddar Rolls— stir in 2 cups cheddar cheese to the dough once it has been initially mixed, before adding additional flour.
- Garlic Rolls— add 2 cloves of minced garlic to the butter and milk as they heat.
- “Everything” Spice Rolls— a 1 tablespoon everything bagel seasoning to the dry ingredients. Additional spice may be sprinkled over the rolls before baking.
Note: feel free to mix and match flavor variations as desired. For example, garlic-herb rolls, whole wheat and cheddar, etc.
Shape Variations:
Disclosure: This recipe was developed in partnership with Red Star Yeast. All opinions are my own, as always. Thank you for supporting partnerships with brands I believe in. Be sure to visit Red Star Yeast on their website, and follow them on Twitter, Facebook, Pinterest and YouTube.
