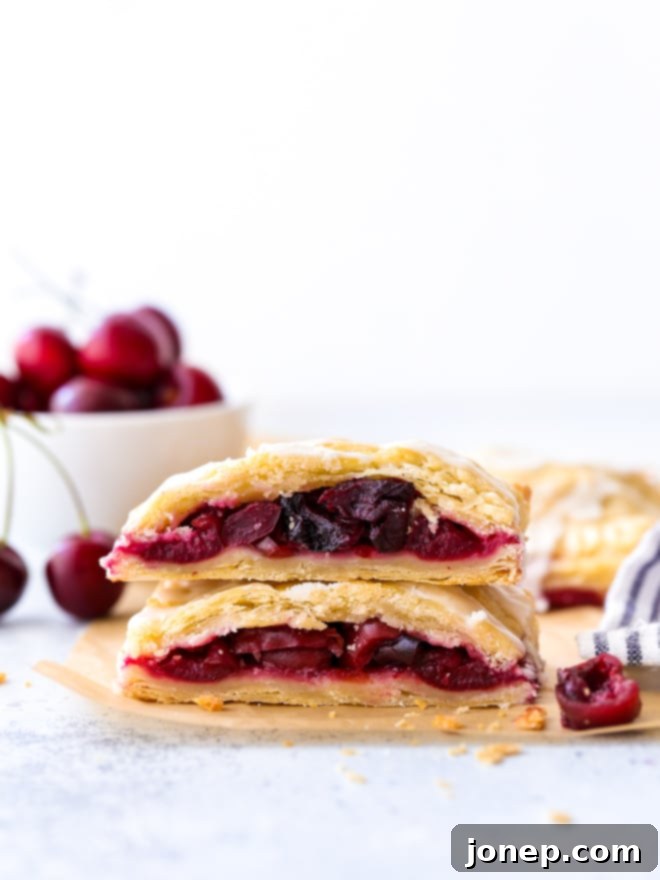
Irresistible Cherry Hand Pies: Your Guide to Flaky, Fruity Perfection for Summer Delights
There’s nothing quite like the arrival of summer, bringing with it an abundance of nature’s sweetest treats. Among them, fresh cherries stand out, offering a burst of vibrant flavor that perfectly embodies the season. While simply popping them straight from the bag is a delightful pleasure, baking with these ruby red gems elevates them to a whole new level of deliciousness. And when it comes to portable, personal-sized delights, these Cherry Hand Pies are simply unmatched.
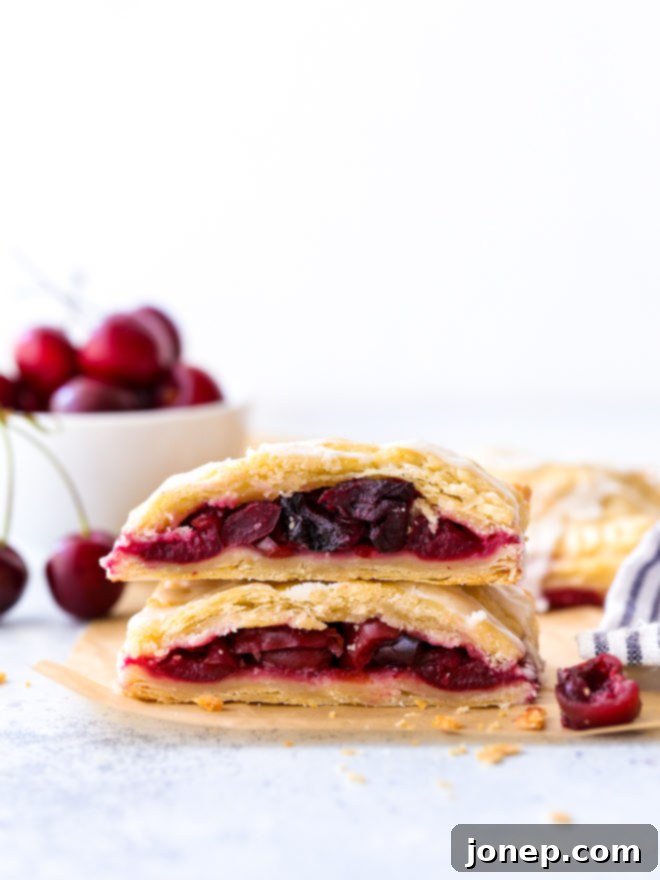
This recipe is proudly sponsored by Challenge Dairy, ensuring the highest quality ingredients for your baking adventures.
Imagine a perfectly golden, buttery, and incredibly flaky pie crust, cradling a luscious, sweet-tart filling made from ripe, fresh cherries. Now, imagine all of that wrapped up in an individual package, ready to be enjoyed anywhere, anytime. That’s the magic of these mini hand pies. Each bite offers a harmonious blend of textures and tastes: the crisp snap of the pastry, the juicy warmth of the cherries, and the delicate sweetness of a shimmering almond icing. This recipe is simple, straightforward, and truly highlights the natural beauty of fresh cherries, making it a new favorite in our summer baking repertoire.
Why These Homemade Cherry Hand Pies Are Your New Summer Essential
Cherry hand pies are more than just a dessert; they’re a celebration of summer in a compact, convenient form. Here’s why they’re an absolute must-make:
- Portability Perfected: As their name suggests, hand pies are designed for eating with your hands. This makes them the ultimate grab-and-go treat. Whether you’re packing a picnic basket for a day at the park, heading to the beach, embarking on a scenic hike, or simply need a sweet snack for the kids (or yourself!), these individual pies travel beautifully. No plates, no forks, just pure enjoyment.
- Bursting with Fresh Cherry Flavor: This recipe truly lets the star ingredient shine. By using fresh sweet cherries, you get an unparalleled fruity depth that’s both sweet and slightly tart, perfectly balanced by the rich crust and icing.
- Irresistibly Flaky, Buttery Crust: The foundation of any great pie is its crust. Our homemade recipe delivers a crust that’s tender, flaky, and rich with real butter flavor, providing the perfect contrast to the soft fruit filling.
- Elegant Almond Icing Finish: A light drizzle of almond icing adds a touch of sophistication and another layer of complementary sweetness that enhances the cherry flavor without overpowering it.
- Simple & Satisfying: Despite their impressive appearance, these hand pies are surprisingly easy to make. With a homemade pie dough, a quick three-ingredient filling, and a simple glaze, you’ll be enjoying these delightful treats in no time.
While they are designed for on-the-go enjoyment, there’s absolutely no rule against serving them warm in a bowl, perhaps accompanied by a scoop of vanilla bean ice cream or a dollop of fresh whipped cream. However you choose to enjoy them, these hand pies promise a delicious experience. So, let’s gather our ingredients and dive into the joyful process of baking!
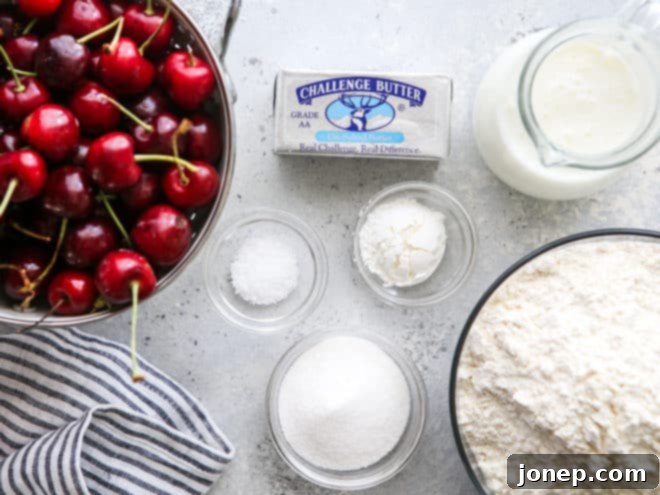
Essential Ingredients for Your Perfect Cherry Hand Pies
Crafting delicious hand pies starts with selecting quality ingredients. Here’s a closer look at what you’ll need and why each component is vital for that signature flavor and texture.
- All-Purpose Flour: The backbone of our flaky pie crust. Using standard all-purpose flour provides the right structure and tenderness needed for a delicate pastry.
- Challenge Butter: This is a star ingredient, and for good reason. High-quality butter is essential for achieving that incredibly rich, buttery flavor and the coveted flaky layers in your pie crust. We’ll delve deeper into why we choose Challenge Butter below.
- Buttermilk: Adds a subtle tang to the crust and helps tenderize the dough, resulting in a more delicate and melt-in-your-mouth texture. Make sure it’s cold!
- Granulated Sugar: Sweetens both the pie crust and the cherry filling. The amount used in the filling can be adjusted based on the natural sweetness or tartness of your cherries.
- Powdered Sugar: The base for our smooth, pourable almond icing. Its fine texture ensures a lump-free glaze that sets beautifully.
- Cornstarch: A crucial thickening agent for the cherry filling. It prevents the filling from becoming too watery and ensures it sets beautifully, keeping your hand pies from becoming soggy and messy.
- Heavy Cream or Milk: Used to create the perfect consistency for the almond icing. Heavy cream will result in a richer, slightly thicker glaze, while milk offers a lighter finish.
- Salt: A pinch of salt enhances all the other flavors, balancing the sweetness in both the crust and the filling. Don’t skip this humble but powerful flavor enhancer!
- Almond Extract: This is the secret ingredient that truly elevates the cherry flavor. Almond and cherry are a classic pairing, with the extract bringing out the cherries’ natural notes and adding an aromatic depth.
- Fresh Sweet Cherries: The undisputed star of the show! Opt for firm, ripe sweet cherries like Bing or Rainier for the best flavor and texture. Pitting them can be a bit of a task, but it’s well worth the effort for the vibrant, fresh taste they impart.
Why Challenge Butter Makes All the Difference
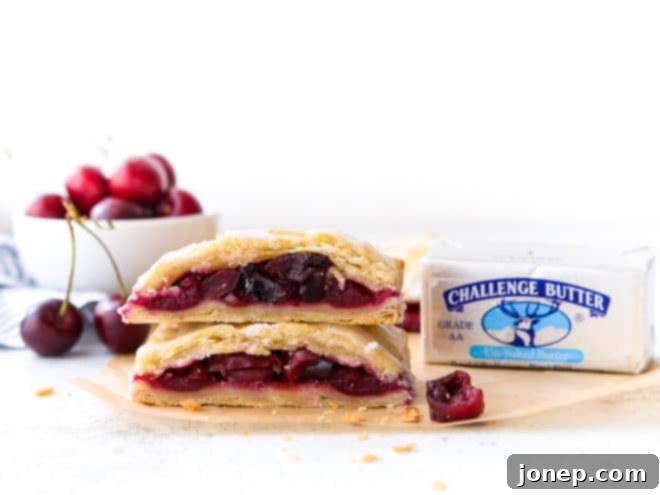
In a recipe with a relatively short ingredient list, the quality of each component truly shines through. That’s precisely why I consistently choose Challenge Butter for my baking. It’s not just butter; it’s a commitment to freshness and exceptional taste. Here’s what sets it apart:
- Unrivaled Freshness: Challenge Butter is churned daily from the freshest cream, sourced from family-owned dairies. This dedication to freshness is remarkable – the butter is often made and ready to be shipped to your supermarket within just 24 hours of milking! This rapid process locks in the natural, clean dairy flavor that is hard to replicate.
- Superior Flavor for Baking: The inherent freshness of Challenge Butter translates directly into a richer, more authentic buttery flavor in your baked goods. For these hand pies, that means a crust that isn’t just flaky, but also deeply flavorful and incredibly satisfying, forming a perfect complement to the sweet cherry filling.
- Perfect for Flaky Pastries: The high quality and consistent texture of Challenge Butter make it ideal for creating flaky pie crusts. When cut into the flour and kept cold, its fat content creates steam during baking, separating the layers of dough to produce that characteristic tender, airy flakiness we all crave in a perfect pie.
Using a premium butter like Challenge ensures that every bite of your cherry hand pie is a testament to quality ingredients, yielding the best possible buttery flavor and those delightful, delicate layers that make homemade pies so special.
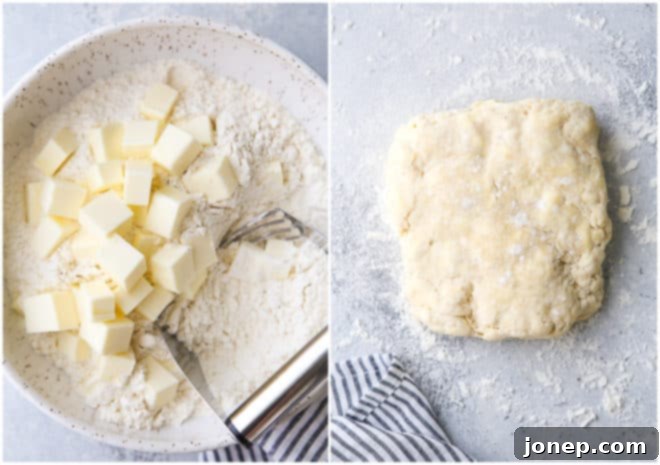
Step-by-Step Guide: How to Make Irresistible Cherry Hand Pies
Crafting these delectable hand pies is a rewarding experience, and surprisingly straightforward. Follow these detailed steps to achieve a buttery, flaky crust and a perfectly sweet-tart cherry filling, all finished with a smooth almond glaze that will have everyone reaching for more.
- Prepare the Flaky Pie Dough: In a large mixing bowl, whisk together the all-purpose flour, granulated sugar, and salt until well combined. Add the cold, cubed Challenge butter to the flour mixture. Using a pastry blender, two knives, or your fingertips, quickly cut the butter into the dry ingredients. Continue until the mixture resembles coarse meal with some pea-sized pieces of butter still visible – these pockets of butter are essential for a flaky crust! Gradually add the cold buttermilk, starting with the specified amount, mixing with a spatula until the dough just starts to come together. Avoid overmixing; gentle handling is key. If necessary, add more buttermilk, a tablespoon at a time, until the dough forms a cohesive ball. It’s perfectly fine if the dough looks a little shaggy; the goal is to hydrate the flour without developing too much gluten. Shape the dough into a flat disk, wrap it tightly in plastic wrap, and refrigerate for at least 2 hours, or preferably overnight. This crucial chilling process allows the gluten to relax and the butter to firm up, making the dough easier to roll and ensuring a tender, flaky crust.
- Roll Out and Cut the Dough: Once your dough is properly chilled, preheat your oven to 400°F (200°C) and line a large baking sheet with parchment paper to prevent sticking. On a lightly floured surface, roll out the chilled pie crust into a large rectangle, approximately 12 x 15 inches and about 1/8-inch thick. While exact dimensions aren’t crucial, aim for an even thickness across the entire sheet of dough. Use a sharp knife or a pastry wheel to trim the edges, making them straight, and then cut the large rectangle into 12 smaller, even rectangles. These will form the tops and bottoms of your hand pies.
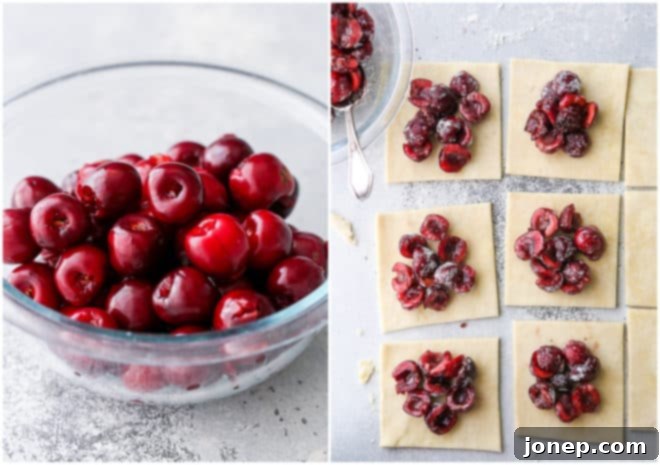
- Prepare the Vibrant Cherry Filling: In a medium bowl, combine your fresh, pitted, and halved sweet cherries with granulated sugar and cornstarch. Add a tiny pinch of salt to enhance and balance the fruit’s natural flavors. Gently toss the ingredients until the cherries are evenly coated. The cornstarch will help thicken the cherry juices as they cook, preventing your pies from becoming watery and ensuring a perfectly set, delicious filling.
- Assemble Your Hand Pies: Take six of your prepared dough rectangles and carefully place a generous mound of the cherry filling into the center of each, leaving about a ½-inch border around the edges. In a small bowl, whisk one egg with a teaspoon of water to create an egg wash. Brush the exposed edges of the dough rectangles with the cherry filling with this egg wash. This acts as a delicious adhesive. Carefully place the remaining six dough rectangles on top of the filled ones. Use your fingers to firmly press around the edges of the dough to seal the two layers together, ensuring no filling can escape during baking. For an attractive finish and an extra secure seal, crimp the edges with the tines of a fork. Finally, brush the tops of the assembled hand pies with the remaining egg wash (this will give them a beautiful golden-brown shine) and use a toothpick or small knife to poke a few small holes in the top of each pie to allow steam to escape during baking.
- Bake to Golden Perfection: Carefully transfer the assembled hand pies to your prepared baking sheet, ensuring they are spaced evenly apart. Bake for about 25-30 minutes, or until the crusts are deeply golden brown and the filling is bubbling gently through the vent holes. The rich golden color indicates a perfectly baked and flaky crust.
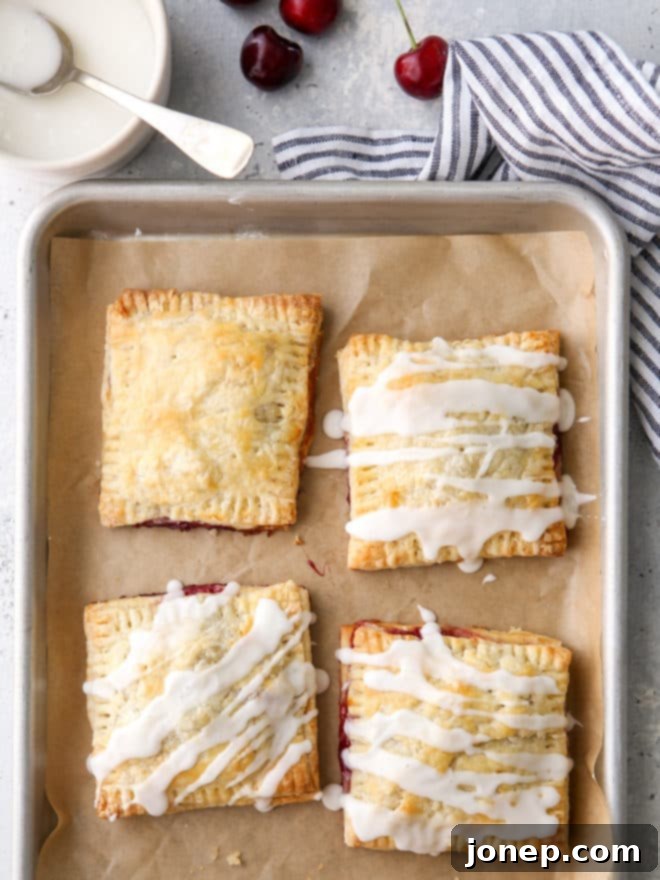
- Drizzle with Almond Icing: While your hand pies are cooling slightly on a wire rack, prepare the irresistible almond icing. In a small bowl, whisk together the powdered sugar, 2-3 tablespoons of milk or heavy cream, and the almond extract. Start with 2 tablespoons of liquid and add more, a tiny bit at a time, until you achieve a thick but pourable glaze consistency. You want it to drizzle elegantly over the pies without running off completely. Once the hand pies have cooled for about 10-15 minutes (they should still be slightly warm but not piping hot), use a spoon to generously drizzle the almond icing over each one. Let the icing set for a few minutes before serving.
And just like that, your delectable Cherry Hand Pies are ready to be devoured! They are truly at their best when fresh and still slightly warm, allowing the buttery crust and warm cherry filling to shine. However, they also keep wonderfully. Store them in an airtight container at room temperature for several days, ready to be enjoyed whenever a craving strikes.
Tips for Hand Pie Perfection
Even though these cherry hand pies are simple to make, a few expert tips can ensure your batch turns out perfectly golden, flaky, and delicious every time:
- Keep Ingredients Cold: This is arguably the most important rule for achieving a super flaky pie crust. Cold butter creates steam pockets during baking, which separate the layers of dough. Cold buttermilk also helps maintain the butter’s low temperature.
- Don’t Overwork the Dough: Overmixing develops gluten, which can lead to a tough, rather than tender, crust. Mix just until the ingredients barely come together. A slightly shaggy dough is better than a smooth, overworked one.
- Adequate Chilling Time: Don’t rush the chilling process! It allows the gluten to relax, making the dough easier to roll without shrinking, and firms up the butter, which is vital for flakiness. Two hours is the minimum, but overnight is even better.
- Adjust Sugar to Cherries: The sweetness of fresh cherries can vary depending on the variety and ripeness. Taste your cherries before mixing the filling and adjust the granulated sugar amount if they are particularly tart or exceptionally sweet.
- Prevent Soggy Bottoms: Ensure your cornstarch is thoroughly mixed with the cherries and sugar. The cornstarch works to thicken the juices, preventing a watery filling from making the bottom crust soggy. The small steam holes poked in the top of the pies also help release excess moisture.
- Even Baking: Bake on the middle rack of your oven for optimal heat circulation. Consider rotating the baking sheet halfway through the baking time to ensure even browning on all sides.
- Cool Before Icing: Drizzling icing on piping hot pies will cause it to melt and run off. Allow them to cool for at least 10-15 minutes so the icing can set beautifully on the warm crust.
- Storage: Store cooled hand pies in an airtight container at room temperature for up to 3-4 days. For longer storage, you can freeze unbaked or baked hand pies in a single layer, then transfer to a freezer-safe bag.
Delightful Variations to Explore
While this classic cherry hand pie recipe is a guaranteed winner, don’t hesitate to get creative and experiment with these delightful variations:
- Fruit Filling Swaps: Not a fan of cherries, or simply want to try something new? This recipe works wonderfully with other fresh fruits! Try sliced apples (tossed with cinnamon and a touch of nutmeg), a mix of your favorite berries (strawberries, blueberries, raspberries), or diced peaches. Remember to adjust the sugar and cornstarch as needed for different fruits, as their moisture and sweetness levels vary.
- Spice it Up: Add a pinch of cinnamon, a hint of nutmeg, or even a tiny amount of ground cardamom to your cherry filling for an extra layer of warmth, aroma, and complexity that perfectly complements the fruit.
- Citrus Zest: A little lemon or orange zest in the cherry filling can brighten the flavors beautifully, adding a zesty counterpoint to the sweetness.
- Nutty Notes: For an added textural contrast and a deeper flavor profile, consider adding a tablespoon of finely chopped almonds, pecans, or walnuts to your cherry filling before assembling the pies.
- Alternative Glazes: If almond extract isn’t your preference, a simple vanilla bean glaze or a vibrant lemon zest glaze (using lemon juice instead of milk for a tangy kick) would also be fantastic finishing touches.
More Fresh Cherry Recipes to Try
If you’ve fallen in love with baking with cherries, you’re in luck! There are so many delightful ways to enjoy this seasonal fruit. Here are a few more recipes to inspire your cherry cravings and extend the summer feeling:
- Sweet Cherry Pie: The quintessential classic dessert reimagined for maximum flavor and an unforgettable taste.
- Ultimate Summer Fruit Cobbler: A warm, comforting, and rustic dessert perfect for any summer gathering, especially when served with a scoop of melting ice cream.
- Fresh Cherry Limeades: A wonderfully refreshing beverage that perfectly captures the sweet-tart essence of summer in a glass.
- Sweet Cherry and Hazelnut Galette: An elegant, free-form, and rustic tart that’s much easier to make than it looks, yet delivers impressive flavor.
Watch the Video: How to Make Cherry Hand Pies
Seeing is believing, especially when it comes to baking! For a comprehensive visual guide to crafting these delicious hand pies, watch our step-by-step video tutorial. It covers everything from preparing the perfect flaky crust, cutting the butter into the flour, assembling the pies, to achieving that beautiful golden-brown bake and drizzling the final icing. This video will give you all the confidence you need to get baking and achieve perfect results every time.
Shop Essential Tools for This Recipe
To make your cherry hand pie baking experience as smooth and enjoyable as possible, here are some recommended tools that will help you achieve perfect, professional-level results every time. These are the items I rely on in my own kitchen:
- Pastry Blender: An indispensable tool for efficiently cutting cold butter into flour. It helps create those distinct butter pieces crucial for a truly flaky crust without overworking the dough.
- Rolling Pin: A good quality, heavy rolling pin makes rolling out dough to an even thickness much easier and more consistent, ensuring uniform pies.
- Baking Sheets: Invest in heavy-duty baking sheets. They ensure even heat distribution, preventing hot spots and promoting a consistently golden-brown crust.
- Parchment Paper: A baker’s best friend! Use it to line your baking sheets for non-stick baking and incredibly easy cleanup.
- Cherry Pitter: If you plan on making cherry recipes often, a cherry pitter is a worthwhile investment. It speeds up the tedious task of pitting fresh cherries, saving you time and effort.
- Mixing Bowls: A set of sturdy mixing bowls in various sizes is essential for preparing the dough, mixing the filling, and whisking the icing.

Cherry Hand Pies
Pin Recipe
Leave a Review
Ingredients
For the Pie Crust:
- 2 ½ cup (300 grams) all-purpose flour
- 1 tablespoon granulated sugar
- 1 teaspoon coarse salt
- 1 cup (226 grams) Challenge Salted Butter , cold and cubed
- ½ cup (113 grams) buttermilk , cold
For the Cherry Filling:
- 12 oz (340 grams) fresh sweet cherries , pitted and halved
- ¼ cup (50 grams) granulated sugar
- 1 tablespoon cornstarch
For the Almond Icing:
- 1 cup (115 grams) powdered sugar
- 2-3 tablespoons milk or heavy cream
- ½ teaspoon almond extract
Instructions
To prepare the pie crust:
-
Combine flour, sugar, and salt in a bowl. Add butter and use a pastry blender to cut butter into dry ingredients until bits of butter are about the size of small peas.
-
Add buttermilk and use a spatula and then your hands to bring the mixture together into a ball. If you need to add more buttermilk, do so a tablespoon at a time. It’s okay it’s a little shaggy, as long as it stays together.
-
Shape into a disk, wrap in plastic, and chill in the fridge for 2 hours.
To assemble Hand Pies:
-
Preheat oven to 400°F and line a sheet pan with parchment paper.
-
On a lightly floured surface, roll out pie crust into a large rectangle about 12 x 15 inches, though you don’t need to be exact. Trim edges so they’re straight and cut dough into 12 rectangles of even size.
-
In a bowl, combine the cherries, sugar, and cornstarch.
-
Place a mound of the cherry filling into the center of 6 rectangles, leaving about a ½-inch border. Brush edges of crust with egg wash and place the remaining 6 rectangles on top. Use your finger to press dough together to seal and then crimp edges with a fork. Brush tops with egg wash and poke a few holes with a toothpick.
-
Place hand pies on prepared sheet pan and bake until crusts are golden brown, about 30 minutes.
-
Let hand pies cool slightly while you prepare the icing.
-
Whisk powdered sugar, milk or heavy cream, and almond extract together. Add only enough milk or cream to make a thick but pourable glaze.
-
Drizzle icing over hand pies. Let set up for a few minutes before serving.
-
Hand pies will keep in an airtight container at room temperature for several days.
Video
Disclosure: This recipe was created in partnership with Challenge Dairy, Inc. Thank you for supporting partnerships with brands I love and believe in, which make Completely Delicious possible. All opinions are always 100% my own. To learn more about Challenge Dairy, you can visit their website here. You can also find them on facebook, instagram, youtube, and pinterest.
