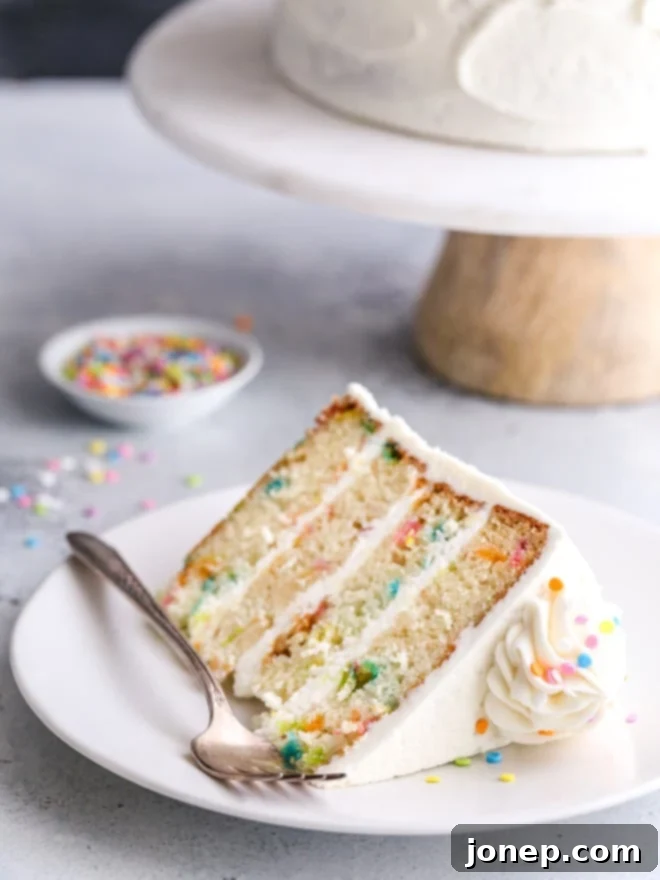
The Ultimate Homemade Funfetti Cake: A Recipe for Joy and Celebration
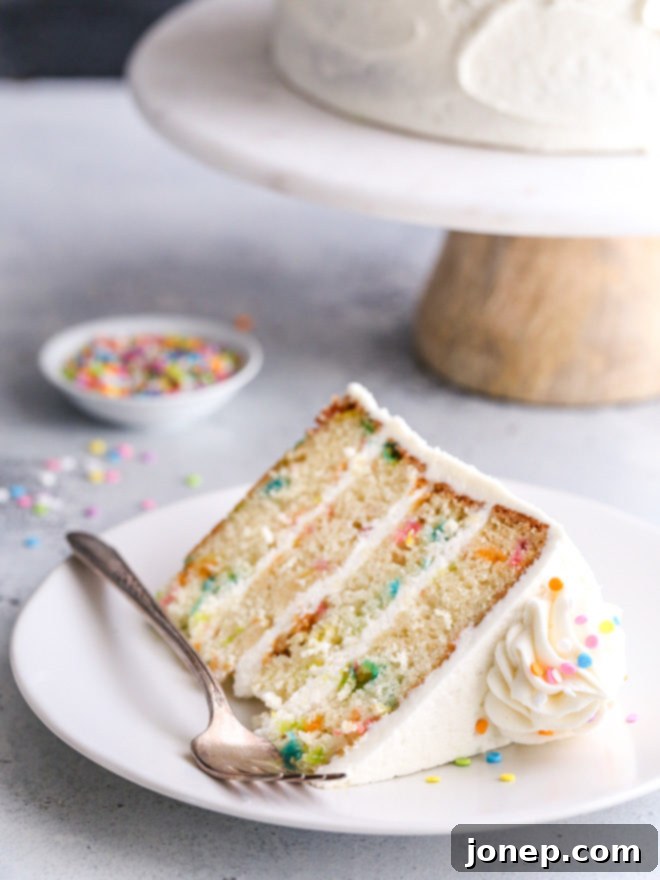
There’s something undeniably magical about a Funfetti cake. It’s more than just a dessert; it’s a celebration in every slice, a burst of color and joy that instantly brings smiles. This particular homemade Funfetti cake recipe takes that magic to a whole new level, featuring light and buttery vanilla cake layers generously studded with vibrant rainbow sprinkles, all enveloped in a cloud of fluffy vanilla buttercream frosting. It’s not just a fun and cheerful dessert; it’s an experience that captures the essence of happiness, perfect for any occasion.
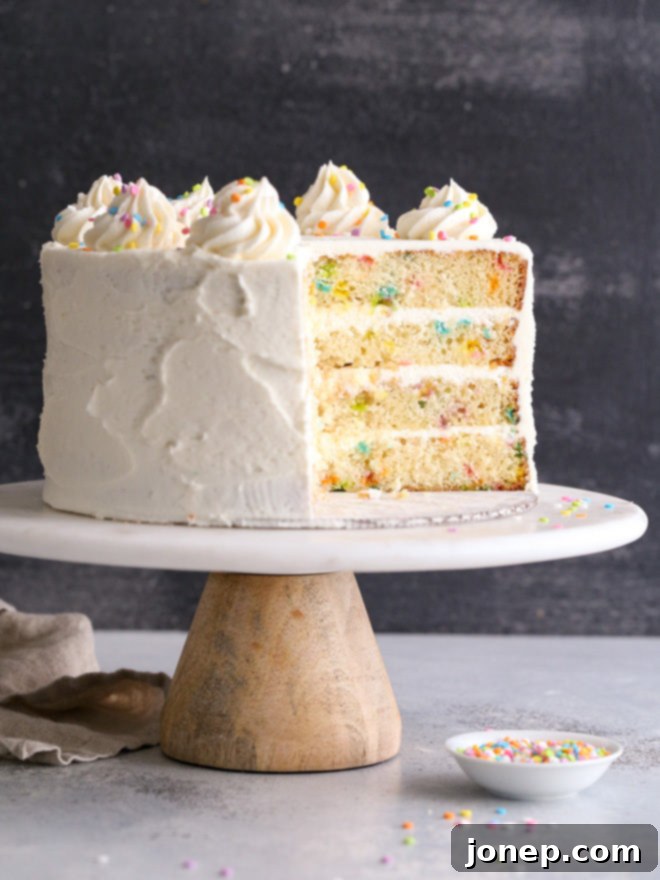
A funfetti cake truly embodies the spirit of fun. How could it not? Each delicious, beautiful, and sprinkle-flecked bite is a delightful surprise, promising nothing but pure joy. While it’s a quintessential birthday cake, its festive nature makes it a fantastic choice for graduations, baby showers, holidays, or simply brightening an ordinary day. This from-scratch recipe ensures a flavor and texture far superior to any box mix, making your celebrations even more special.
Our journey to the perfect Funfetti cake begins with incredibly light and tender cake layers. These layers boast a rich, authentic buttery and vanilla flavor that forms the perfect canvas for the colorful sprinkles. Complementing the cake is my absolute favorite: a luscious, creamy whipped vanilla buttercream. Finally, a generous shower of rainbow sprinkles, both baked into the cake layers and artfully decorating the top, provides that iconic, delightful finish. Get ready to bake a cake that will be remembered long after the last crumb is gone!
What is Funfetti Cake? The Story Behind the Sprinkles
At its heart, a funfetti cake is a vibrant twist on a classic vanilla cake, elevated by the playful addition of colorful sprinkles. Think of it as a vanilla cake that’s always ready for a party! The name “funfetti” itself is a clever portmanteau of “fun” and “confetti,” perfectly describing the festive explosion of color that appears when you slice into it. While traditional vanilla cakes are comforting, funfetti cakes bring an extra layer of excitement and visual appeal, making them incredibly popular for celebrations of all kinds.
You might be tempted by the convenience of a store-bought funfetti cake mix, but trust us when we say that homemade is an entirely different league. This from-scratch funfetti cake recipe is surprisingly straightforward and yields a cake with unparalleled flavor and texture. It truly has just two main components, each contributing to its spectacular result:
- Moist Vanilla Cake Layers Filled with Sprinkles: These are not just any vanilla layers; they are light, tender, and infused with a delightful buttery flavor, with sprinkles baked right in for that iconic confetti look.
- Fluffy Whipped Vanilla Buttercream Frosting: A rich, creamy, and airy frosting that perfectly complements the cake’s sweetness and provides a smooth canvas for even more sprinkles.
Seriously, baking homemade funfetti cake couldn’t be easier, especially with our detailed tips. Whether you’re a seasoned baker or just starting your baking adventure, you’ll find everything you need to create a show-stopping dessert. Keep reading for our best layer cake tips to ensure your funfetti masterpiece is a resounding success!
Why Choose Homemade Funfetti Over a Box Mix?
The allure of a boxed cake mix is understandable – convenience. However, when it comes to a funfetti cake, the difference between homemade and a mix is night and day. A scratch-made funfetti cake offers a depth of flavor, a tender crumb, and a level of freshness that simply cannot be replicated by a box. You control the quality of your ingredients, from the rich butter to the pure vanilla extract, resulting in a superior taste profile. Furthermore, the joy of baking from scratch, knowing you’ve created something truly special for your loved ones, is an invaluable part of the funfetti experience.
Choosing the Right Sprinkles for Your Funfetti Masterpiece
Not all sprinkles are created equal, especially when it comes to baking them into a cake. The wrong type of sprinkle can “bleed” its color into your beautiful vanilla batter, turning your vibrant rainbow cake into a muddy, unappealing mess. To avoid this common pitfall, it’s crucial to select the correct type of sprinkles.
I highly recommend using either jimmies or confetti sprinkles (also sometimes referred to as sequins or quins). Both of these types have been successfully used in this recipe without any color bleeding. Confetti sprinkles are specifically featured in the images throughout this post, showcasing their cheerful appearance within the cake.
Conversely, I strongly advise against using nonpareils. These are the very tiny, round, colorful sprinkles often found on ice cream cones. Their small size and porous nature make them highly susceptible to bleeding into the cake batter, creating undesirable streaks of color. When incorporating any sprinkles into your batter, always fold them in gently and avoid overmixing. This gentle technique helps preserve their vibrant colors and prevents them from dissolving into the batter, ensuring your funfetti cake looks as good as it tastes.
Mastering Your Layer Cake: Essential Tips for Success
Baking a beautiful layer cake might seem intimidating, but with a few key techniques and tips, you’ll be creating stunning funfetti masterpieces in no time. If you’re new to baking layered cakes or just need a refresher, consider checking out my complete guide on how to build a layer cake for a comprehensive overview.
The Power of Cake Flour
This funfetti cake recipe specifically calls for cake flour to achieve its signature light, tender, and airy crumb. Cake flour has a lower protein content than all-purpose flour, which results in less gluten development. Less gluten means a more delicate and melt-in-your-mouth texture, which is exactly what we want for a fluffy funfetti cake. For the best results, do not substitute all-purpose flour. Cake flour is readily available in most grocery stores, or you can even make your own at home with a simple trick.
Room Temperature Ingredients are Key
For the absolute best results in terms of rise and texture, it’s crucial to have your butter, buttermilk, and eggs at room temperature before you begin mixing the cake batter. This isn’t just a suggestion; it’s a fundamental baking principle. Room temperature ingredients emulsify more effectively, meaning they combine smoothly and evenly. This creates a homogeneous batter that traps air more efficiently during mixing, leading to a lighter, more voluminous cake with a finer, more tender crumb.
Selecting and Preparing Your Cake Pans
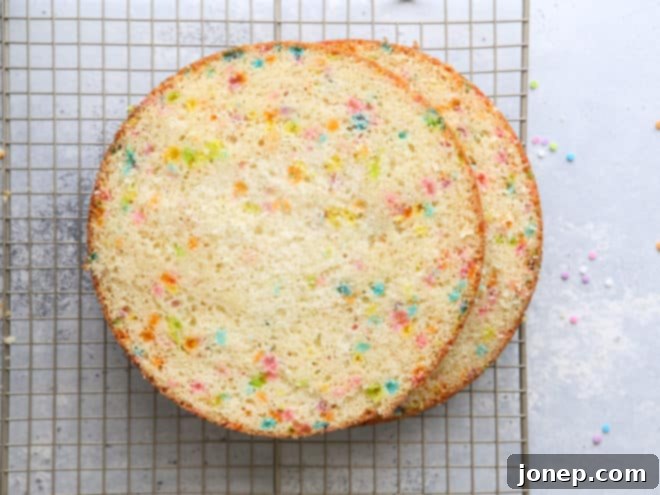
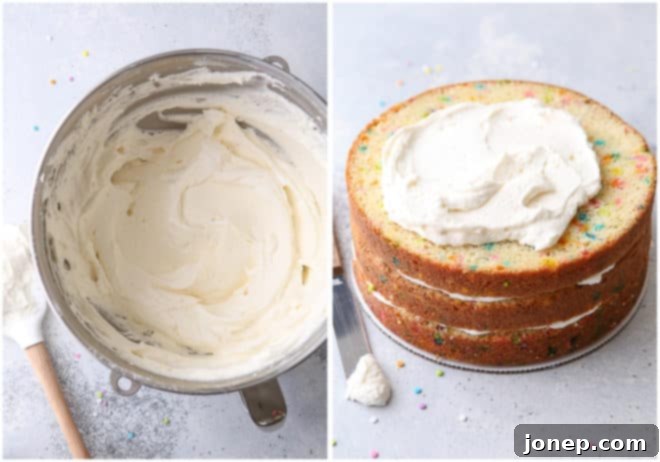
You have flexibility when it comes to your cake pans! You can use either 8-inch or 9-inch cake pans. (These are the pans I have and love.) Remember that 8-inch pans will yield a taller, more dramatic cake, while 9-inch pans will result in a slightly wider and shorter cake, which may require a minute or two less baking time. You can also use more or fewer pans to create a 2, 3, or 4 (or even more!) layered cake. For this specific recipe, I used two 8-inch pans and then split each cake layer in half to create four thinner layers, a technique that adds to the visual appeal. To learn how to split cake layers evenly, check out my easy guide – it’s simpler than you might think!
To prevent your precious cake layers from sticking to the pan, proper pan preparation is essential. See how I prepare my cake pans to ensure they come out clean and intact every single time, ready for assembly.
The Reverse Creaming Method Explained
This funfetti cake recipe utilizes the reverse creaming method, a technique often favored for its ability to produce incredibly light and tender cakes. Unlike the traditional creaming method where butter and sugar are beaten together first, the reverse creaming method begins by beating all the dry ingredients (flour, sugar, leavening agents, salt) together with the butter. This coats the flour particles in fat, which inhibits gluten development, resulting in a cake with a velvety-soft texture. The eggs and liquids are then added at the end. While it might sound different, it’s not any more difficult than using the traditional creaming method, and I absolutely love the light and tender results it yields for these funfetti cake layers.
Perfecting Your Frosting Technique
Once your cake layers are baked and cooled, the fun of frosting begins! If you need a little help frosting your cake like a (semi) pro and achieving those smooth, professional-looking finishes, see my full tutorial. A good crumb coat is often the secret to a beautifully frosted cake, trapping any loose crumbs before the final decorative layer.
Storing and Serving Your Funfetti Masterpiece
After assembling and frosting, I like to store assembled cakes in the fridge. This helps keep them firm, fresh, and perfectly safe from curious hands! The cake will be at its freshest within 2-3 days of assembly, but it can be stored in the refrigerator for up to a week. For the best serving experience, pull the cake out of the fridge and let it rest at room temperature for about 30 minutes before slicing. This allows the cake and frosting to soften slightly, enhancing both flavor and texture for each delicious bite.
The Fluffy Vanilla Buttercream: A Perfect Companion
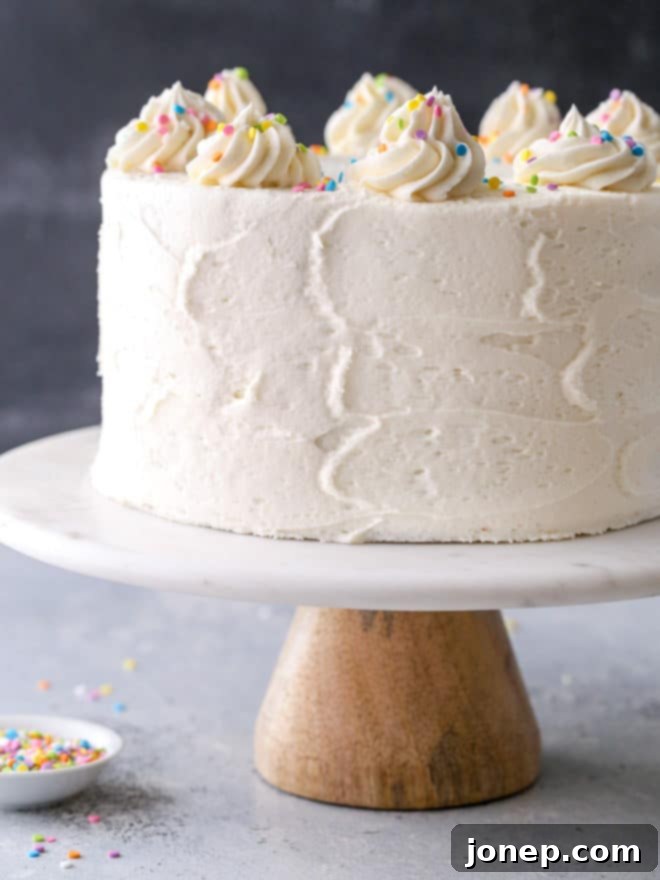
No funfetti cake is complete without an equally delightful frosting, and our fluffy vanilla buttercream is the ideal choice. This frosting is rich, creamy, and boasts a wonderfully light, airy texture that melts in your mouth. Its prominent vanilla flavor perfectly complements the buttery notes of the cake, creating a harmonious balance that is sweet without being overly cloying. The recipe for this buttercream is straightforward, coming together quickly to provide the perfect spreadable consistency for decorating and holding those festive sprinkles. It’s the finishing touch that truly elevates this homemade funfetti cake from great to absolutely unforgettable.
Assembling Your Funfetti Masterpiece
The assembly process is where your funfetti cake truly comes to life. Once your cake layers are completely cooled and, if desired, split into thinner layers, you’ll begin by placing your first layer on a cake stand or serving plate. Spread a generous amount of that fluffy vanilla buttercream evenly over the top. Repeat this process with subsequent layers. After stacking all the layers, apply a thin “crumb coat” of frosting all over the cake – this seals in any loose crumbs and creates a smooth base. Chill briefly, then apply your final, thicker layer of buttercream. Finally, shower your cake with an abundance of rainbow sprinkles for a vibrant, festive finish. For the neatest slices, a quick chill in the fridge for about 20 minutes before serving works wonders!
Beyond Birthdays: Occasions for Your Funfetti Cake
While often associated with birthday celebrations, this funfetti cake is incredibly versatile and can bring joy to a multitude of events. Imagine it as the centerpiece for a baby shower, its playful colors mirroring the excitement of a new arrival. It’s fantastic for graduation parties, office celebrations, or even just a casual weekend gathering where you want to add a touch of whimsy. The simple act of baking and sharing this cheerful dessert can turn any ordinary day into a special occasion, proving that you don’t always need a specific reason to enjoy something so delightful.
More Layer Cakes to Love
If you’ve fallen in love with the process of creating beautiful layer cakes, you’re in for a treat! The world of layered desserts is vast and delicious. Here are some other fantastic layer cake recipes from our collection that you might enjoy baking next:
- Brown Sugar Cinnamon Layer Cake
- Chocolate Sour Cream Cake
- Lemon Blueberry Cake
- White Chocolate Raspberry Layer Cake
Shop Tools for this Recipe
To make your baking experience as smooth as possible, here are some essential tools that will help you create this perfect Funfetti Layer Cake:
Funfetti Layer Cake
Pin Recipe
Leave a Review
Ingredients
For the cake:
- 4 large eggs
- 1 ¼ cup buttermilk (310 ml)
- 2 teaspoons vanilla extract
- ¼ teaspoon almond extract
- 3 cups cake flour , sifted (360 grams)
- 2 cups granulated sugar (400 grams)
- 1 tablespoon baking powder
- 1 teaspoon baking soda
- ½ teaspoon salt
- 1 cup unsalted butter , at room temperature (226 grams)
- 2 large egg whites
- ½ cup sprinkles , see Notes
For the frosting:
- 6 cups powdered sugar , sifted (683 grams)
- 1 ½ cup unsalted butter , at room temperature (3 sticks, 340 grams)
- ⅓ cup heavy whipping cream (80 ml)
- ½ teaspoon salt
- 1 tablespoon vanilla extract
- ½ teaspoon almond extract
- Sprinkles , for decorating
Instructions
To make the cake:
-
Preheat oven to 350°F. Line two or more 8 or 9-inch pans with parchment paper and grease with butter and flour (see Notes).
-
In a small bowl whisk together the eggs, ¼ cup of the buttermilk, the vanilla, and almond extract.
-
In the bowl of a stand mixer fitted with a paddle attachment or in a large bowl with a hand held mixer, combine the cake flour, sugar, baking powder, baking soda, salt, butter, and remaining 1 cup of buttermilk.
-
Beat on low speed until it comes together, then increase speed to high and beat until light and creamy, pausing to scrape down the bowl as needed, about 3-4 minutes.
-
Add the egg mixture in 3 additions, mixing after each.
-
In a separate mixer bowl (alternatively you can transfer batter to another bowl and wash that mixer bowl) with a whisk attachment beat the egg whites to soft peaks.
-
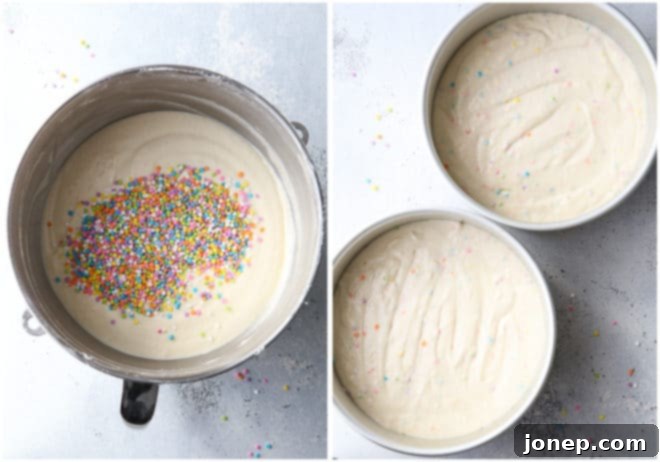
Gently fold in two additions into the cake batter. Add the sprinkles with the second addition.
-
Divide the cake batter evenly into the two pans and bake until the centers of the cakes bounce back when touched or a toothpick inserted into the middle comes out with a few moist crumbs, 25-30 minutes. Time will vary slightly depending on which pan size you use.
-
Let cool 10 minutes in the pan, then transfer to a wire rack to cool completely.
To make the frosting and assemble cake:
-
In the bowl of a stand mixer fitted with a paddle attachment, or in a large bowl with a hand held mixer, combine the powdered sugar, butter, heavy cream, salt, vanilla and almond extracts.
-
Beat on low until the frosting comes together, then increase speed to high and beat until light and creamy, about 3-4 minutes.
-
Place one cake layer on a cake stand or plate. Cover with 1 cup of frosting. Top with other cake layer.
-
Cover completely with frosting and top with sprinkles as desired. For clean slices, let sit in the fridge for 20 minutes before slicing.
Notes
NOTES
- Do not use “nonpareil” sprinkles as they will bleed into your batter. Use “jimmies” or “confetti/sequin” sprinkles.
- For a double layer 8-inch cake you’ll need to use two 8-inch pans that are 4 inches deep. Shallower pans will not be able to hold all of the batter. You can also use 3 (or even 4) pans, washing and reusing pans as necessary, or use 9-inch pans.
- Cake layers can be made ahead and stored in the fridge for up to 3 days and in the freezer for up to 1 month. See my tips for how to store cake layers.
- Here are some tutorials to help you make your cake: How to keep your cake from sticking to the pan, how to bake flat cake layers, how to cut a cake into even layers, and how to build a layer cake.
