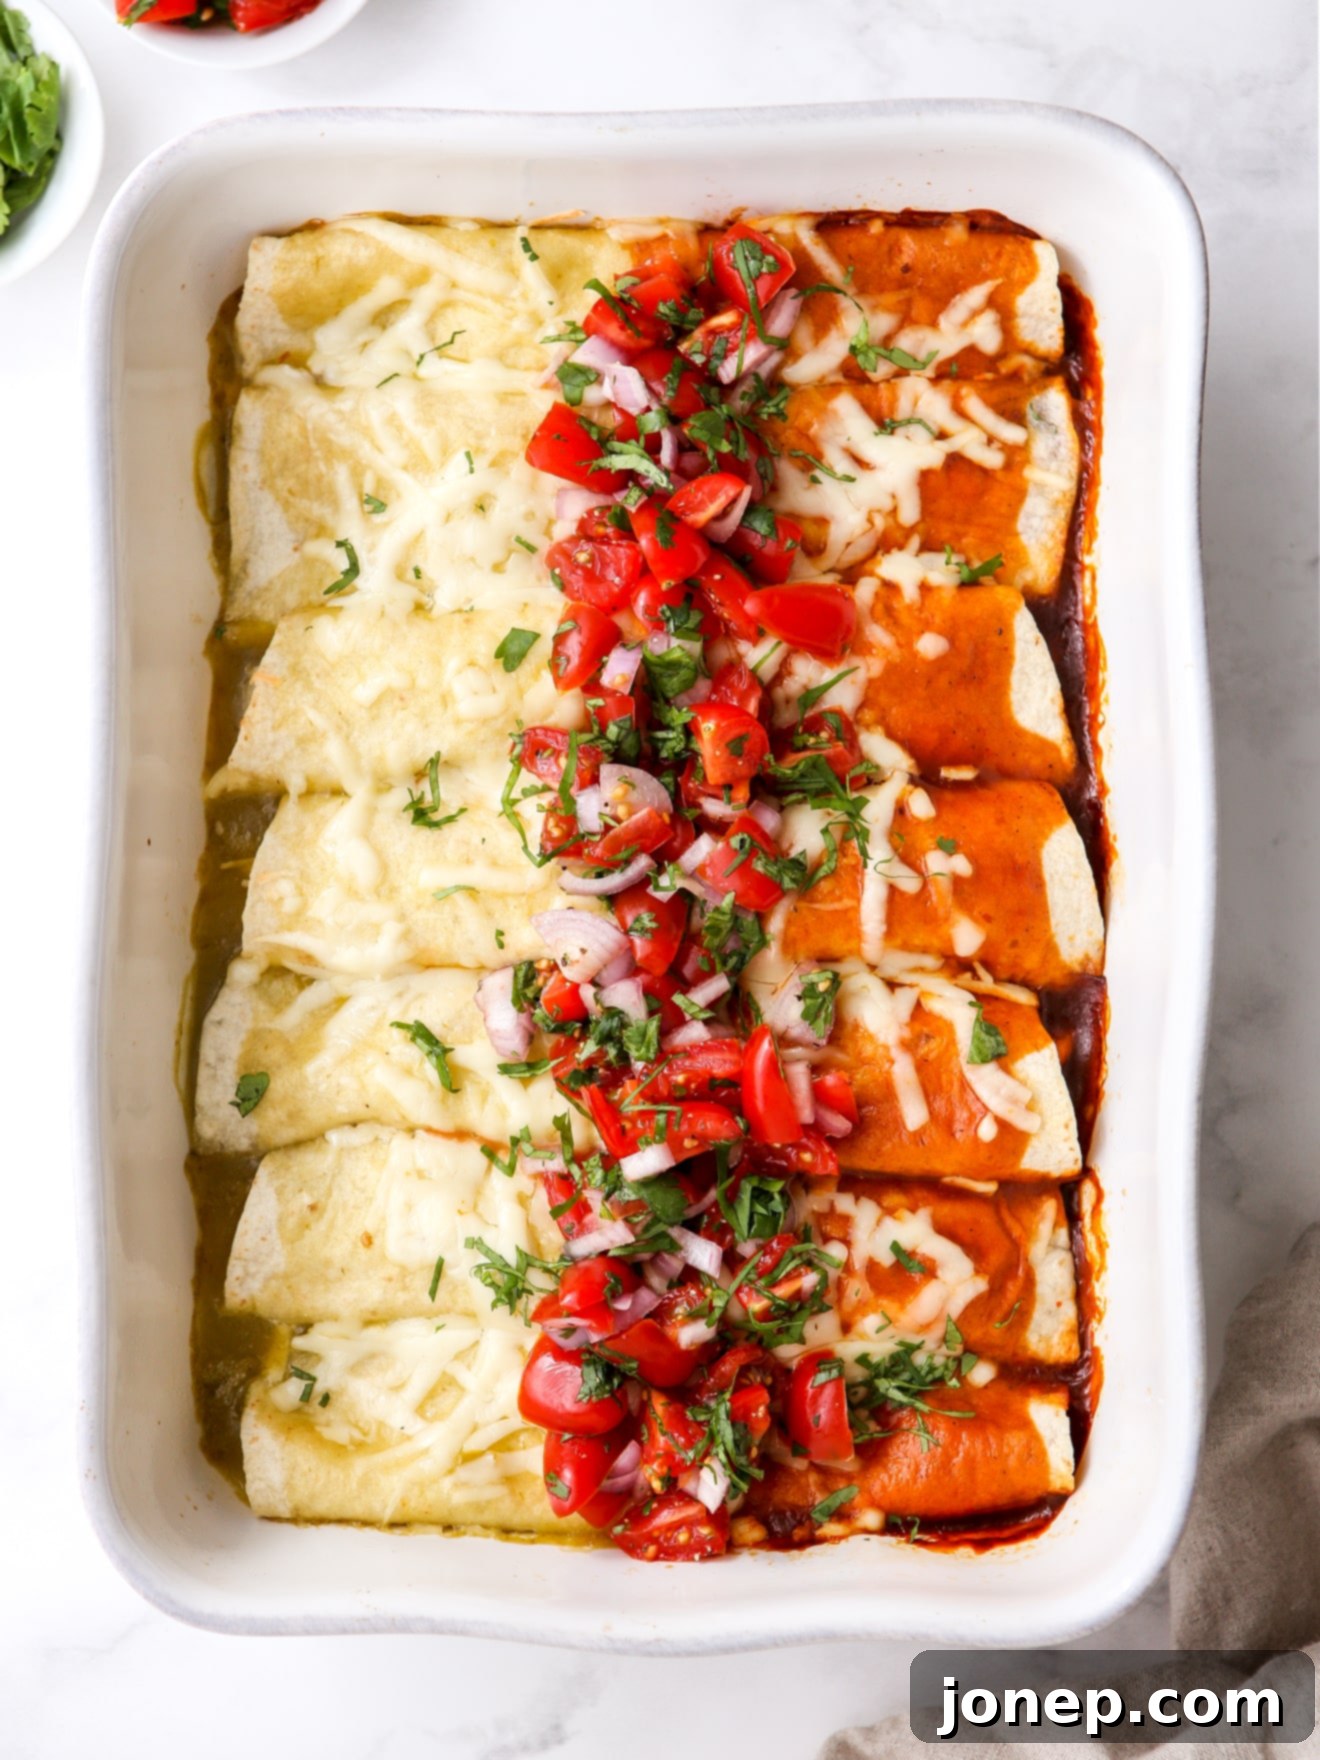
Ultimate Red and Green Chicken Enchiladas: A Festive & Flavorful Recipe
Welcome to a culinary delight that brings the best of both worlds to your dinner table: vibrant Red and Green Chicken Enchiladas. This recipe celebrates the harmonious pairing of two classic enchilada sauces, offering a tantalizing balance of smoky, rich red sauce and bright, zesty green sauce in every bite. It’s a dish that’s not only incredibly delicious but also a feast for the eyes, making it a perfect centerpiece for any gathering.
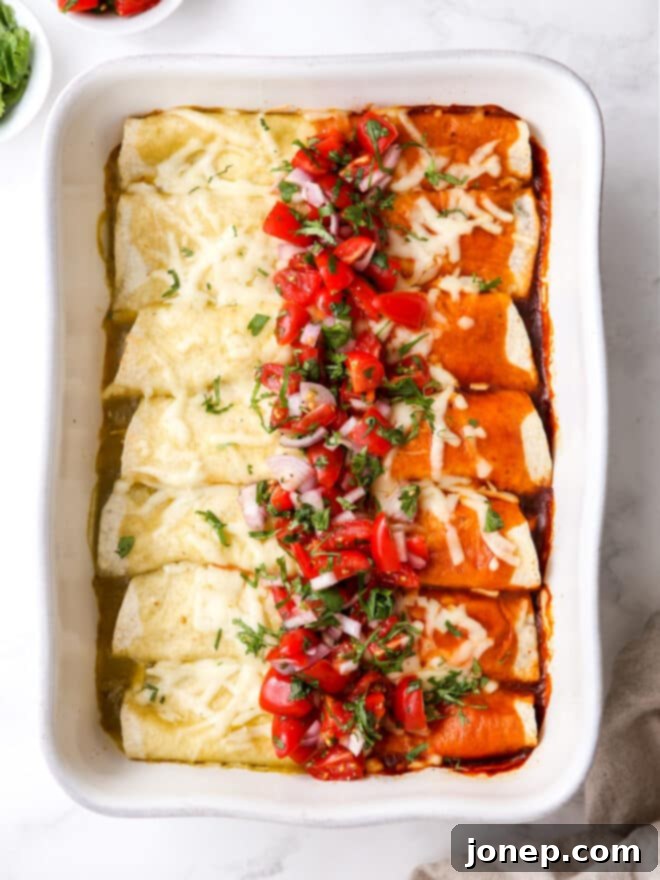
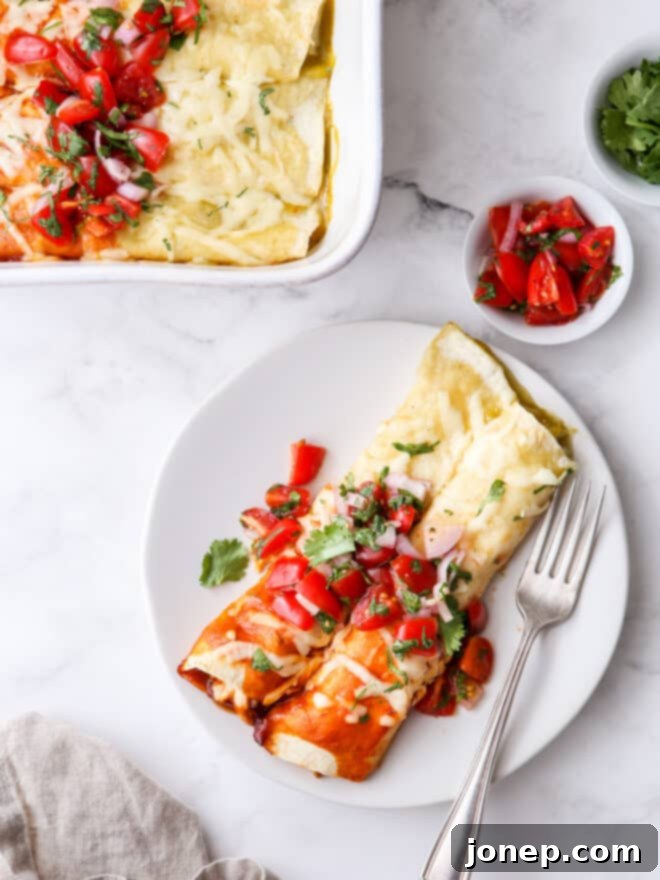
At our house, we affectionately call these “Christmas Enchiladas” because their striking red and green colors evoke the festive spirit of the holiday season. They’ve become a cherished non-traditional main dish during December, bringing joy and a touch of Mexican warmth to our holiday tables. However, their incredible flavor and ease of preparation mean they’re truly fantastic and highly versatile for enjoyment all year round. Whether you’re celebrating a special occasion or simply craving a comforting weeknight meal, these enchiladas are sure to impress.
What sets this dish apart is the thoughtful combination of two distinct flavor profiles. One half of your enchiladas will be bathed in a traditional red enchilada sauce, offering deep, smoky, and earthy notes with a hint of spice. The other half will be covered in a traditional verde or green enchilada sauce, delivering a fresh, tangy, and zesty kick, often with a brighter heat. This dual-sauce approach ensures a dynamic eating experience, allowing you to savor the unique characteristics of each sauce, or even mix them for an intriguing third flavor.
Why You’ll Adore These Chicken Enchiladas
These Red and Green Chicken Enchiladas are more than just a meal; they’re an experience designed for ease, flavor, and sheer enjoyment. Here are several compelling reasons why this recipe is destined to become a household favorite:
- Effortlessly Easy to Prepare: This recipe is designed with convenience in mind, making it accessible even for novice cooks. By leveraging smart shortcuts like pre-cooked rotisserie chicken and store-bought salsa, you can significantly cut down on prep time without compromising on flavor. The result is a delicious homemade meal that comes together quickly, allowing you more time to savor and less time to stress in the kitchen.
- A Flavorful Compromise – Enjoy Both Sauces: No more debates about whether to make red or green enchiladas! This recipe offers the ultimate solution, allowing everyone to indulge in their favorite, or experience both side-by-side. The distinct flavors of the smoky red chili sauce and the vibrant, zesty green tomatillo sauce create a beautiful contrast that satisfies all palates, offering a diverse taste experience within a single dish.
- Rich, Satisfying Filling: Each tortilla is generously filled with tender, succulent shredded chicken breast, perfectly seasoned and mixed with plenty of gooey, melted cheese. This hearty filling is then enveloped in your chosen sauce, creating a comforting and incredibly satisfying texture and taste. The abundance of cheese and flavorful sauce ensures a decadent bite every time.
- Perfect for Meal Prep: Life gets busy, and having delicious meals ready to go is a game-changer. These enchiladas are ideal for preparing ahead of time. You can assemble them entirely, cover, and refrigerate, making dinnertime a breeze on those hectic weeknights. Simply pop them in the oven when you’re ready to eat, and enjoy a freshly baked meal with minimal effort.
Essential Ingredients for Your Enchiladas
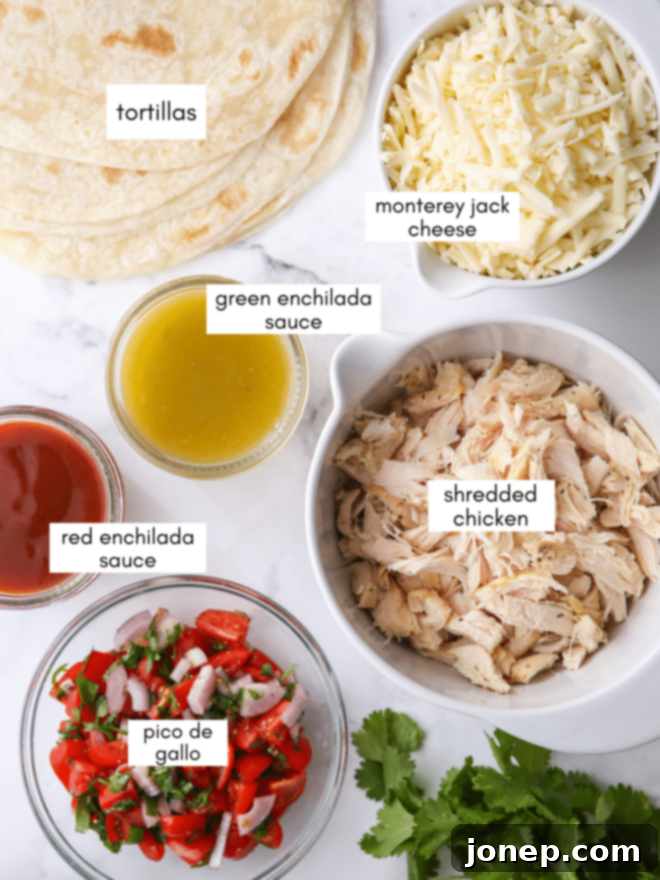
Crafting these delectable Red and Green Chicken Enchiladas requires a selection of fresh, high-quality ingredients. While the full, detailed recipe can be found at the conclusion of this article, here’s an overview of what you’ll need to gather to bring this vibrant dish to life. We’ll explore both the core components for the enchiladas themselves and the simple ingredients for a quick, fresh pico de gallo, which adds an essential burst of flavor and texture.
For the enchiladas, you’ll want two distinct enchilada sauces: one can of green enchilada sauce for its tangy, zesty notes, and one can of red enchilada sauce for its deep, smoky character. The star of the filling is cooked shredded chicken – whether you prepare it yourself or opt for the ultimate convenience of a store-bought rotisserie chicken. Grated Monterey Jack cheese provides that irresistible melt, though a Mexican blend works beautifully too. Don’t forget your tortillas, either flour or corn, to wrap up all that goodness. And finally, a cup of fresh pico de gallo or a good chunky salsa will add a crucial layer of freshness and moisture to the filling.
For the homemade pico de gallo, you’ll need ripe, chopped tomatoes, finely diced shallot or a quarter of an onion, fresh chopped cilantro, the juice of half a lime for brightness, and salt and pepper to taste. This simple salsa elevates the entire dish with its vibrant, garden-fresh flavors.
Crafting Your Red & Green Chicken Enchiladas: A Step-by-Step Guide
Creating these vibrant enchiladas is a straightforward process, breaking down into a few simple steps. The beauty of this recipe lies in its adaptability, allowing you to choose between homemade components for a touch of artisanal flair or store-bought shortcuts for ultimate convenience.
- Prepare Your Ingredients for Efficiency: Before you begin assembling, it’s crucial to have all your components ready. If you’re opting for homemade, take the time to prepare your shredded chicken (a great tip is to use leftover chicken or boil/bake chicken breasts specifically for this purpose) and fresh pico de gallo (or simply open a jar of chunky salsa for a quick alternative). Don’t forget to grate your Monterey Jack cheese; pre-shredded cheese is an option, but freshly grated melts more smoothly and offers a richer flavor. This mise en place ensures a seamless and enjoyable assembly process.
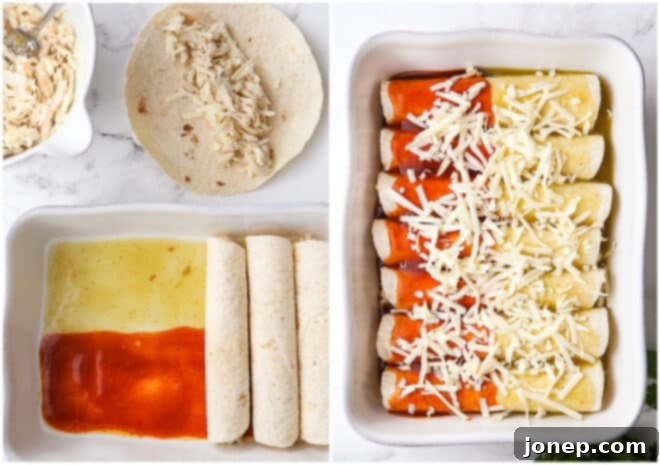
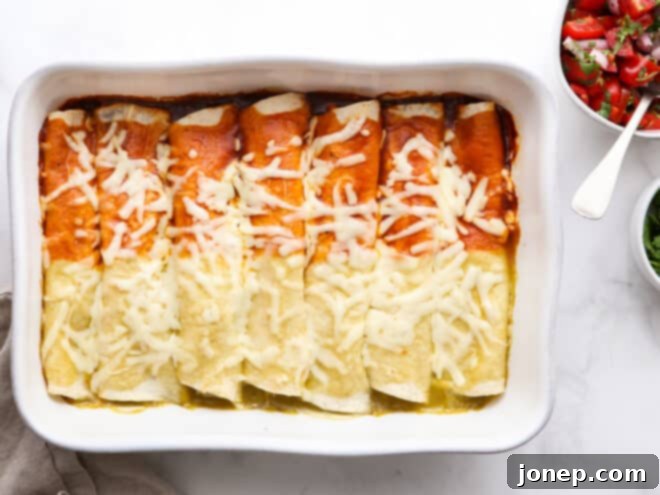
- Master the Art of Enchilada Assembly: In a mixing bowl, combine your tender shredded chicken, two-thirds of the grated cheese, and a small amount (about a quarter cup) of either the red or green enchilada sauce. This step helps bind the filling and infuse it with initial flavor. Take your tortillas – if using corn, warming them briefly in the microwave with a damp paper towel can prevent tearing – and fill each with a generous spoonful of the chicken mixture. Roll them snugly and place them seam-side down in your prepared baking dish. Once all enchiladas are arranged, comes the visually striking part: carefully cover one half of the enchiladas with the vibrant green sauce and the other half with the rich red sauce, creating a distinct color divide. Finally, sprinkle the remaining cheese evenly over the top, preparing for that golden, bubbly finish.
- Bake to Golden Perfection: Cover your baking dish with aluminum foil. This helps to steam the enchiladas, ensuring the tortillas soften and the filling heats through evenly without drying out. Bake in a preheated oven at 350°F (175°C) until the sauces are bubbly and the cheese is thoroughly melted, typically around 30 minutes. For an extra touch of golden-brown deliciousness, you can remove the foil for the last 5-10 minutes of baking.
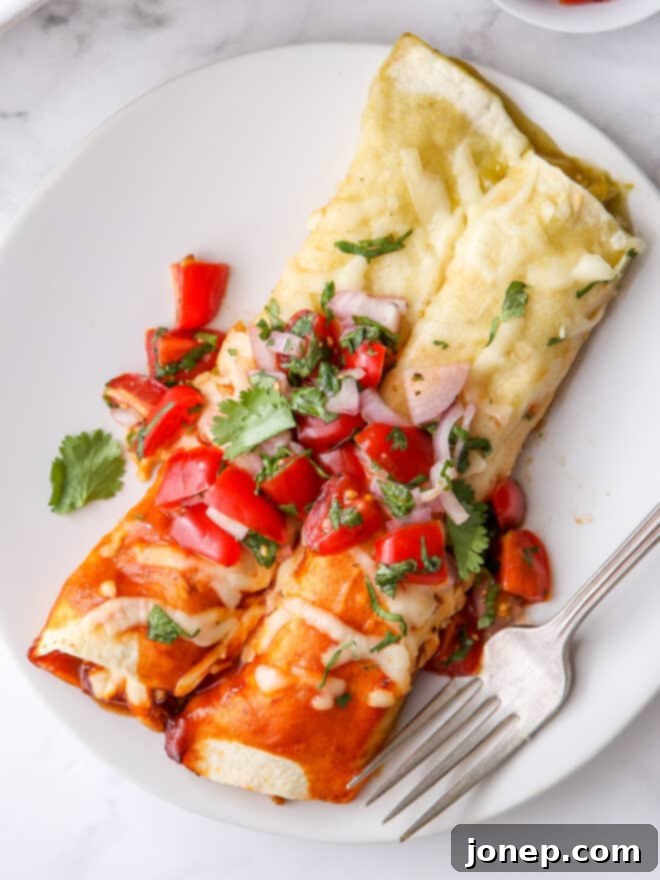
- Rest and Relish Your Creation: Once baked, resist the urge to dive in immediately! Allowing the enchiladas to rest for a few minutes outside the oven helps the sauces and cheese set, making them easier to serve without falling apart. Then, it’s time to customize your serving. Top with a dollop of cool sour cream, creamy avocado slices, a sprinkle of fresh cilantro, or more zesty salsa. Serve them alongside your favorite Mexican sides, such as rice and beans, for a complete and utterly satisfying meal.
Effortless Meal Prep: Making Enchiladas Ahead of Time
One of the many charms of enchiladas is their incredible make-ahead potential, transforming them into the ultimate convenient meal. If you’re planning a busy week, hosting a dinner party, or simply want to minimize cooking on a particular day, preparing these red and green chicken enchiladas in advance is a brilliant strategy. They are a freezer-friendly and refrigerator-friendly dish that tastes just as good, if not better, after a little resting period.
To make these enchiladas ahead, simply follow the recipe instructions for assembling them as described above, right up until the point of baking. Once they are neatly arranged in your baking dish, with the dual sauces and cheese on top, cover the dish tightly. You can use plastic wrap, ensuring it’s sealed completely to prevent air exposure, and then add a layer of aluminum foil for extra protection. Store the covered dish in your refrigerator for up to 24 hours. When you’re ready to enjoy, just remove the plastic wrap (if used), keep the foil on, and pop the dish directly into a preheated 350°F (175°C) oven, adding about 10-15 minutes to the initial baking time to account for the chilled temperature.
For longer storage, these enchiladas also freeze beautifully. Assemble them in a freezer-safe baking dish, cover tightly with several layers of plastic wrap and foil, and freeze for up to 2-3 months. When ready to bake from frozen, remove the plastic wrap and cover with foil. Bake at 350°F (175°C) for 60-75 minutes, then remove the foil for the last 10-15 minutes to brown the cheese. This make-ahead capability ensures a delicious, comforting meal is always within reach, offering both convenience and a homemade touch.
Expert Tips for Perfect Red and Green Enchiladas
While this recipe is designed for ease, a few expert tips can elevate your red and green chicken enchiladas from great to truly exceptional. These insights will help you customize the dish, enhance flavors, and troubleshoot common challenges, ensuring a perfect batch every time.
- Customize Your Sauce Ratio: While the charm of this recipe lies in its “half and half” red and green presentation, don’t hesitate to customize! This same foundational recipe can easily be adapted to make a full pan of all-red or all-green enchiladas if you have a strong preference or are catering to specific tastes. Simply use two cans of your preferred sauce instead of one of each.
- Choose Your Favorite Store-Bought Enchilada Sauces Wisely: The quality of your enchilada sauce significantly impacts the final flavor. While making sauce from scratch is an option, many excellent store-bought brands offer convenience without sacrificing taste. I’ve found great success with brands like Frontera and La Victoria, which provide authentic, well-balanced flavors. Experiment with different brands to discover your personal favorite, paying attention to their spice level and ingredient quality.
- Select the Right Tortillas for Easy Rolling: The size and type of tortilla can make a big difference in how easily your enchiladas assemble and fit into the baking dish. I’ve found that 8-inch tortillas are ideally sized for enchiladas, often labeled as “taco” size in stores. They provide enough surface area for a generous filling without being too bulky to roll or fit snugly in a standard 9×13-inch baking dish.
- Corn vs. Flour Tortillas: You have the flexibility to use either corn or flour tortillas for this recipe.
- Flour Tortillas: These are generally softer and more pliable, making them very easy to roll without breaking. They absorb sauce wonderfully and create a hearty, comforting texture.
- Corn Tortillas: For a more traditional Mexican flavor, corn tortillas are excellent. However, they can be prone to tearing when cold. To prevent this, always heat them up before filling and rolling. A simple method is to stack them between damp paper towels and microwave for 30 seconds to 1 minute, until they are soft and pliable. Another fantastic method (as linked in the original content: this video) involves quickly dipping them in warm oil, which not only softens them but also adds a layer of flavor and helps prevent sogginess.
- Cheese Choices for Optimal Melt: Monterey Jack cheese is a fantastic choice for these enchiladas due to its excellent melting properties and mild, creamy flavor that complements the sauces beautifully. However, don’t limit yourself! A pre-shredded Mexican blend cheese is another convenient and delicious option, often combining Monterey Jack with cheddar, asadero, or Oaxaca cheeses for a more complex cheesy profile. For those who enjoy a sharper taste, a touch of aged cheddar or cotija cheese sprinkled on top could add an interesting dimension.
- Get Creative with Your Fillings: While shredded chicken is a classic and delicious choice, this recipe is highly adaptable to other fillings. Feel free to experiment with shredded pork (carnitas would be amazing!), tender shredded beef, or even vegetarian options. Roasted vegetables like bell peppers, zucchini, and corn, combined with black beans and spices, make for a hearty and flavorful meatless alternative. Just ensure your chosen filling is cooked and seasoned well before assembling.
- Reheating for Continued Enjoyment: These enchiladas are truly best served fresh, right out of the oven. However, leftovers are incredibly delicious and reheat wonderfully for a few days.
- Reheating the Entire Pan: If you have a large portion left, cover the baking dish tightly with aluminum foil and heat in a 350°F (175°C) oven for about 20 minutes, or until heated through and bubbly.
- Reheating Individual Servings: For a quick single serving, place an enchilada or two on a microwave-safe plate, cover with a damp paper towel (to prevent drying), and microwave for 1-2 minutes, or until hot. You can also reheat them in a toaster oven for crispier edges.
- Serving Suggestions for a Festive Holiday Dinner: If you’re planning to feature these vibrant red and green enchiladas as a festive holiday meal, consider pairing them with complementary sides and drinks to create a complete and memorable feast. I usually serve them alongside fluffy cilantro-lime rice and savory refried or black beans. A fresh, colorful Mexican elote corn salad ( Esquites) adds a bright, tangy crunch. To complete the holiday theme, pomegranate or cranberry margaritas make for perfectly festive and delicious beverage pairings, enhancing the red and green aesthetic and celebratory mood.
Explore More Delicious Enchilada Recipes
If you’ve fallen in love with the comforting and versatile world of enchiladas, there’s a whole array of incredible variations to explore! From creamy and rich to vegetarian and vibrant, here are a few other enchilada recipes to tantalize your taste buds and expand your culinary repertoire:
- Sour Cream Chicken Enchiladas: A creamy, tangy twist on the classic, these enchiladas are incredibly rich and satisfying, perfect for those who love a milder, creamier sauce.
- Butternut Squash, Mushroom and Poblano Enchiladas: A delightful vegetarian option, these enchiladas are packed with earthy flavors and a hint of smoky heat from the poblano peppers, making them surprisingly hearty and flavorful.
- Chicken Fajita Enchiladas: Experience the sizzling flavors of chicken fajitas wrapped in a comforting enchilada form. This recipe combines tender chicken and vibrant peppers with enchilada sauce for a truly unique and delicious meal.
Shop Essential Tools for This Recipe
To make your enchilada-making experience as smooth and enjoyable as possible, having the right kitchen tools can make a significant difference. From preparing your ingredients to baking and serving, these recommended items will help you achieve perfect results every time.
Whether you’re looking for a sturdy baking dish, a reliable cheese grater, or practical serving utensils, investing in quality kitchenware will enhance your cooking process and the overall enjoyment of your meals.
Red and Green Chicken Enchiladas
Pin Recipe
Leave a Review
Ingredients
Enchiladas
- 10 oz can green enchilada sauce , divided
- 10 oz can red enchilada sauce , divided
- 2 cups cooked shredded chicken
- 8 oz Monterey jack cheese , grated and divided
- 8 flour or corn tortillas
- 1 cup pico de gallo or chunky salsa , recipe below or use store-bought
- Optional toppings: sour cream, avocado, cilantro or more salsa
Quick pico de gallo
- 1 cup chopped tomatoes
- 1 shallot or ¼ onion , finely diced
- ½-1 tablespoon chopped cilantro , per your preference
- Juice of ½ lime
- Salt and pepper , to taste
Instructions
-
Preheat oven to 350°F. Grease a 9×13-inch baking dish with cooking spray. Spread ¼ cup of the green enchilada sauce on half of dish lengthwise. Spread ¼ cup of the red enchilada sauce on the other half.
-
In a bowl combine the chicken, ⅔ of the cheese and ¼ cup of either the green OR red enchilada sauce (your choice!).
-
Fill tortillas with a generous spoonful of the chicken mixture, then roll up and place seam side-down in the baking dish.
-
Spoon remaining green sauce over half of the enchiladas lengthwise (match the sauce on the bottom of the dish) and spoon remaining red sauce over the other half, making sure to keep the two separate. (Note: you will have more of one enchilada sauce than the other, depending on which you added to the chicken filling. Add equal amounts of sauce to the top of the enchiladas and discard whatever is leftover.)
-
Run a knife or spatula down in between each enchilada, separating them so they don’t stick together after baking (Do all of the green side and then do all of the red side to keep colors separate). Top enchiladas with remaining cheese.
-
Cover with foil and bake until bubbly, about 30 minutes, taking off the foil for the last 5-10 minutes of baking to brown the enchiladas just a bit.
-
Let enchiladas stand for at least 5-10 minutes, then top with pico de gallo or chunky salsa down the middle and serve. Add any additional toppings as desired.
To make the pico de gallo:
-
Combine all ingredients in bowl. Add cilantro, salt and pepper to taste. Pico de gallo can be made in advance and stored in the fridge.
