The Ultimate Homemade Yellow Cake with Decadent Chocolate Frosting Recipe
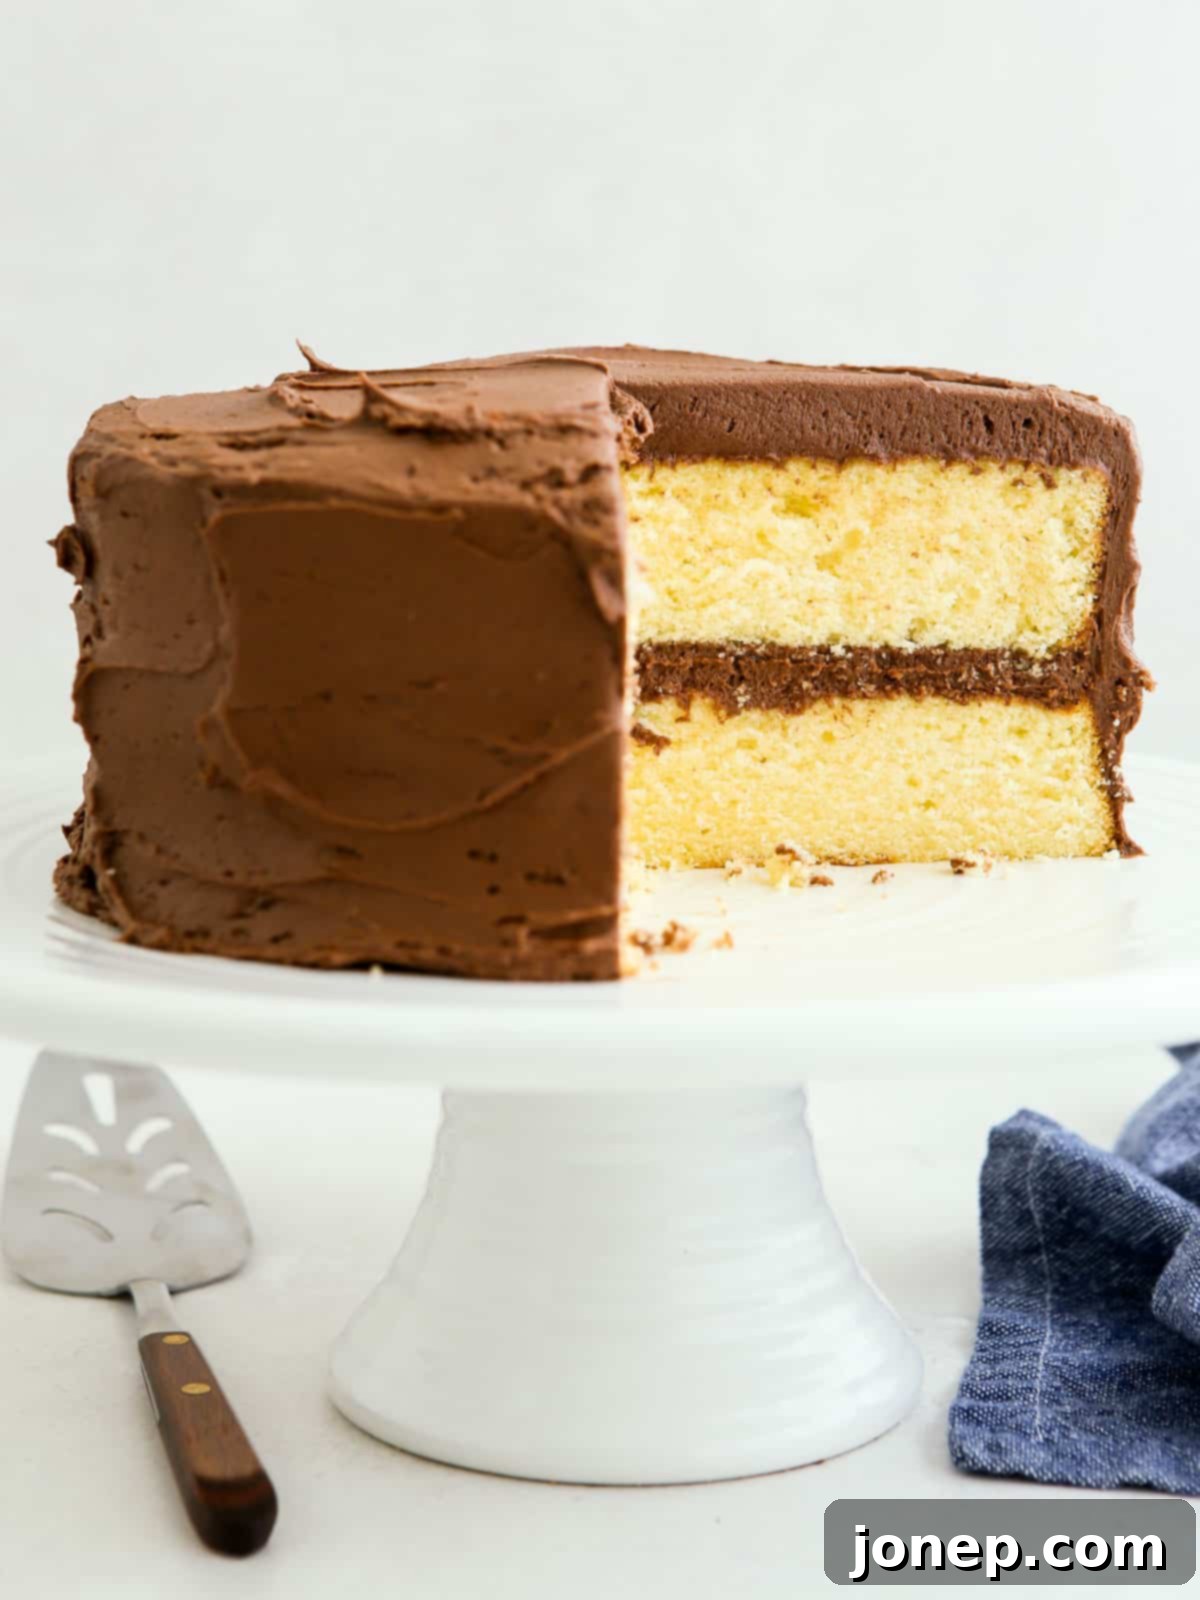
Few desserts evoke such a powerful sense of nostalgia and pure joy as a classic yellow cake generously slathered with rich chocolate frosting. This timeless confection isn’t just a dessert; it’s a centerpiece for birthdays, a comforting treat for family gatherings, and a guaranteed crowd-pleaser that embodies celebration. Forget dry, bland cakes – this incredible homemade recipe has been meticulously developed and perfected over many years to deliver an unbelievably soft, moist, and flavorful experience that will become your go-to for all special occasions.
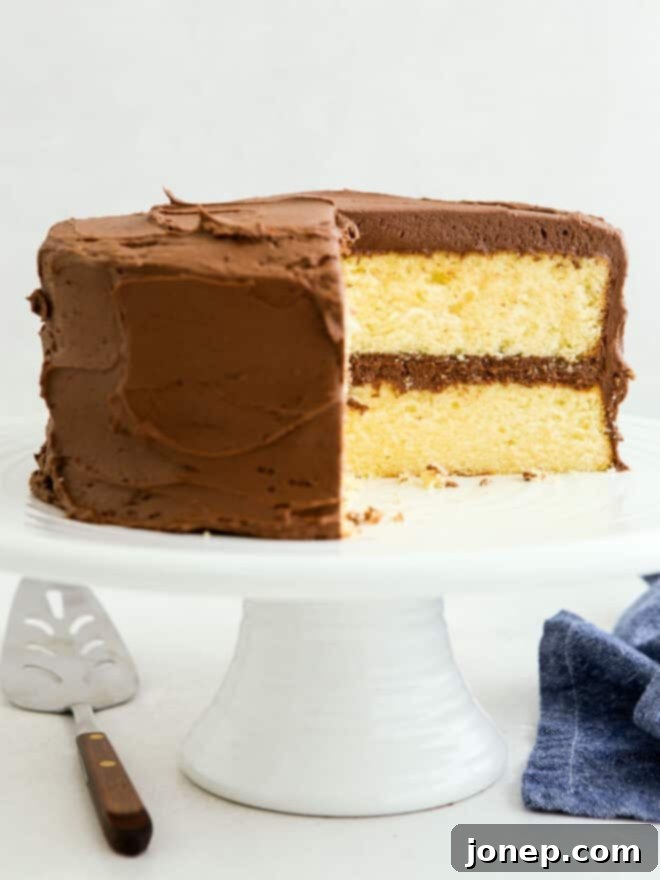
My journey to perfecting this yellow cake recipe spans over a decade, almost as long as this website has existed! I first shared a version of homemade yellow cake with chocolate frosting when my oldest son celebrated his first birthday back in 2013 (see the cherished photos here!). While that recipe held a special place in my heart, I knew there was potential to elevate it further, to make it truly exceptional and foolproof.
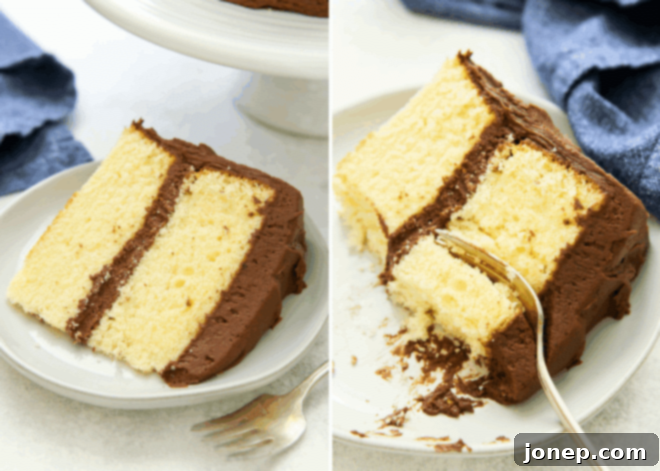
Crafting the perfect homemade vanilla or yellow cake is famously challenging. It often falls prey to being too dry, disappointingly bland, or both. Driven by a quest for perfection, I embarked on an extensive baking marathon, testing more than a dozen different iterations over the past few years. Each trial brought me closer, refining techniques and ingredient ratios, until finally, I achieved what I proudly declare to be a masterpiece. This is, without a doubt, the BEST yellow cake recipe I have ever created or tasted. Its texture is sublime – wonderfully tender, unbelievably moist, and boasts an open, airy crumb – and its buttery vanilla flavor is simply divine. You’re going to fall in love with it, just like I have!
Continue reading to unlock the secrets behind creating the most perfect yellow vanilla cake, crowned with the creamiest, most decadent chocolate buttercream frosting imaginable. This versatile cake can be dressed up for an elegant affair or kept simple for a cozy family dessert, making it an ideal choice for any celebration, especially those cherished birthday moments!
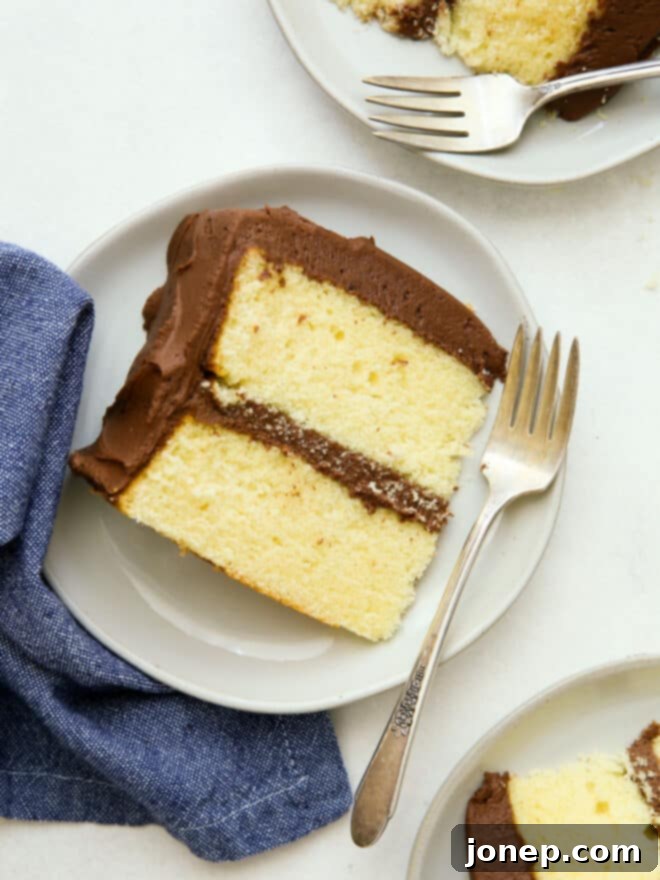
Table of Contents
- Why you’ll love this yellow cake recipe
- Ingredients you’ll need
- Step by step instructions
- Tips for baking and assembling a perfect cake
- Make-ahead options
- Get the recipe
Why You’ll Fall in Love with This Yellow Cake Recipe
Beyond its undeniable charm, this particular yellow cake recipe stands out for several compelling reasons:
- Unrivaled Softness and Moisture: This cake is incredibly soft, light, and wonderfully moist, resisting the common pitfall of dryness that often plagues homemade yellow cakes. Each bite melts in your mouth, leaving a tender crumb.
- Rich Buttery Vanilla Flavor: It boasts a deep, authentic buttery vanilla flavor that tastes genuinely homemade. We achieve this by thoughtfully combining key ingredients and using the right techniques to highlight these classic notes.
- Completely Homemade, Surprisingly Easy: While it delivers a gourmet homemade taste and texture, this recipe is designed to be accessible. No box mix shortcuts here, yet it’s straightforward enough for even novice bakers to achieve stunning results.
- Perfect Pairing: While delicious on its own, this yellow cake is truly elevated when paired with a classic frosting. It complements virtually any topping, but it finds its soulmate in my famous, rich chocolate buttercream, creating a flavor combination that is pure bliss.
- Versatile for Any Occasion: Whether it’s a grand birthday celebration, a casual dessert for Sunday dinner, or an elegant dinner party, this classic yellow cake adapts beautifully. Its inviting golden hue and comforting flavor make it universally appealing.
So, what’s the secret to achieving both fantastic flavor and an impeccably moist texture in a yellow cake? The magic lies in using both butter and oil. Butter contributes an unparalleled richness and depth of flavor that oil alone cannot provide. However, butter can sometimes lead to a slightly drier cake due to its lower fat content compared to oil. By incorporating a small amount of neutral-flavored oil, we ensure the cake layers remain incredibly moist and tender, even days after baking. This clever combination gives you the best of both worlds: robust flavor from butter and irresistible moisture from oil. But that’s not all – a few other carefully chosen ingredients and smart baking tricks are essential to making this the absolute BEST yellow cake. Keep reading to unveil all the details!
Essential Ingredients for Your Perfect Yellow Cake and Chocolate Frosting
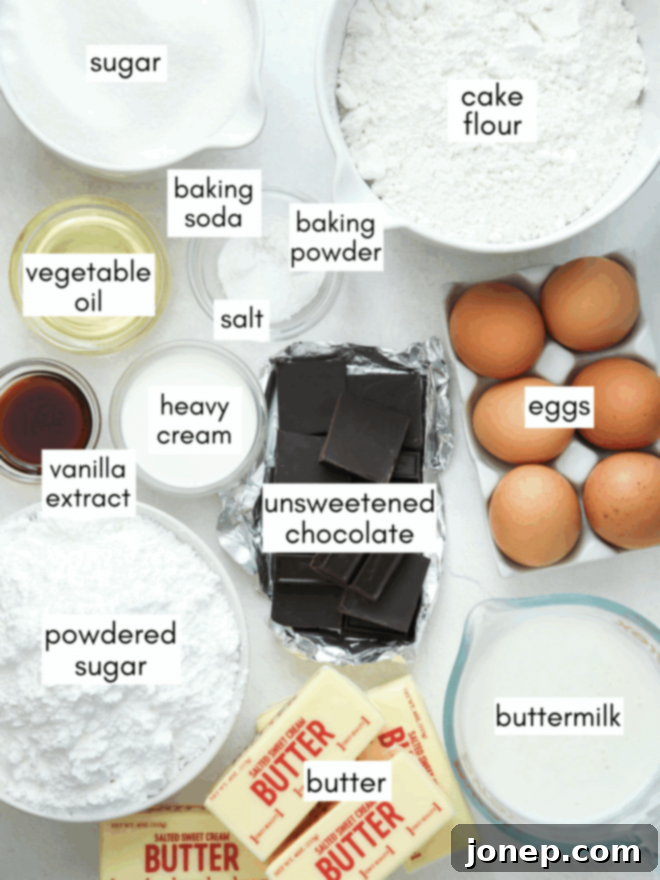
Each ingredient in this recipe plays a crucial role in achieving the optimal flavor and texture. Here’s a breakdown of what you’ll need and why:
- Cake Flour: This is non-negotiable for the best, most tender cake texture. Cake flour has a lower protein content than all-purpose flour, which results in a finer, softer crumb. It’s readily available in most grocery stores and truly makes a difference.
- Granulated Sugar: Provides sweetness and helps keep the cake moist by attracting and holding onto water.
- Baking Powder & Baking Soda: Our leavening agents! Baking powder provides initial lift, while baking soda reacts with the acidic buttermilk to create more air bubbles, ensuring a light and fluffy cake.
- Salt: A crucial flavor enhancer. It balances the sweetness of the cake and frosting, making the other flavors truly shine. We use it in both the cake and the frosting.
- Salted Butter: Starting with good quality salted butter significantly boosts the flavor of your cake. For the frosting, using salted butter also helps cut through the sweetness, creating a more balanced and addictive taste. Ensure it’s softened to room temperature for proper creaming.
- Vegetable Oil: Just a touch of a neutral-flavored oil (like canola or grapeseed oil) is key for extra moisture. It prevents the cake from drying out, even if slightly overbaked.
- Whole Eggs & Egg Yolks: This combination is one of the secrets to the cake’s richness, color, and depth of flavor. Whole eggs provide structure and moisture, while the extra egg yolks contribute a beautiful golden hue and an intensely custardy, tender crumb. Ensure they are at room temperature.
- Buttermilk: Beyond adding a subtle tang that complements the vanilla, buttermilk is vital for tenderizing the cake. Its acidity reacts with the baking soda, creating a more tender and moist crumb. Make sure it’s at room temperature.
- Vanilla Extract: Use pure vanilla extract for the best, most authentic vanilla flavor. It’s the soul of this yellow cake!
- Unsweetened Chocolate: For the frosting, unsweetened chocolate is preferred as it allows you to control the sweetness and achieve a deep, rich chocolate flavor without being cloyingly sweet. However, semi-sweet chocolate can be used if that’s all you have on hand – just be mindful of the overall sweetness.
- Powdered Sugar: The base for our smooth, creamy chocolate buttercream. Sifting it can prevent lumps.
- Heavy Cream (or Half & Half): Adds richness and helps create the perfect fluffy consistency for the buttercream frosting.
Step-by-Step Instructions: Baking and Frosting Your Masterpiece
Follow these detailed steps carefully to ensure a perfect yellow cake with luscious chocolate frosting every time. Precision is key, but don’t be intimidated – the process is quite straightforward!
- Prepare Your Cake Batter Using the Reverse Creaming Method:
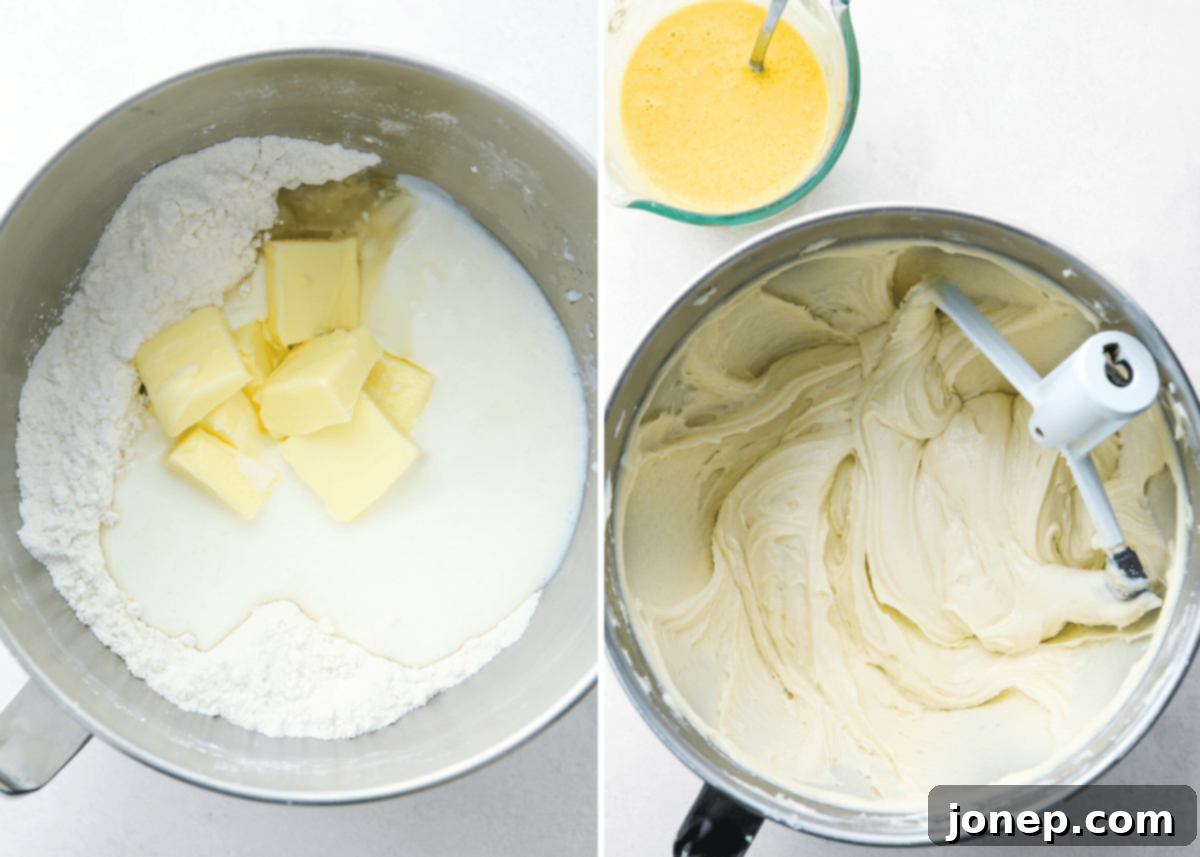
Preheat your oven to 350°F (175°C). Grease two 8-inch or 9-inch round cake pans with nonstick baking spray (one that contains flour, like Baker’s Joy, is excellent) or butter and flour, then line the bottoms with parchment paper circles. This ensures your cakes will release perfectly. In the bowl of a stand mixer fitted with a paddle attachment, combine all your dry ingredients: cake flour, granulated sugar, baking powder, salt, and baking soda. Add the softened butter (cut into cubes for easier mixing), vegetable oil, and 1 cup of the room temperature buttermilk. Mix on low speed until the dry ingredients are just moistened. Increase the speed to medium-high and beat for about 3-4 minutes until the mixture is light, fluffy, and creamy. This reverse creaming method, where fat is mixed with flour first, coats the flour particles and helps prevent gluten development, resulting in a supremely tender cake. Remember to stop and scrape down the sides and bottom of the bowl at least once to ensure everything is evenly combined.

In a separate bowl or liquid measuring cup, whisk together the room temperature whole eggs, egg yolks, the remaining ¼ cup of buttermilk, and the vanilla extract until well combined. With the mixer on low speed, gradually add the egg mixture to the butter-flour mixture in three additions, mixing only until just incorporated after each addition. Be careful not to overmix, as this can develop too much gluten and make the cake tough. Scrape the bowl down after each addition to ensure a smooth, uniform batter.
- Bake Your Moist Cake Layers:
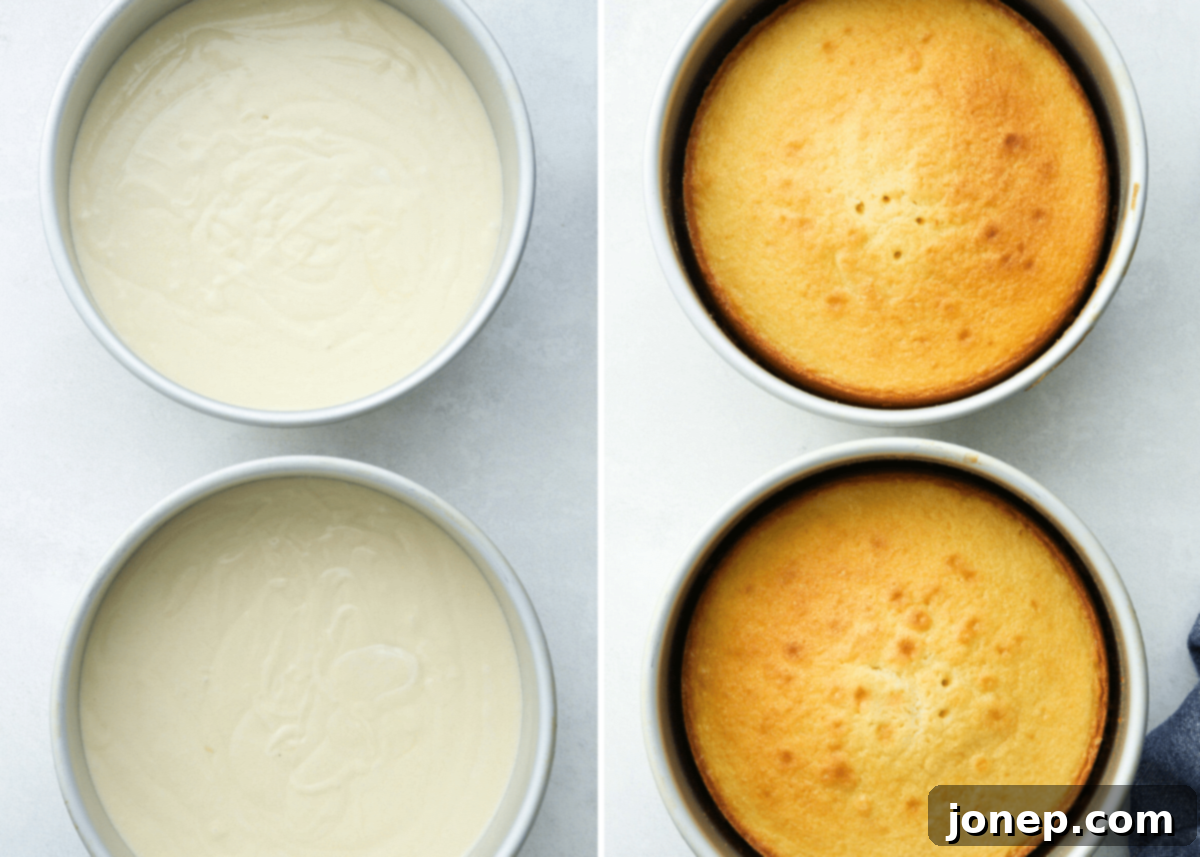
Divide the perfectly smooth cake batter equally between your prepared cake pans. Using a kitchen scale (about 1 lb 8 oz / 680 grams per pan) ensures even layers. Bake for 32-35 minutes, or until the cake tops are golden, slightly puffed, and a wooden skewer or toothpick inserted into the center comes out clean. When gently pressed with a finger, the tops of the cake should bounce back. Let the cakes cool in their pans on a wire rack for 10-15 minutes. This cooling period allows them to firm up slightly before you handle them. After 10-15 minutes, carefully invert the cakes onto the wire rack to cool completely. Ensure they are fully cooled before frosting, which can take 1-2 hours, or even longer.

- Prepare the Decadent Chocolate Buttercream Frosting:
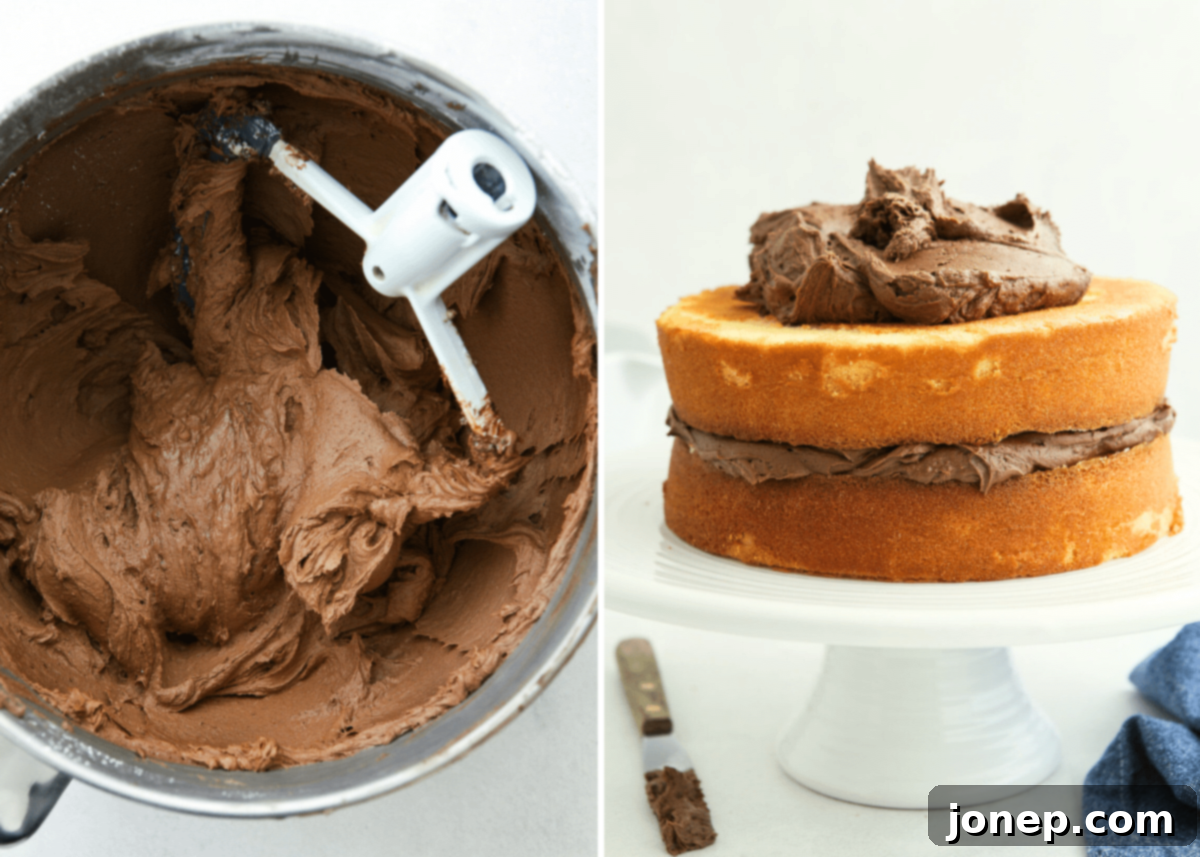
First, melt the chopped unsweetened chocolate. You can do this in a double boiler over simmering water or in the microwave in 30-second bursts, stirring well after each interval, until just a few small bits of chocolate remain. Continue stirring off the heat until fully smooth, then set aside to cool almost completely to room temperature. It’s crucial that the chocolate isn’t hot when added to the butter, as it can melt the butter and ruin the frosting’s consistency. In the bowl of an electric mixer (using the paddle attachment is best), combine the powdered sugar, softened butter, the cooled melted chocolate, heavy cream (or half and half), vanilla extract, and salt. Beat on low speed to combine the ingredients, then gradually increase to medium-high speed and beat until the frosting is thick, creamy, and wonderfully fluffy. This might take 3-5 minutes. You’ll need to stop and scrape down the sides and bottom of the bowl several times to ensure all ingredients are thoroughly incorporated and the frosting is smooth and lump-free. If the frosting is too thick, add a tiny bit more cream, a teaspoon at a time, until you reach your desired consistency. If it’s too thin, add a tablespoon of powdered sugar.

- Assemble Your Beautiful Cake:
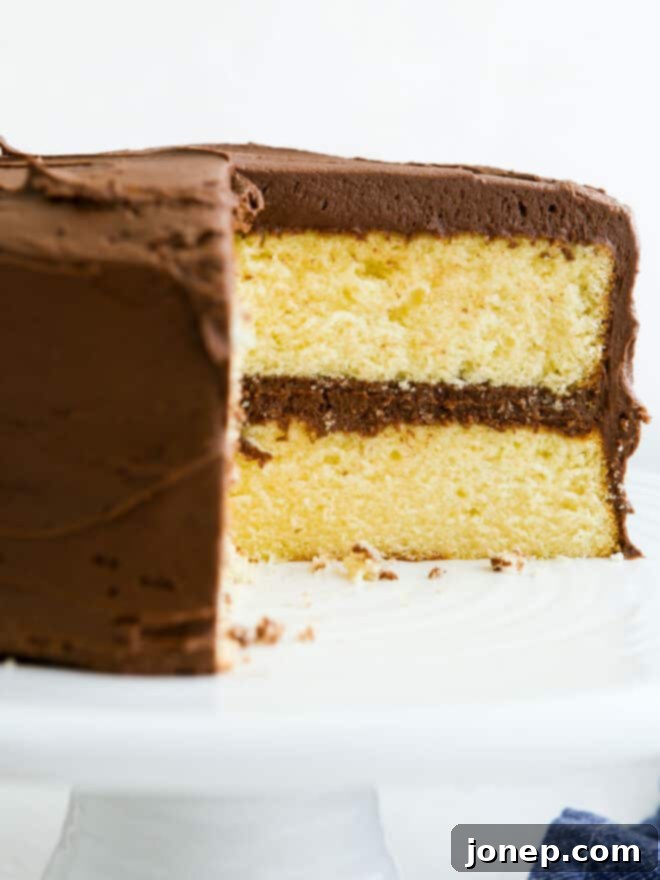
Once the cake layers are completely cool, you can level them if necessary using a serrated knife for a perfectly flat top. Place one cake layer (flat side up) onto your desired cake stand or serving plate. Spoon 1 to 2 cups of the prepared chocolate frosting onto this layer and spread it evenly to the edges. Gently place the second cake layer on top. Cover the top and sides of the entire cake with the remaining chocolate frosting. This cake has a wonderfully rustic and charming appeal, so don’t stress over achieving perfect, pristine edges. A slightly casual, homemade look is part of its charm! However, if you’re looking for more advanced frosting techniques, I do have some helpful tips here for creating smoother finishes.
- Slice and Indulge:
Your magnificent yellow cake with chocolate frosting is now ready to be served! You can slice and enjoy it immediately, or store it for later. While delicious at any time, the cake will be at its absolute best within two days of assembly. There’s no need to store it in the refrigerator unless your kitchen is exceptionally warm, or you plan to serve it outdoors and need it to hold its shape. If you do chill it, allow it to come to room temperature for about 30 minutes before serving for the best flavor and texture.
Expert Tips for Baking and Assembling a Perfect Yellow Cake
Achieving a bakery-worthy yellow cake at home is within your reach with these essential tips:
- Always Start with Room Temperature Ingredients: This is a golden rule in baking, especially for cakes. Pull your butter, buttermilk, and eggs from the fridge 30-60 minutes (or even longer, up to 2 hours) before you plan to start baking. Room temperature ingredients emulsify better, creating a smoother batter and a more uniform, soft texture in the final cake. Cold ingredients can cause the batter to curdle and result in a dense cake (learn more about why room temperature ingredients matter here).
- Embrace a Digital Kitchen Scale: For unparalleled accuracy in baking, a digital kitchen scale is your best friend. Measuring ingredients by weight (especially flour) is far more precise than volumetric measurements, which can vary wildly. Not only will you achieve more consistent results, but it also reduces the number of dirty dishes, and makes it simple to ensure your cake pans get the exact same amount of batter – leading to perfectly even cake layers!
- For a Deeper Natural Yellow Hue: The color of your yellow cake can be influenced by your ingredients. For a more intense, natural golden yellow, opt for high-quality European-style butter (like Kerrygold) and super fresh eggs, ideally from a local market or a neighbor’s backyard chickens. These often have richer, more vibrant yolks than cheaper, generic options.
- Pan Size Matters: While the recipe provides flexibility, I personally prefer 8-inch cake pans for this recipe. You can use two or three pans, depending on whether you desire a taller, more dramatic cake or slightly thinner layers. If using 9-inch pans, be aware that your cake layers will be noticeably thinner, and baking time might need to be adjusted slightly.
- Experiment with Different Frostings: While chocolate buttercream is a classic, this versatile yellow cake pairs beautifully with other frosting variations. Consider a light and airy whipped vanilla buttercream frosting, an elegant chantilly cream frosting, or a tangy-sweet cream cheese frosting for delicious alternatives.
- Utilizing Leftover Egg Whites: Since this recipe uses extra egg yolks, you might find yourself with leftover egg whites. Don’t let them go to waste! They are perfect for making delightful desserts such as coconut macaroons, a show-stopping pavlova, a classic white cake, or a fluffy angel food cake. Egg whites can be stored in an airtight container in the fridge for up to one week, or frozen for several months and thawed when needed.
Baking Tip: How to Prevent Cake from Sticking to the Pan
There are few baking failures as frustrating as a beautiful cake that sticks stubbornly to the pan! Ensure your cakes come out perfectly clean every single time with these fail-proof methods:
- Line with Parchment Paper: Always cut circles of parchment paper to fit the bottom of your cake pans. This creates a non-stick barrier that guarantees easy release from the base.
- Proper Greasing and Flour Dusting: After lining with parchment, generously grease the sides of the cake pans. You can use a baking-specific nonstick spray that contains flour (like Baker’s Joy), or coat the entire inside of the pan thoroughly with softened butter, then dust lightly with all-purpose flour, tapping out any excess.
- Choose the Right Pan: While non-stick pans are excellent for many baked goods like bundt cakes, cupcakes, and loaf cakes, I generally prefer traditional aluminum pans for layer cakes. Non-stick coatings can sometimes lead to over-browning of the cake edges, which isn’t ideal for a delicate yellow cake.
Make-Ahead Options for Stress-Free Baking
Preparing this yellow cake in advance is incredibly easy and highly recommended, especially if you’re planning for a special event. I frequently split the cake-making process over two days – baking the layers on one day and assembling/frosting on the next. You can even prep components much further in advance.
Prepare Cake Layers in Advance: Once completely cooled, individual cake layers can be wrapped tightly in plastic wrap (I recommend a double layer of wrap for extra protection) and stored at room temperature for up to 1 day, in the fridge for up to 2 days, or in the freezer for up to 3 months. When freezing, place the wrapped layers in an airtight freezer bag or container. When you’re ready to assemble, frost the cake layers while they are still cold from the fridge (this makes them easier to handle and prevents crumbling). If using frozen layers, thaw them overnight in the refrigerator, still wrapped in plastic, before using. See my detailed tutorial on how to properly store and freeze cake layers for more in-depth information.
Prepare the Frosting in Advance: The chocolate buttercream frosting is also very make-ahead friendly. Store it at room temperature for several days (if your kitchen is cool), in an airtight container in the fridge for 1-2 weeks, or in the freezer for several months. Before using, allow refrigerated frosting to come to room temperature, then beat it with an electric mixer until it’s smooth and fluffy again. You might need to add a tablespoon or two of additional heavy cream, a little at a time, to achieve the perfect creamy consistency.
Get the Full Recipe
Yellow Cake with Chocolate Frosting
Servings: 16 servings
Prep Time: 30 mins
Cook Time: 30 mins
Assembly Time: 30 mins
Total Time: 1 hr 30 mins
A light and flavorful vanilla cake iced with rich chocolate buttercream frosting. This classic homemade yellow cake is perfect for birthdays, holidays, and any special occasion!
Pin Recipe
Leave a Review
Ingredients
For the yellow cake:
- 3 cups (375 grams) cake flour
- 2 cups (400 grams) granulated sugar
- 2 ½ teaspoons baking powder
- 1 teaspoon salt
- ¼ teaspoon baking soda
- ¾ cup (170 grams) salted butter, softened to room temperature
- ¼ cup (56 grams) vegetable oil (or other neutral-flavored oil)
- 1 ¼ cups (300 grams) buttermilk, at room temperature, divided
- 2 large whole eggs, at room temperature
- 4 large egg yolks, at room temperature
- 2 teaspoons pure vanilla extract
For the chocolate frosting:
- 6 oz (180 grams) unsweetened chocolate, chopped (semi-sweet chocolate will work too)
- 4 ½ cups (565 grams) powdered sugar
- 1 ½ cups (340 grams) butter, softened at room temperature
- 6 tablespoons (85 grams) half and half or heavy cream
- 1 teaspoon vanilla extract
- ¼ teaspoon salt
Equipment
Electric mixer
8-inch cake pans
Offset spatula
Non-stick baking spray
Instructions
To make the cake:
- Preheat oven to 350°F (175°C). Grease two 8 or 9-inch cake pans with nonstick baking spray or butter and flour, and line the bottoms with parchment paper.
- In the bowl of a stand mixer fitted with a paddle attachment, combine the cake flour, sugar, baking powder, salt, and baking soda. Add the softened butter, vegetable oil, and 1 cup of the room temperature buttermilk. Mix on low speed until moistened, then increase the speed to medium-high and beat until light and creamy, about 4 minutes total. Stop and scrape the bowl down at least once to ensure even mixing.
- Whisk together the eggs, egg yolks, remaining ¼ cup of the buttermilk, and the vanilla extract in a separate bowl or liquid measuring cup until combined.
- Add the egg mixture to the mixer in 3 additions, mixing on low speed only until just incorporated after each addition. Scrape the bowl down between each addition to ensure a smooth, uniform batter. Be careful not to overmix.
- Divide the batter equally between the prepared pans, aiming for about 1 lb 8 oz (680 grams) of batter in each pan for even layers. Bake for 32-35 minutes, or until the tops are golden and slightly domed, and a wooden skewer inserted into the center comes out clean. When gently pressed with a finger, the tops of the cake should bounce back. Let cool in the pan for 5-10 minutes, then turn out onto a wire rack to cool completely.
To make the frosting:
- Melt the chopped chocolate in a double boiler or in the microwave in 30-second bursts, stirring until mostly smooth with a few bits remaining. Continue stirring off the heat until fully melted and smooth. Cool the melted chocolate mostly to room temperature before proceeding.
- In the bowl of an electric mixer, combine the powdered sugar, softened butter, cooled melted chocolate, heavy cream (or half and half), vanilla extract, and salt. Beat on medium-high speed until the frosting is combined and super creamy, light, and fluffy (about 3-5 minutes). Scrape down the bowl a few times to ensure uniformity. If needed, add a little more cream, a teaspoon at a time, to reach your desired consistency.
- To assemble the cake, place one cooled cake layer (flat side up) on a plate or cake stand. Cover with 1-2 cups of the chocolate frosting, spreading evenly. Top with the second cake layer and cover the top and sides of the entire cake with the remaining frosting.
- Serve immediately or as desired. The cake will be at its best within 2 days of assembly. No need to refrigerate unless your kitchen is very warm or for extended storage.
Notes
-
Prep cake layers in advance: Cooled cake layers can be wrapped tightly in plastic wrap and stored at room temperature for up to 1 day, in the fridge for up to 2 days, or in the freezer (double-wrapped in plastic and then foil or a freezer bag) for up to 3 months. Assemble layers while cold from the fridge for easier handling. Thaw frozen cakes overnight in the fridge while still wrapped before using. See my tutorial on how to store cake layers for more detailed info.
-
Prep the frosting in advance: Chocolate buttercream can be stored at room temperature for several days (in a cool room), in an airtight container in the fridge for 1-2 weeks, or in the freezer for several months. For best results, allow refrigerated or frozen frosting to come to room temperature, then beat until smooth and fluffy again, adding a bit more cream if needed to achieve the right texture.
Nutrition Information (per serving, estimated):
- Calories: 650kcal
- Carbohydrates: 80g
- Protein: 7g
- Fat: 36g
- Saturated Fat: 22g
- Polyunsaturated Fat: 2g
- Monounsaturated Fat: 10g
- Trans Fat: 1g
- Cholesterol: 146mg
- Sodium: 440mg
- Potassium: 228mg
- Fiber: 2g
- Sugar: 59g
- Vitamin A: 1006IU
- Vitamin C: 0.03mg
- Calcium: 84mg
- Iron: 2mg
Cuisine: American
Course: Dessert
Author: Annalise Sandberg
Have you tried this recipe? I’d love to hear about it! Leave a rating and review below, or take a photo and tag it on Instagram @completelydelicious with #completelydelicious.
Note: A version of this recipe was originally published in April 2013. In May 2025, the recipe was significantly improved and updated with enhanced techniques and ingredient ratios to achieve superior texture and flavor. This recipe is completely my own creation, though I was influenced by yellow cake recipes from Bake from Scratch magazine and Sky High Cakes cookbook, which inspired me to push for perfection.
