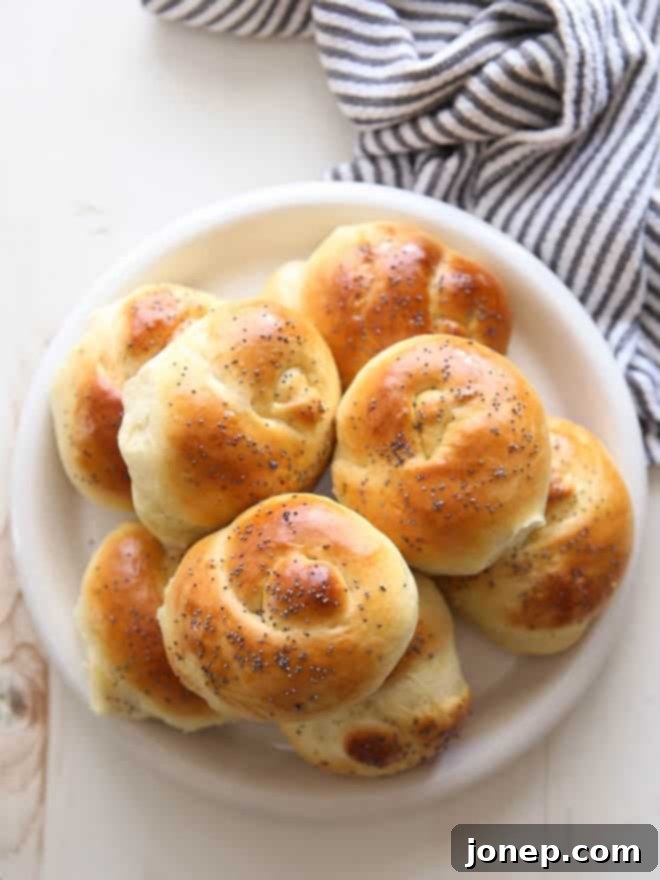
Homemade Knotted Dinner Rolls: Soft, Fluffy & Perfect for Any Occasion
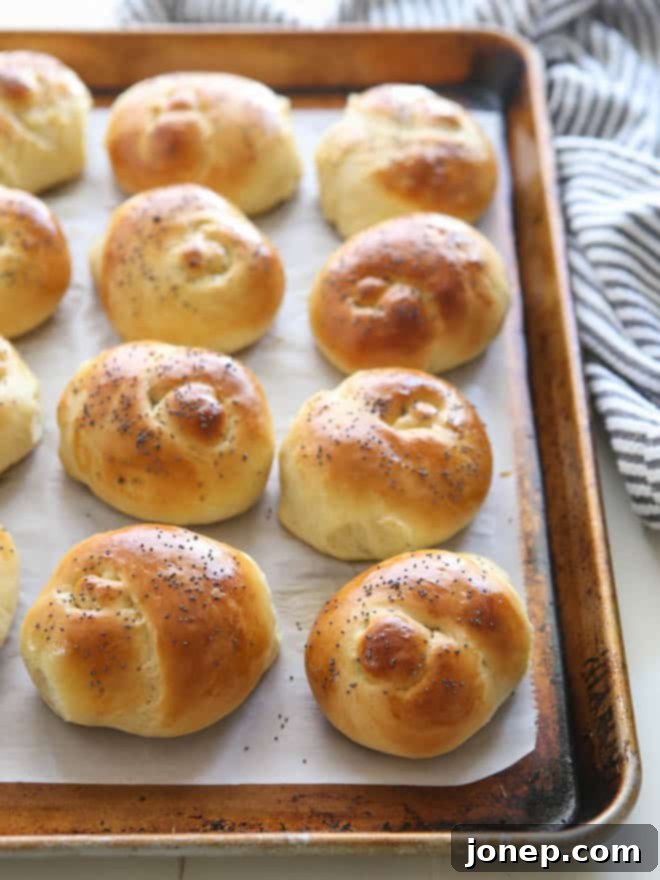
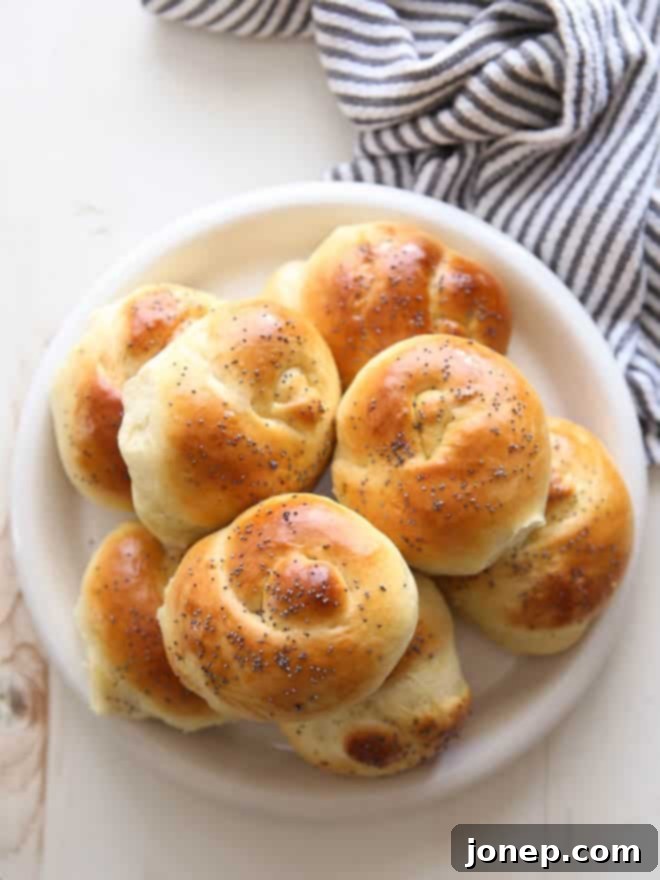
There’s something truly special about a basket of warm, homemade dinner rolls gracing your table. These soft and rich knotted dinner rolls are not just a side dish; they’re a centerpiece, a conversation starter, and a comforting embrace in every bite. Perfect for any occasion, from a casual family meal to a festive holiday gathering, their beautiful knotted shape and irresistible texture will leave everyone reaching for more.
Embracing Spring with Homemade Goodness
Easter is undeniably one of my most cherished holidays. After enduring the long, often dreary, and cold winter months, there’s an immense sense of joy and renewal that comes with celebrating the arrival of spring. Right now, I watch as the tiny leaves on the trees are just beginning to unfurl, a vibrant green promising warmer days. Flowers are bursting into bloom everywhere, painting the landscape with a riot of colors, and I can almost feel the liberating spirit of flip-flop season just around the corner.
Seriously, the anticipation is real. Flip-flops, you guys! It’s the little things, isn’t it?
This year, I’m thrilled to be hosting some of my beloved family members at our home for Easter. While our celebration won’t be overly elaborate or formal, you can absolutely count on a few truly special, time-honored recipes making their way to the table. And these exquisite knotted rolls are at the very top of that list. They first graced this site for Easter back in 2010 and have remained a steadfast favorite ever since, proving their timeless appeal and undeniable deliciousness.
The Secret to Unforgettable Rolls: Enriched Dough
These magnificent rolls are essentially a delightful twist on my classic braided egg bread recipe, simply portioned out and lovingly tied into elegant knots. The magic lies in the dough itself, which is an enriched yeast dough. What does “enriched” mean in baking terms? It means the dough contains more fat (like butter) and sugar (like honey) than a traditional lean yeast dough, which typically consists only of flour, water, yeast, and salt. This additional richness contributes significantly to the rolls’ incredibly soft, tender crumb and imparts a depth of flavor that is truly unparalleled.
While I may have what feels like dozens of fantastic roll recipes on my blog, these knotted challah rolls easily rank among my top two or three favorites. They aren’t any more difficult to prepare than many other roll recipes, but their beautiful, intricate knot shape gives them an undeniably fancy and impressive appearance. They elevate any meal, making them absolutely perfect for any dinner, holiday gathering, or special party you might have on your calendar!
Psst, keep an eye out for more delightful Easter recipes heading your way over the next two weeks. Have any specific requests? Don’t hesitate to leave them in the comments below!
Baking Tip: What is Bread Flour and Why Does It Matter for These Rolls?
Understanding your ingredients is key to successful baking, and bread flour is a star player in these knotted rolls. Bread flour boasts a significantly higher protein content compared to standard all-purpose flour. This elevated protein level is crucial because protein develops into gluten when mixed with water and kneaded. More gluten means a stronger, more elastic dough, which is ideal for yeast bread baking.
A strong gluten network is like a finely woven net that can effectively trap the expanding gases (carbon dioxide) released by the yeast during fermentation and baking. This trapping action allows your bread to rise higher and achieve that coveted airy, yet chewy and elastic texture that makes these rolls so delightful. Breads baked with bread flour will generally rise higher, have a more structured crumb, and a satisfyingly chewier and more elastic texture.
If you don’t typically keep bread flour on hand, I highly recommend acquiring some for this recipe. While you can substitute all-purpose flour in a pinch, be aware that the final results won’t be quite the same. The rolls might be slightly less chewy, and their rise may not be as dramatic. For truly superior results, stick with bread flour!
Crafting the Perfect Knotted Dinner Rolls: A Step-by-Step Guide
Making these gorgeous knotted dinner rolls is a rewarding experience, and with a few key tips, you’ll achieve bakery-quality results every time. Let’s walk through the process:
1. Activating the Yeast: The Foundation of Fluffy Rolls
The first step is crucial: activating your yeast. Combining warm water (ideally between 105-115°F or 40-46°C – warm to the touch, but not hot) with active dry yeast provides the perfect environment for the yeast to awaken. Let it sit for about 5 minutes. You’ll know it’s active and ready when a foamy layer forms on the surface. If it doesn’t foam, your yeast might be old or the water temperature was off, and it’s best to start again.
2. Mixing the Enriched Dough: Achieving the Right Consistency
In the bowl of your electric mixer, fitted with a dough hook, you’ll combine the activated yeast mixture with the honey, melted and cooled butter, and eggs. These are the enriching agents that give your rolls their incredible flavor and tenderness. Gradually add the bread flour, starting with about 2 1/2 cups, along with the salt. Mix on low speed until everything just comes together to form a wet, shaggy dough. Continue to add the remaining flour, a quarter cup at a time, mixing until the dough is manageable but still very soft and slightly sticky. It should no longer aggressively cling to your fingers when gently touched. Remember, enriched doughs often remain soft and won’t fully “clear the bowl” like leaner doughs, so avoid the temptation to add too much flour.
3. Kneading for Elasticity: Building the Gluten Network
Once your dough has come together, increase the mixer speed to low and continue kneading for about 5 minutes. This crucial step develops the gluten, making the dough smooth, elastic, and capable of holding its shape and rising beautifully. You’ll notice the dough becoming smoother and more cohesive as you knead.
4. First Rise (Bulk Fermentation): The Magic of Time
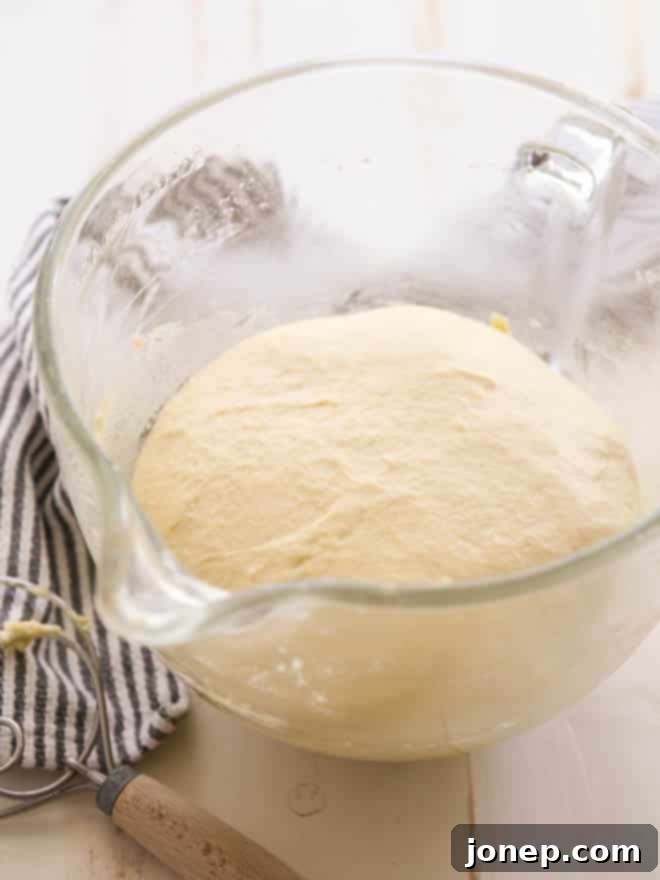
Gently form the dough into a ball and place it in a lightly greased bowl. Cover the bowl tightly with plastic wrap to prevent a skin from forming, and let it rise in a warm, draft-free place until it has doubled in size. This usually takes about 1 hour, but the exact time can vary depending on the temperature of your kitchen. This first rise allows the yeast to work its magic, developing flavor and volume.
5. Shaping the Knots: Adding Visual Appeal
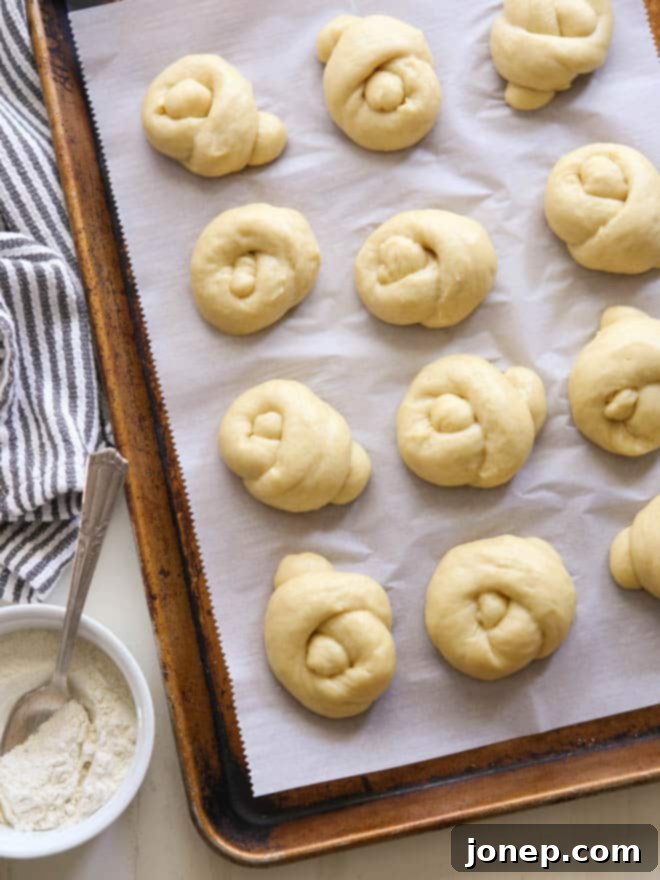
Once doubled, gently punch down the dough to release the air, and then gather it back into a smooth ball. Divide the dough into 12 equal pieces. For the perfect knotted shape, take one piece of dough and roll it out into a rope approximately 6 inches long. Then, simply tie it into a loose knot. Arrange these beautifully shaped knots on a parchment-lined baking sheet, leaving some space between each one to allow for their second rise. Cover them with greased plastic wrap and let them rise again until doubled, which typically takes about 30-45 minutes. During this second rise, preheat your oven to 350 degrees F (175 degrees C).
6. Egg Wash and Baking: Golden Perfection
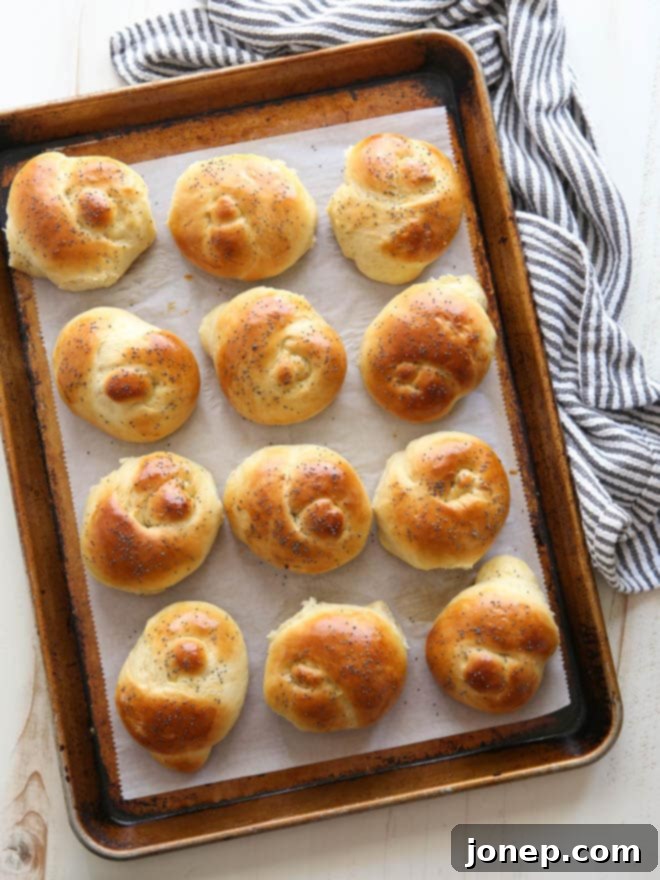
Just before baking, gently brush the risen rolls with an egg wash (one egg beaten with a teaspoon of water). This egg wash isn’t just for shine; it helps the rolls achieve that beautiful, irresistible golden-brown crust. If you like, sprinkle a few poppy seeds over the top for an authentic challah look and a subtle textural contrast. Bake for about 15-17 minutes, or until the rolls are deeply golden brown and sound hollow when tapped on the bottom.
7. Serving and Storage: Enjoying Your Creation
Serve these incredible knotted dinner rolls warm, straight from the oven, for the ultimate experience. They are truly at their absolute best on the day they are baked, with that fresh, soft texture. However, any leftover rolls can be stored in an airtight container at room temperature for up to 3 days. To refresh them, a quick warm-up in the microwave or a low oven will bring back some of their initial charm.
Knotted Dinner Rolls
Pin Recipe
Leave a Review
Ingredients
- 1 packet active dry yeast (2 1/4 teaspoons)
- ½ cup warm water (125 ml)
- ⅓ cup honey (115 grams)
- ¼ cup unsalted butter , melted and cooled (56 grams)
- 2 large eggs
- 3 – 3 ½ cups bread flour (360-420 grams)
- ¾ teaspoon salt
- 1 egg + 1 teaspoon water , beaten (for egg wash)
- Poppy seeds , for sprinkling (optional)
Instructions
-
Combine warm water and yeast and let sit for 5 minutes till foamy.
-
In the bowl of an electric mixer fitted with a dough hook (or in a large bowl if you intend to knead by hand), combine the yeast mixture, honey, butter, and eggs. Add 2 1/2 cups of the flour, and the salt. Mix on low until it comes together to make a wet dough. Continue adding remaining flour 1/4 cup at a time until dough no longer sticks to your fingers when touched. You may not need all 3 1/2 cups of the flour. Dough should be able to be handled, but still very soft. It will not clear the bowl.
-
Continue kneading on low speed until smooth and elastic, about 5 minutes more.
-
Gently form into a ball and place in a greased bowl. Cover with plastic wrap and let rise in a warm place until doubled, about 1 hour.
-
Gently punch down dough and gather back into a ball. Divide into 12 equal pieces. Working with one piece at a time, roll out into a 6-inch long rope and tie into a knot. Place on a sheet pan lined with parchment paper. Cover with greased plastic wrap and let rise until doubled again, about 30-45 minutes. Meanwhile, preheat oven to 350 degrees F.
-
Brush rolls with egg wash and sprinkle with poppy seeds, if using. Bake until golden brown, about 15-17 minutes.
-
Serve warm. Rolls are best the day they are baked, but will keep at room temperature for up to 3 days.
Essential Tools for Making These Rolls
Having the right equipment can make all the difference in your baking experience. Here are a few tools that will help you achieve perfect knotted dinner rolls:
- Stand Mixer with Dough Hook: While these rolls can be kneaded by hand, a stand mixer greatly simplifies the process and ensures consistent dough development.
- Large Mixing Bowl: Essential for the initial mixing and the first rise.
- Measuring Cups and Spoons: For accurate ingredient proportions.
- Kitchen Scale: For precise measurement of flour and other ingredients, ensuring the best consistency.
- Parchment Paper: Prevents sticking and makes for easy cleanup.
- Baking Sheets: To hold your rolls as they rise and bake.
- Pastry Brush: For applying the egg wash evenly.
Beyond the Recipe: Tips for Success and Variations
Mastering homemade bread is a journey, and these knotted dinner rolls are a fantastic step along the way. Here are a few extra tips to ensure your baking success and some ideas for variation:
Tips for Perfect Rolls:
- Don’t Rush the Rise: Patience is truly a virtue in bread making. The rising times are approximate; focus on whether the dough has doubled in size rather than strictly adhering to the clock. A warm, draft-free spot is ideal for rising – a slightly warm oven (turned off!) or a sunny spot can work wonders.
- Proper Kneading: Under-kneading results in a dense, crumbly roll, while over-kneading can make it tough. Look for a smooth, elastic dough that springs back when gently poked. The “windowpane test” (stretching a small piece of dough until you can see light through it without tearing) is a good indicator of proper gluten development.
- Avoid Over-Flouring: It’s tempting to add more flour if the dough feels sticky, but this can lead to dry, dense rolls. An enriched dough like this one is meant to be soft and slightly tacky. Add flour sparingly, just enough so it’s workable.
- Even Heating: If your oven tends to have hot spots, rotate your baking sheet halfway through the baking time to ensure even browning.
Serving Suggestions:
These versatile rolls are fantastic with almost anything! Serve them alongside a hearty roast, a light salad, or a rich stew. They are also incredible for breakfast, lightly toasted and spread with butter and jam. For a delightful appetizer, slice them and serve with a flavored olive oil for dipping.
Creative Variations:
- Sweet Rolls: Before baking, brush with melted butter and sprinkle with cinnamon sugar for a sweeter treat. You could even add some dried fruit, like raisins or cranberries, to the dough.
- Savory Enhancements: Incorporate finely chopped fresh herbs like rosemary or thyme into the dough during mixing. A sprinkle of flaky sea salt or everything bagel seasoning on top (instead of poppy seeds) would also be delicious.
- Garlic Butter Rolls: After baking, brush the warm rolls with melted garlic butter for an aromatic and flavorful twist.
Conclusion: The Joy of Homemade Bread
There’s an undeniable satisfaction that comes from baking bread from scratch, especially when it results in something as beautiful and delicious as these knotted dinner rolls. The aroma filling your kitchen, the soft texture in your hands, and the smiles on the faces of those you share them with – these are the moments that make baking truly worthwhile. Whether you’re celebrating a holiday, hosting friends, or simply treating your family to something extraordinary, these rolls are sure to impress. So roll up your sleeves, embrace the joy of baking, and get ready to enjoy the best soft, fluffy, and rich homemade dinner rolls you’ve ever tasted!
