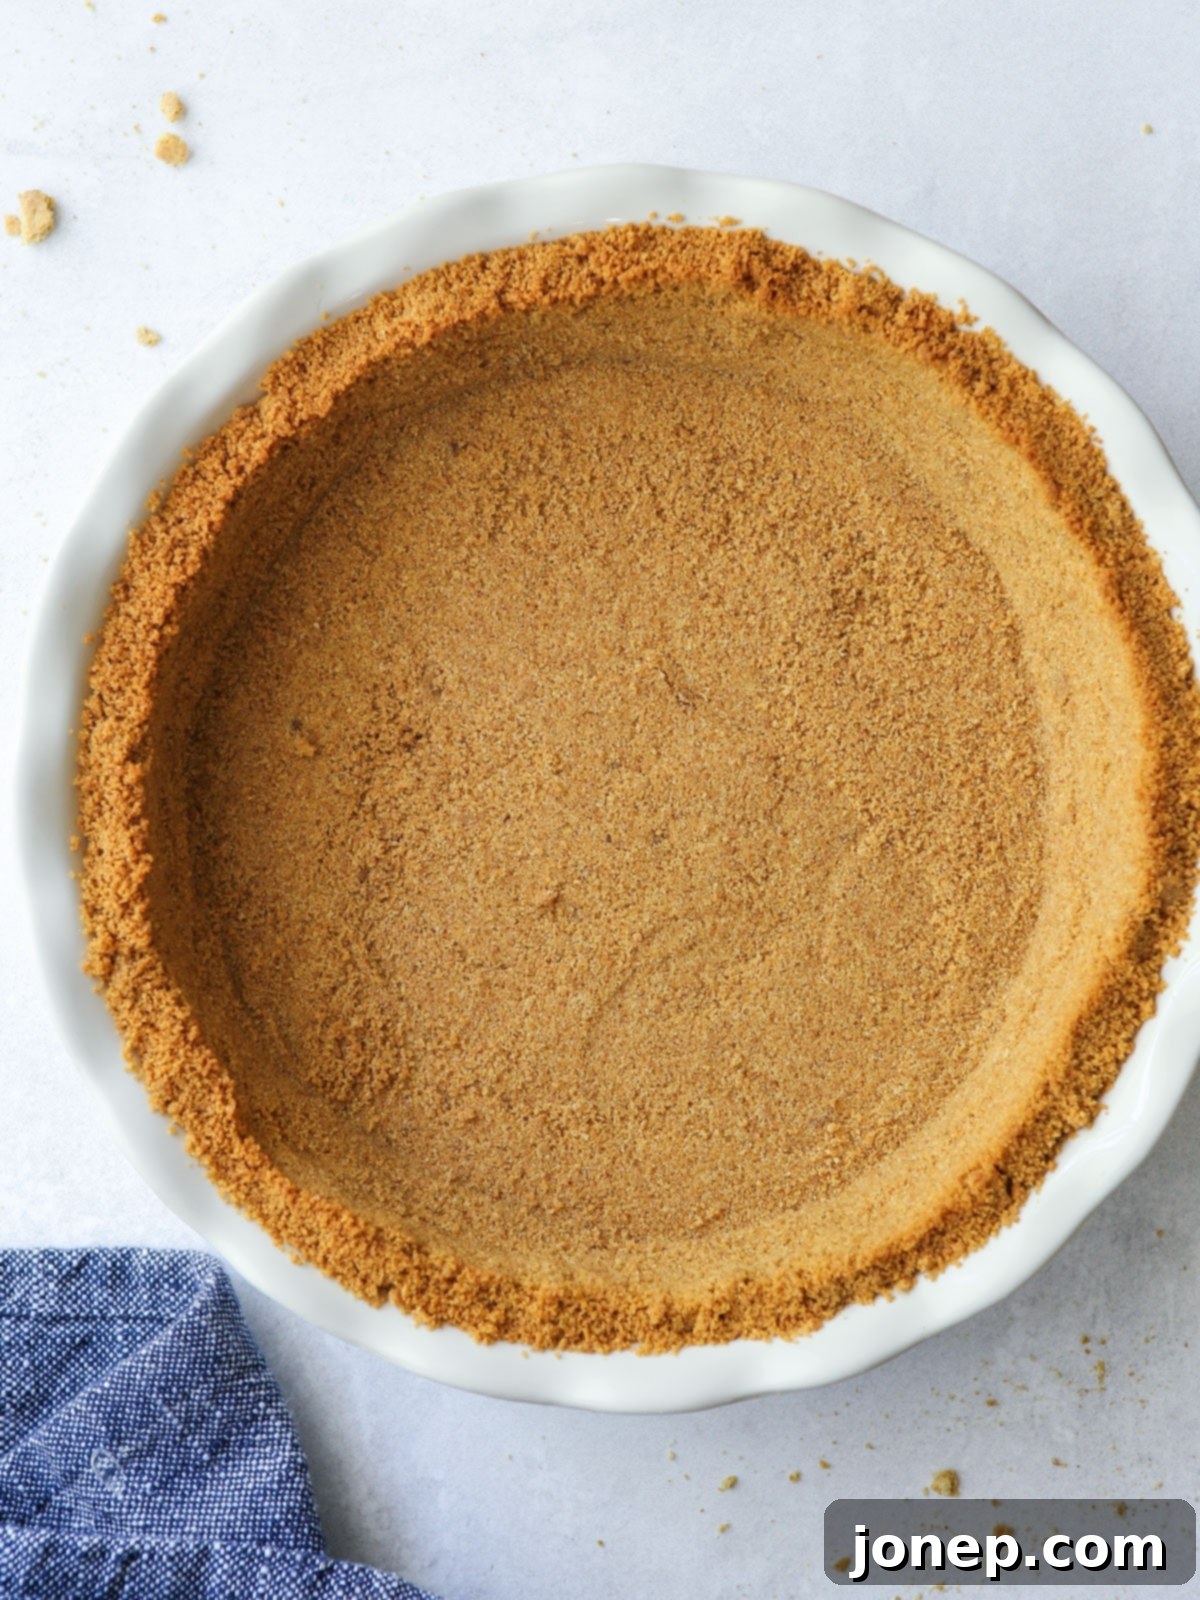
Perfect Homemade Graham Cracker Pie Crust: Easy 5-Ingredient Recipe (Baked & No-Bake)
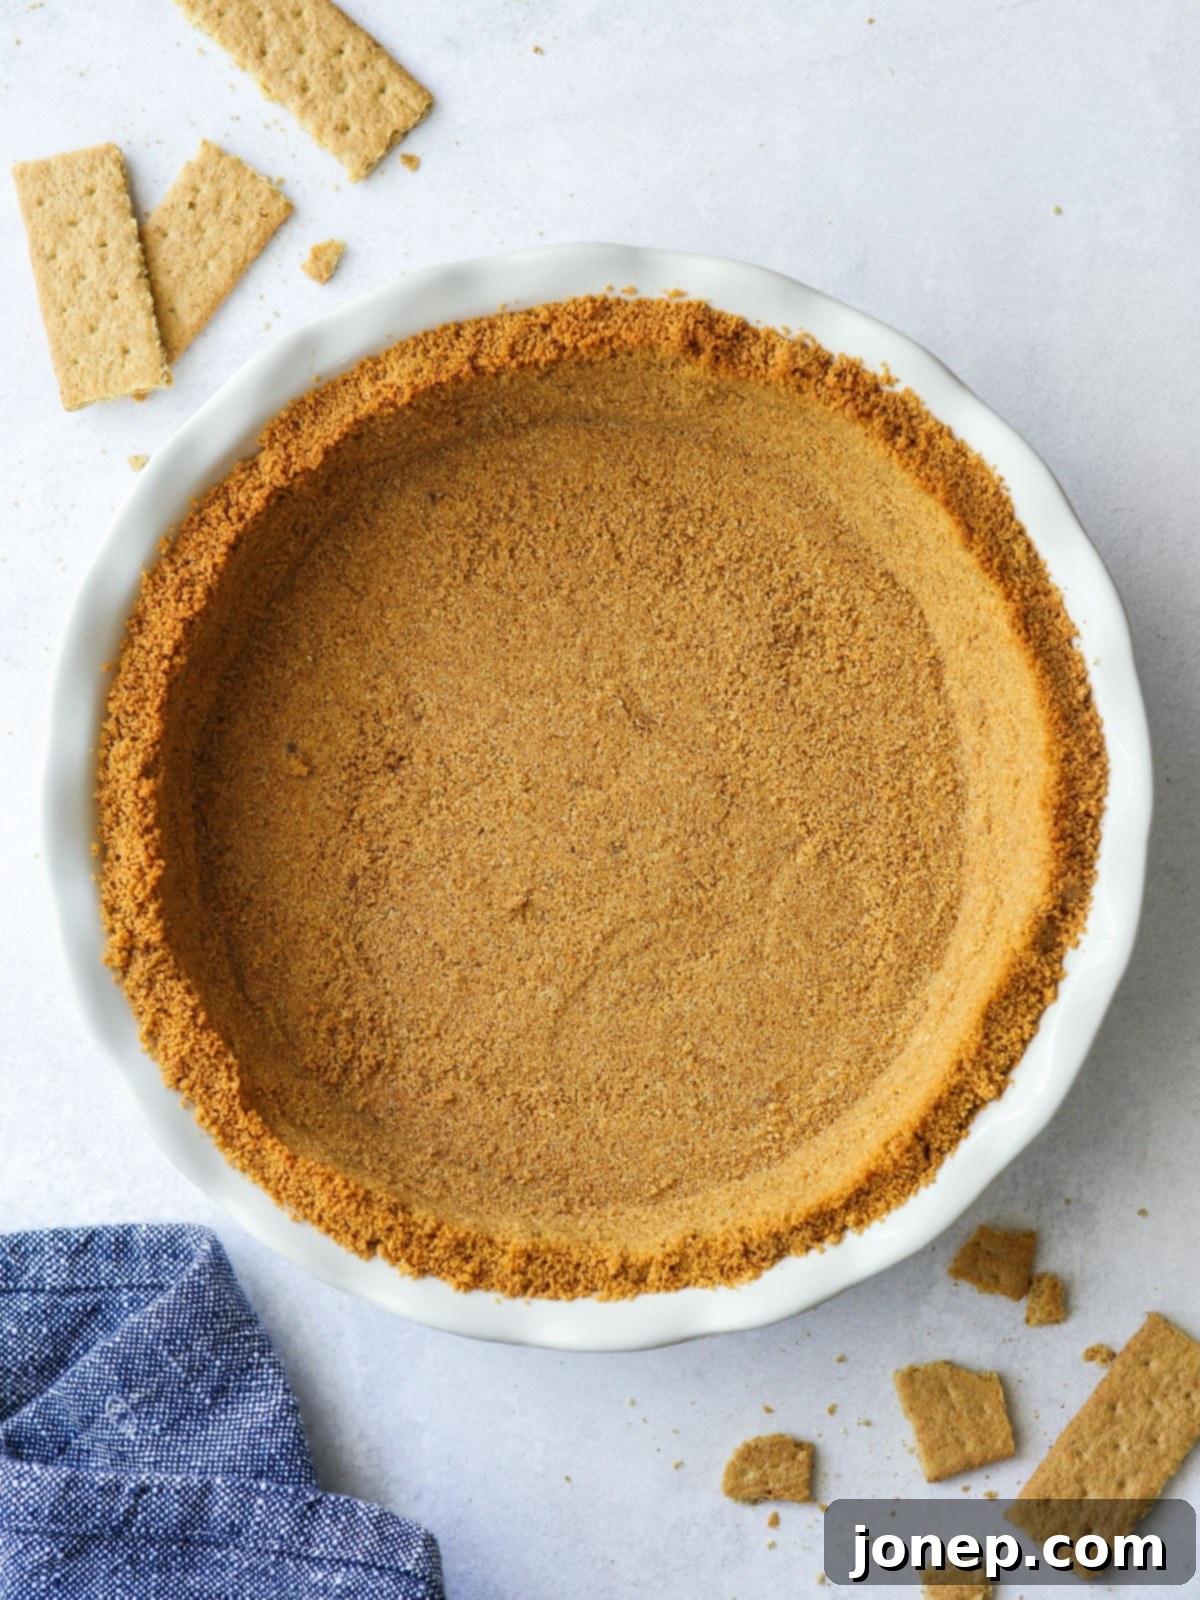
Unlock the secret to the ultimate dessert base with this incredibly easy and versatile graham cracker pie crust recipe. Made with just 5 simple ingredients, it’s buttery, delightfully crisp, and infused with a subtle sweetness that complements a wide array of fillings. Whether you need a sturdy foundation for a baked pie or a quick base for a no-bake cheesecake, this recipe offers both options, making it your go-to starting point for countless delicious creations. Say goodbye to store-bought crusts and hello to homemade perfection that elevates every dessert!
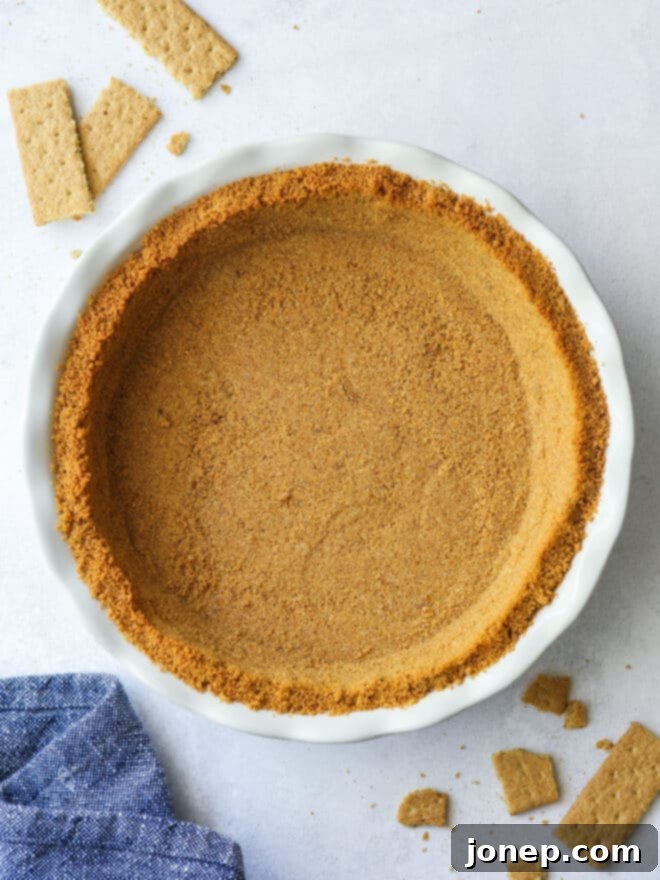
This homemade graham cracker crust isn’t just a recipe; it’s a game-changer for your dessert repertoire. Its rich, buttery flavor and wonderfully crisp texture provide a far superior experience compared to bland, often dry store-bought versions. Incredibly versatile, it serves as an exceptional alternative to traditional pie crusts, especially when you’re looking for a quick and flavorful foundation.
Imagine the vibrant tang of a Key Lime Pie or the creamy decadence of no-bake cheesecake bars, all resting on a crust that’s perfectly balanced in sweetness and crunch. This recipe is not only simple to master but also adaptable to many of your most cherished dessert ideas. Get ready to impress with minimal effort!
Table of Contents
- Why This Graham Cracker Crust is the Best!
- Essential Ingredients for This Recipe
- How to Make the Perfect Graham Cracker Pie Crust
- Pro Tips for a Flawless Crust
- Recipe FAQs
- Delicious Ways to Use Graham Cracker Crust
- Get the Recipe
Why This Graham Cracker Crust is the Best!
There are countless reasons why this homemade graham cracker crust will become your new favorite. It’s not just easy to make; it’s designed for superior flavor, texture, and versatility:
- Enhanced Flavor Profile: Unlike standard recipes, ours incorporates brown sugar for a richer, more caramel-like sweetness and a touch of cinnamon, which adds a warm, aromatic depth that truly makes this crust stand out. These small tweaks make a significant difference!
- Dual-Purpose Perfection: This recipe is a fantastic two-for-one! It can be either perfectly baked to a golden crisp or simply chilled for a firm, no-bake base, ideal for various chilled desserts. This flexibility means one recipe covers all your needs.
- Incredibly Versatile for Any Pan: Designed to fit a standard 9-inch pie plate, a 9-inch springform pan for your cheesecakes (where the crust elegantly extends about halfway up the sides), or even the bottom of a 9×13-inch rectangular baking pan for bars and larger desserts. Its adaptability ensures it works with your preferred bakeware.
- Effortless and Quick: With just 5 ingredients and minimal prep time, this crust comes together incredibly fast. It’s perfect for when you need a delicious homemade base without spending hours in the kitchen.
- Superior Texture: The right balance of butter and crumbs, along with optional baking, ensures a crust that’s wonderfully crisp and holds its shape, providing the ideal contrast to creamy fillings without becoming soggy.
Essential Ingredients for This Recipe
Crafting this perfect graham cracker crust requires only a handful of common pantry staples. Here’s a closer look at what you’ll need and why each ingredient plays a crucial role:
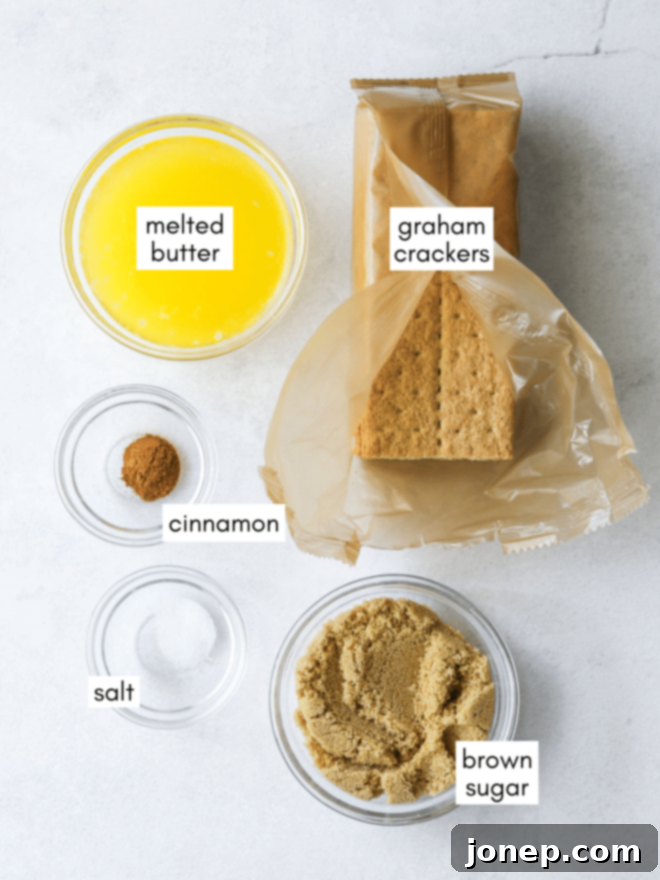
The full recipe details and measurements can be found in the recipe card further down below.
- Graham Crackers: The star of our crust! For the best flavor and consistent texture, we highly recommend using Nabisco Honey Maid brand. Their classic honey-sweet flavor is ideal. You’ll need them finely crushed into crumbs.
- Brown Sugar: This is a key ingredient that sets our recipe apart. Using brown sugar instead of granulated sugar not only adds a deeper, more molasses-rich flavor but also contributes to a slightly softer, more moist crumb texture that binds beautifully. Light or dark brown sugar works well.
- Melted Butter: Essential for binding all the ingredients together. The melted butter coats the graham cracker crumbs, creating that desirable crisp and sturdy crust once set. We recommend using unsalted butter to control the salt content.
- Salt: A small but mighty ingredient! If you’re using unsalted butter, adding a pinch of salt is crucial to balance the sweetness and enhance all the flavors in the crust. If you opt for salted butter, you can adjust or omit the added salt based on your preference.
- Cinnamon: An optional yet highly recommended ingredient! A touch of ground cinnamon adds a warm, inviting aroma and a subtle spicy note that perfectly complements the graham cracker flavor. It elevates the overall taste profile, making the crust even more irresistible. Feel free to experiment with other spices like nutmeg or ginger for different flavor profiles.
Baking Tip: How Many Graham Crackers Make a Cup of Crumbs?
Approximately 1 cup of finely crushed graham cracker crumbs equals about 110 grams (or 3.5 oz). This typically translates to about 14 individual squares or 7 full rectangle graham crackers. Keep in mind that different brands may vary slightly in size and density, and packaging can change over time. Therefore, using a kitchen scale to measure by weight (grams or ounces) is always the most accurate method to ensure consistent results in your baking.
How to Make the Perfect Graham Cracker Pie Crust
Creating this delicious graham cracker crust is surprisingly simple and comes together in just a few easy steps. Follow these instructions for a perfect base every time:
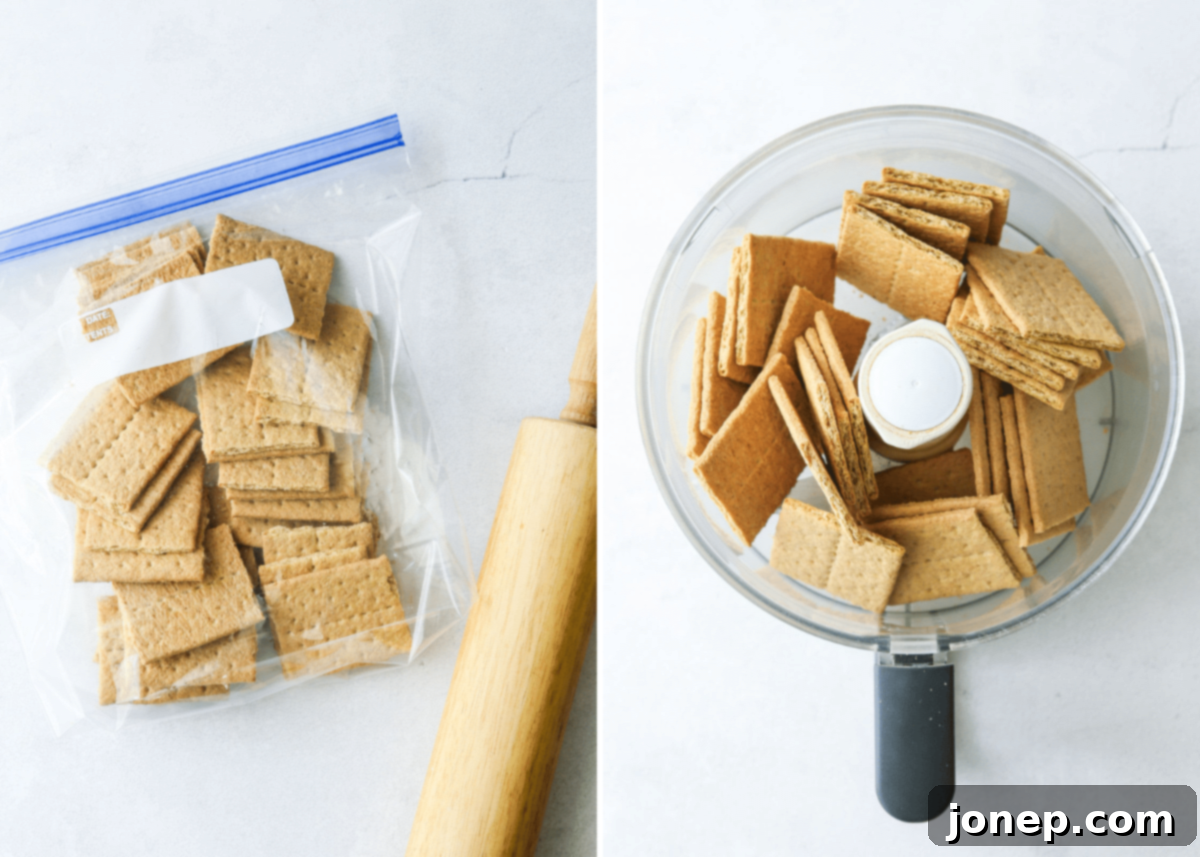
- Crush Graham Crackers: The first step is to transform your graham crackers into fine, even crumbs. You can achieve this using two primary methods:
- Food Processor: This is the quickest and most efficient method. Simply break the graham crackers into smaller pieces and pulse them in a food processor until they form fine, uniform crumbs, similar to sand.
- Ziploc Bag & Rolling Pin: If you don’t have a food processor, place the graham crackers in a sturdy Ziploc bag, seal it, and use a rolling pin to crush them. Roll over the crackers repeatedly until they are reduced to fine crumbs. Ensure there are no large chunks, as this will affect the crust’s texture.

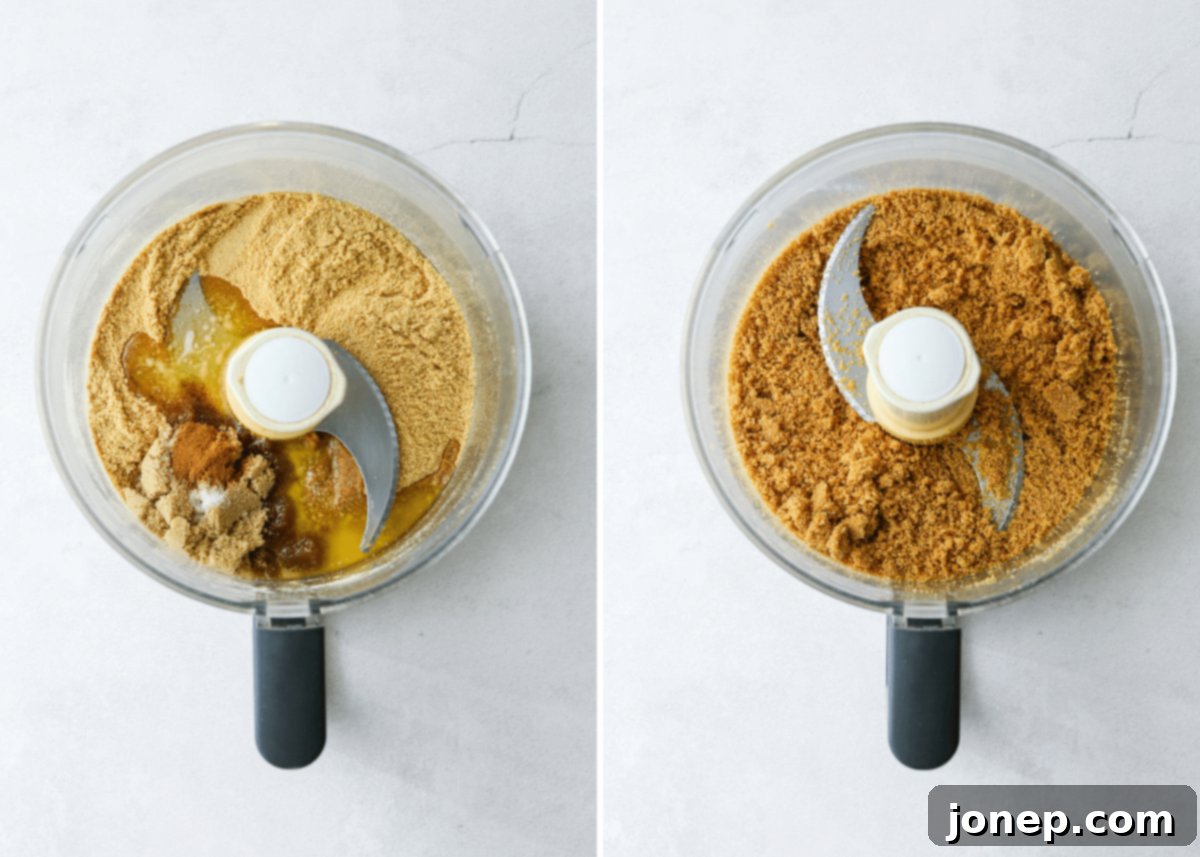
- Combine with Butter, Sugar, Cinnamon, and Salt: Once your graham cracker crumbs are ready, it’s time to bring the crust together.
- If you used a food processor, you can simply add the brown sugar, melted butter, salt, and cinnamon (if using) directly to the processor. Pulse a few times until all ingredients are thoroughly combined and the mixture resembles wet sand.
- If you crushed the crackers manually, transfer the crumbs to a medium bowl, then add the remaining ingredients. Mix well with a spoon or your hands until the crumbs are evenly coated and moist, similar to the “wet sand” consistency.

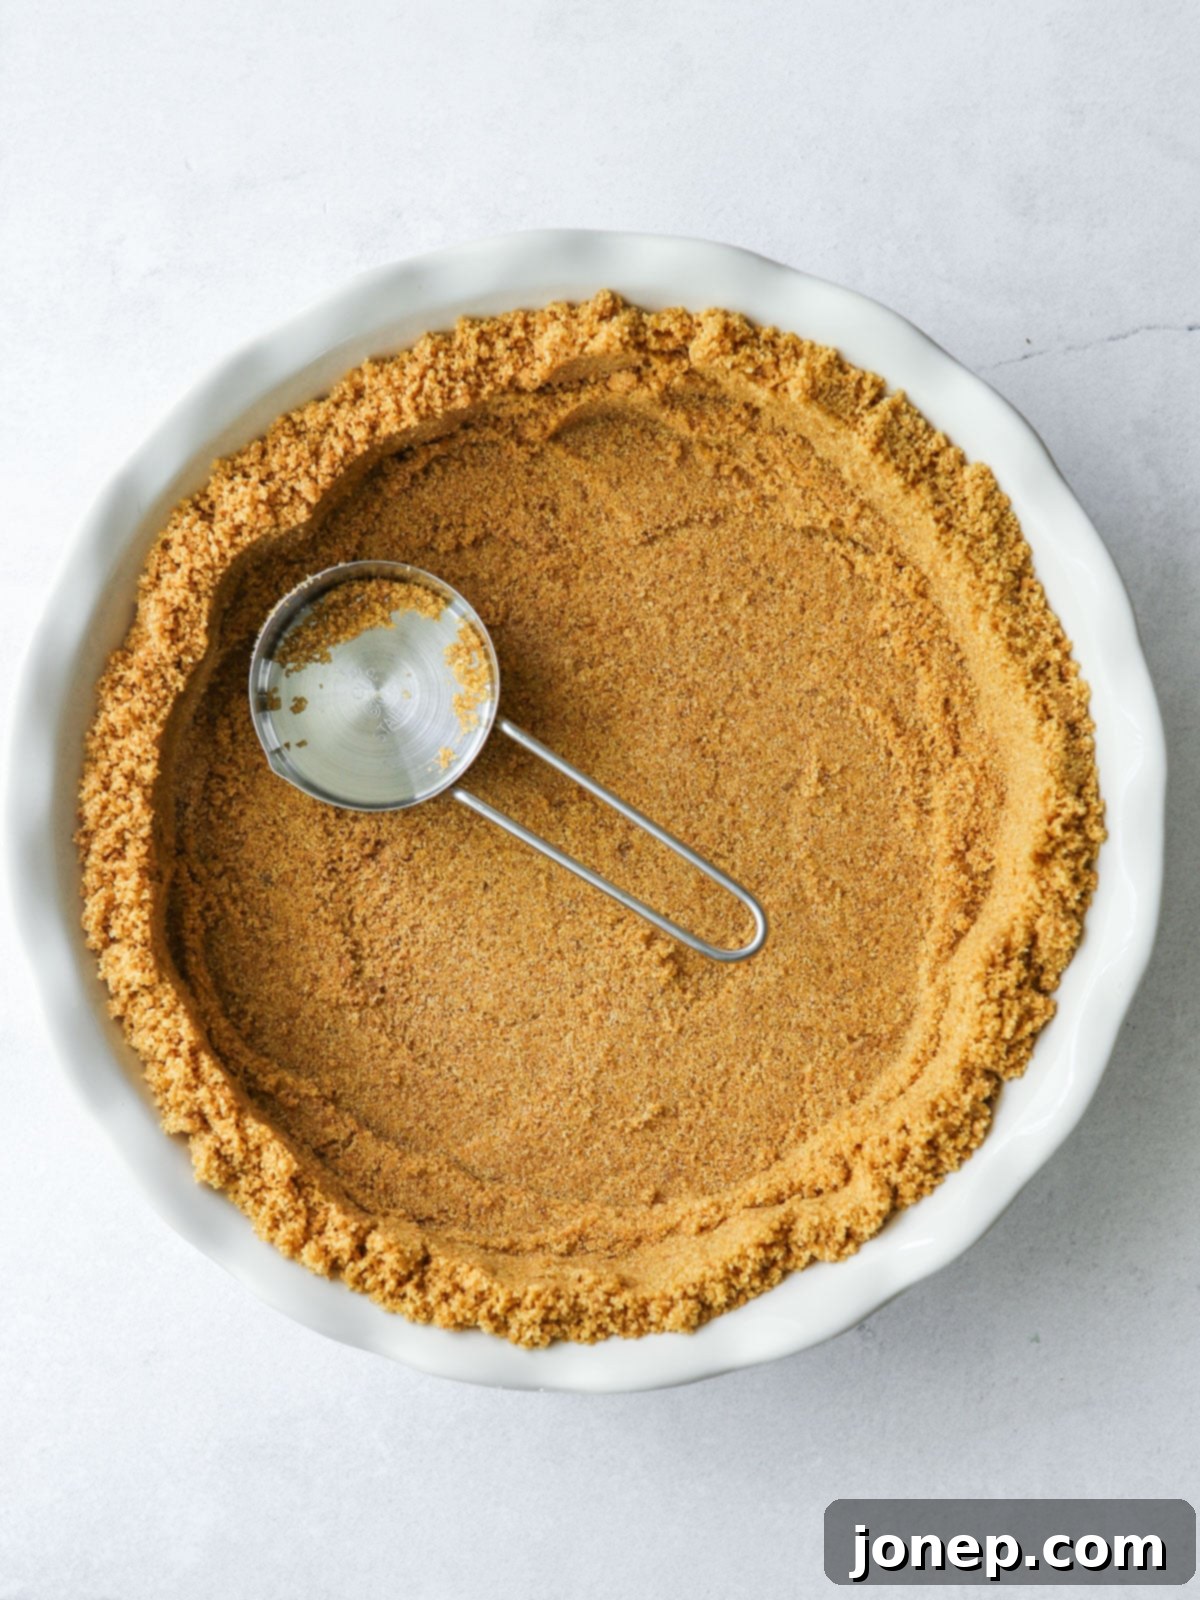
- Press the Mixture into Your Pan: This step is crucial for a firm, even crust. Pour the mixture into your chosen pan—a 9-inch pie plate, a 9-inch springform pan, or a 9×13-inch baking pan.
- Start by pressing the mixture firmly along the bottom and up the sides of the pan. Using your fingers works well for the edges, ensuring they are even and compact.
- For the bottom, use the flat bottom of a measuring cup, a small glass, or a tart tamper to press the crumbs into a tight, even layer. This creates a solid foundation for your filling and prevents crumbling.

- Bake or Chill: Depending on your dessert, you have two options for setting the crust:
- Baked Option: For a sturdier, toastier crust that’s perfect for many pies, bake it in a preheated 350°F (175°C) oven for about 10 minutes. It should be fragrant and just begin to turn lightly golden brown around the edges. Allow it to cool completely before adding your filling.
- No-Bake Option: For chilled desserts like no-bake cheesecakes or cream pies, simply chill the crust in the refrigerator for at least 1 hour, or for a quicker set, place it in the freezer for 30 minutes. This will firm it up nicely without baking.
- Add Filling: Once your crust is baked and cooled, or thoroughly chilled, it’s ready for its delicious filling! Proceed with your desired pie, cheesecake, or tart recipe, following their specific instructions to complete your masterpiece.

Pro Tips for a Flawless Crust
Achieving the perfect graham cracker crust is easy, but a few expert tips can make all the difference:
- Finely Grind Your Crumbs: The finer and more uniform your graham cracker crumbs, the more cohesive and less crumbly your crust will be. Large pieces can create gaps and a less stable base.
- Press Firmly and Evenly: Don’t be shy! Compressing the mixture firmly into the pan is key to a crust that holds its shape and doesn’t fall apart when sliced. Pay extra attention to the corners and edges.
- Chill Before Filling (No-Bake): If you’re going for a no-bake crust, adequate chilling time is essential. This allows the butter to solidify and bind the crumbs, ensuring a firm, sliceable crust.
- Cool Completely (Baked): For baked crusts, always allow them to cool fully before adding your filling. Adding a cold filling to a warm crust can result in a soggy bottom.
- Adjust Cinnamon to Taste: While we love the hint of cinnamon, you can increase or decrease the amount, or even omit it, based on your preference and the filling you plan to use.
- Flavor Variations: Don’t limit yourself to honey graham crackers! This recipe works beautifully with chocolate graham crackers (consider omitting cinnamon), or even digestive biscuits or gingersnaps for a completely different flavor profile.
Recipe FAQs
Got questions about making the perfect graham cracker crust? We’ve got answers!
This graham cracker crust recipe is designed to be highly adaptable. It will perfectly fit a standard 9-inch or 10-inch pie dish or pie pan, providing a classic crust depth. For cheesecakes, it works wonderfully in a 9-inch springform pan, where the crust will extend approximately halfway up the sides. Additionally, it can be pressed into the bottom of a 9×13-inch baking pan, making it ideal for dessert bars or larger sheet pan creations. For different pan sizes, you may need to slightly adjust the recipe by increasing or decreasing ingredient quantities by about 25% to achieve the desired crust thickness and coverage.
Absolutely! This recipe is incredibly versatile and works beautifully with flavored graham crackers. Chocolate graham crackers will yield a rich, cocoa-infused crust, perfect for chocolate pies or cheesecakes. Cinnamon-flavored graham crackers will enhance the cinnamon notes already in the recipe. If you use flavored graham crackers, you might wish to omit or reduce the additional ground cinnamon mentioned in the recipe to avoid an overpowering flavor.
While graham crackers are the preferred choice for their unique flavor and texture, if you live outside the US or simply can’t find them, you have excellent alternatives. Digestive biscuits are a fantastic substitute and will yield very similar results in terms of texture and crumb. For a completely different but equally delicious flavor profile, you can use this exact recipe with finely crushed gingersnaps for a spicy, aromatic crust, or even shortbread cookies for a richer, buttery base. Just ensure they are finely crushed to the same consistency as graham cracker crumbs.
Making your graham cracker crust ahead of time is a great way to streamline your dessert preparation!
- Unfilled Baked Crust: Once baked and completely cooled, cover the crust tightly with plastic wrap or aluminum foil. It will keep beautifully at room temperature for up to a week.
- Unfilled No-Bake Crust: For an unbaked crust, cover it tightly with plastic wrap and store it in the refrigerator for up to 3 days. Alternatively, you can freeze it for a month or even longer. Freezing an unbaked crust is a fantastic option for long-term storage and convenience.
- Filled Crust: For a filled pie or dessert, always follow the specific storage instructions for that particular recipe, as fillings often have different refrigeration or shelf-life requirements.
Yes, this recipe scales very well! To make a larger crust (e.g., for a deep-dish pie or two standard crusts), simply double all the ingredients. If you need a smaller crust (e.g., for mini tarts or a small pie), you can halve the recipe. Always ensure you maintain the proper ratios of crumbs to butter and sugar for the best results, especially when adjusting quantities by weight.
Delicious Ways to Use Graham Cracker Crust
This versatile graham cracker crust is the perfect foundation for a countless array of desserts. Its buttery, slightly sweet, and crisp texture pairs wonderfully with creamy, fruity, or chocolatey fillings. Here are some of our favorite ideas to inspire your next culinary creation:
Beyond these ideas, think about s’mores pies, banana cream pies, or even savory quiches (though you might adjust the sugar and cinnamon for savory applications). The possibilities are truly endless with this versatile crust!
Get the Recipe
Ready to create your own perfect graham cracker crust? Here’s the detailed recipe card to guide you through every step. Enjoy!
Graham Cracker Pie Crust
8 servings
10 minutes
10 minutes
1 hour
1 hour 20 minutes
Pin Recipe
Leave a Review
Ingredients
-
2 cups
(225 grams) graham cracker crumbs -
¼ cup
(55 grams) packed light or dark brown sugar -
6 tablespoons
(85 grams) butter , melted (unsalted recommended) -
¼ teaspoon
salt -
¼ teaspoon
ground cinnamon (optional, but highly recommended for enhanced flavor)
Equipment
Instructions
-
If opting for a baked crust, preheat your oven to 350°F (175°C).
-
Finely crush graham crackers using a food processor (pulse until fine crumbs form) or a Ziploc bag and rolling pin (roll until no large chunks remain). Add brown sugar, melted butter, salt, and cinnamon (if using) to the crumbs. Combine thoroughly until the mixture resembles wet sand and holds together when squeezed.
-
Press the mixture firmly and evenly into your chosen pan—a 9 or 10-inch pie pan, a 9-inch springform pan, or a 9×13-inch baking pan. Use your fingers for the sides and the flat bottom of a measuring cup or glass for the base to ensure a compact crust.
-
EITHER (Baked Crust): Bake the crust for 10 minutes until it becomes fragrant and the edges just begin to turn golden brown. Remove from oven and let it cool completely before filling. OR (No-Bake Crust): Chill the crust in the pan for at least 1 hour in the refrigerator, or for a faster set, 30 minutes in the freezer.
-
Once your crust is ready (baked and cooled, or properly chilled), add your desired filling and follow the specific instructions of your pie or dessert recipe to finish.
-
To store an unfilled crust, cover it tightly with plastic wrap. A baked graham cracker crust can be kept at room temperature for up to a week. An un-baked (unfilled) crust will last about 3 days in the fridge or can be frozen for a month or more. Always store filled crusts according to their specific recipe instructions.
Notes
- For this recipe, you’ll need approximately 2 cups or 225 grams of finely ground graham cracker crumbs. This usually translates to about 14 full sheets (or 28 squares) of graham crackers, which is almost equivalent to two sleeve packages. Remember that different brands might have slightly different cracker sizes, so using a kitchen scale for grams is the most accurate measurement.
- If you prefer using salted butter, you can choose to omit the additional ¼ teaspoon of salt from the recipe. Taste the mixture before pressing to ensure it’s balanced to your liking.
- This versatile crust is suitable for a 9 or 10-inch pie plate, a 9-inch springform pan (the crust will go up about half the sides), or for lining the bottom of a 9×13-inch rectangular baking pan for bars.
- For an extra sturdy baked crust, you can bake it for 12-15 minutes instead of 10, ensuring it’s golden brown.
Carbohydrates: 29g,
Protein: 5g,
Fat: 6g,
Saturated Fat: 3g,
Cholesterol: 90mg,
Sodium: 67mg,
Potassium: 209mg,
Fiber: 1g,
Sugar: 27g,
Vitamin A: 237IU,
Vitamin C: 6mg,
Calcium: 152mg,
Iron: 1mg
Have you tried this recipe?
I’d love to hear about it! Leave a rating and review below, or take a photo and tag it on Instagram @completelydelicious with #completelydelicious.
