Indulge in the Ultimate Homemade Chocolate Hazelnut Ice Cream: A Creamy Dream Recipe
There’s something truly magical about the start of summer, a season brimming with sunshine, outdoor adventures, and the sweet promise of refreshing treats. This past Memorial Day weekend perfectly encapsulated that joyous spirit. It was a time for leisurely days spent soaking up the sun, firing up the grill for delicious feasts, sipping on vibrant summer cocktails, catching up on beloved shows like the return of Arrested Development, and yes, even enjoying those glorious, guilt-free naps. But what truly elevated the weekend to perfection was a batch of incredible homemade ice cream.
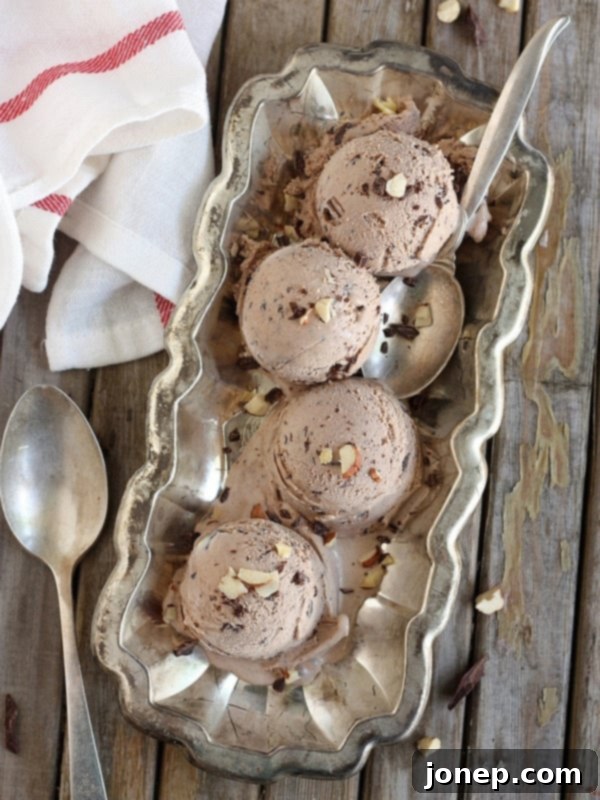
And we’re not talking about just any ice cream. We’re talking about one of my absolute all-time favorites: Chocolate Hazelnut Ice Cream. This recipe has graced my blog for a few years now, but I’ll admit, it was tucked away amidst older photographs and instructions that, looking back, could certainly be clearer. It was in desperate need of a refresh, a modern makeover to truly showcase the intense creaminess and exquisite flavor that makes it so beloved.
The Irresistible Allure of Chocolate and Hazelnut
Chocolate and hazelnut is more than just a flavor combination; it’s a culinary love affair. This classic pairing holds a special place in my heart and, as you might notice, a prominent spot here on the blog. From rich Nutella brownies with toasted hazelnuts to chewy chocolate hazelnut cookies and a decadent chocolate hazelnut fudge sauce, I simply can’t get enough of it. Give me a few more years, and I’ll likely share even more innovative chocolate hazelnut recipes. The harmony between the deep, roasted notes of hazelnuts and the sweet, comforting embrace of chocolate is truly unparalleled.
What makes this particular chocolate hazelnut ice cream so extraordinary is its masterful balance. While chocolate always plays a crucial role, it surprisingly takes a backseat here, allowing the hazelnut to truly shine and captivate your palate. The result is an intensely creamy, exquisitely rich ice cream that highlights the nutty goodness in every spoonful. It’s a sophisticated twist on a beloved flavor, promising to become a new favorite in your dessert repertoire, just as it has in mine.
Why Homemade Ice Cream is Always Better
Making ice cream at home might seem daunting, but the rewards far outweigh any perceived effort. When you craft your own batch, you gain complete control over the ingredients, ensuring only the freshest, highest-quality components go into your dessert. This translates to a superior flavor and an incredibly smooth, rich texture that simply can’t be replicated by store-bought options. Plus, there’s an immense sense of satisfaction that comes from creating such a delightful treat from scratch, making it a truly memorable experience for yourself and your loved ones.
This recipe, in particular, showcases the beauty of homemade ice cream. The process of infusing the milk and cream with toasted hazelnuts allows for a depth of flavor that is simply sensational. The custardy base, enriched with egg yolks, contributes to that signature melt-in-your-mouth creaminess, ensuring no icy crystals ruin your perfect scoop. And the final touch of chopped milk chocolate swirling through the churned ice cream adds delightful texture and bursts of sweetness.
Tips for Achieving the Perfect Chocolate Hazelnut Ice Cream
To ensure your homemade chocolate hazelnut ice cream turns out perfectly creamy and bursting with flavor, pay attention to these key steps:
baking tip: Choosing an Ice Cream Machine
If you’ve been considering venturing into the world of homemade ice cream, now is indeed the perfect moment to invest in a machine! For a fantastic balance of performance and value, I wholeheartedly recommend my Cuisinart machine. It’s incredibly user-friendly and consistently produces excellent results. For those who make ice cream more frequently or desire a higher capacity, a more industrial model might be a worthwhile upgrade. Alternatively, if you already own a stand mixer, you can often find an ice cream attachment that works wonderfully. Not quite ready to commit to a purchase? Don’t let that stop you! You can always explore delicious no-churn ice cream recipes that require no special equipment, offering a different but equally delightful experience.
Hazelnut Roasting and Skin Removal
Don’t skip the roasting step! Toasting the hazelnuts brings out their essential oils and intensifies their nutty flavor, which is crucial for the depth of this ice cream. After roasting, cooling them completely and then rubbing them in a kitchen towel helps remove most of the bitter skins. While you don’t need to get every single piece of skin off, removing the majority will result in a cleaner, purer hazelnut flavor.
Proper Chilling for Optimal Texture
One of the most important steps for any homemade ice cream is thoroughly chilling your base. After cooking, the ice cream mixture needs to be refrigerated for several hours, ideally overnight. This allows the fats to chill completely and fully emulsify, which is vital for preventing ice crystals and achieving that silky-smooth, intensely creamy texture we all crave.
Adding the Chocolate Swirl
For the best results, add the finely chopped milk chocolate during the last 5 minutes of churning. This allows the chocolate to distribute evenly throughout the ice cream, creating delightful little flecks and pockets of chocolate without overwhelming the hazelnut. It also prevents the chocolate from sinking to the bottom if added too early.
Storage for Lasting Freshness
Once churned, transfer your beautiful chocolate hazelnut ice cream to an airtight container. Press a piece of parchment paper or plastic wrap directly onto the surface of the ice cream before sealing the container. This helps prevent ice crystals from forming on top, keeping your ice cream wonderfully fresh for up to two weeks in the freezer. Allow it to firm up for a few hours before serving for the best scoopability and flavor.

Chocolate Hazelnut Ice Cream
8
(1/2 cup) servings
20 minutes
4 hours
Pin Recipe
Leave a Review
Ingredients
Prevent your screen from going dark
Instructions
- 1
Preheat oven to 350°F (175°C). Spread the hazelnuts in an even layer on a non-greased sheet pan. Bake the nuts for 10 to 12 minutes, stirring once or twice to ensure they toast evenly and develop a rich flavor. The nuts should be lightly golden brown and fragrant. Let the nuts cool completely, then rub them vigorously in a clean kitchen towel to remove as much of their papery skins as possible. Finely chop the toasted hazelnuts in a food processor until they resemble a coarse meal.
- 2
In a medium saucepan, gently warm the whole milk with 1 cup of the heavy cream, granulated sugar, and coarse salt. Stir the mixture constantly until the sugar completely dissolves. Once the mixture begins to steam gently around the edges and just before it reaches a rolling boil, remove it from the heat. Stir in the finely chopped hazelnuts. Cover the saucepan and let the mixture steep at room temperature for 1 hour to infuse the rich hazelnut flavor into the cream base.
- 3
Meanwhile, place 4 ounces of the finely chopped milk chocolate into a large, heatproof bowl. In a separate small saucepan, heat the remaining 1 cup of heavy cream until it just begins to boil. Immediately pour the hot cream over the chopped chocolate. Let it sit undisturbed for 5 minutes, allowing the chocolate to soften. Then, stir gently with a whisk or spatula until the chocolate is completely melted and the mixture is smooth and glossy. Set aside to cool slightly.
- 4
After the steeping time, carefully pour the hazelnut-infused milk mixture through a fine-mesh strainer into a separate clean bowl. Press firmly on the hazelnuts in the strainer with the back of a spoon or spatula to extract as much of their delicious, nutty flavor as possible. Discard the spent hazelnuts. Return the now smooth, hazelnut-infused milk to the saucepan and place it over medium-low heat.
- 5
In the bowl, whisk together the large egg yolks until they are light yellow and slightly thickened. When the hazelnut milk mixture in the saucepan is warm (but not boiling), slowly ladle about half a cup of the warm milk into the egg yolks while whisking constantly. This crucial step, known as tempering, prevents the eggs from scrambling. Gradually pour the tempered egg mixture back into the saucepan with the remaining hazelnut milk. Cook over medium heat, whisking constantly with a heatproof spatula or whisk, until the mixture thickens sufficiently to coat the back of a spoon (reaching about 175°F / 79°C). Immediately remove from heat and pour the custard through a clean fine-mesh strainer into the bowl containing the chilled melted chocolate mixture. Add the vanilla extract and stir until all ingredients are thoroughly combined and smooth.
- 6
Chill the ice cream mixture thoroughly in the refrigerator for at least several hours, or preferably overnight, until completely cold. This is essential for a creamy texture. Once chilled, freeze the mixture in an ice cream maker according to the manufacturer’s instructions. During the last 5 minutes of churning, add the remaining 4 ounces of finely chopped milk chocolate, allowing it to incorporate into the semi-frozen ice cream, creating delightful chocolate flecks.
- 7
For optimal texture, transfer the freshly churned ice cream to an airtight container and let it firm up in the freezer for a few hours before serving. This allows it to reach a scoopable, decadent consistency.
Notes
For an extra rich hazelnut flavor, you can briefly warm the chopped hazelnuts in the infused milk mixture after steeping, before straining, to release even more of their oils.
Ensure all your equipment, especially the ice cream machine bowl, is thoroughly chilled according to manufacturer instructions before churning.
Nutrition Facts (per serving)
Carbohydrates: 43g
Protein: 8g
Fat: 49g
Saturated Fat: 22g
Cholesterol: 207mg
Sodium: 119mg
Potassium: 332mg
Fiber: 4g
Sugar: 36g
Vitamin A: 1086IU
Vitamin C: 2mg
Calcium: 120mg
Iron: 2mg
Have you tried this recipe?
I’d love to hear about it! Leave a rating and review below, or take a photo and tag it on Instagram @completelydelicious with #completelydelicious.
Serving Suggestions for Your Decadent Ice Cream
This luxurious chocolate hazelnut ice cream is a star on its own, but it can also be the perfect base or accompaniment for a variety of other desserts. Imagine a scoop alongside a warm brownie, complementing its rich chocolate notes with creamy, nutty goodness. Drizzle it with a homemade chocolate hazelnut fudge sauce for an extra layer of decadence, or sprinkle with more toasted, chopped hazelnuts for added texture. For a refreshing twist, serve it with fresh berries, like raspberries or strawberries, whose tartness perfectly cuts through the richness of the ice cream. You could even use it to make a sophisticated affogato, pouring a shot of hot espresso over a scoop for an unforgettable adult treat. Whether it’s the centerpiece of a summer barbecue or a cozy indulgence on a quiet evening, this ice cream is sure to impress.
So, as summer beckons with its long, warm days, take a moment to savor the simple pleasures. And what better way to do that than with a spoonful (or three!) of this updated, intensely creamy, and utterly delicious homemade chocolate hazelnut ice cream? It’s a labor of love that promises to deliver pure joy with every bite. Enjoy!
