Mastering the Creaming Method: Your Ultimate Guide to Fluffy Cakes and Perfect Cookies
Every home baker dreams of creating light, airy cakes and perfectly chewy cookies. The secret to achieving these coveted textures often lies in a fundamental technique known as the creaming method. This comprehensive guide will demystify this essential baking process, explaining what it is, how it works, and how to execute it flawlessly every time. By understanding the science and mastering the steps, you’ll not only bake more delicious treats but also gain a deeper appreciation for the intricate art of baking.
What is the “Creaming Method”?
At its core, the creaming method is a specific technique for mixing fat (most commonly butter) and sugar together, forming the foundation for many beloved baked goods. When a recipe instructs you to beat or “cream” softened butter and sugar, you are employing this crucial method. The magic happens as the sharp edges of the sugar crystals cut into the softened butter, creating countless tiny air pockets throughout the mixture. This aeration is not merely a mixing step; it’s a vital chemical and physical process that profoundly impacts the final texture, rise, and structure of your baked creations.
These minuscule air cells are crucial for leavening. During baking, these trapped air bubbles expand from the heat, causing your batter or dough to rise. Additionally, this aeration contributes significantly to the desirable light and fluffy texture of cakes, as well as the perfect tender chewiness in cookies. Without proper creaming, cakes can turn out dense and heavy, and cookies might spread excessively, losing their intended shape and texture. It’s often considered the most important step in recipes that call for it, setting the stage for success or failure.
So, let’s delve into the specifics of how to master this technique and ensure your baked goods are always a triumph!
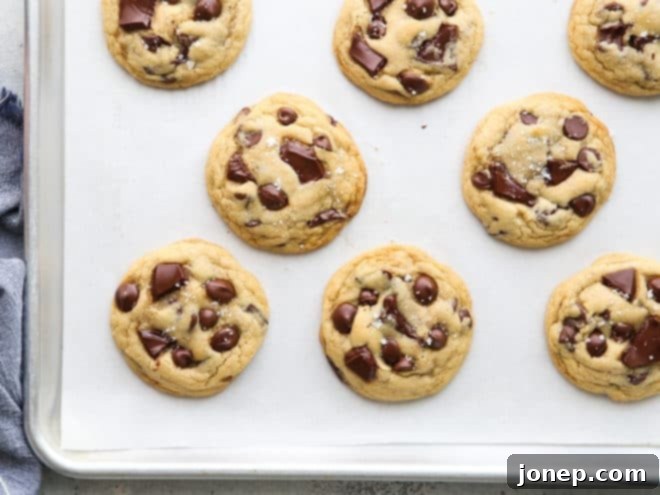
Table of Contents
- What is the “Creaming Method”?
- Ingredients and Tools Needed
- How to Use the Creaming Method
- When to Stop Mixing
- Finish Combining Your Batter or Dough
- Tips for Success
- The “Reverse Creaming Method”
- Recipes That Use the Creaming Method
- More Baking Articles
Ingredients and Tools Needed for the Creaming Method
To successfully execute the creaming method, understanding your ingredients and having the right equipment is paramount. Here’s what you need to know:
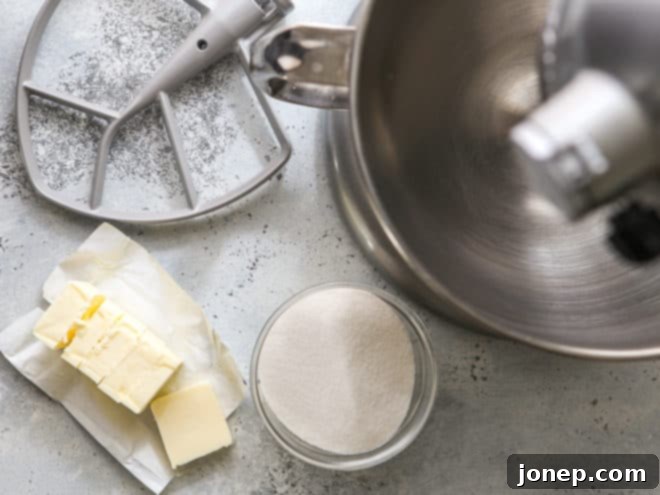
- Fat— While recipes most commonly call for unsalted butter, other non-liquid fats like shortening or even solid coconut oil can be used. The critical factor for butter is its temperature. It should be at a cool room temperature, ideally around 65°F (18°C). This means it’s soft enough to yield to a gentle press, but still firm enough to hold its shape. If your butter is too cold, it won’t cream properly, and if it’s too warm or melted, the air pockets won’t form, leading to a greasy, dense result. The butter should not appear shiny or oily, as this indicates it’s too soft. Learning more about why butter temperature matters will significantly improve your baking.
- Sugar— Granulated sugar is the most common choice due to its ideal crystal size, but brown sugar (which adds moisture and a chewier texture) and even powdered sugar can be used depending on the recipe. The sharp edges of these granular sugars are what create the air pockets by cutting into the softened fat. Non-traditional granular sugar substitutes like coconut sugar also work effectively. However, liquid sweeteners such as honey, maple syrup, or agave nectar are not suitable for the creaming method because they cannot physically cut into the fat to create aeration. If your recipe uses liquid sweeteners, it will require a different mixing technique.
- Electric Mixer— While it’s technically possible to cream butter and sugar by hand with a sturdy whisk or wooden spoon, it’s an incredibly labor-intensive process requiring significant “elbow grease” and patience. For optimal results and efficiency, an electric mixer is highly recommended.
- Stand Mixer: A stand mixer fitted with a paddle attachment (also known as a flat beater) is the most efficient and preferred choice. The paddle attachment is designed to incorporate air into denser mixtures like butter and sugar without over-whipping, creating the ideal texture.
- Hand Mixer: A hand mixer can also be used, though it may take slightly longer and require more effort to achieve the same level of aeration. Ensure you use the appropriate beaters (usually the standard flat ones) rather than whisk attachments, which are better for lighter mixtures.
How to Use the Creaming Method: A Step-by-Step Guide
Executing the creaming method correctly is a straightforward process, but attention to detail is key. Follow these steps for perfect results:
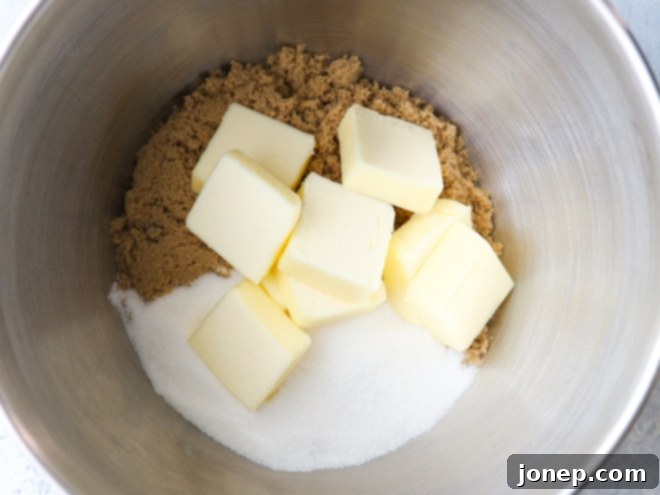
- Prepare Your Mixer and Ingredients: Ensure your mixing bowl and paddle attachment (or hand mixer beaters) are completely clean and dry. Place the softened butter (or other fat) and the sugar directly into the bowl of your stand mixer, or into a large mixing bowl if you are using a hand-held mixer. Make sure your butter is at the ideal cool room temperature, neither too cold nor too warm.

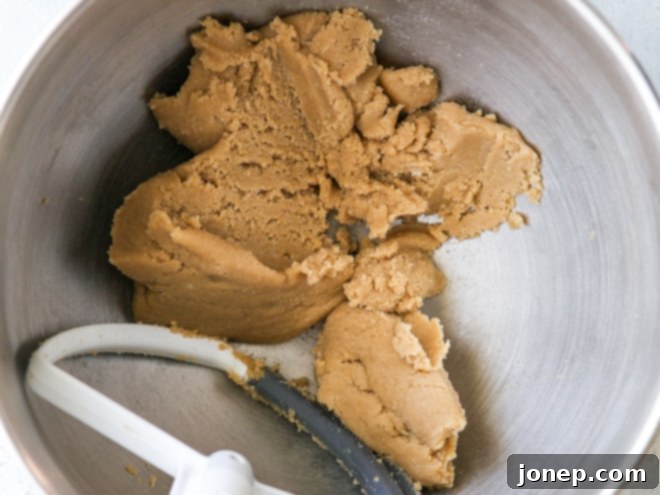
- Begin Initial Mixing: Start your mixer on a low speed to gradually combine the butter and sugar, preventing the sugar from scattering. Once loosely combined, increase the speed to medium-high. Mix for about 30 seconds to 1 minute, until the butter and sugar are just incorporated. Stop the mixer, and use a rubber spatula to scrape down the sides and bottom of the bowl, ensuring all ingredients are fully integrated with the paddle attachment. This early scraping is important to ensure uniform mixing.

- Continue Beating for Aeration: This is where the magic happens! Continue beating the mixture on medium-high speed. As the mixer runs, the sugar granules relentlessly cut into the softened butter, creating countless tiny air pockets. This process is called aeration. You will notice a dramatic transformation:
- Color Change: The mixture will gradually lighten in color, typically from a deep yellow to a pale, almost white or very light yellow. This change is a direct result of the air being incorporated, making the mixture opaque and lighter.
- Texture Change: The mixture will become noticeably fluffier, lighter, and more voluminous. It will no longer look dense and greasy but will take on a whipped, cloud-like consistency.
- Volume Increase: The volume of the butter and sugar mixture will increase significantly, often almost doubling.
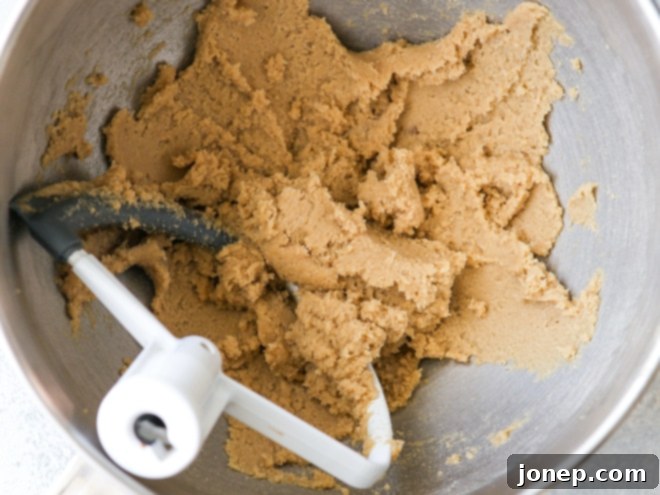
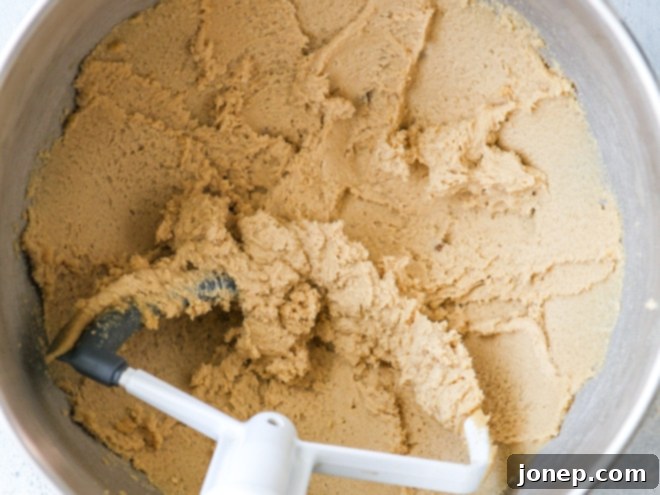
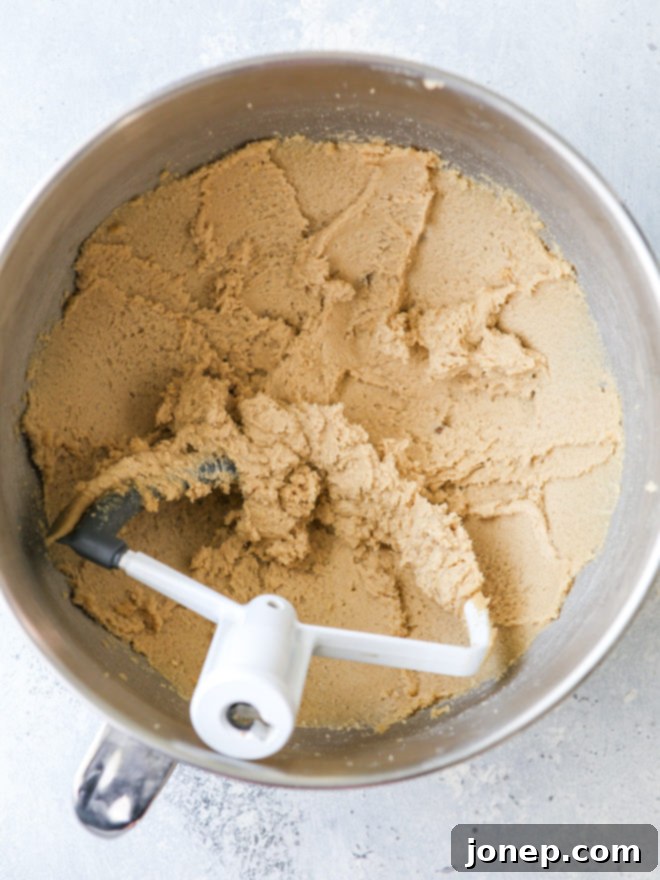
The photo above, taken after approximately 2 minutes of beating, shows the mixture beginning to lighten and stick to the sides of the bowl. It’s making progress, but it’s not quite at the optimal creaming stage yet.

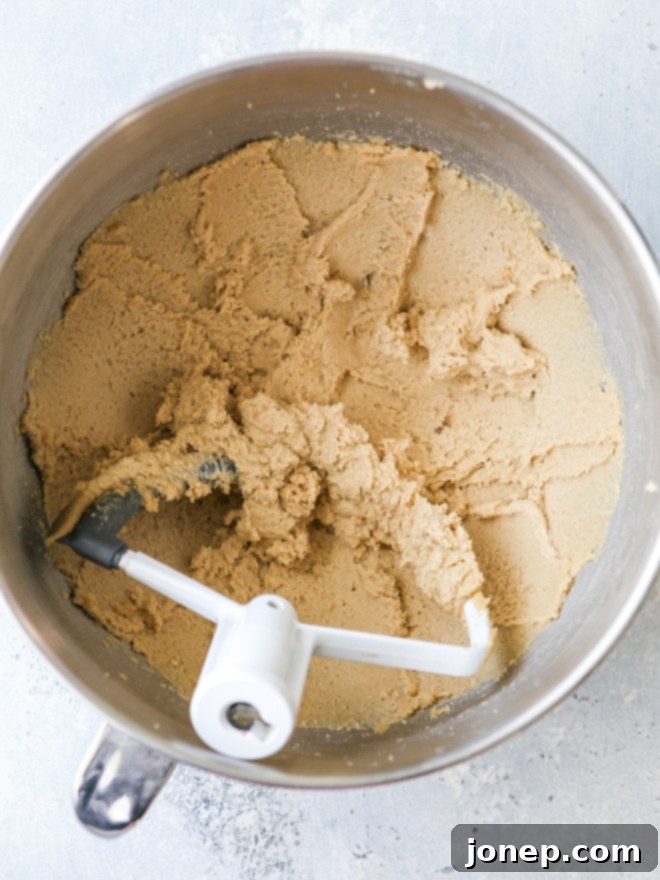
- Achieve the Desired Consistency: Continue beating, scraping down the bowl one or two more times during this process to ensure consistent creaming. The exact duration will vary based on your mixer, butter temperature, and the specific recipe’s requirements. Most recipes will specify a time frame (e.g., “beat for 3-5 minutes”) or describe the desired appearance. It’s crucial to follow your recipe’s instructions, as different baked goods may require slightly different levels of creaming. The photo below illustrates the mixture after 3-4 minutes of mixing at medium-high speed, typically reaching the perfectly creamed stage.

When to Stop Mixing: Recognizing Perfectly Creamed Butter and Sugar
Knowing exactly when to stop mixing is a common challenge, as over-mixing or under-mixing can compromise your final product. The precise timing depends on several factors, including the type of mixer, its speed, and the initial temperature of your ingredients. Always consult your specific recipe for guidance, but generally, your butter and sugar mixture is properly creamed when it meets these criteria:
- Very Light in Color: The mixture should have transformed from a deep yellow to a pale, almost white or light golden hue. This visible lightening is a key indicator of successful air incorporation.
- Fluffy and Airy Texture: It should look and feel significantly lighter, whipped, and cloud-like, rather than dense or heavy. The texture will be smooth and uniform.
- Almost Doubled in Volume: Due to the trapped air, the mixture should visibly increase in volume, often appearing almost twice as much as when you started.
- Sugar Granules are No Longer Distinct: While you might still feel a slight grittiness if you rub a tiny bit between your fingers (especially with coarse sugars), the individual sugar crystals should no longer be clearly visible. They should be thoroughly dispersed and integrated into the fat.
The Pitfalls: Don’t Over-mix or Under-mix!
- Under-beating: If you stop too early, the butter and sugar mixture will remain thick, dense, and dark in color. It will not have incorporated enough air, resulting in baked goods that are flat, dense, and potentially heavy or crumbly. The crucial lift and tender texture will be missing.
- Over-beating: Beating for too long can also be detrimental. While it might seem like more air is better, excessive beating can incorporate too many large, unstable air bubbles. These large bubbles can deflate during the baking or cooling process, leading to cakes with a coarse, crumbly texture, or large, undesirable holes and tunnels. In cookies, over-creaming can sometimes lead to excessive spread, making them thin and brittle. Aim for that perfect balance of light, airy, and stable.
Finish Combining Your Batter or Dough After Creaming
Once you’ve successfully creamed your butter and sugar to perfection, the next steps in your recipe are crucial for maintaining the delicate structure you’ve built. Here’s how to proceed for common applications:
If you’re making a cake:
- Add Eggs Gradually: Introduce eggs one at a time, mixing after each addition just until incorporated. This slow, gradual addition helps create a stable emulsion between the liquid in the eggs and the fat in your creamed mixture. Adding eggs too quickly can cause the mixture to “break” or curdle, resulting in a lumpy batter and a less smooth final product.
- Alternate Dry and Wet Ingredients: Once the eggs are fully mixed in, you’ll typically add the combined dry ingredients (flour, salt, leavening agents like baking powder/soda, spices) in separate additions, alternating with any liquid ingredients (like milk or buttermilk). Begin and end with dry ingredients. This method prevents the overdevelopment of gluten from the flour, which can lead to a tough cake, and also ensures that all ingredients are evenly distributed without overwhelming the batter.
- Mix Just Until Combined: After all ingredients are added, mix only until the cake batter is just combined and no streaks of dry ingredients remain. Overmixing at this stage will develop too much gluten, resulting in a cake with a tougher, chewier texture.
If you’re making cookies:
- Add Eggs One by One: Similar to cakes, add eggs one at a time, mixing thoroughly after each addition until fully incorporated.
- Incorporate Flavorings: Mix in vanilla extract or any other liquid flavorings specified in the recipe.
- Add Dry Ingredients: Often, all combined dry ingredients are added at once to cookie dough. Mix on low speed until the dough is mostly combined, but a few streaks of dry ingredients may still remain. This prevents overmixing.
- Fold in Mix-ins: If your recipe calls for chocolate chips, nuts, dried fruit, or other mix-ins, add them now. Mix them in on the lowest speed or by hand, just until they are evenly distributed throughout the dough. Overmixing with mix-ins can crush them or lead to a tougher cookie.
While cakes and cookies are the most frequent beneficiaries of the creaming method, you might also encounter this technique in recipes for certain frostings (especially buttercream), quick breads, and even some muffin variations where a tender, lighter crumb is desired.
Tips for Success with the Creaming Method
Even with a solid understanding of the steps, a few expert tips can elevate your creaming technique from good to truly exceptional:
- Always Follow Your Specific Recipe! This article provides a general guide and foundational understanding of the creaming method. However, every recipe is unique, and its specific instructions regarding mixing times, speeds, and ingredient temperatures are tailored to achieve a particular result. Always prioritize and adhere to the instructions given in the recipe you are using.
- Utilize a Paddle Attachment for Stand Mixers. If you have a stand mixer, always opt for the paddle attachment over the wire whisk. The paddle’s flat surface is designed to effectively beat air into the dense butter and sugar mixture without over-whipping, creating stable air cells. The wire whisk attachment is better suited for whipping lighter ingredients like egg whites or cream, and will not produce the same desired results for creaming. If using a hand-held mixer, use its standard beaters.
- Regularly Scrape Down the Bowl. This cannot be emphasized enough. Butter and sugar tend to stick to the sides and bottom of the mixing bowl, especially during the initial stages. Stop your mixer at least once, and ideally two to three times, during the creaming process to scrape down the bowl thoroughly with a rubber spatula. This ensures that all ingredients are evenly incorporated and creamed, preventing pockets of unmixed butter or sugar and resulting in a uniform batter.
- Ensure All Dairy and Eggs are at Room Temperature for Cakes. While butter temperature is critical, bringing other dairy ingredients (like milk, yogurt, or sour cream) and eggs to room temperature is equally important for cake recipes. Room temperature ingredients emulsify much more efficiently, creating a smoother, more homogenous batter. This leads to a better rise, finer crumb, and superior overall texture in your finished cake. Cold ingredients can cause the batter to seize or curdle, hindering proper emulsion and aeration.
Exploring the “Reverse Creaming Method”
While the traditional creaming method is a staple, some recipes employ a clever variation known as the reverse creaming method. This technique fundamentally alters the order of ingredient addition, resulting in a distinct texture, particularly favored in certain types of cakes.
In the reverse creaming method, all the dry ingredients (flour, sugar, leavening, salt) are first combined and then beaten together with the softened butter. Only after the butter has been thoroughly incorporated into the dry mixture are the eggs and other liquid ingredients added at the very end. The key difference here is that the fat coats the flour particles early in the process. This coating acts as a barrier, preventing excessive gluten development when the liquids are finally introduced. The result is typically a very fine, tender, and velvety crumb with a remarkably sturdy structure – ideal for elaborate layer cakes that need to hold up well.
Many professional bakers and home baking enthusiasts prefer the reverse creaming method for specific cake profiles, as it often produces a softer, less elastic crumb than cakes made with the traditional method. Recipes like my Southern Coconut Cake or Brown Sugar Cinnamon Layer Cake are excellent examples that utilize this variation, showcasing its ability to create exceptionally light and delicate textures that truly melt in your mouth.
Recipes That Use the Creaming Method
The creaming method is a versatile technique foundational to a wide array of delicious baked goods. From classic cookies to festive cakes, understanding and applying this method correctly will elevate your baking. Here are some fantastic recipes that rely on the creaming method for their perfect texture:
Elevate Your Baking: More Helpful Articles
To further enhance your baking knowledge and skills, explore these additional resources:
- How to Measure Flour Correctly: Precision is key in baking.
- How to Build a Layer Cake: Master the art of cake assembly.
- Baking with Butter: A Complete Guide: Dive deeper into the role of fats.
- How to Bake Picture-Perfect Cookies: Tips for consistently beautiful cookies.
