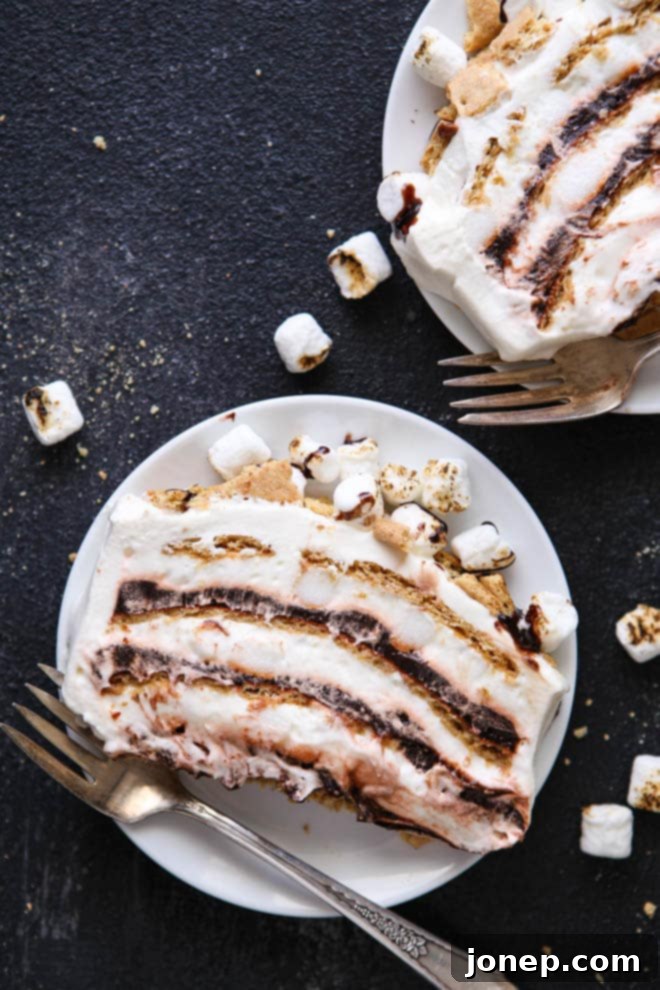
Indulge in S’mores Heaven: The Ultimate No-Bake S’mores Icebox Cake Recipe
Imagine a dessert so utterly delightful, so perfectly balanced in its creamy, crunchy, and chocolatey goodness, that it transports you straight to s’mores heaven. This isn’t just any s’mores-inspired treat; it’s a magnificent no-bake icebox cake, featuring luxurious layers of crisp graham crackers, rich chocolate pudding, and airy marshmallow whipped cream, all perfectly chilled to create an unforgettable experience. It’s the ultimate hassle-free s’mores indulgence, no campfire required!
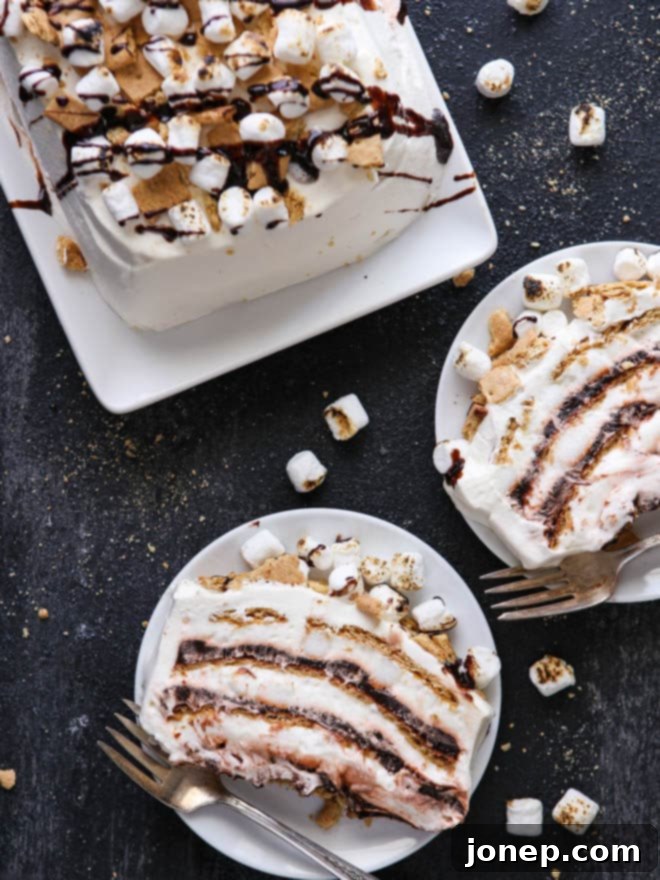
You know that timeless phrase, “if it ain’t broke, don’t fix it?” While the classic campfire s’more is undoubtedly a perfect creation in its own right—a symphony of toasted marshmallow, melty chocolate, and crispy graham cracker—its beloved flavor profile has inspired countless creative variations. The undeniable deliciousness of s’mores is something everyone loves to recreate and experience in new forms. From cozy campfires to gourmet kitchens, the s’mores craze has spawned an impressive array of desserts.
You can find s’mores variations everywhere you look: rice krispie treats, decadent brownies, comforting pies, adorable cupcakes, delightful cookies, elegant cheesecakes, refreshing ice cream, and even sophisticated cocktails. Each offers a unique spin on the classic, proving that the combination of chocolate, marshmallow, and graham cracker is truly versatile.
However, once you try this S’mores No-Bake Icebox Cake, you might just forget all those other s’mores desserts. This recipe truly takes the cake (pun intended!). It’s the last s’mores-inspired dessert you will ever need, offering all the beloved flavors and textures in a surprisingly easy, chilled format perfect for any occasion, especially warm weather gatherings. Its simplicity and incredible taste make it a staple in my kitchen, and I’m sure it will become one in yours too.
As you can probably guess, a lot of sweet treats come out of my kitchen. And while I always make sure to sample and occasionally indulge a little extra, I usually try to limit my intake and share my creations with friends and family. But not with this S’mores Icebox Cake. Oh no, not this one! Whenever I make it, I find myself eating as much of it as humanly possible, completely disregarding swimsuit season. I’ve even been known to sneak bites from the fridge in the middle of the night, just to ensure I don’t have to share a single morsel. It’s truly *that* good.
I first created this recipe four summers ago, and since then, I’ve made this s’mores icebox cake at least a dozen times – probably more! It has consistently proven to be an absolute crowd favorite. My friends and family frequently ask me to bring it to barbecues, potlucks, and summer parties, and I’m always more than happy to oblige. Any excuse I can find to whip up a batch of this deliciousness is a good excuse in my book. It’s the perfect make-ahead dessert, taking the stress out of entertaining while still delivering maximum flavor and enjoyment.
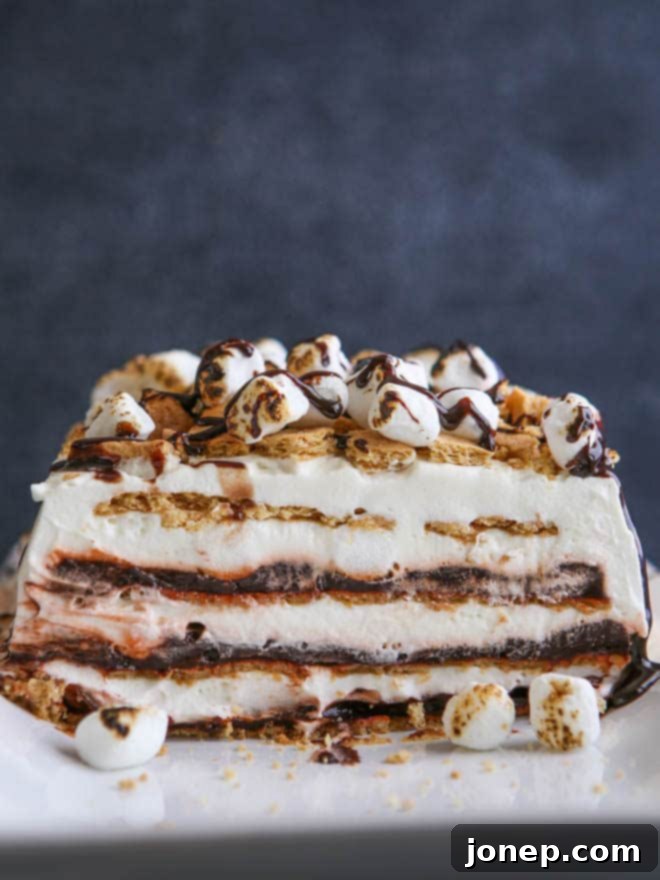
The beauty of this S’mores Icebox Cake lies in its layered perfection. Each component plays a crucial role in creating the signature s’mores experience. The graham crackers soften overnight, transforming into tender, cake-like layers that provide that quintessential crumbly base. Nestled between these layers is a rich, creamy chocolate pudding, delivering deep cocoa notes that are perfectly complemented by the fluffy, sweet marshmallow whipped cream. And for an extra touch of s’mores authenticity, mini marshmallows are folded into the cream, providing soft, chewy pockets of goodness. This harmonious combination of textures and flavors makes every bite an absolute dream.
baking tip:What is an icebox cake?
An icebox cake is a marvelous dessert that requires a fridge, not an oven, to work its magic. It’s a classic, no-bake treat where layers of a creamy filling and store-bought cookies or crackers are assembled and then chilled overnight. During this chilling period, the creamy filling softens the cookies, transforming them into soft, tender, cake-like layers. This process sets the filling and marries the flavors, creating a cohesive and delightful dessert.
Icebox cakes are incredibly easy to assemble, making them ideal for beginner bakers or anyone looking for a low-effort, high-reward dessert. The hardest part, truly, is patiently waiting for them to set up in the fridge!
There are many different variations of icebox cakes, showcasing an endless array of possibilities. Some use whole cookies, while others opt for crushed cookie crumbs. They also vary widely in size, shape, and flavor profiles – from chocolate and vanilla to fruit-infused versions. There’s no single right way to make an icebox cake, allowing for plenty of creativity and customization to suit any taste or occasion.
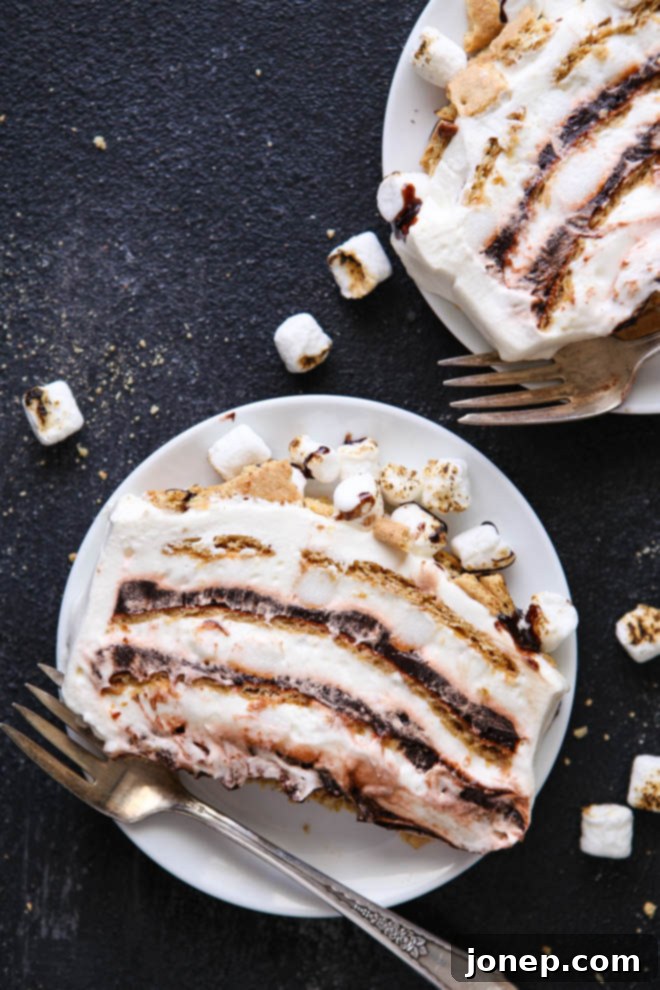
Creating this S’mores No-Bake Icebox Cake is a straightforward process, broken down into three main steps: making the luscious chocolate pudding, assembling the layers, and finally, adding the irresistible toppings. Whether you choose to make your chocolate pudding from scratch for that extra rich, homemade flavor, or opt for a convenient instant mix (see note below for details!), the result will be undeniably delicious. The key is allowing ample chill time, which is essential for the graham crackers to soften and for the entire cake to set into its perfect, sliceable form.
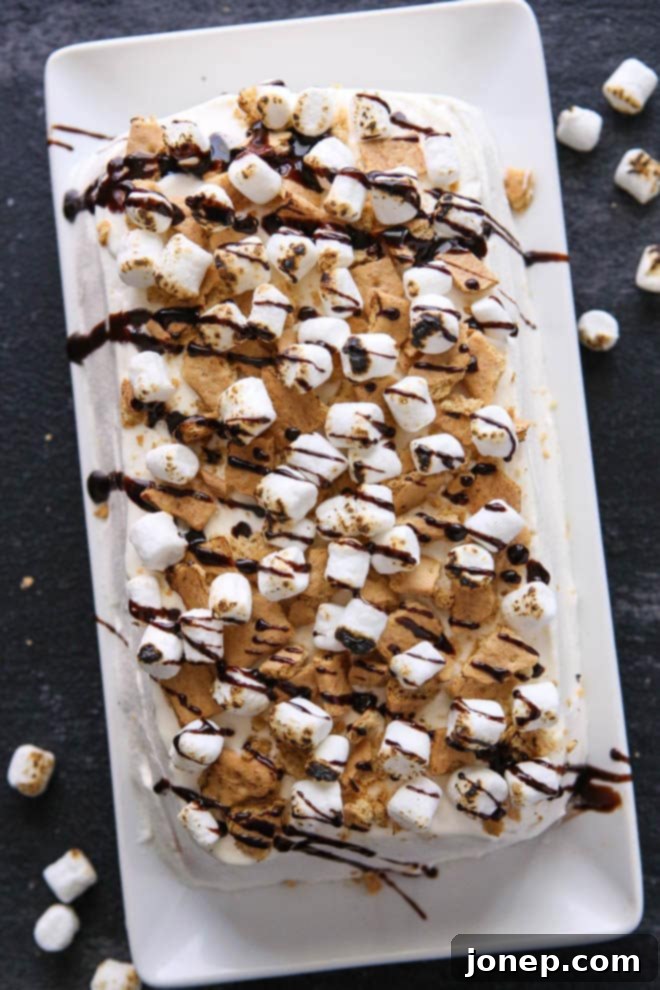
Once the cake has properly chilled, the fun continues with the toppings. A generous layer of freshly whipped cream provides a luxurious finish, ready to be adorned with extra graham cracker crumbles, a scattering of mini marshmallows, and a decadent drizzle of chocolate syrup. For a truly authentic s’mores touch, you can even lightly toast the mini marshmallows on top with a kitchen torch, adding a beautiful golden hue and that signature campfire flavor without ever lighting a fire. This final flourish elevates the cake from simply delicious to absolutely spectacular, making it a showstopper at any gathering.
This recipe was originally published in June 2014.

S’mores No-Bake Icebox Cake
Pin Recipe
Leave a Review
Ingredients
For the chocolate pudding: (see Note)
- 1 ¾ cup whole milk (415 ml)
- ⅓ cup granulated sugar (65 grams)
- ¼ cup unsweetened cocoa powder (20 grams)
- 3 tablespoons cornstarch (20 grams)
- Pinch of salt
- 2 large egg yolks
- 1 teaspoon vanilla extract
To assemble the icebox cake:
- 1 cup heavy whipping cream (237 ml)
- 7 ounce jar marshmallow cream (200 grams)
- 1 ½ cup mini marshmallows (65 grams)
- 1 sleeve graham crackers (approximately 20 squares, 150 grams)
Toppings:
- 1 cup heavy whipping cream (237 ml)
- 2 tablespoons granulated sugar
- 1 teaspoon vanilla extract
- Graham crackers , broken up
- Mini marshmallows
- Chocolate syrup
Instructions
To make the chocolate pudding:
-
In a medium saucepan over medium-low heat, combine the milk, sugar, cocoa powder, cornstarch, and a pinch of salt. Whisk vigorously until the mixture is completely smooth and free of lumps. Heat this mixture, stirring occasionally, until it just begins to steam and is warm to the touch.
-
In a separate medium bowl, whisk together the egg yolks until they are light yellow and slightly frothy. This tempering step is crucial: slowly add about half of the warm milk mixture to the egg yolks in a thin, steady stream while continuously whisking the egg yolks. This will gently raise the temperature of the yolks without scrambling them. When fully combined, pour the egg yolk mixture back into the saucepan with the remaining milk mixture.
-
Place the saucepan back over medium heat. Cook, stirring constantly with a whisk or rubber spatula, until the pudding thickens considerably, becoming rich and glossy. This usually takes about 4-5 minutes. The pudding should be thick enough to coat the back of a spoon. Remove from heat and stir in the vanilla extract. Pour the pudding into a clean bowl, cover the surface directly with plastic wrap to prevent a skin from forming, and chill in the fridge for at least 1 hour, or until completely cool.
To assemble the icebox cake:
-
In the chilled bowl of a stand mixer fitted with a whisk attachment (or using a large bowl and a hand-held mixer), beat the heavy cream and marshmallow cream on medium-high speed until soft peaks form. Be careful not to overmix. Gently fold in the mini marshmallows until evenly distributed. This creates your dreamy marshmallow whipped cream layer.
-
Line a 9×5-inch loaf pan with plastic wrap, leaving an overhang on all sides to make it easier to lift out the cake later. Place a single layer of graham crackers on the bottom of the pan. You may need to break some crackers to fit them snugly and cover the entire base. Next, spread an even layer of the marshmallow whipped cream over the graham crackers. Then, carefully spread a layer of the chilled chocolate pudding on top of the marshmallow cream.
-
Repeat the layering process: graham crackers, then marshmallow whipped cream, then chocolate pudding. Continue these layers until the pan is full, usually allowing for three complete layers. Finish with one final row of graham crackers on top. Cover the entire pan tightly with the overhanging plastic wrap, ensuring no air can get in. Chill the cake in the fridge overnight, or for at least 8 hours, to allow the flavors to meld and the crackers to soften into a cake-like consistency.
For the toppings:
-
Just before serving, prepare your final whipped cream topping. In the bowl of a stand mixer fitted with a whisk attachment (or with a large bowl and a hand-held mixer), beat the heavy cream, granulated sugar, and vanilla extract until medium peaks form. The cream should be thick and hold its shape.
-
Remove the plastic wrap from the top of the chilled icebox cake. Place a serving platter or cutting board upside-down firmly on top of the loaf pan. Carefully but quickly invert the entire thing so that the cake is now sitting perfectly on the platter. Gently lift and remove the loaf pan and peel away the plastic wrap.
-
Generously cover the entire exposed icebox cake in the freshly whipped cream. For that classic s’mores appearance and extra texture, sprinkle with additional broken graham crackers and mini marshmallows. If you have a kitchen torch, you can carefully and quickly toast the mini marshmallows on top for a beautiful, smoky char – but work fast to avoid melting the whipped cream! Finish with a delightful drizzle of chocolate syrup over the top.
-
Slice and serve immediately for the best experience. Store any leftovers in an airtight container in the fridge for up to 5 days, though it rarely lasts that long!
Notes
- For a quicker preparation, you can substitute the homemade chocolate pudding with one 3.5 oz package of instant chocolate pudding mix. Prepare it according to the package directions, but you won’t need to chill it in the fridge before assembly; use it immediately after mixing.
- If you plan to transport this delicious cake, such as to a potluck or barbecue, you might find it easier to serve it directly from the loaf pan. In this case, you can skip the step of inverting it onto a platter and simply add the toppings directly to the cake while it’s still in the pan. This option is also great for a more rustic presentation.
- This recipe was originally published in June 2014. Over the years, I’ve made this recipe countless times and have made a few small adjustments and clarifications to the instructions to make things even easier and more foolproof for you!
Tools for this recipe
(Affiliate links)
