Ultimate No-Bake Lime Cheesecake Bars: Your Go-To Zesty, Creamy Dessert
Prepare to have your dessert world rocked! There’s truly nothing quite like a recipe that effortlessly combines ease, incredible flavor, and a show-stopping presentation. These easy, creamy, and zesty No-Bake Lime Cheesecake Bars with a perfect graham cracker crust are exactly that kind of recipe. Forget heating up your kitchen; no oven is required for this refreshing treat, making it an absolute must-have for warm weather, potlucks, or simply a delightful everyday indulgence.
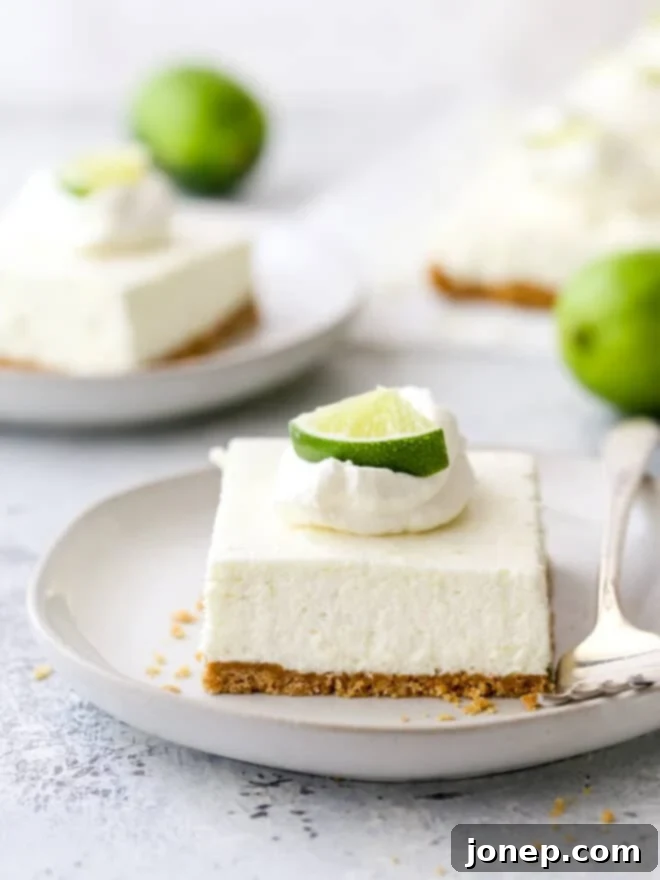
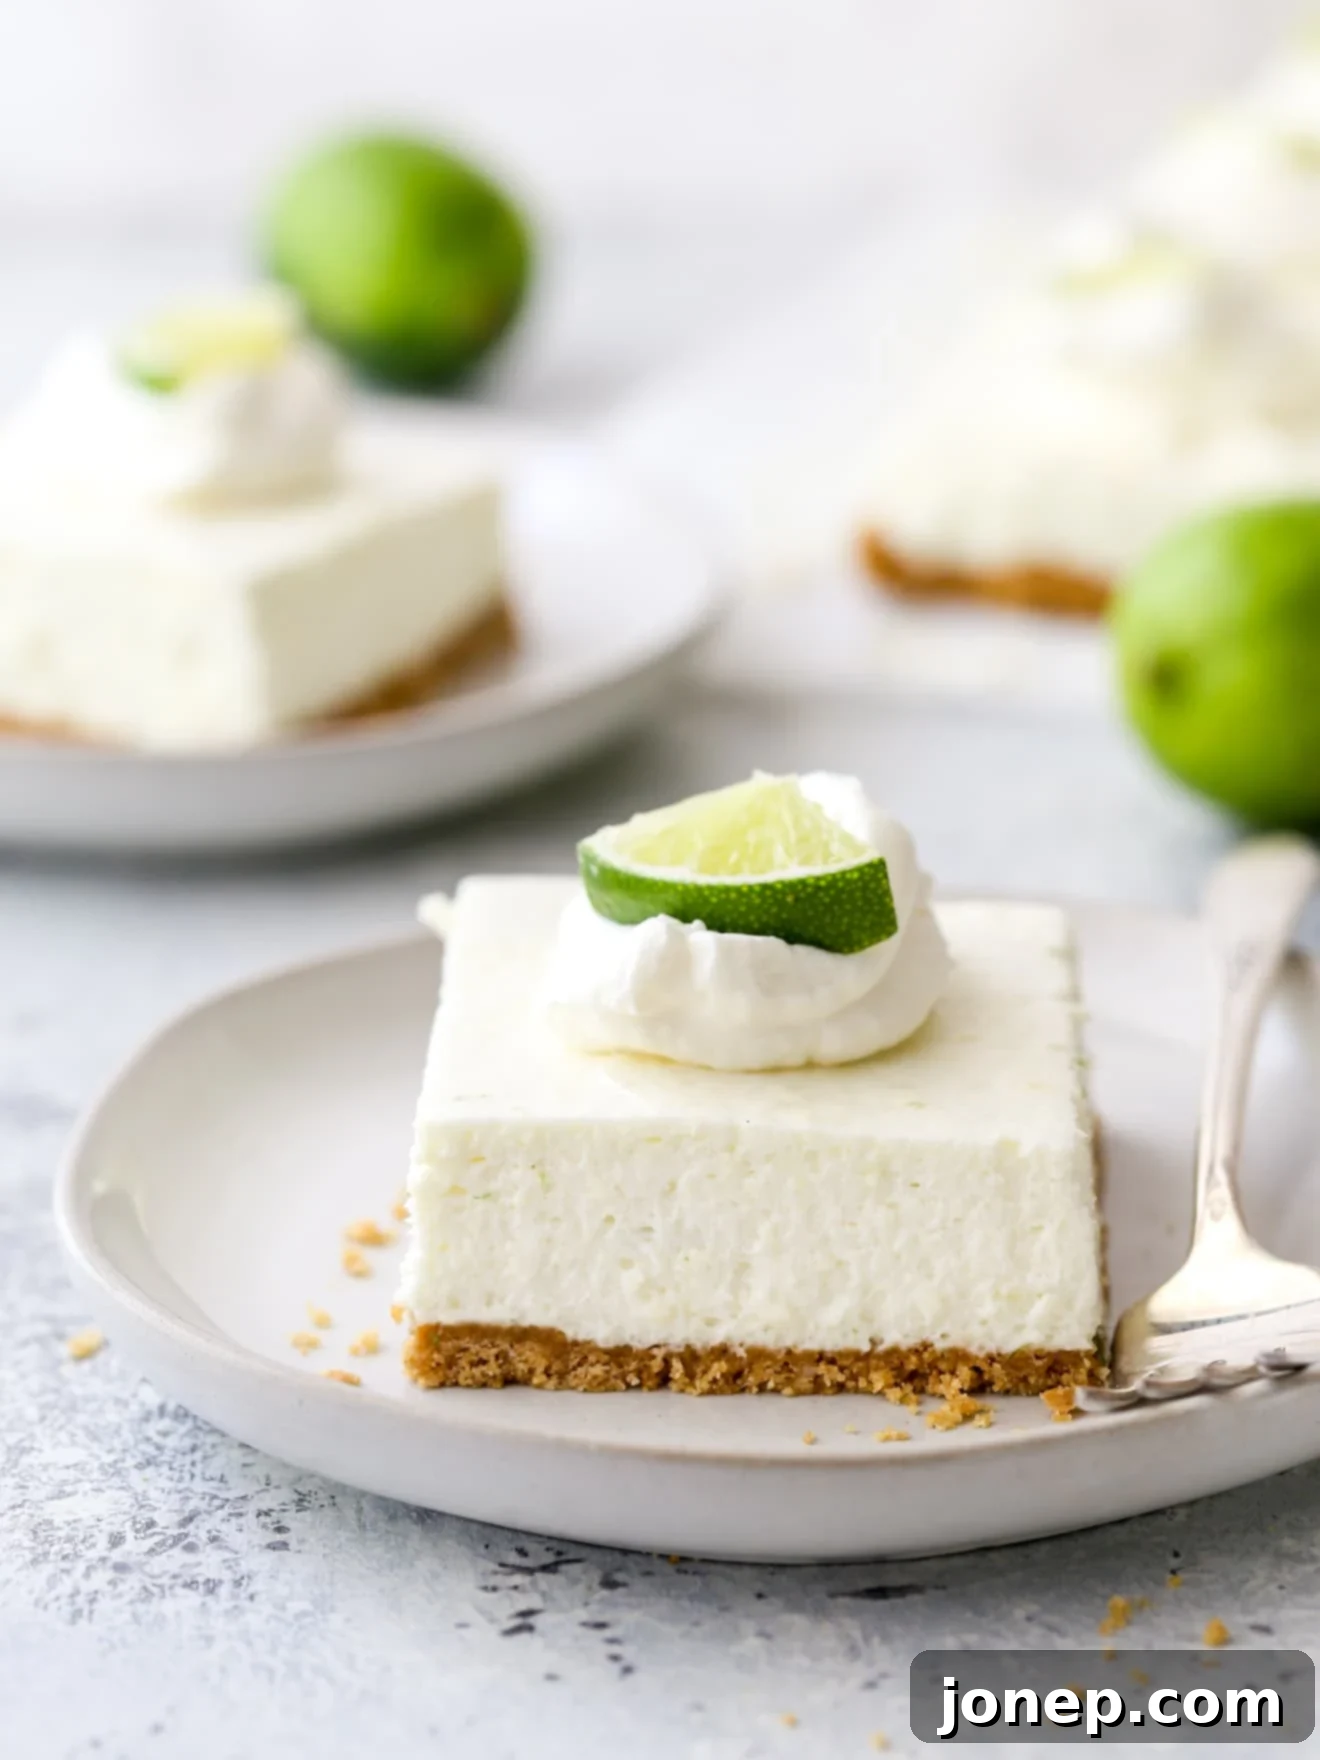
Every now and then, a new creation emerges from my kitchen and completely captures my heart. These lime cheesecake bars did just that! They instantly soared into my list of top 10 favorite desserts, and I’m convinced they’ll hold that coveted spot forever and ever. Imagine the best parts of a classic cheesecake mingling with the tangy, bright flavors of a key lime pie – that’s precisely what these bars deliver. They strike a perfect balance with their buttery graham cracker crust and a filling that’s so light, airy, and bursting with citrusy goodness.
If you adore the rich, smooth texture of cheesecake and the vibrant, refreshing tang of key lime pie, then this recipe is tailor-made for you. It masterfully combines the creamy decadence of cheesecake with the invigorating zest of lime, all without the hassle of baking. That’s right, these bars are completely no-bake, making them as simple and straightforward as homemade desserts get. This means less time in the kitchen and more time enjoying a truly spectacular treat. Let’s dive into how you can make these incredible bars your next dessert sensation!
Table of Contents
- Ingredients You’ll Need
- Key Limes vs. Regular Limes: What’s the Difference?
- How to Make No-Bake Lime Cheesecake Bars
- Expert Tips for the Best No-Bake Lime Cheesecake Bars
- More Cheesecake Treats to Love
- Get the Full Recipe
Ingredients You’ll Need for Irresistible Bars
Crafting these delectable no-bake lime cheesecake bars starts with a selection of simple, high-quality ingredients. Each component plays a vital role in achieving that perfect creamy texture and vibrant flavor. Here’s what you’ll need, along with a few insights into why they’re important:
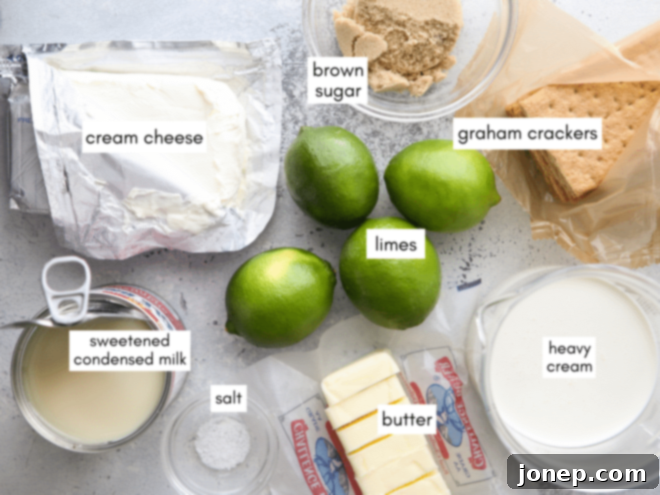
- Graham Cracker Crumbs: The foundation of our crust! You can buy pre-crushed crumbs for convenience or crush whole graham crackers yourself for a fresher taste and control over texture.
- Light or Dark Brown Sugar: Adds a hint of caramel sweetness and helps bind the crust together, contributing to its rich flavor profile.
- Unsalted Butter (melted): Essential for creating a cohesive and flavorful crust. Unsalted allows you to control the overall saltiness of the dish.
- Salt: A small pinch enhances all the flavors in the crust, balancing the sweetness.
- Full-Fat Cream Cheese (at room temperature): This is the star of our filling! Using full-fat cream cheese is crucial for achieving that signature rich, dense, and ultra-creamy cheesecake texture. Ensure it’s at room temperature for a lump-free, silky smooth filling.
- Heavy Whipping Cream: Whipped to soft or stiff peaks, it’s gently folded into the cream cheese mixture to create a light, airy, and fluffy texture, making the bars melt-in-your-mouth delicious.
- Sweetened Condensed Milk: This magical ingredient provides sweetness, thickens the filling, and contributes to the smooth, rich consistency without the need for baking. It’s a no-bake dessert’s best friend!
- Fresh Lime Juice and Zest: The heart of the lime flavor! Always use fresh limes for the brightest, most authentic citrus taste. The zest adds an incredible aromatic punch and depth of flavor that bottled juice simply can’t replicate.
Key Limes vs. Regular Limes: What’s the Difference?
When it comes to lime-flavored desserts, the question often arises: Key limes or regular limes? The regular limes you typically find at your local grocery store are actually “Persian limes.” They are generally larger, possess a thicker rind, yield more juice, and have a distinctly tart flavor profile. Key limes, on the other hand, are smaller, have a thinner, more yellowish rind, and are known for their intensely aromatic, slightly less tart, and more floral juice. While true Key lime pie purists might insist on Key limes for their unique essence, both varieties will work beautifully in this recipe.
Honestly, for these no-bake cheesecake bars, the flavor profile will be remarkably similar and equally delicious whether you opt for Persian or Key limes. The most important factor, however, is to use fresh limes. The fresh lime juice provides that essential tangy brightness, but it’s the fresh lime zest that truly elevates the flavor, adding a complex aromatic quality that cannot be replicated with bottled lime juice. Bottled juices, whether Key lime or regular, often contain preservatives and lack the vibrant, nuanced flavor that fresh zest and juice bring. So, grab a few fresh limes, whichever variety you prefer, and get ready for a burst of citrusy goodness!
How to Make No-Bake Lime Cheesecake Bars: A Simple 3-Step Process
You’ll be delighted by how incredibly simple it is to whip up these irresistible lime cheesecake bars. There are just three main steps to achieve this creamy, zesty perfection!
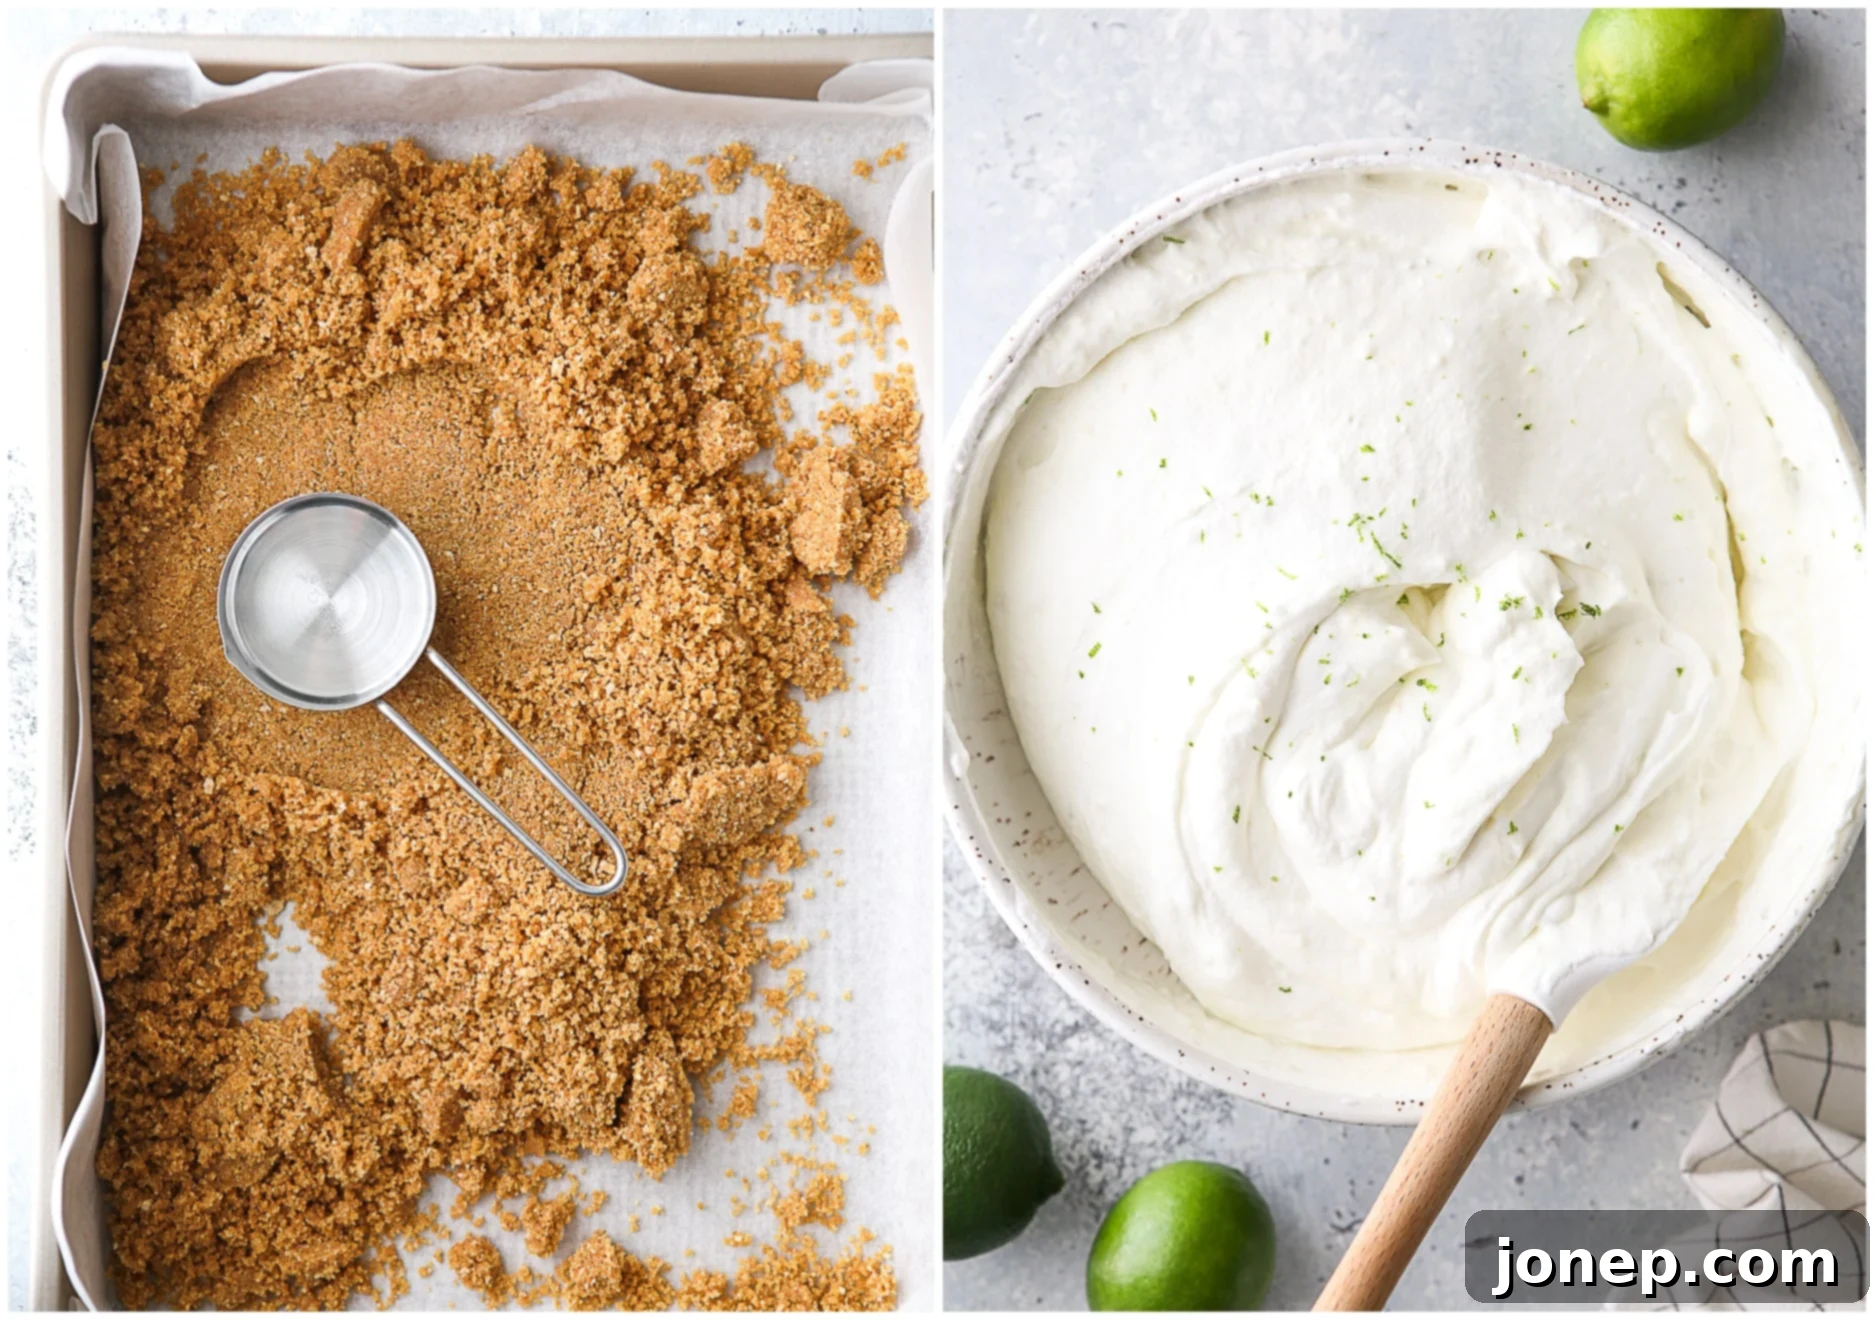
- Prepare the Crust. In a medium bowl, combine the graham cracker crumbs, a pinch of salt, light or dark brown sugar, and melted unsalted butter. Mix thoroughly until the crumbs are evenly moistened and resemble wet sand. Press this mixture firmly and evenly into the bottom of a 9×13-inch baking pan. For the cleanest lift, consider lining your pan with parchment paper beforehand, leaving an overhang on the sides. Once pressed, place the crust in the refrigerator to chill while you prepare the filling. This chilling step is crucial as it helps the butter solidify, setting the crust and preventing it from becoming crumbly when cut.

- Prepare the Filling. Begin by beating the room temperature full-fat cream cheese in a large bowl with a hand-held mixer (or a stand mixer with a paddle attachment) until it is completely smooth and free of lumps. This ensures a silky texture. Gradually add the sweetened condensed milk, fresh lime juice, and vibrant lime zest, continuing to beat until the mixture is well combined and beautifully smooth. In a separate, clean bowl, whip the heavy whipping cream until it forms stiff peaks. Gently fold this whipped cream into the cream cheese mixture in two additions. Be careful not to overmix; fold just until no streaks of white whipped cream remain. This folding technique keeps the filling light and airy.

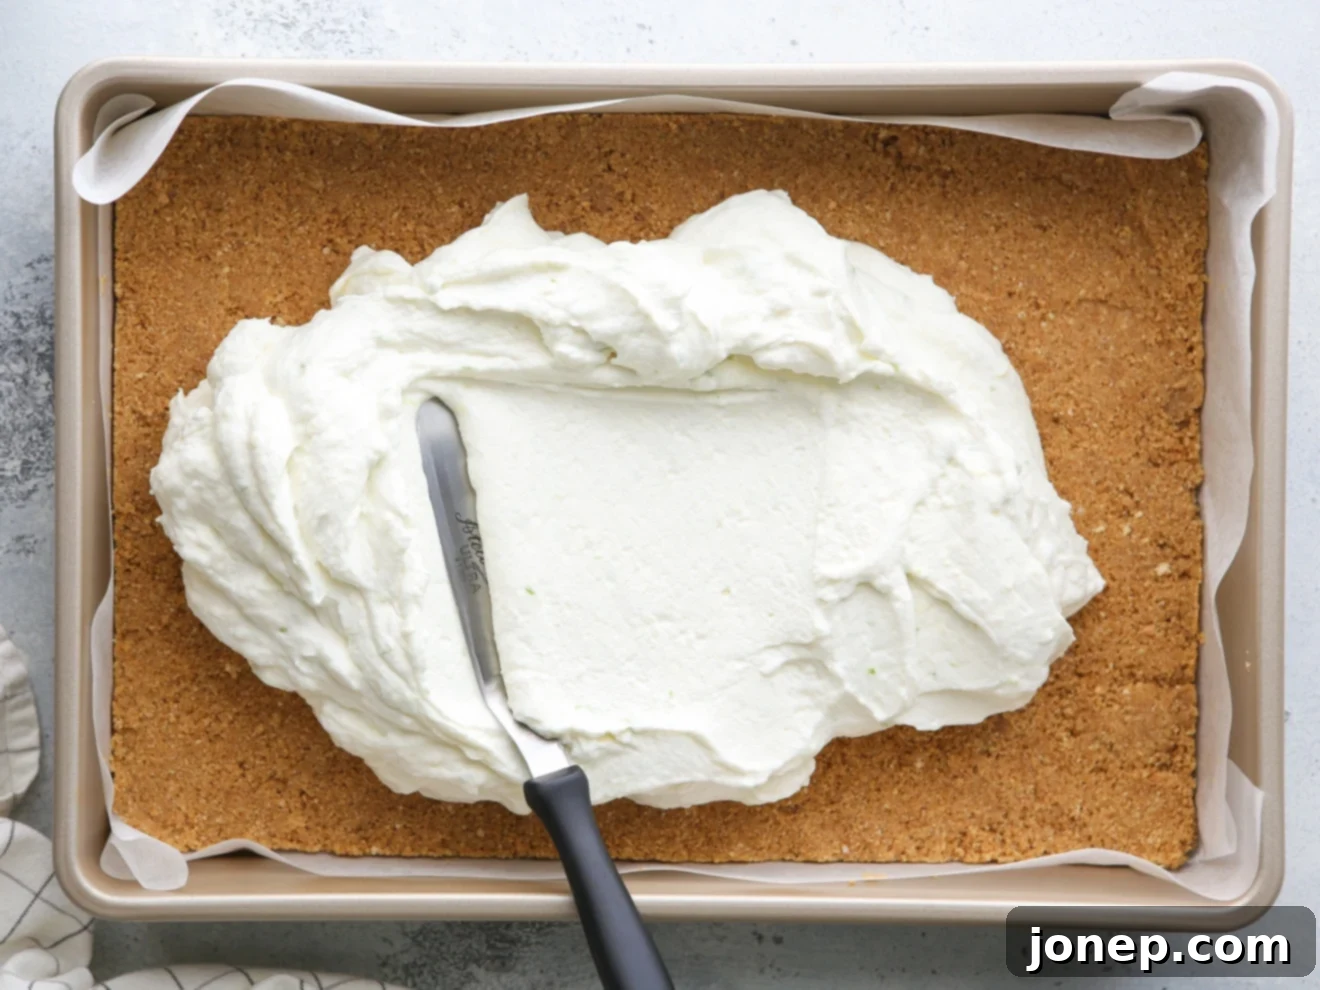
- Chill. Carefully spread the prepared cheesecake filling evenly over the chilled graham cracker crust in the pan. Once smoothed, return the pan to the refrigerator. Allow the cheesecake bars to chill for at least 4 hours, though for the best and cleanest slices, I highly recommend chilling them overnight. This extended chilling time allows the filling to fully set and firm up, ensuring perfect presentation and an enjoyable texture.

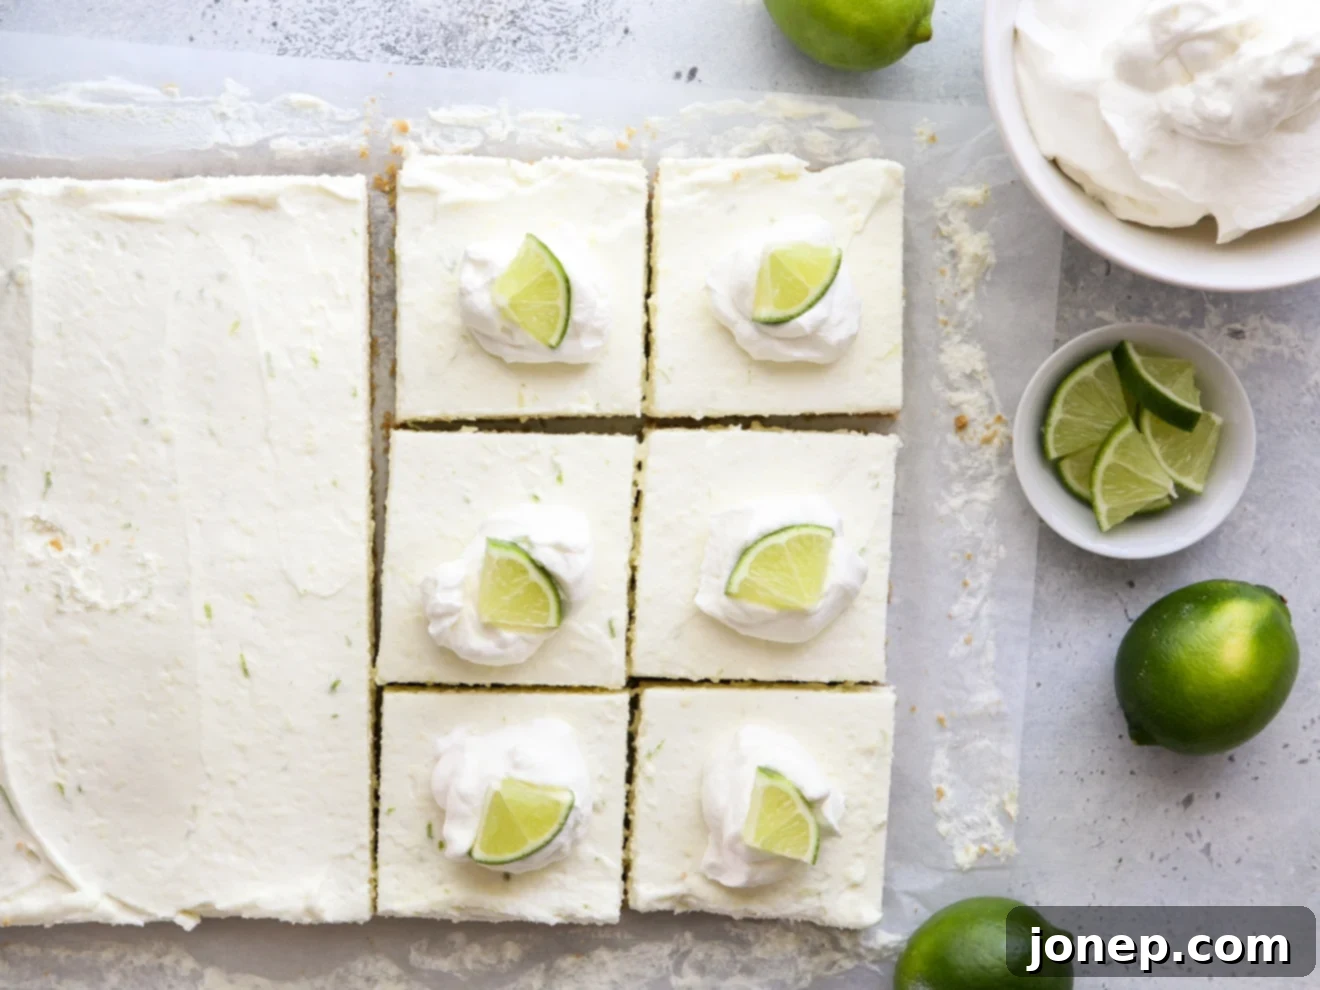
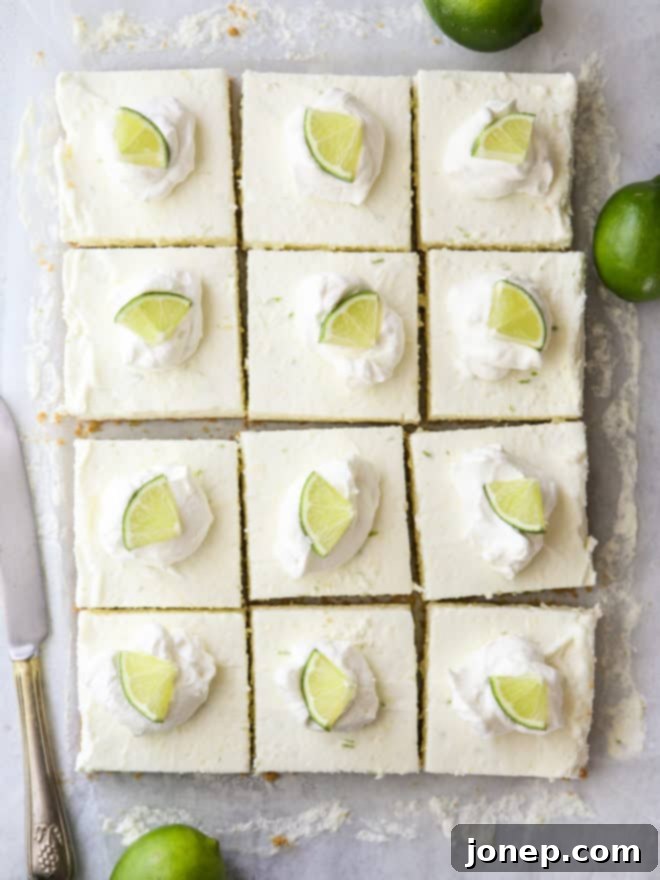
- Slice & Enjoy! Once thoroughly chilled, use the parchment paper overhang to carefully lift the entire slab of cheesecake bars out of the pan and transfer it to a cutting board. Using a sharp knife, slice the cheesecake into individual bars. For the cleanest, most precise cuts, wipe the knife clean with a warm, damp cloth between each slice. Top with additional sweetened whipped cream, fresh lime wedges, or a sprinkle of extra lime zest, if desired, for an extra touch of elegance and flavor.
Expert Tips for the Best No-Bake Lime Cheesecake Bars
Achieving perfect no-bake lime cheesecake bars is easy, but a few simple tips can make all the difference, ensuring your dessert is not just good, but truly spectacular. Follow these recommendations for the best results:
- The Magic of Parchment Paper: This is my number one secret for effortless removal and clean slices! Line your 9×13-inch pan with parchment paper, allowing an overhang on the longer sides. Once the bars are fully set, you can easily use this overhang to lift the entire cheesecake slab out of the pan and onto a cutting board. This prevents messy edges and keeps your pan clean. Aluminum foil can also work in a pinch. (Note: These bars are creamy, so it helps to have an extra set of hands if the slab is large when lifting!)
- How to Make Graham Cracker Crumbs: While store-bought graham cracker crumbs are convenient, making your own ensures freshness and allows for texture control. To make your own, simply pulse whole graham crackers in a food processor until fine. Alternatively, place them in a sturdy ziplock bag and crush them using a rolling pin until you reach your desired consistency. A finer crumb creates a more solid crust, while slightly coarser crumbs can add a nice textural element.
- Start with Room Temperature Cream Cheese: This tip is absolutely crucial for a smooth, lump-free filling! If your cream cheese is cold, it won’t blend properly, resulting in a chunky texture. Let your full-fat cream cheese sit out at room temperature for 60-90 minutes before mixing. This allows it to soften sufficiently for a perfectly silky filling.
- Consider Green Food Coloring (Optional): I personally love the natural, pale off-white color of the lime filling, which subtly hints at the fresh lime flavor. However, if you prefer a more vibrant, “lime green” appearance, you can add a few drops (start with 1/4 to 1/2 teaspoon) of green food coloring to the filling mixture. Gel food coloring works best for a concentrated color without adding extra liquid.
- Elevate with Garnishes: These bars are incredibly delicious on their own, but a simple garnish can transform them into an elegant dessert. A dollop of freshly made sweetened whipped cream and a thin slice or wedge of fresh lime are classic and beautiful additions. For extra flair, consider a sprinkle of lime zest, a few fresh mint leaves, or even a dusting of toasted coconut flakes.
- Plan Ahead for Optimal Chilling: The chilling time is perhaps the most important part of a no-bake cheesecake. To ensure these cheesecake bars have ample time to set up for clean, firm slices, I highly recommend making them the day before you plan to serve them. A minimum of 4-6 hours of chill time is essential, but chilling overnight is truly ideal. Avoid trying to speed up the setting process by placing them in the freezer, as this can affect the creamy texture of the filling and make it icy rather than smooth. The refrigerator is your best friend here.
- Storage and Shelf Life: These delicious bars keep wonderfully! Store them in the baking pan, covered tightly with plastic wrap or aluminum foil, for several days in the refrigerator. For longer storage or if you’ve already sliced them, transfer them to an airtight container and they’ll remain fresh for up to a week in the fridge. While you can freeze the bars for up to a month, the texture might be slightly altered upon thawing, so fresh from the fridge is always best.
More Cheesecake Treats to Love
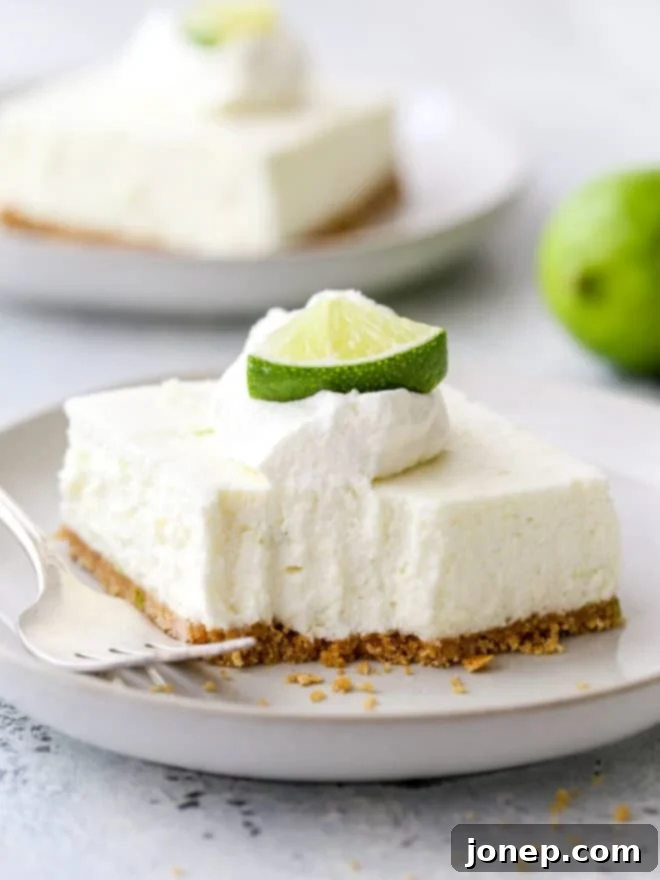
If you’re a fan of the creamy, dreamy goodness of cheesecake, then you’ll love exploring these other fantastic recipes from our collection. Whether you prefer baked or no-bake, classic or fruity, there’s a cheesecake treat here for everyone!
Get the Full No-Bake Lime Cheesecake Bars Recipe
Ready to create this incredible no-bake dessert? Here’s the complete recipe card with all the measurements and detailed instructions. You’ll love how easy it is to bring this zesty, creamy delight to your table!
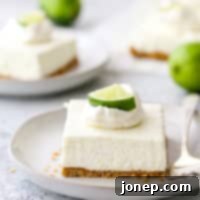
No-Bake Lime Cheesecake Bars
12
bars
20 minutes
0 minutes
4 hours
4 hours
20 minutes
Pin Recipe
Leave a Review
Ingredients
For the crust:
- 2 cups (285 grams) graham cracker crumbs
- Pinch of salt
- ¼ cup (50 grams) packed light or dark brown sugar
- 6 tablespoons (85 grams) unsalted butter , melted
For the filling:
- 8 ounces (225 grams) cream cheese , at room temperature
- 14 oz can (400 grams) sweetened condensed milk
- ½ cup (125 ml) freshly squeezed lime juice
- 1 tablespoon lime zest
- 1 cup (250 ml) heavy whipping cream
- Sweetened whipped cream , for topping
- Lime slices , for garnish
Instructions
-
Combine the graham cracker crumbs, salt, brown sugar and melted butter in a medium bowl. Stir until thoroughly combined.
-
Press the crust mixture evenly and firmly into the bottom of a 9×13-inch baking dish (lined with parchment paper for easy removal, if desired). Chill in the fridge for at least 15-20 minutes while you prepare the filling.
-
In a large bowl, beat the room temperature full-fat cream cheese with a hand-held mixer until completely smooth and creamy. Add the sweetened condensed milk, freshly squeezed lime juice, and lime zest. Continue to beat until the mixture is well combined and silky smooth.
-
In a separate, clean bowl, beat the heavy whipping cream until stiff peaks form. Gently fold this whipped cream into the cream cheese mixture in 2 additions, mixing just until combined and no white streaks remain. Avoid overmixing to maintain the light and airy texture. Spread the cheesecake filling evenly on top of the chilled graham cracker crust.
-
Chill the cheesecake bars in the fridge for a minimum of 4 hours, or preferably overnight, to allow the filling to set completely.
-
Once thoroughly chilled, lift the bars out of the pan using the parchment paper overhang. Place on a cutting board. Use a sharp knife, wiping it clean between each cut, to slice into individual bars. Top with sweetened whipped cream and fresh lime slices for garnish before serving. Enjoy your perfectly zesty, creamy dessert!
Video
Notes
NOTES
- To make graham cracker crumbs, crush graham crackers in a large ziplock bag with a rolling pin, or pulse in a food processor until desired consistency.
- For ultra-clean slices, run a sharp knife under hot water and dry thoroughly between each cut.
- Ensure cream cheese is at room temperature to avoid lumps in the filling.
- Chilling overnight is highly recommended for the firmest, best-setting bars.
Carbohydrates: 35g,
Protein: 5g,
Fat: 24g,
Saturated Fat: 14g,
Trans Fat: 1g,
Cholesterol: 74mg,
Sodium: 205mg,
Potassium: 208mg,
Fiber: 1g,
Sugar: 26g,
Vitamin A: 814IU,
Vitamin C: 4mg,
Calcium: 143mg,
Iron: 1mg
American
Dessert
Annalise Sandberg
Have you tried this recipe?
I’d love to hear about it! Leave a rating and review below, or take a photo and tag it on Instagram @completelydelicious with #completelydelicious.
This recipe was originally published April 2016 and has been updated for clarity, enhanced SEO, and additional helpful tips.
