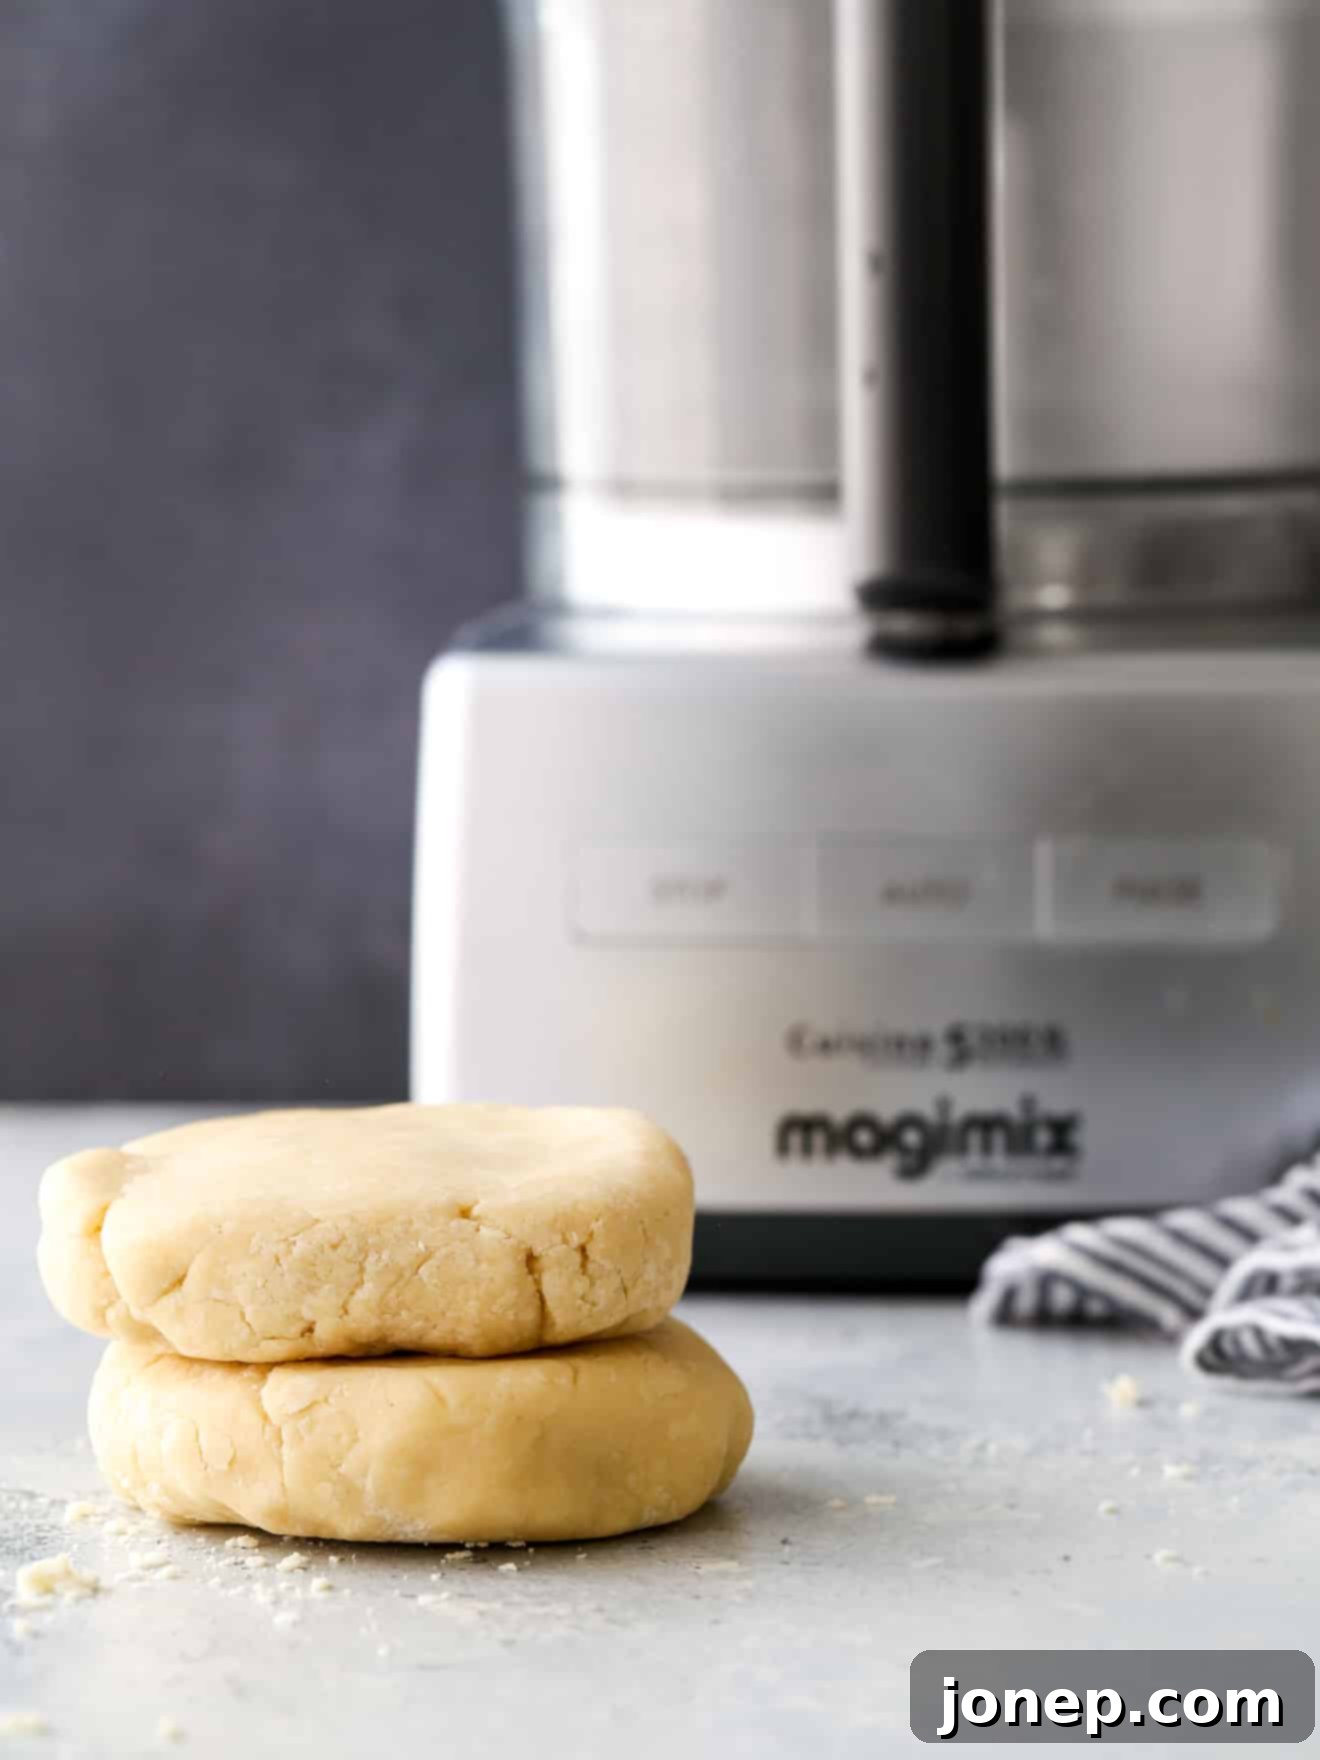
Effortlessly Flaky: The Ultimate Food Processor Pie Crust Recipe for Beginners
Baking a delicious homemade pie starts with a perfect crust. While traditional methods can be time-consuming and sometimes intimidating, learning how to make pie crust in a food processor is an absolute game-changer. It’s the easiest way to achieve that sought-after flaky texture without the extensive effort of hand-mixing. This method is incredibly efficient, allowing you to whip up a beautiful, all-butter pie dough in a fraction of the time, so you can focus on perfecting your fillings.
There are certainly times when you might crave the meditative process of crafting a pie crust by hand, meticulously cutting in butter for that foolproof flaky pie crust. But let’s be honest, often, our busy lives call for a shortcut. That’s where the trusty food processor comes to the rescue! This ingenious kitchen tool drastically cuts down on prep time, allowing you to quickly combine ingredients, get your dough chilling in the fridge, and move on to other tasks or simply enjoy more of your day.
This food processor pie crust method is not just about speed; it’s about smart baking. It minimizes the handling of the dough, which is crucial for preventing over-development of gluten and keeping the butter cold – two key factors for achieving a tender, flaky texture. The result is a perfectly flaky, all-butter double pie crust that tastes just as incredible as one made by hand, but with significantly less effort.
While incredibly efficient, it’s worth noting that the food processor method isn’t entirely foolproof. Like any baking technique, it requires a little attention. The main pitfalls to watch out for are accidentally adding too much water or overworking the dough. However, with my clear instructions and a bit of care, you’ll be amazed at how quickly you can assemble your pie crust. Pay close attention to the visual cues and timing, and your food processor will help you create beautiful, professional-quality pie dough in almost no time at all.
Table of Contents
- What You’ll Need
- How to Make Pie Crust in a Food Processor
- Step 1— Add Ingredients to Food Processor
- Step 2— Pulse to Break Up the Butter
- Step 3— Add Liquid
- Step 4— Let Dough Start to Come Together
- Step 5— Form into Disks
- Use Right Away or Store for Later
- Pro Tips for the Best Pie Crust
- Common Questions About Food Processor Pie Crust
- My Favorite Pie Recipes
- Recipe for Making Pie Crust in the Food Processor
What You’ll Need for Food Processor Pie Crust
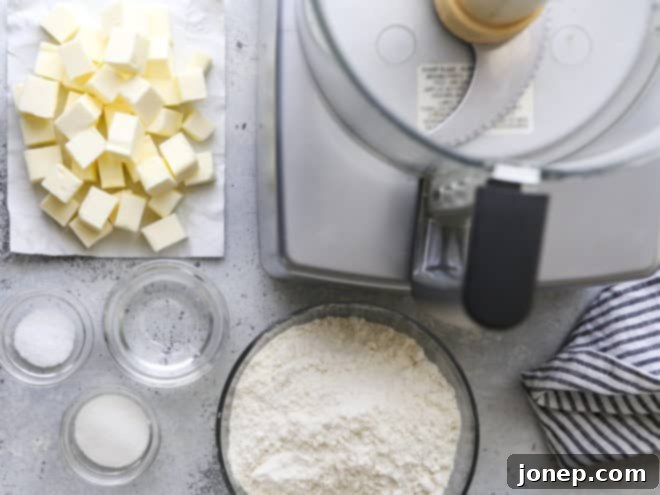
Making pie crust in a food processor requires just a few basic ingredients and one key piece of equipment. The quality and temperature of your ingredients are crucial for success:
- All-purpose flour: The foundation of our crust. Ensure it’s fresh for best results.
- Cold unsalted butter, cubed: This is non-negotiable! Cold butter creates pockets of steam during baking, leading to a wonderfully flaky texture. Cubing it helps the food processor break it down evenly and quickly without warming it too much.
- Granulated sugar (optional): A touch of sugar adds a hint of sweetness and helps with browning, especially if you’re making a sweet pie.
- Salt: Enhances the flavor of the crust and balances the richness of the butter.
- Ice cold water: Like the butter, cold water is essential. It prevents gluten from developing too much and keeps the butter from melting, preserving flakiness. You can even add a few ice cubes to your water to ensure it’s super chilled.
- A food processor: Your workhorse for this recipe! A large food processor (10-12 cup capacity) with a sharp S-blade is ideal for handling the volume of ingredients efficiently.
How to Make Pie Crust in a Food Processor: A Step-by-Step Guide
Follow these simple steps to create a perfect, flaky pie crust with minimal effort:
Step 1— Add Dry Ingredients to Food Processor
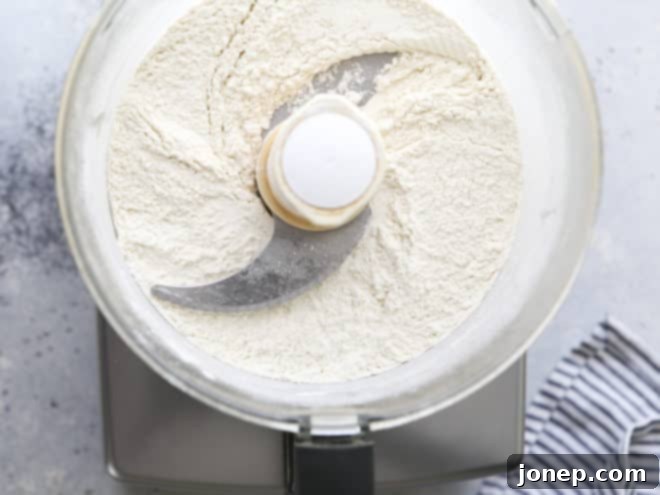
Begin by adding your dry ingredients – flour, salt, and granulated sugar (if you’re using it) – into the bowl of a large food processor fitted with the metal S-blade. Give it a few quick pulses, about 5-10 seconds, to ensure they are well combined. This initial step helps distribute the salt and sugar evenly throughout the flour, ensuring consistent flavor in your final crust.

Step 2— Pulse to Break Up the Butter
Next, scatter the cold, cubed butter over the dry ingredients in the food processor. It’s crucial that the butter is very cold; straight from the fridge or even slightly frozen is best. Pulse the mixture 3-5 times, using short bursts, until the smallest pieces of butter are roughly the size of large peas. You’ll still see some larger, almond-sized pieces, and that’s perfectly fine – even desirable! Avoid over-processing at this stage, as the butter will be further broken down when you add the liquid. Larger pieces of butter contribute to the flakiest layers in the baked crust.
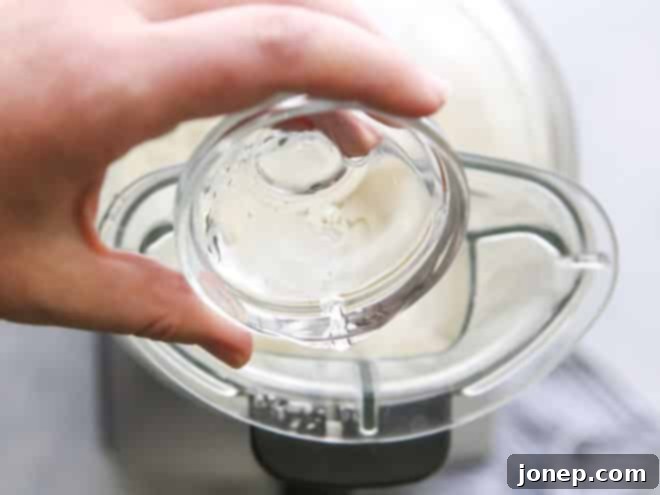
Step 3— Add Liquid Gradually
With the food processor running on low, slowly begin to pour in the ice-cold water through the feed tube. The cold temperature of the water is vital for keeping the butter firm and minimizing gluten development. If you’re experimenting or using a specific recipe, you could also use buttermilk (as in my buttermilk pie crust recipe), which adds a lovely tang and tenderness. Continue pouring all the liquid in a steady stream while the processor is running until it’s fully incorporated. This gradual addition ensures even distribution without overworking the dough.
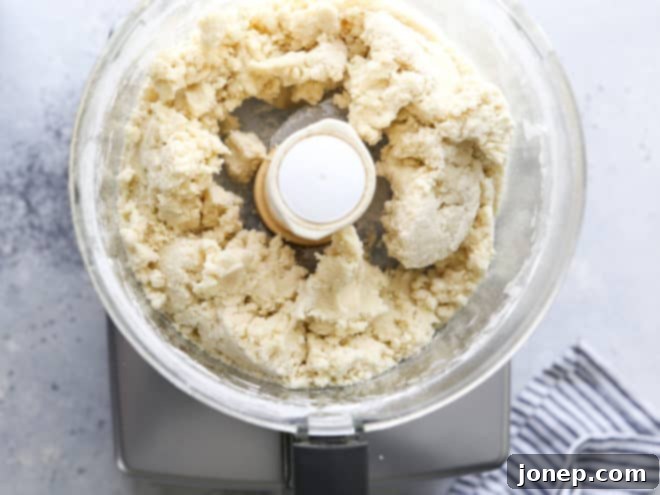
Step 4— Let Dough Start to Come Together
Allow the food processor to run until the dough just begins to clump together and form large, shaggy pieces. You’ll notice a distinct change in the sound of the food processor – it will typically become louder or sound like it’s working harder as the dough starts to consolidate. Once all the liquid has been added, this usually takes only a few more seconds, certainly less than 10 seconds total. It’s crucial not to over-process the dough; stop as soon as it looks like the photo above. The dough should still appear loose and crumbly, but when you pinch a piece between your fingers, it should hold together easily. A common mistake is to let it form a complete ball in the food processor, which can lead to a tough crust due to overdeveloped gluten.
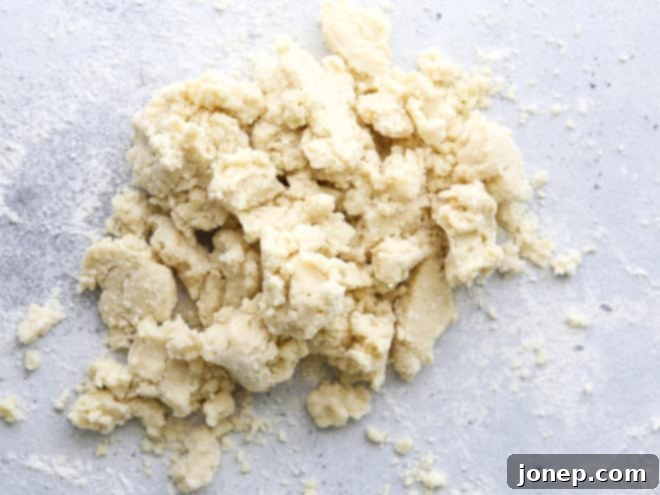
Step 5— Form into Disks
Carefully dump the dough mixture out onto a clean, lightly floured surface. Using your hands, gently gather the loose crumbs and press them together to form two equal disks. Avoid kneading the dough excessively; simply work it enough to bring it together. The goal is to keep the butter pieces distinct and prevent further gluten development. Shaping it into disks at this stage makes it much easier to roll out later, as the dough will already be in a manageable form.
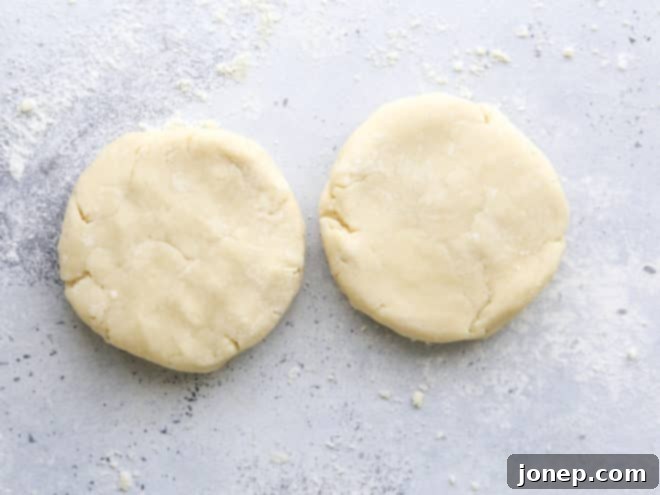
Use Right Away or Store for Later
Once your pie dough disks are formed, wrap each tightly in plastic wrap. Chilling is a crucial step that allows the flour to fully hydrate and the butter to firm up again, which contributes significantly to a tender, flaky crust. It also gives the gluten a chance to relax, making the dough easier to roll out without shrinking. Chill the wrapped disks in the fridge for at least 1-2 hours before using. For best results, I often chill mine for a full 24 hours.
This homemade pie crust is also excellent for meal prep! If you’re planning ahead, you can store the wrapped dough disks in the fridge for up to 5 days. For longer storage, this pie crust freezes beautifully. Double wrap each disk in plastic wrap, then place them in a freezer-safe bag or airtight container. It can be stored in the freezer for a few months or even longer (up to 6 months for optimal freshness). When you’re ready to use frozen dough, simply transfer it to the fridge overnight to thaw gradually, then let it sit at room temperature for about 15-20 minutes before rolling out.
Pro Tips for the Best Food Processor Pie Crust
Achieving a consistently flaky and delicious pie crust every time is simple with these additional tips:
- Keep Everything Cold: This cannot be stressed enough. Cold butter and ice-cold water are paramount. If your kitchen is warm, you can even chill your food processor bowl and blade beforehand.
- Don’t Overmix: The food processor is fast, which means it’s easy to overmix. Stop as soon as the dough begins to clump together. Overmixing develops gluten, leading to a tough, less flaky crust.
- Handle Gently: When forming the disks, use a light touch. Avoid kneading or squeezing the dough aggressively.
- Proper Chilling is Key: Don’t skip the chilling step. It allows the gluten to relax, making the dough easier to roll out, and ensures the butter is firm for ultimate flakiness.
- Flour Your Surface Wisely: When rolling out, use just enough flour to prevent sticking. Too much flour can make the crust tough.
Common Questions About Food Processor Pie Crust
Here are answers to some frequently asked questions that can help you master this technique:
- Can I use shortening instead of butter? While this recipe focuses on all-butter crust for flavor, you can certainly use a combination of butter and shortening, or even all shortening. Shortening can make the crust more tender and easier to handle, but may lack the rich flavor of butter.
- How long does the dough really need to chill? A minimum of 1 hour is recommended, but 2 hours or even overnight (up to 5 days) will yield better results. Longer chilling allows the flour to fully hydrate and the butter to firm up, making the dough easier to roll and ensuring a flakier crust.
- What if my food processor is too small? If you have a smaller food processor, you might need to make the pie crust in two batches. Divide all ingredients in half and process them separately, then combine the two halves gently when forming the disks.
- My dough is too sticky/too dry, what went wrong? If it’s too sticky, try adding a tablespoon of flour and pulsing once or twice more. If it’s too dry and crumbly to form a disk, add water, one teaspoon at a time, pulsing briefly after each addition until it just comes together when pinched.
My Favorite Pie Recipes to Use with This Crust
Now that you’ve mastered the art of making an effortlessly flaky pie crust with your food processor, it’s time to put it to good use! A homemade crust elevates any pie to extraordinary status. Here are a few of my absolute favorite pie recipes that you should definitely try with your newly made dough:
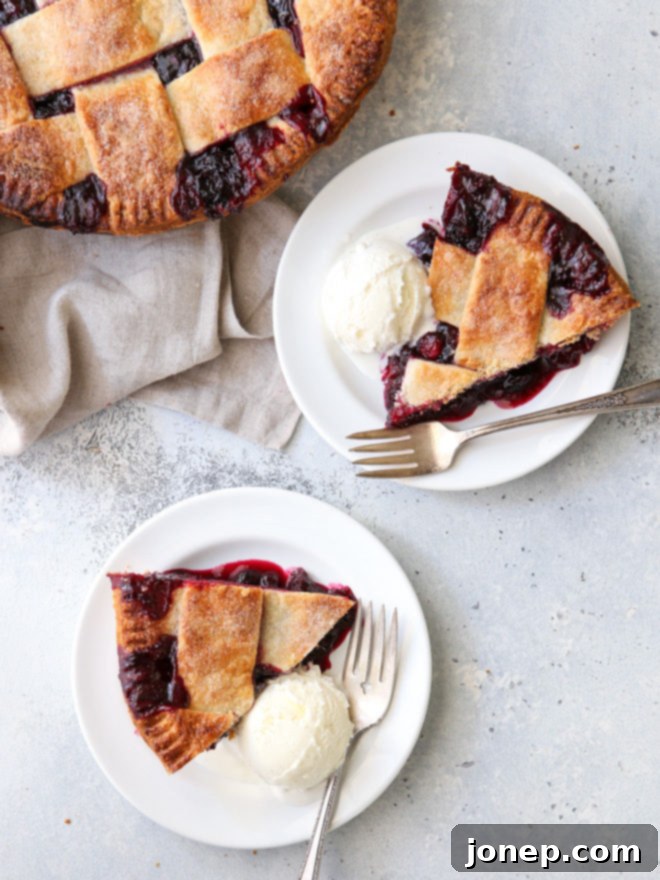
- Cranberry Blueberry Pie (pictured below) – A perfect balance of sweet and tart, especially wonderful during the holidays.
- Mile High Apple Pie – A classic with a sky-high filling, demanding a sturdy yet tender crust.
- Sweet Cherry Pie – The vibrant flavor of fresh cherries sings when encased in a buttery, flaky shell.
- Strawberry Rhubarb Pie – A springtime favorite, the tart rhubarb and sweet strawberries are a match made in heaven.
- Classic Pumpkin Pie – Essential for fall and holiday gatherings, this crust provides the perfect foundation.
Recipe: How to Make Pie Crust in a Food Processor

How to Make Pie Crust in a Food Processor
Pin Recipe
Leave a Review
Ingredients
- 2 ½ cups all-purpose flour (300 grams)
- 1 tablespoon granulated sugar (optional)
- 1 teaspoon salt
- 1 cup unsalted butter , cold and cut into cubes (226 grams)
- ⅓ cup ice cold water (80 ml)
Instructions
-
Combine the flour, sugar (if using), and salt in a large food processor fitted with the metal blade. Pulse a few times to ensure they are well combined. Add the very cold, cubed butter and quick pulse 3-5 times until the butter pieces are broken up, with the smallest bits being the size of large peas.
-
With the food processor running, slowly pour in the ⅓ cup of ice-cold water through the feed tube. Continue to process until the mixture just begins to come together into large clumps and appear shaggy (you’ll hear the processor’s sound change). Stop immediately before the dough forms a complete ball. Some loose crumbs are perfectly fine, as long as it holds together when pinched.
-
Turn the dough out onto a clean, lightly floured surface. Gently gather the dough and divide it into 2 equal disks. Cover each disk tightly in plastic wrap and chill in the fridge for at least 1 hour, or up to 5 days. For longer storage, the pie crust freezes exceptionally well for up to 2 months.
-
When ready to bake, roll out the chilled dough as instructed in your specific pie recipe.
Notes
NOTES
- This recipe yields two 9-inch pie crusts, perfect for two single-crust pies or one double-crust pie.
- For a deeper dive into pie crust perfection, be sure to check out my full tutorial on how to make the flakiest pie crust by hand.
- Looking for a delightful variation? My buttermilk pie crust recipe, found here, is particularly fantastic for fruit pies, offering extra tenderness and a subtle tang.
- Please note that I have primarily developed and tested this food processor method for traditional all-butter pie crusts. Using other fats or flours may produce different results.
- The nutritional information provided is for one entire pie crust, which typically serves approximately 10 individual portions.
Carbohydrates: 125g,
Protein: 17g,
Fat: 94g,
Saturated Fat: 59g,
Polyunsaturated Fat: 4g,
Monounsaturated Fat: 24g,
Trans Fat: 4g,
Cholesterol: 244mg,
Sodium: 1178mg,
Potassium: 195mg,
Fiber: 4g,
Sugar: 6g,
Vitamin A: 2836IU,
Calcium: 51mg,
Iron: 7mg
