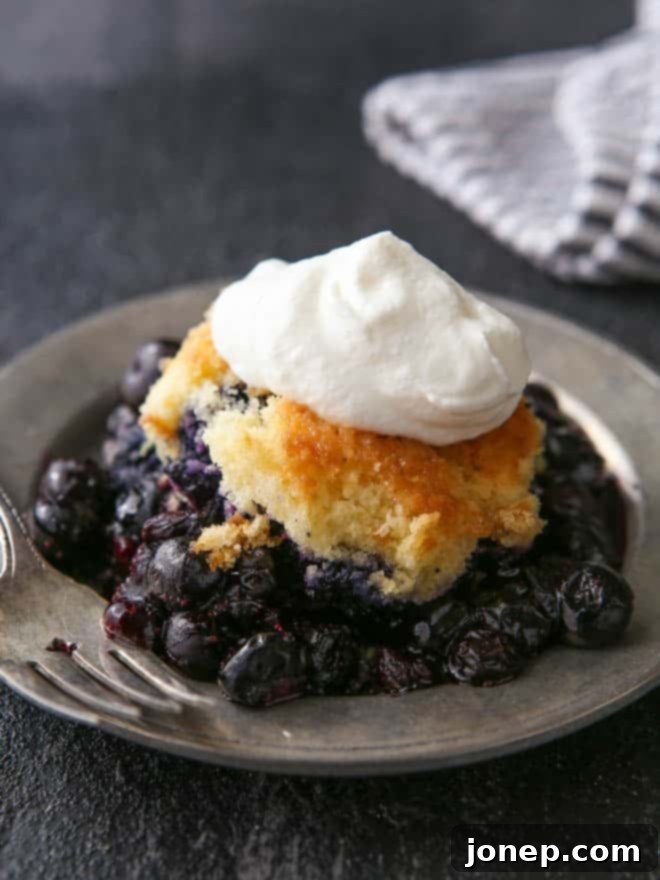
Easy 4-Ingredient Dutch Oven Fruit Cobbler: Your Ultimate Camping & Outdoor Dessert Recipe
Prepare to amaze your taste buds with this incredibly simple, yet utterly delicious, 4-ingredient summer fruit cobbler. Baked to perfection in a trusty cast iron Dutch oven, this retro shortcut recipe is not just a dessert; it’s an experience. Whether you’re gathered around a crackling campfire, heading to a lively potluck, or showcasing your skills at a cook-off, this cobbler promises golden, bubbly perfection with minimal effort.
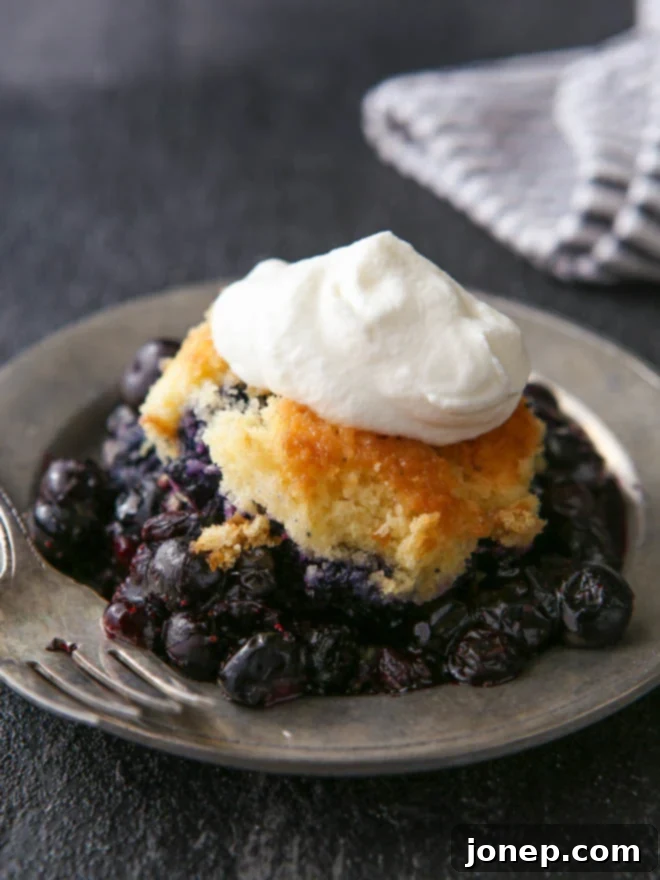
This Dutch oven fruit cobbler stands out as one of the most effortless desserts you’ll ever create! Its method might sound a bit unconventional at first, but trust us, the results are nothing short of magical. Imagine this: you simply combine your favorite fruit, a clever batter crafted from yellow cake mix and lemon-lime soda, and a touch of butter. Then, you let your camp Dutch oven do the heavy lifting, baking it over hot coals until the fruit is wonderfully bubbly and the topping achieves a beautiful golden-brown crispness.
It’s a recipe that defies expectations – a little crazy, yes, but undeniably effective! It embodies the spirit of summer with its unique blend of simplicity, old-school charm, and irresistible flavor. For years, this cobbler has been my personal favorite for camping trips, providing a comforting and sweet end to adventurous days. The best part? You don’t even need to turn on your kitchen oven, making it ideal for any outdoor occasion or when you simply want to keep your house cool during those warm summer months. It’s the ultimate hassle-free dessert that consistently delivers on taste and nostalgia.
Table of Contents
- Ingredients You’ll Need for Your Easy Cobbler
- Essential Equipment You’ll Need
- Understanding the Camp Dutch Oven: Your Outdoor Oven
- Step-by-Step: How to Make This Irresistible Dutch Oven Cobbler
- Recipe Tips & Variations for Your Perfect Cobbler
- More Camp-Friendly Recipes to Explore
- Get This Recipe
Ingredients You’ll Need for Your Easy Cobbler
This recipe prides itself on its simplicity, calling for just four core ingredients that come together to create a dessert greater than the sum of its parts. Each plays a crucial role in achieving that perfect cobbler texture and flavor, making it incredibly easy to remember and prepare, even in a rustic outdoor setting.
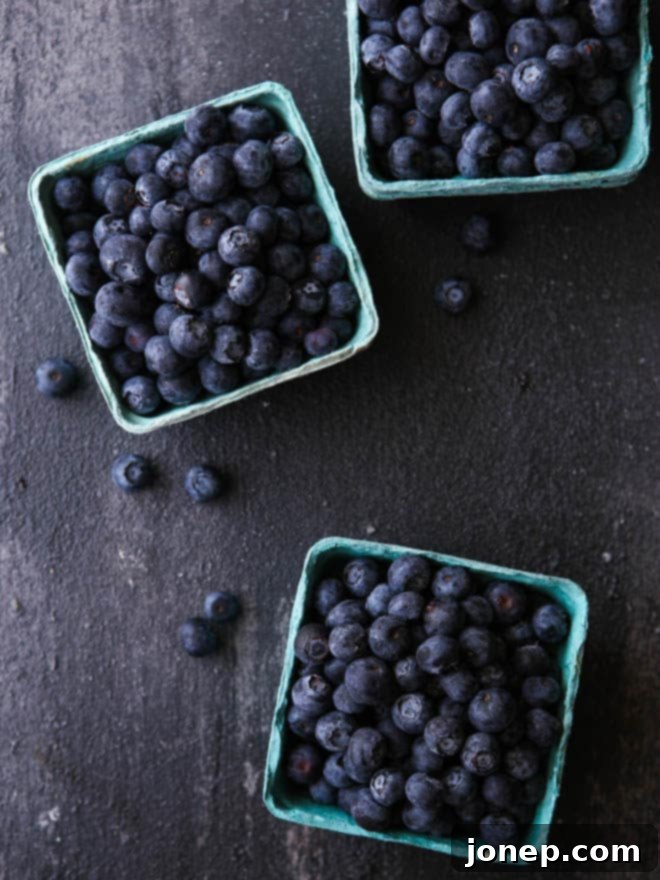
- Fresh, Frozen, or Canned Fruit: The beauty of this cobbler lies in its adaptability. While traditional peach pie filling was a classic choice, I’ve always leaned towards fresh fruits for their vibrant flavor and natural sweetness. Blueberries, strawberries, and sliced peaches are my personal favorites, offering a burst of summer goodness. Feel free to use what’s in season, what you have on hand, or even a mix! For example, a combination of raspberries and blackberries creates a delightful tart-sweet balance. If using frozen fruit, there’s no need to thaw it beforehand; it will release its juices beautifully as it bakes, creating a rich, flavorful sauce. For canned fruit, such as peaches or cherries, make sure to drain any heavy syrup to prevent an overly sweet or watery cobbler. This ensures the fruit’s natural flavor shines through.
- Yellow Cake Mix: This is our clever shortcut for a wonderfully soft, moist, and slightly chewy cobbler topping. While any brand of yellow cake mix will do, some variations like vanilla or even white cake mix can also work in a pinch, though yellow cake mix often provides a lovely golden hue. The dry mix provides the essential structure for the “batter” when combined with the soda, eliminating the need for flour, sugar, leavening agents, or eggs. It’s truly a one-and-done solution for your topping.
- Butter: Cold, unsalted butter, cut into small bits, is essential for achieving a rich, golden, and slightly crisp topping. As the butter melts over the heat, it seeps into the cake mix, adding moisture, flavor, and a luxurious texture that elevates the cobbler from good to unforgettable. Using cold butter ensures it melts slowly, creating pockets of richness throughout the topping rather than simply greasing it.
- Lemon-Lime Soda (e.g., Sprite or 7-Up): This might seem like the most unusual ingredient, but it’s key to the cobbler’s magic! The carbonation helps create a light, fluffy, and tender topping, while the sweetness and subtle citrus notes from the soda complement the fruit without overpowering it. It reacts with the leavening agents in the cake mix, giving the cobbler its characteristic soft texture. It’s truly a game-changer for this “dump cake” style cobbler, providing both moisture and lift in one simple pour.
- Whipped Cream or Ice Cream (Optional, for Serving): A dollop of creamy whipped topping or a scoop of cold vanilla ice cream is the perfect accompaniment to the warm, bubbly, and fruity cobbler. The contrast in temperature and texture is simply divine. When camping, a can of Reddi Wip or similar whipped topping is a convenient choice that requires no refrigeration until opened. For a homemade touch, you can always whip up your own sweetened whipped cream ahead of time and keep it chilled in a cooler.
Essential Equipment for Your Outdoor Cobbler Adventure
To master this Dutch oven cobbler, having the right tools is almost as important as the ingredients. These pieces of equipment are specifically designed for outdoor cooking and will make your experience safe, efficient, and enjoyable, transforming your campsite into a gourmet kitchen.
- Cast Iron Camp Dutch Oven: The undeniable star of our show! A good quality, seasoned cast iron camp Dutch oven is indispensable for this recipe. Its heavy construction and superior heat retention are perfect for creating an “oven” outdoors. Look for one with short legs on the bottom, which elevate it slightly above the ground for under-coal placement, and a flanged (rimmed) lid, which is crucial for holding additional hot coals on top. A 10-inch or 12-inch Dutch oven is typically ideal for this recipe, easily serving a generous crowd.
- Lid Lifter: This simple but ingenious tool is a game-changer for safety and convenience. It allows you to safely lift the heavy, hot lid of your Dutch oven to check on your cobbler, rotate it, or add/remove coals, keeping your hands at a safe distance from the intense heat of the coals. It’s an absolute must-have for Dutch oven cooking.
- A Campfire or Charcoal Briquettes: Your primary heat source! While a well-managed campfire can certainly work (with practice), charcoal briquettes offer a more consistent and controllable heat, which is vital for even and predictable baking. We’ll outline the precise number needed for this recipe to achieve optimal temperature.
- Tongs: Essential for handling hot charcoal briquettes safely and accurately. They allow you to place, remove, and arrange the coals around and on your Dutch oven, ensuring optimal baking conditions without burning your hands. Long-handled tongs are highly recommended.
- Dutch Oven Liners (Optional): For those who dread post-dessert cleanup, disposable Dutch oven liners are a fantastic, convenient option. They fit snugly inside your Dutch oven, preventing food from sticking to the cast iron and making cleanup a breeze – simply lift out the liner and discard. This is especially useful when camping where water for washing might be limited.
Understanding the Camp Dutch Oven: Your Outdoor Oven
If you’re new to the exciting world of outdoor cooking, you might be wondering, “What exactly is a camp Dutch oven?” It’s a culinary marvel specifically engineered for rugged environments and direct heat sources. Unlike the enameled Dutch ovens (like those from Le Creuset or Staub) you might use on your stovetop or in your conventional oven at home, a camp Dutch oven is made entirely of robust, seasoned cast iron. This sturdy construction allows it to withstand direct flame, the intense heat of coals, and the rigors of outdoor use without damage.
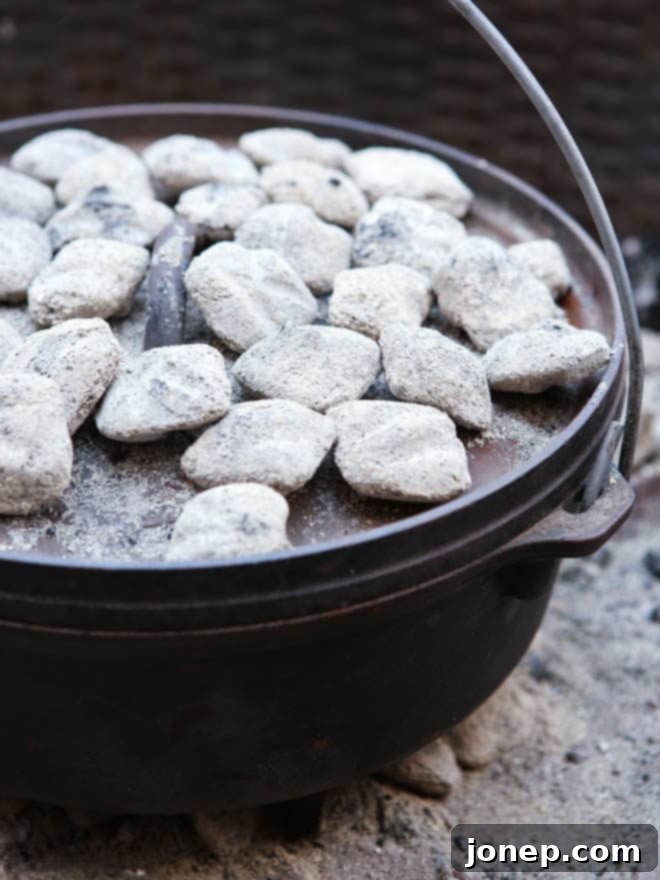
Key features that distinguish a camp Dutch oven include sturdy support legs on its bottom, which elevate it slightly above the ground. This elevation is critical, as it allows for charcoal briquettes or campfire coals to be placed directly underneath, providing consistent bottom heat. The lid is equally unique, featuring a raised, flanged rim that is specifically designed to hold additional hot coals on top. This ingenious design transforms the heavy cast iron pot into a self-contained, portable oven. The heat from the coals both underneath and on top circulates efficiently within the thick cast iron, providing a remarkably even baking temperature, much like a conventional oven. This dual-heat approach is what allows you to bake everything from this delicious fruit cobbler to hearty roasts, bubbling stews, and even fresh bread while enjoying the great outdoors. The heavy cast iron also helps in retaining heat, ensuring your food stays warm long after it’s cooked. If you haven’t yet experienced the versatility, durability, and sheer joy of cooking with a camp Dutch oven, I highly recommend exploring this fantastic piece of equipment. It truly opens up a world of culinary possibilities beyond the confines of your kitchen, inviting you to embrace the adventure of outdoor cooking!
Step-by-Step: How to Make This Irresistible Dutch Oven Cobbler
Creating this delicious cobbler is a straightforward process, but paying attention to a few key details will ensure perfect results every time. Follow these steps for an amazing outdoor dessert that will be the highlight of any gathering:
- Prepare Your Cooking Station and Dutch Oven: First, you’ll need to prepare your heat source. Whether you’re using a campfire or, ideally, charcoal briquettes, ensure they are ready to go. For this recipe, you’ll need approximately 45 briquettes. Light them and wait until they are white-hot and glowing, indicating they’ve reached optimal temperature for baking. While the coals are heating, prep your Dutch oven. Lightly grease the inside bottom and sides of the cast iron with nonstick cooking spray or a thin, even layer of butter. Alternatively, for the absolute easiest cleanup, use a Dutch oven liner.
- Craft the Cobbler Topping Batter: This is where we ensure no dry cake mix pockets! In a medium-sized mixing bowl, combine the entire box of yellow cake mix with the lemon-lime soda. Whisk or stir them together until you have a thick, moist, and relatively smooth batter. The consistency might vary slightly depending on your cake mix brand, but aim for something that spoons easily but isn’t overly runny. This crucial pre-mixing step ensures an evenly textured, tender, and delicious topping, avoiding any unpleasant dry spots often found in “dump cake” methods.
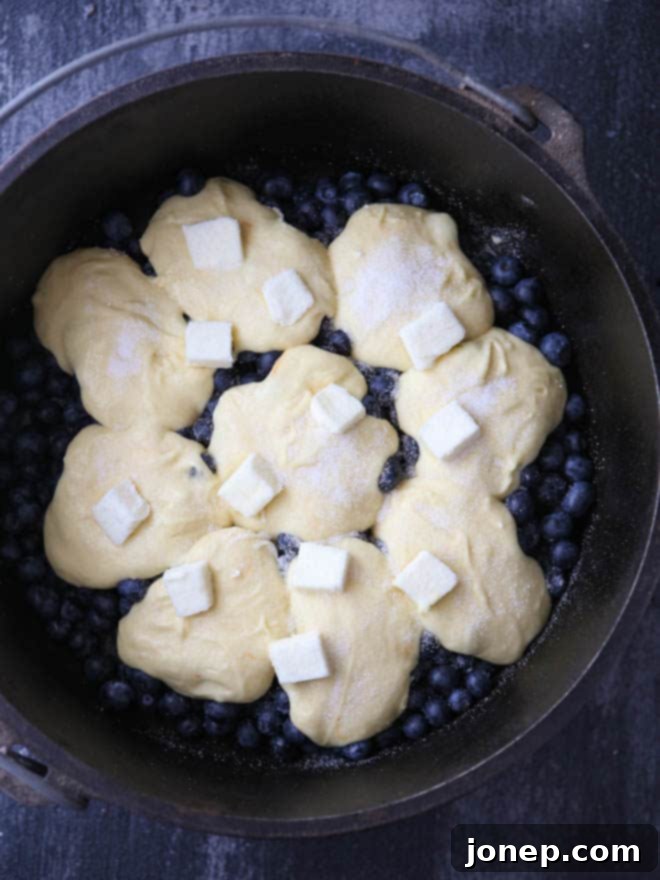
- Layer Everything in the Dutch Oven: Now it’s time to assemble your delicious masterpiece. Start by spreading your chosen fruit evenly across the bottom of the prepared Dutch oven. Ensure it forms a relatively flat layer. Next, carefully spoon the cake mix batter over the fruit, distributing it as uniformly as possible to cover the fruit layer. Finally, take your small slices or bits of cold butter and dot them evenly across the top of the cake mix batter. If desired, sprinkle a tablespoon of granulated or coarse sugar over the butter for extra crunch and a hint of caramelized sweetness. Cover the Dutch oven securely with its lid.
- Begin the Baking Process: Arrange 15 of your hot, glowing charcoal briquettes in a tight, even circle on your cooking surface. Carefully place the Dutch oven directly onto these briquettes, ensuring it’s centered for even bottom heat. Then, take the remaining 30 briquettes and arrange them evenly on top of the Dutch oven lid. This specific charcoal distribution (approximately 1/3 below, 2/3 on top) is expertly calculated to create an internal temperature of approximately 350°F (175°C), effectively mimicking a conventional oven and ensuring your cobbler bakes perfectly.
- Rotate for Uniform Baking: To guarantee your cobbler bakes evenly and avoids hot spots that can occur with direct coal heat, gentle rotation is key. After about 10 minutes of baking, use your lid lifter to carefully rotate the entire Dutch oven approximately 180° clockwise over the bottom coals. Then, lift the lid (again, with the lid lifter) and rotate it 180° counter-clockwise relative to the pot. This counter-rotation technique helps distribute the heat more uniformly across the entire surface of the cobbler. I usually repeat this rotation process 1-2 times during the total baking period.
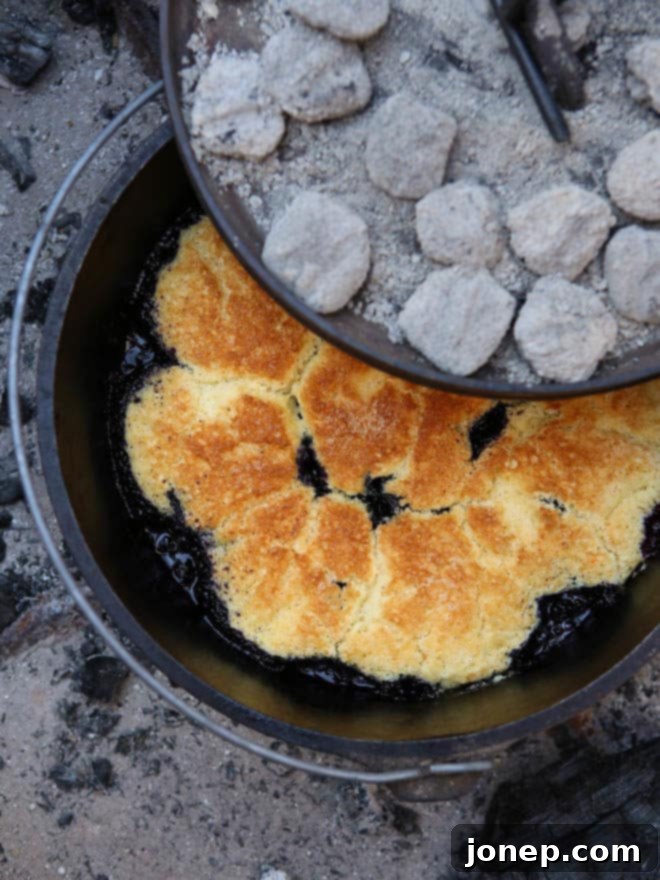
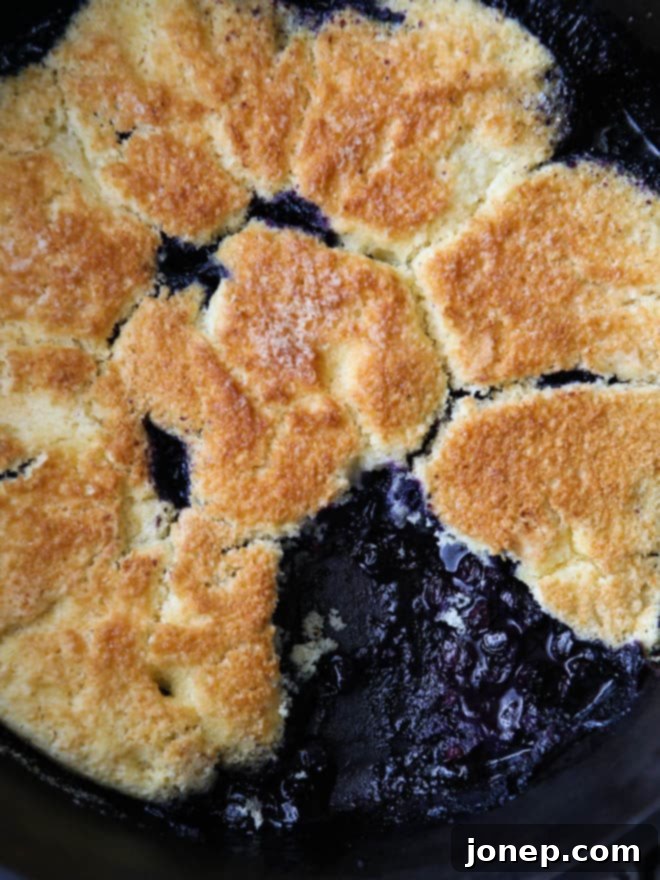
- Check for Doneness: The irresistible aroma of baked fruit is your first delicious hint that your cobbler is nearing completion. After about 20 minutes of baking time, carefully peek under the lid (using your lid lifter, of course!). The cobbler is perfectly done when the fruit juices are visibly bubbling vigorously around the edges and through the topping, and the cake topping has turned a beautiful, inviting golden brown. The center should also feel set, not jiggly.
- Serve and Savor!: Once baked to perfection, carefully remove the Dutch oven from the coals using your lid lifter and tongs. Allow it to cool for a few minutes if desired, then scoop generous portions of the warm, bubbly cobbler into bowls. For an extra special treat, enhance the experience with a dollop of fresh whipped cream or a scoop of your favorite vanilla ice cream. Enjoy the sweet, comforting rewards of your outdoor culinary adventure!
Recipe Tips & Variations for Your Perfect Cobbler
This simple Dutch oven cobbler recipe is wonderfully versatile, allowing for various tweaks and customizations to suit your taste, dietary preferences, or simply what you have available. Here are some pro tips to ensure your cobbler is always a hit, along with creative ideas for delicious variations:
- The Batter Secret Explained: As emphasized in the instructions, combining the cake mix and lemon-lime soda *before* adding it to the fruit is a crucial step that sets this recipe apart from less successful “dump cake” methods. The original technique of sprinkling dry cake mix over the fruit and then pouring soda over it often leads to unsightly and unappetizing pockets of dry, uncooked cake mix within the topping. By pre-mixing, you ensure that all the dry ingredients are fully hydrated and incorporated, resulting in a uniformly moist, tender, and delicious topping with minimal extra effort. It’s a small change that makes a big difference!
- Oven Baking Option: While this recipe truly shines in the great outdoors, offering a unique smoky flavor and adventurous cooking experience, it can absolutely be adapted for your conventional oven at home. Simply preheat your oven to 350°F (175°C), grease a standard 9×13 inch baking dish (or a similar size that fits your fruit volume), layer the ingredients as directed in the recipe, and bake for 20-25 minutes, or until the topping is beautifully golden brown and the fruit juices are visibly bubbling around the edges. However, for a truly traditional oven-baked cobbler experience with a classic biscuit-like topping, you might prefer this recipe.
- Lemon-Lime Soda Alternatives: The lemon-lime soda is part of this recipe’s quirky charm, providing not just the necessary carbonation for lift, but also a pleasant sweetness and a hint of citrus that brightens the fruit flavors. If you don’t have lemon-lime soda on hand or prefer an alternative, plain club soda or even sparkling water could work for the carbonation, though you might want to add a little extra granulated sugar (1-2 tablespoons) or a squeeze of fresh lemon juice to compensate for the lost sweetness and tang. Milk or plain water would also provide moisture but won’t offer the same light, airy texture or complex flavor profile that the soda imparts.
- Fruit Freedom: Feel empowered to use any fruit you love! This recipe is incredibly adaptable to whatever you have in your pantry or what’s in season. Fresh, frozen, or canned – they all work beautifully. For fresh fruit, ensure larger fruits like peaches or apples are peeled (if desired) and sliced into manageable chunks. Smaller fruits like berries can be used whole. If you’re feeling adventurous, try a mix of fruits like peaches and blueberries, or tart apples with cranberries. Pie filling is also a convenient option; just be mindful of its sweetness and adjust any added sugar accordingly.
- Add a Crunchy Topping: For extra texture and a delightful crunch, consider sprinkling a handful of chopped nuts (like pecans, walnuts, or almonds) or a spoonful of old-fashioned rolled oats over the butter before baking. This can add a lovely depth of flavor and an appealing textural contrast to the soft cobbler.
- Spice It Up: Don’t hesitate to enhance the flavor profile with warm spices! A pinch of cinnamon, nutmeg, or even a tiny bit of ground cardamom pairs wonderfully with fruit cobblers, especially when using apples, peaches, or mixed berries. These spices can significantly enhance the fruit’s natural sweetness and add another layer of complexity and warmth to your dessert. Start with 1/2 teaspoon and adjust to your preference.
- Serving Suggestions Beyond Cream: While whipped cream and ice cream are classic pairings, consider other options. A drizzle of caramel sauce, a sprinkle of toasted coconut flakes, or a dollop of Greek yogurt (for a tangier contrast) can all elevate your cobbler experience.
More Camp-Friendly Recipes to Explore
If you’ve enjoyed the simplicity, deliciousness, and sheer fun of cooking this Dutch oven cobbler outdoors, you’ll love exploring other recipes designed for camp cooking and outdoor adventures. There’s a whole world of culinary possibilities that open up when you embrace cooking outside. Here are a couple more ideas to inspire your next campout or backyard gathering, proving that outdoor meals can be just as exciting and satisfying as their indoor counterparts:
Get This Recipe: Easy Dutch Oven Cobbler
Ready to try this simple yet spectacular outdoor dessert for yourself? Below, you’ll find the full, printable recipe card with precise measurements and detailed instructions. Whether you’re a seasoned outdoor chef or a beginner looking for a foolproof camping dessert, this Easy Dutch Oven Cobbler is sure to become a cherished favorite. Get ready to impress your family and friends with a warm, bubbly fruit cobbler that tastes like summer in every single bite!
Easy Dutch Oven Cobbler
Pin Recipe
Leave a Review
Ingredients
- 4 cups (600 grams) fruit such as berries , peaches, apples, etc.
- ½ (225 grams) box vanilla cake mix
- 1 cup (227 grams) lemon lime soda , such as Sprite or 7up
- 2 tablespoons unsalted butter , cold and cut into bits
- 1 tablespoons granulated or coarse sugar , optional
- Whipped cream , for serving
Equipment
Instructions
-
Preheat 45 charcoal briquettes until white and glowing. Lightly grease the bottom of a cast iron camp dutch oven with cooking spray (see Notes).
-
In a medium bowl combine the cake mix and lemon lime soda. You want a batter that is thick, but moist (it does not have to be precise, I’ve had varying consistencies from stiffer batters to thinner cake-like batters).
-
Place fruit in the cast iron dutch oven and spoon batter over top. Top with bits of butter. Sprinkle with the sugar, if using. Cover the dutch oven with its lid.
-
Place 15 hot charcoal briquettes together and set dutch oven over them. Using tongs, place the remaining 30 briquettes on the dutch oven lid. (This exact number and placement is required to achieve 350°F inside the dutch oven.)
-
After about 10 minutes, rotate the dutch oven over the coals clockwise and the lid over the dutch oven counter clockwise to promote even cooking. Check after 20 minutes, cobbler is done with the topping is golden brown and the fruit juices are bubbling.
-
Remove dutch oven from coals. Serve the cobbler with whipped cream or ice cream.
Notes
- Use any fresh, frozen or canned fruit you like. This recipe is very adaptable! If using strawberries or stone fruit such as peaches, slice into wedges or chunks.
- Follow the exact amount of charcoal briquettes listed in this recipe for best results. Using too many or too few will change the internal temperature, overall baking time, and could burn it quickly if you’re not careful. I have actually never tested this recipe with coals from a wood-burning campfire so I can’t give more specific instructions.
- You can also bake this cobbler in the oven. Preheat oven to 350°F and grease a standard baking dish with cooking spray. Bake the cobbler until golden brown and the fruit is bubbly around the edges, 20-25 minutes.
This recipe was first published July 2011. Photos have been updated.
