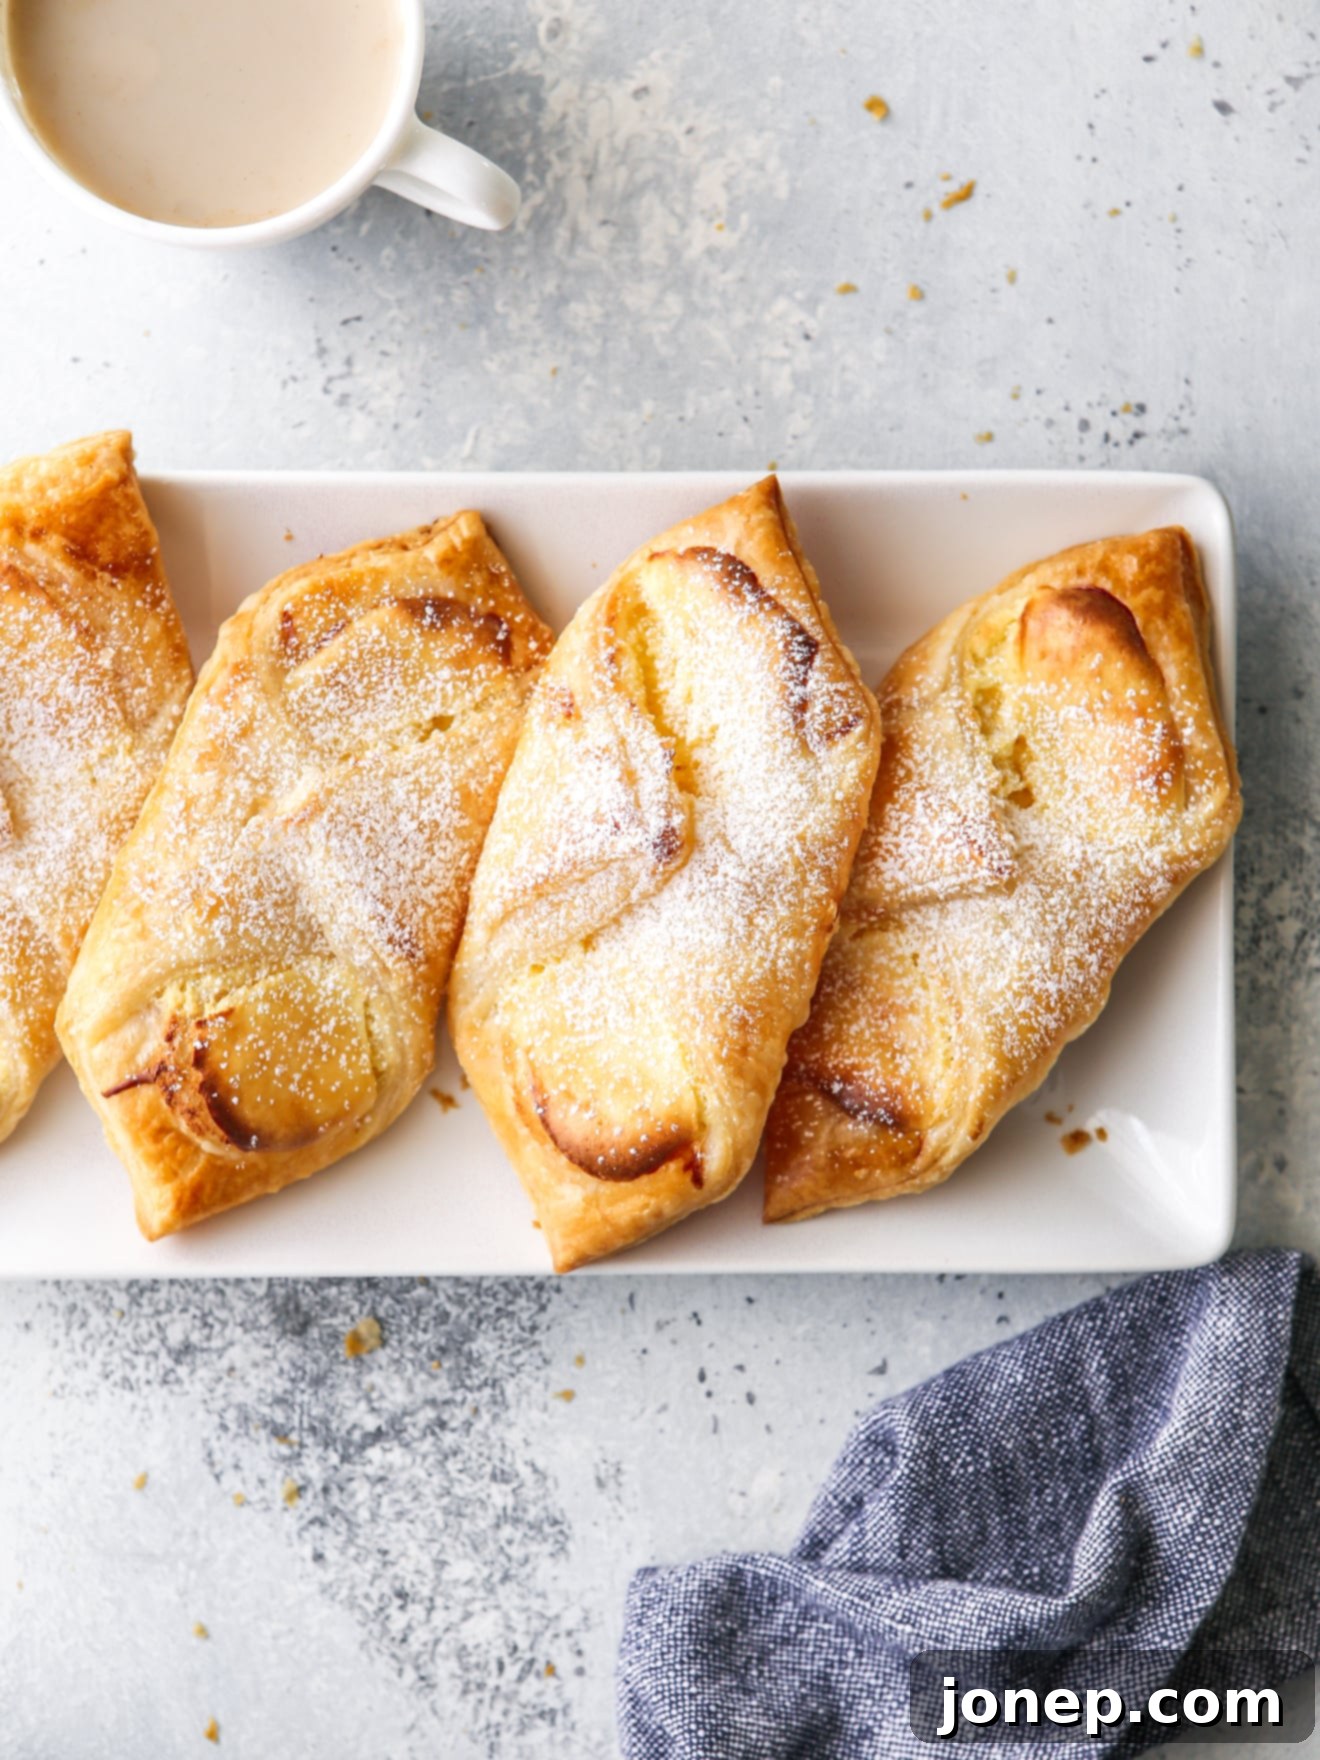
Homemade Cream Cheese Danishes: Your Guide to Flaky Pastry and Creamy Perfection
Imagine biting into a golden, flaky pastry, yielding to a lusciously rich and tangy cream cheese filling. That’s the magic of a homemade cream cheese Danish. Far from being a complicated bakery exclusive, these delightful pastries are surprisingly easy to create in your own kitchen. Layers of buttery puff pastry, delicately folded around a simple yet divine creamy center, make these cream cheese Danishes a truly wonderful indulgence perfect for any time of day – whether it’s a special breakfast, a delightful brunch, or a comforting treat with your afternoon coffee.
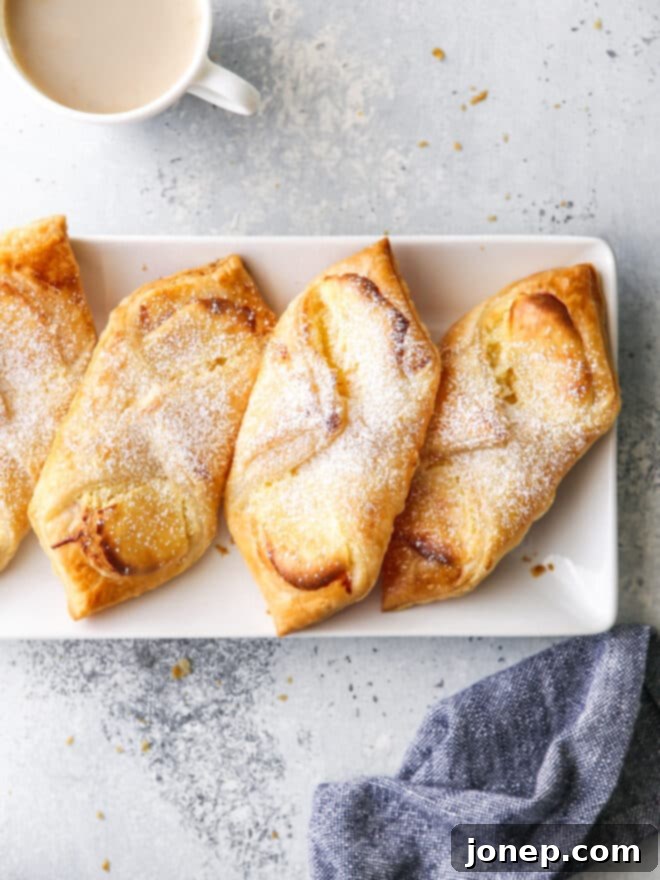
Forget the long lines at the bakery or the extravagant buffet spreads. What if we told you that creating these exquisite pastries at home is not only achievable but also incredibly rewarding? With just a few basic ingredients and a little over 30 minutes of active preparation time, you can transform simple components into an irresistible pastry experience. The secret lies in readily available puff pastry, combined with a handful of other pantry staples like cream cheese, sugar, and a hint of lemon.
We promise you that the very first bite – the exquisite crunch of golden-brown pastry giving way to the smooth, tangy, and subtly sweet cream cheese filling – will convert you. Once you taste the superior quality and freshness of homemade, you’ll undoubtedly agree: store-bought simply can’t compare. Get ready to impress yourself and everyone else with these incredible cream cheese Danishes!
Why Make Your Own Cream Cheese Danishes?
- Unbeatable Freshness: There’s nothing quite like a pastry straight from your oven. The aroma, the warmth, and the crispness of homemade Danishes are truly unparalleled.
- Quality Ingredients: You control what goes into your Danishes. Opt for high-quality butter in your puff pastry and premium cream cheese for the best flavor and texture.
- Customization Options: Once you master the basic recipe, the possibilities are endless! Add fresh fruit, chocolate chips, or different extracts to tailor them to your taste.
- Cost-Effective: Making Danishes at home is often significantly cheaper than buying them from a gourmet bakery, especially when you’re making a batch for family or guests.
- The Joy of Baking: There’s immense satisfaction in creating something so delicious from scratch. It’s a wonderful way to spend time in the kitchen and share your passion with loved ones.
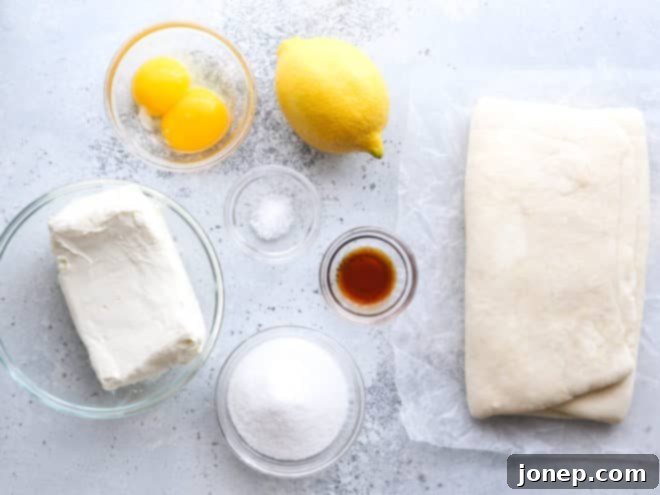
Essential Ingredients You’ll Need for Flawless Danishes
Crafting perfect cream cheese Danishes starts with a few key ingredients. Here’s what you’ll need, along with a little insight into why each component is so important:
- Puff Pastry: This is the foundation of your Danish. While high-quality store-bought puff pastry makes this recipe incredibly quick and easy, we genuinely encourage you to try making your own if you’re feeling adventurous. I have a full tutorial here for a truly exceptional experience! The layers of butter and dough are what give Danishes their signature flakiness.
- Cream Cheese: The star of the filling! Use full-fat cream cheese for the richest, creamiest texture and best flavor. Ensure it’s softened to room temperature for a lump-free filling.
- Egg Yolks: These add richness and a beautiful golden color to the cream cheese filling, helping it set perfectly during baking. They also contribute to a smoother consistency.
- Lemon Zest: A touch of fresh lemon zest brightens the entire flavor profile of the cream cheese filling, cutting through the richness and adding a delightful tang. Don’t skip it!
- Granulated Sugar: Sweetens the cream cheese filling to perfection. Adjust to your personal preference, but the amount specified provides a balanced sweetness.
- Vanilla Extract: Enhances the overall flavor of the filling, adding warmth and depth. Use pure vanilla extract for the best results.
- Salt: A pinch of salt is crucial in both sweet and savory recipes. It balances the sweetness and brings out the other flavors in the filling.
- Egg Wash (beaten egg with 1 tablespoon water): This is your secret weapon for a golden, glossy finish. Brushing the pastry with egg wash before baking gives it that professional, appetizing sheen.
- Powdered Sugar for Dusting (optional): A final flourish! A light dusting of powdered sugar adds a touch of elegance and an extra hint of sweetness.
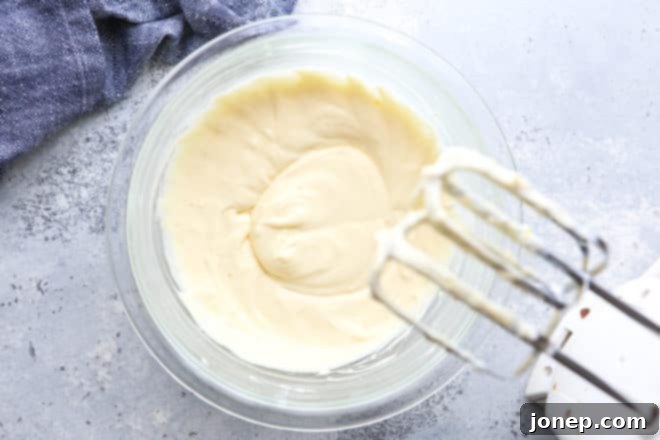
Step-by-Step Guide: How to Make Cream Cheese Danishes
Get ready to create bakery-quality pastries right in your kitchen! Follow these easy steps for delicious, flaky cream cheese Danishes.
- Prepare the Cream Cheese Filling: In a medium bowl, or the bowl of a stand mixer fitted with a paddle attachment, beat the softened cream cheese and granulated sugar together until the mixture is completely smooth and creamy. This usually takes about 3-4 minutes. Scrape down the sides of the bowl as needed. Next, add the egg yolks, vanilla extract, lemon zest, and salt. Mix on low speed just until all ingredients are fully combined. Be careful not to overmix at this stage. Set the filling aside.
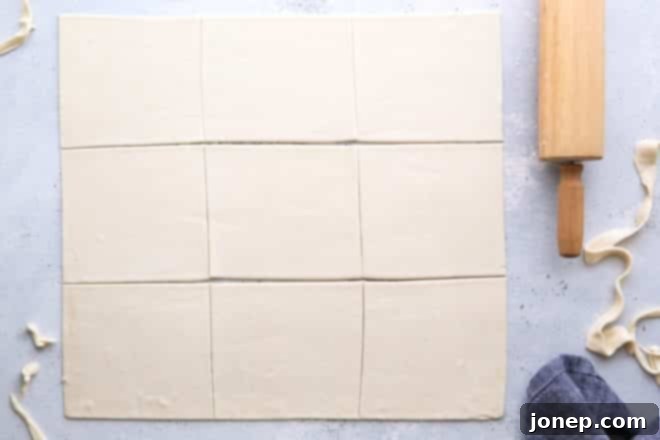
- Roll and Cut Puff Pastry: Lightly flour a clean work surface. Carefully unfold or roll out your puff pastry sheet. Roll it gently with a rolling pin to achieve an approximate 18-inch square. Aim for even thickness. Using a sharp knife or a pizza cutter, trim the edges to create clean lines, then cut the large square into 9 even smaller squares. Each square will form one Danish.
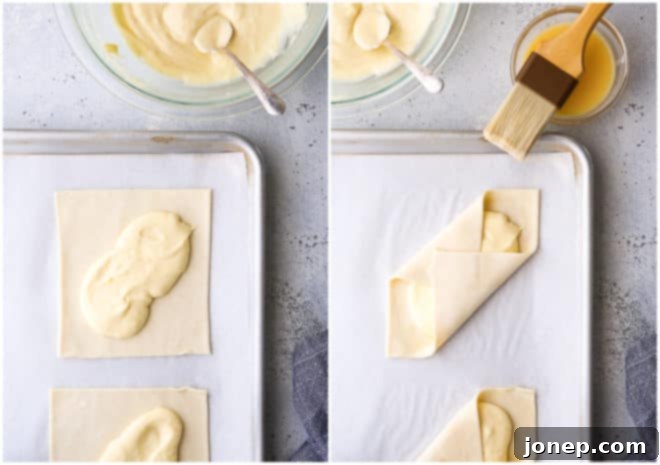
- Assemble the Danishes: Place the puff pastry squares on a parchment paper-lined baking sheet. Spoon about 2 tablespoons of your prepared cream cheese filling into the center of each pastry square. Gently spread the filling diagonally across the center, leaving the corners clear. Now, take two opposing corners of each square (e.g., top-left and bottom-right) and lightly brush them with egg wash. Fold these two brushed corners together over the filling, meeting in the center, and gently press them firmly to seal. This creates the classic Danish shape. Finally, brush the exposed puff pastry on all Danishes with more egg wash to ensure a beautiful golden crust.
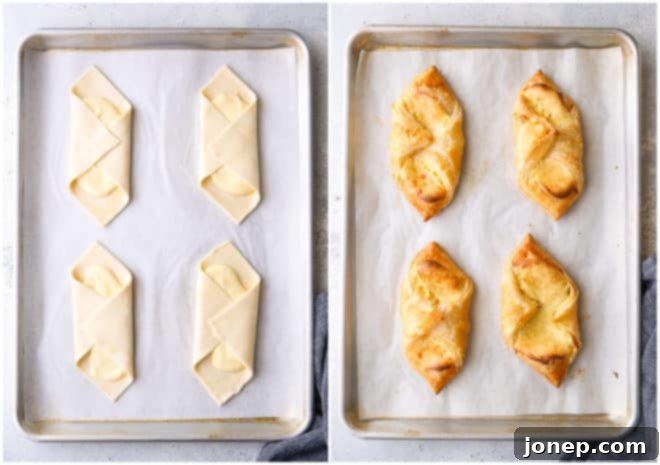
- Bake to Golden Perfection: Preheat your oven to 400°F (200°C). Bake the assembled Danishes in the preheated oven for 20-25 minutes, or until they are beautifully puffed up and golden brown. The filling should also appear set. Keep an eye on them, as oven temperatures can vary.
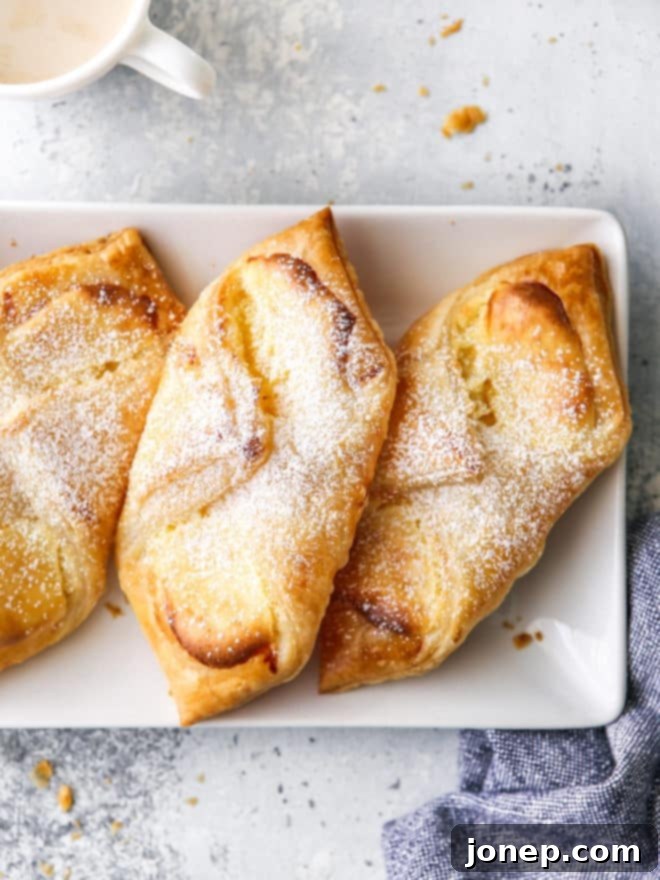
- Cool and Enjoy: Once baked, remove the Danishes from the oven and transfer them to a wire rack to cool slightly. While still warm, you can optionally dust them generously with powdered sugar for an extra touch of sweetness and a professional look. These cream cheese Danishes are truly best enjoyed the day they are baked, when the pastry is at its flakiest.
Pro Tips for Perfect Cream Cheese Danishes Every Time
Achieving bakery-quality Danishes at home is easier than you think, especially with these helpful tips:
- Thaw Frozen Puff Pastry Properly: If you’re using frozen puff pastry, proper thawing is key to prevent cracking and ensure even rolling. The best method is to transfer it to the refrigerator overnight. If you’re short on time, you can leave it on the kitchen counter at room temperature for 30-60 minutes, but watch it closely – it should be pliable but still cold.
- Room Temperature Ingredients for Filling: For a silky-smooth and lump-free cream cheese filling, ensure both your cream cheese and egg yolks are at room temperature before mixing. Cold ingredients will result in a lumpy texture that won’t spread as easily.
- Quick-Softening Cream Cheese: Forgot to take your cream cheese out? Don’t fret! You can quickly soften it by unwrapping the block and placing it in a microwave-safe bowl for 10-15 seconds on low power, checking frequently. Alternatively, you can cut it into smaller cubes and let it sit for about 15 minutes. See my tips to quickly soften cream cheese for more methods.
- Experiment with Danish Shapes: While our recipe uses a simple folded square, Danishes come in many beautiful shapes! This is just one suggestion. For more visual inspiration and here’s a demonstration of a few more ideas, including pinwheels, pockets, or classic open squares. Don’t be afraid to get creative!
- Ensuring a Secure Seal: The most common issue with folded Danishes is the corners popping open during baking. To prevent this (as shown in the “before and after” photo, particularly on the right), make sure to apply a generous amount of egg wash to the opposing corners you intend to fold. Then, press them together firmly once folded over the filling. A good seal ensures your filling stays put and your Danishes maintain their beautiful shape.
- Make Ahead and Freeze: Cream cheese Danishes are an excellent candidate for meal prep! You can prepare them ahead of time and freeze them before baking. Arrange the unbaked Danishes in a single layer on a sheet pan, then transfer them to a freezer-safe ziplock bag or airtight container once solid. They can be stored for several weeks. When ready to bake, place them straight from the freezer onto a baking sheet (no need to thaw) and add a few extra minutes to the baking time (typically 5-10 minutes more) until golden and puffed.
- Don’t Overfill: While tempting, overfilling your Danishes can lead to the filling oozing out during baking, making them messy and potentially sticking to the parchment paper. Stick to the recommended 2 tablespoons per Danish.
- Even Baking: For best results, rotate your baking sheet halfway through the baking time. This helps ensure that all Danishes brown evenly, especially if your oven has hot spots.
Cream Cheese Danish Variations to Explore
Once you’ve mastered the classic cream cheese Danish, feel free to unleash your creativity with these delicious variations:
- Fruit & Cream Cheese Danishes: Add a layer of your favorite fruit preserve (like raspberry, apricot, or cherry) or fresh berries (strawberries, blueberries) on top of the cream cheese filling before folding the pastry.
- Chocolate Chip Cream Cheese Danishes: Fold a handful of mini chocolate chips into the cream cheese filling for a delightful chocolatey twist.
- Lemon Curd Danishes: Replace the lemon zest in the filling with a tablespoon or two of vibrant lemon curd, or swirl it on top of the cream cheese filling for an extra burst of citrus.
- Almond Cream Danishes: Add a layer of almond paste or frangipane underneath or swirled with the cream cheese filling. A sprinkle of sliced almonds on top before baking adds texture and flavor.
Serving and Storage Suggestions
These homemade cream cheese Danishes are incredibly versatile. Serve them:
- Warm with a fresh cup of coffee or tea for a perfect breakfast or brunch.
- As a delightful dessert, perhaps with a side of fresh fruit or a dollop of whipped cream.
- Wrapped individually for a grab-and-go snack or a thoughtful gift.
While Danishes are undoubtedly best enjoyed fresh from the oven, any leftovers can be stored in an airtight container at room temperature for up to 3 days. For optimal flakiness, you can gently reheat them in a toaster oven or a regular oven at 300°F (150°C) for about 5-7 minutes. Avoid the microwave, as it can make the pastry soft and chewy.
Frequently Asked Questions (FAQs)
- Can I use any type of puff pastry?
- For the best flavor and flakiness, we highly recommend using all-butter puff pastry. It provides a richer taste and superior texture compared to puff pastry made with vegetable shortening.
- My Danishes opened up during baking. What went wrong?
- This is usually due to insufficient egg wash and not pressing the corners firmly enough when sealing. Be generous with the egg wash on the corners you are folding, and really pinch them together to create a strong seal.
- Can I make the cream cheese filling ahead of time?
- Absolutely! The cream cheese filling can be prepared up to 2-3 days in advance. Store it in an airtight container in the refrigerator. Let it come to room temperature for about 15-20 minutes before using, and give it a quick whisk to ensure it’s smooth again.
- How do I prevent the bottom of my Danishes from getting soggy?
- Ensure your oven is fully preheated to the correct temperature. Baking on a parchment-lined baking sheet helps, and avoid overcrowding the pan, which can trap steam. A perforated baking sheet can also aid in air circulation and prevent sogginess.
- Can I freeze baked Danishes?
- Yes, you can! Once baked and completely cooled, wrap individual Danishes tightly in plastic wrap, then place them in a freezer-safe bag or container for up to 1 month. Reheat from frozen in an oven at 300°F (150°C) until warmed through and flaky, about 10-15 minutes.
Shop Tools for this Recipe
Having the right tools can make your baking experience even smoother and more enjoyable. Here are a few essentials that will help you create these perfect cream cheese Danishes:
This recipe was originally published September 2015, and has been updated for clarity and expanded tips to help you achieve the best results.

Cream Cheese Danishes
Pin Recipe
Leave a Review
Ingredients
For the Danish:
- 1 sheet all-butter puff pastry , store-bought or make your own
- 8 ounces cream cheese , softened
- ⅓ cup granulated sugar
- 2 large egg yolks
- 1 teaspoon vanilla extract
- ¼ teaspoon coarse salt
- Zest of 1 lemon
- 1 large egg + 1 teaspoon water , egg wash
- Powdered sugar , for dusting (optional)
Instructions
-
Preheat oven to 400°F. Line a sheet pan with parchment paper.
-
In the bowl of stand mixer fitted with paddle attachment or in large bowl with hand-held mixer, beat cream cheese and sugar until smooth and creamy, about 3-4 minutes. Add egg yolks, vanilla, salt and lemon zest and mix until just incorporated.
-
On floured surface, roll puff pastry into an approximate 18-inch square. Cut into 9 squares.
-
Spoon approximately 2 tablespoons of cream cheese filling into center of each square. Brush two opposing corners with egg wash, then fold over the filling in the center, pressing gently to seal. Brush rest of the puff pastry with egg wash.
-
Bake until puffed and golden, about 20-25 minutes. Let cool to room temperature.
-
Dust with powdered sugar if desired.
-
Danishes are best the day they are made but will keep in an airtight container for up to 3 days.
Disclosure: This recipe was made with Real® Butter in partnership with the American Butter Institute. Thank you for supporting partnerships with brands and campaigns I believe in, which make it easier for me to bring you new and creative content. All opinions are always my own. To see all of the recipes I have created for Go Bold with Butter, click here.
