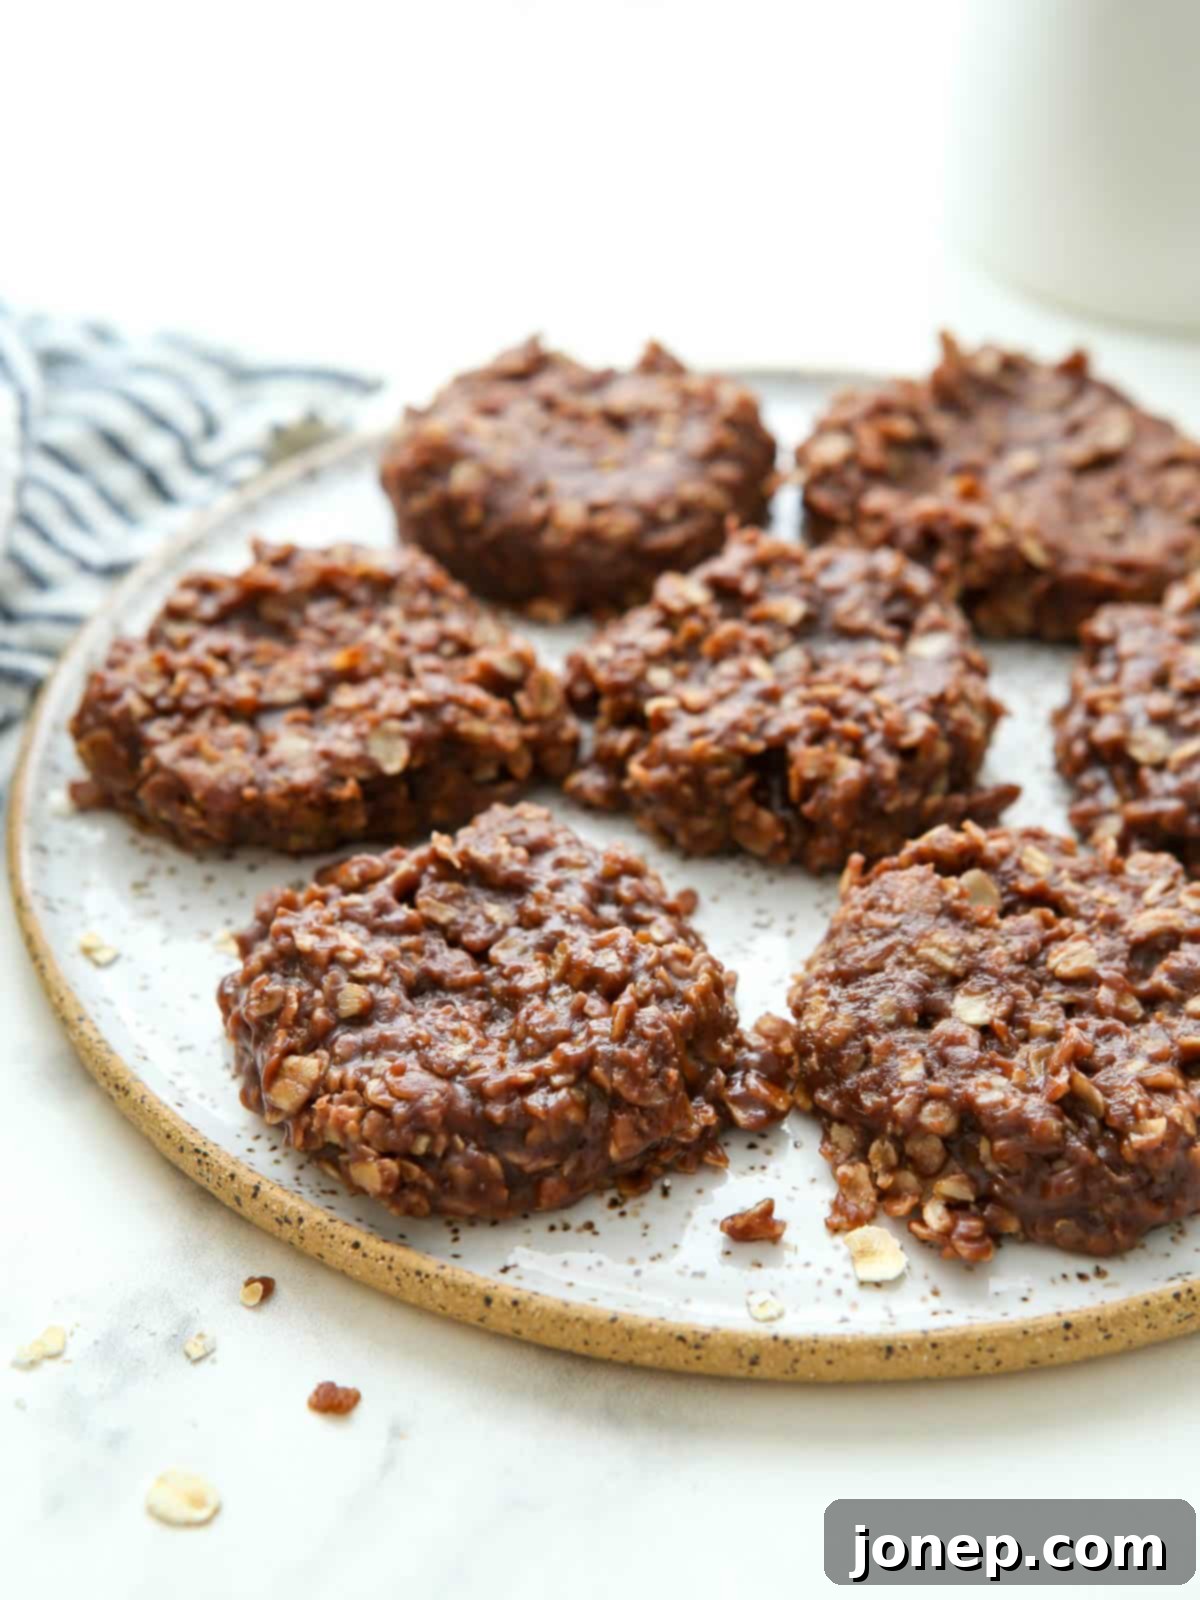
Easy No-Bake Chocolate Cookies: Your Guide to the Classic Peanut Butter & Oat Treat
No-bake chocolate cookies are more than just a dessert; they’re a beloved retro treat that evokes feelings of childhood and simple kitchen magic. This classic recipe requires just 8 basic ingredients and a mere 15 minutes of active preparation time, meaning no oven or mixer is required! It’s the perfect solution when a sweet craving strikes, or you need a quick, delicious dessert without the fuss of traditional baking.
Many of us grew up with these delightful no-bake cookies. For me, it was one of the very first recipes I ever “mastered” as a child, feeling like a true chef in the kitchen. Yet, decades passed since I last whipped up a batch. Recently, while sifting through my mom’s treasured recipe box, I stumbled upon her old, worn recipe card for these very cookies. The nostalgia hit instantly, and I knew I had to recreate them.
To my absolute delight, they were just as incredibly easy to make as I remembered – perhaps even easier with a bit more cooking confidence! And the taste? Even more delicious, comforting, and utterly satisfying than the sweet memories had preserved. This timeless combination of chocolate and peanut butter, bound together with oats, creates a chewy texture that’s simply irresistible. It’s a reminder that some of the best treats are often the simplest, proving that you don’t need fancy equipment or complex techniques to create pure joy in every bite.
Table of Contents
- The easiest cookie recipe!
- Ingredients you’ll need
- How to make no-bake cookies
- Recipe tips and FAQs
- Get the recipe
- More cookie recipes
The Easiest Cookie Recipe You’ll Ever Make!
What makes these no-bake chocolate cookies truly special is their incredible simplicity and the beloved flavor profile. The classic pairing of rich chocolate and creamy peanut butter creates a taste that’s both familiar and deeply satisfying. Beyond the delightful taste, the oats contribute a wonderful, chewy texture that perfectly complements the soft, fudgy base. Unlike traditional cookies that demand precise baking times and temperatures in an oven, this recipe comes together entirely on the stovetop.
The magic happens as the sugar mixture is cooked, creating a binding agent that sets the “cookies” as they cool. This ingenious method means you can enjoy freshly made cookies without ever turning on your oven, making them ideal for hot summer days or when you just want a fuss-free dessert. It’s truly super hard to mess up this recipe – even if your timing isn’t perfect or you scoop them a little too soon, they are almost guaranteed to be delicious! And let’s be honest, their charmingly “homely” appearance is part of their appeal. They’re meant to look a little rustic, a testament to their handmade, comforting nature. 😊
Essential Ingredients You’ll Need for No-Bake Cookies
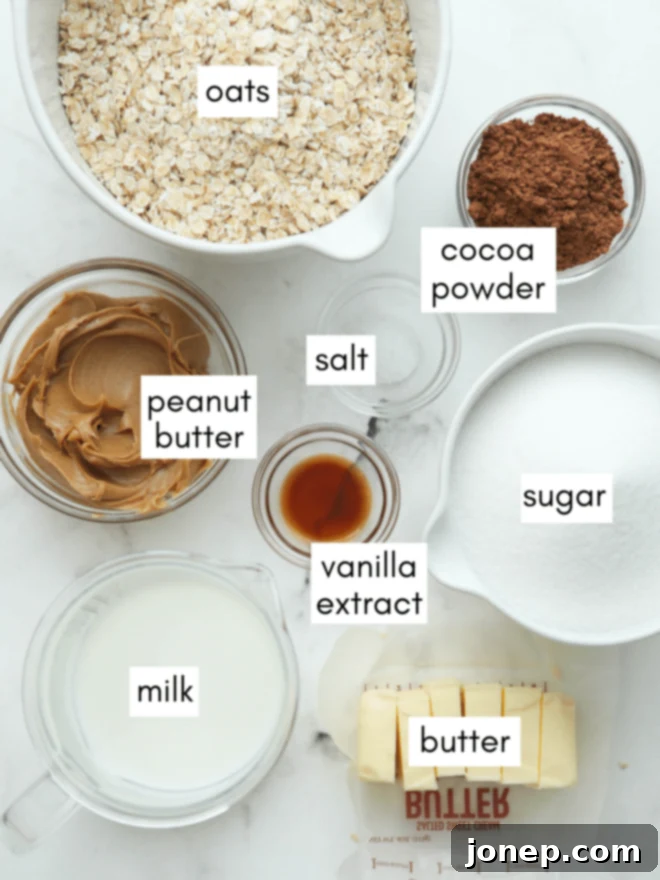
Ready to get started on these irresistible no-bake chocolate cookies? Gather these basic, readily available ingredients. You’ll find the full recipe and precise measurements down below, but here’s a quick overview of what you’ll need to have on hand:
- Butter: Essential for richness and helping the mixture set. Unsalted is preferred, but salted works if you adjust the added salt.
- Granulated Sugar: The base for sweetness and structure. It melts and then hardens to bind the cookies.
- Unsweetened Cocoa Powder: Provides that deep, rich chocolate flavor. Make sure it’s unsweetened, as the recipe accounts for its bitterness.
- Peanut Butter: A critical flavor component and binder. Creamy peanut butter is usually recommended for a smoother texture, but crunchy can add an interesting textural contrast. (See FAQs for more on types of peanut butter.)
- Oats: The heart of the cookie’s chewy texture. Quick oats are generally preferred for a more tender result, but old-fashioned (rolled) oats work for a heartier chew.
- Milk (Whole or 2%): Adds moisture and helps dissolve the sugar. The fat content contributes to the richness.
- Vanilla Extract: Enhances all the other flavors, adding a warm, aromatic note.
- Salt: A pinch of salt balances the sweetness and brings out the chocolate and peanut butter flavors. Don’t skip it!
Having all your ingredients measured and ready before you begin (this is often called “mise en place”) is particularly helpful for this recipe, as the cooking process moves quite quickly once it starts.
Step-by-Step: How to Make No-Bake Chocolate Cookies
Making these no-bake cookies is a straightforward process that comes together in just a few simple steps. The key is to work efficiently once the mixture starts cooking. Here’s a detailed breakdown:
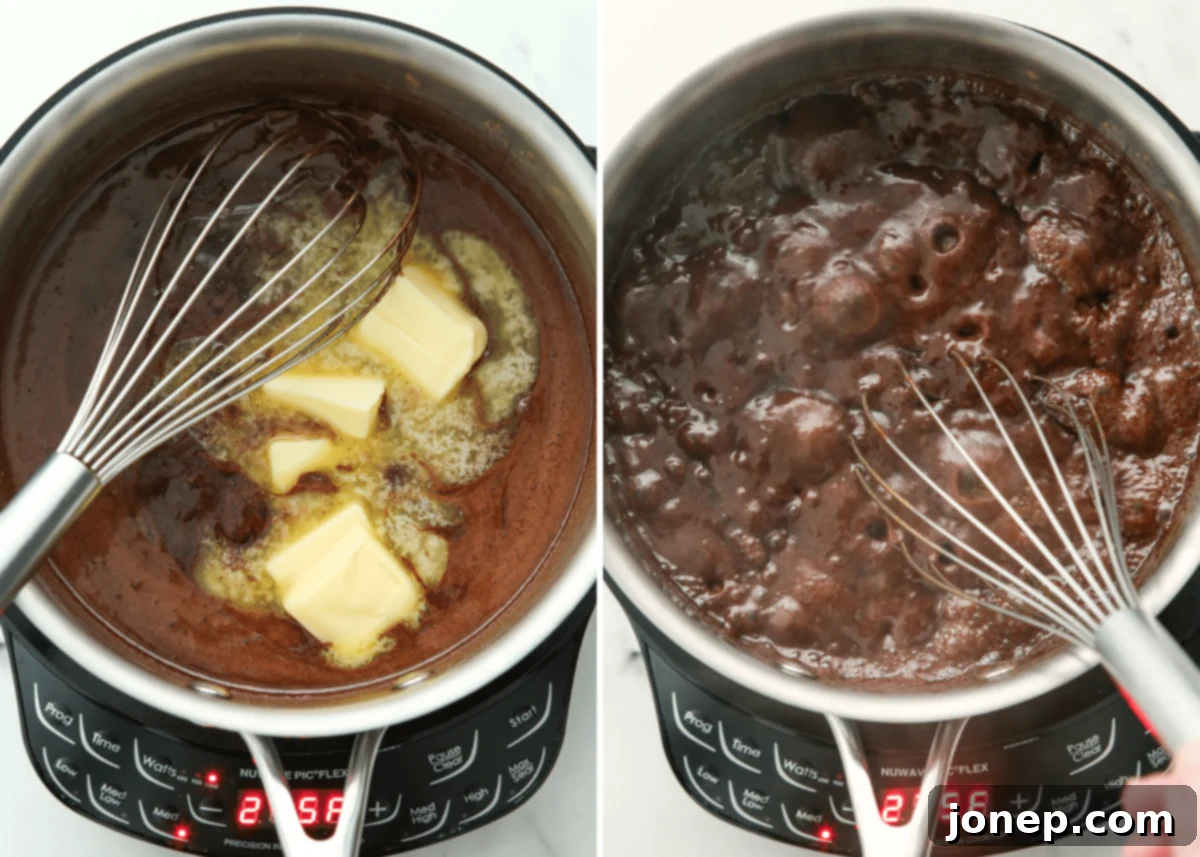
- Combine and Bring to a Boil: In a medium to large saucepan, begin by whisking together the dry ingredients: granulated sugar, unsweetened cocoa powder, and salt. This ensures they are evenly distributed and prevents lumps. Next, pour in the milk and add the butter. Place the saucepan over medium-high heat. Stir continuously as the butter melts and the ingredients combine. It’s important to keep stirring to prevent the sugar from scorching at the bottom of the pan.

The chocolate mixture coming to a rolling boil on the stovetop. - Cook for Precisely 1 Minute: This step is crucial for the cookies’ texture. As soon as the mixture reaches a “rolling boil” – meaning it continues to bubble vigorously even when you stir it – immediately set a timer for exactly 1 minute. Continue to stir constantly during this minute. Overcooking can lead to dry, crumbly cookies, while undercooking can result in them not setting properly.
- Stir in Remaining Ingredients: Once the 1 minute of boiling is complete, promptly remove the saucepan from the heat. Quickly stir in the peanut butter and vanilla extract until completely melted and smooth. The residual heat will help melt the peanut butter. Immediately follow by adding the oats. Stir vigorously until all the oats are thoroughly coated and incorporated into the chocolate-peanut butter mixture. Don’t let it sit too long before adding the oats, as the mixture will start to cool and thicken quickly.

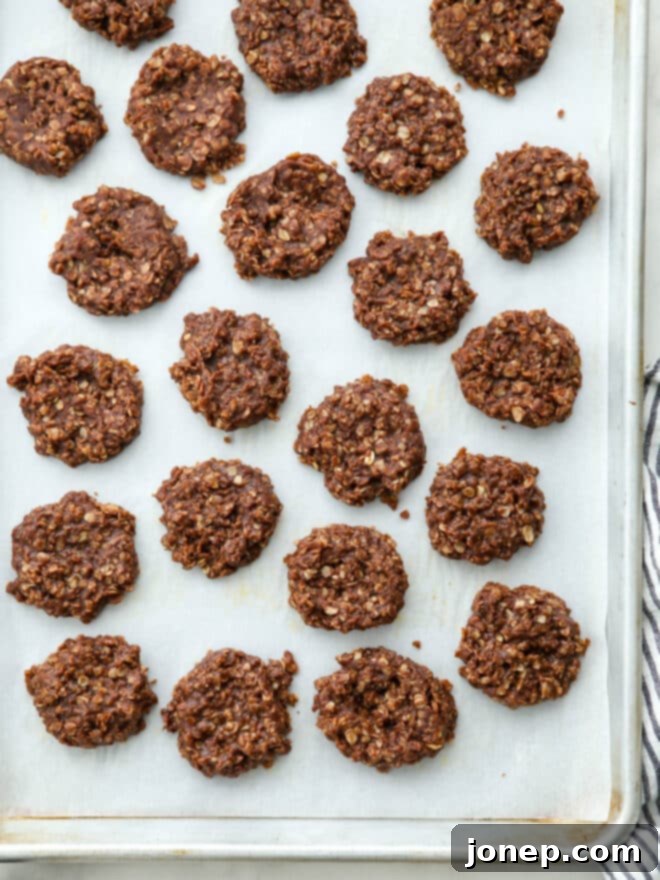
Preparing to scoop the perfect no-bake cookie mounds. - Scoop into Cookies: Allow the mixture to rest for just a few minutes (about 3-4 minutes is ideal). During this brief cooling period, stir it occasionally. You’ll notice it will begin to thicken and become more manageable for scooping. Using a spoon or a cookie scoop, drop mounds of the warm mixture onto wax paper or parchment paper. If the mixture is still a bit too loose, wait another minute or two. If desired, you can gently flatten the tops with the back of the spoon for a more uniform appearance.
- Cool and Enjoy: These magical cookies only take a few extra minutes to fully set up. As they cool, the cooked sugar will crystalize, firming them into perfect, chewy treats. Once completely cooled and firm (typically 10-15 minutes), you’re free to peel them off the paper. Store your delicious creations in an airtight container at room temperature to maintain their freshness for several days. Get ready to indulge in these incredibly easy and satisfying homemade treats!
Expert Recipe Tips and FAQs for Perfect No-Bake Cookies
While these cookies are famously easy, a few key tips and answers to common questions can help ensure your batch turns out perfectly every time.
- Delicious Variations to Try:
- For an added layer of flavor and delightful texture, stir in 1 cup of shredded coconut (unsweetened is generally preferred) along with the oats.
- If you need a peanut-free or nut-free option, feel free to substitute the peanut butter with almond butter, cashew butter, or sunflower seed butter. Be aware that the texture might vary slightly with different nut/seed butters.
- Consider adding a handful of mini marshmallows or extra chocolate chips when you stir in the oats for even more gooey goodness and chocolatey delight.
- Always Read Through the Recipe Before Starting: This is generally good advice for any recipe, but it’s particularly important for no-bake cookies. The process moves rather quickly once you start boiling, so knowing the next steps and having all your ingredients measured and ready (“mise en place”) will help you stay organized and prevent any hurried mistakes.
- The Golden Rule: Don’t Overcook! This cannot be stressed enough. Overcooking the sugar mixture is the most common mistake and will lead to disappointing results. It draws out too much moisture, causing a dry, crumbly, grainy, and hard texture in your cookies instead of the desirable soft and chewy consistency. Once it reaches a rolling boil, set your timer for exactly 1 minute and stick to it! Trust the process.
- No Need to Refrigerate (Mostly!): Unlike some other no-bake cookie recipes that rely on refrigeration to set, this classic version typically doesn’t require chilling in the fridge. Just let the scooped cookies firm up at room temperature for a few minutes before serving. However, if your kitchen is particularly warm, a short stint in the fridge can speed up the setting process.
- What Kind of Oats Are Best for These Cookies? I always grew up using old-fashioned (rolled) oats, which provide a heartier, more substantial chew. However, I’ve found a personal preference for quick-cooking oats. They meld into the batter more seamlessly and result in a more tender, chewy texture that some find more appealing. Both types will work beautifully, so feel free to use whichever you prefer or have on hand!
- What’s the Best Type of Peanut Butter to Use? You can use practically any kind of creamy peanut butter you want, and even crunchy peanut butter can add a nice crunch. However, for the best and most consistent setting results, traditional commercially-processed creamy peanut butter (like Jif or Skippy) is highly recommended. Natural peanut butters, especially those with oil separation, tend to have a higher oil content which can sometimes prevent the cookies from setting as firmly.
- Storage Tips: Store your cooled no-bake cookies in an airtight container at room temperature for up to 3-5 days. While they’re best enjoyed fresh, they remain delicious for a few days. For longer storage, you can freeze them in a single layer, then transfer to a freezer-safe bag or container for up to 1-2 months. Thaw at room temperature before serving.
- Troubleshooting: Why Are My Cookies Not Setting? If your cookies are too sticky or soft, it’s usually due to not cooking the sugar mixture long enough. Ensure you hit a true rolling boil and time it for the full minute. If they’re too dry and crumbly, it’s likely they were overcooked. Adjust your boiling time next time!
Get the Full Recipe Here
No-Bake Chocolate Cookies
24
cookies
5 minutes
5 minutes
15 minutes
25 minutes
Pin Recipe
Leave a Review
Ingredients
-
2 cups
(200 grams)
granulated sugar -
¼ cup
(21 grams)
unsweetened cocoa powder -
Pinch of salt -
½ cup
(113 grams)
milk -
½ cup
(113 grams)
butter -
½ cup
(135 grams)
creamy peanut butter
, not natural-style -
1 teaspoon
vanilla extract -
3 cup
(270 grams)
oats
, quick-cooking (preferred) or old-fashioned
Prevent your screen from going dark
Equipment
Instructions
-
In a medium to large saucepan, whisk together the sugar, cocoa powder and salt. Whisk in the milk. Add the butter and set over medium high heat, stirring as the butter melts.
-
Bring mixture to a boil. Once it’s at a rolling boil (meaning it continues to boil while stirring), set a timer for 1 minute and continue to stir constantly.
-
Once the 1 minute is up, remove from heat and stir in vanilla and peanut butter, followed by the oats. Let the mixture rest for 3-4 minutes, stirring often, just until it starts to thicken and hold together. Mixture should still be plenty soft and shiny.
-
Use a cookie scoop or spoon to drop mounds of the mixture onto wax paper or parchment paper. If desired, flatten with the back of the spoon. (If the mixture has cooled a little too much, it might need just a bit of flattening.)
-
Let the cookies cool and set up completely, which should only take about 10-15 minutes. Transfer to an airtight container for storage and enjoy cookies within a few days while they’re still fresh.
Notes
- I prefer to use quick oats, as they make for a more tender chewy texture. Traditional old-fashioned oats will works just fine too, but the cookies will have a heartier texture. Use what you have!
- Don’t over cook! Make sure to set a timer and stick to it. Cooking the mixture too long will remove too much moister, resulting in cookies that are dry, crumbly and grainy.
Carbohydrates: 25g,
Protein: 3g,
Fat: 8g,
Saturated Fat: 3g,
Polyunsaturated Fat: 1g,
Monounsaturated Fat: 3g,
Trans Fat: 0.2g,
Cholesterol: 11mg,
Sodium: 56mg,
Potassium: 90mg,
Fiber: 2g,
Sugar: 18g,
Vitamin A: 126IU,
Calcium: 17mg,
Iron: 1mg
American
Dessert
Annalise Sandberg
Have you tried this recipe?
I’d love to hear about it! Leave a rating and review below, or take a photo and tag it on Instagram @completelydelicious with #completelydelicious.
Discover More Irresistible Cookie Recipes
If you’ve fallen in love with the ease and deliciousness of these no-bake chocolate cookies, you’ll be thrilled to explore more fantastic cookie recipes from our collection. Whether you’re looking for chewy classics or something with a bit more crunch, we have a cookie for every craving!
Whether you’re recreating a childhood memory or discovering a new favorite, these no-bake chocolate cookies are sure to become a staple in your dessert repertoire. Happy no-baking!
