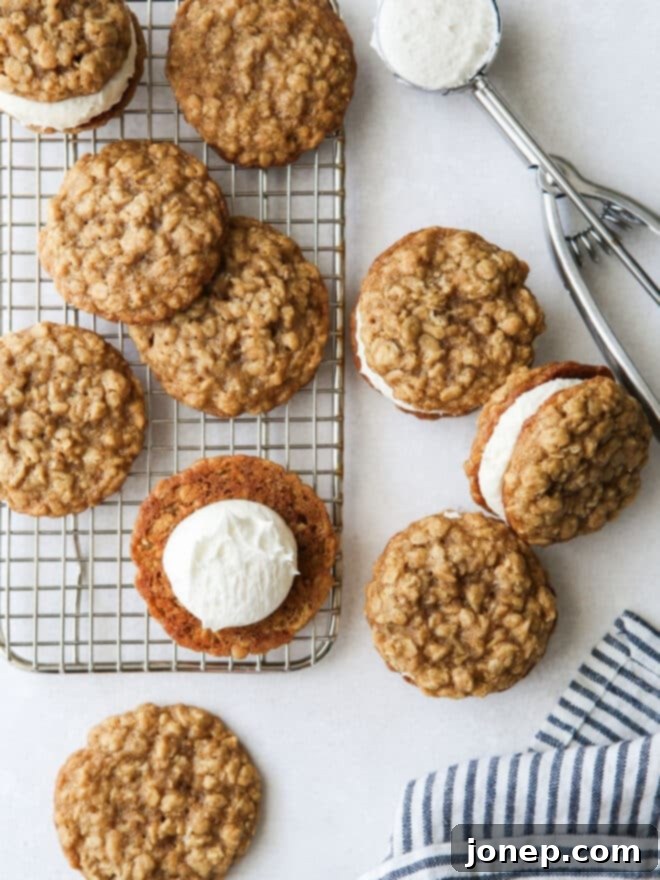
Homemade Oatmeal Cream Pie Cookies: Your Ultimate Guide to the Classic Treat
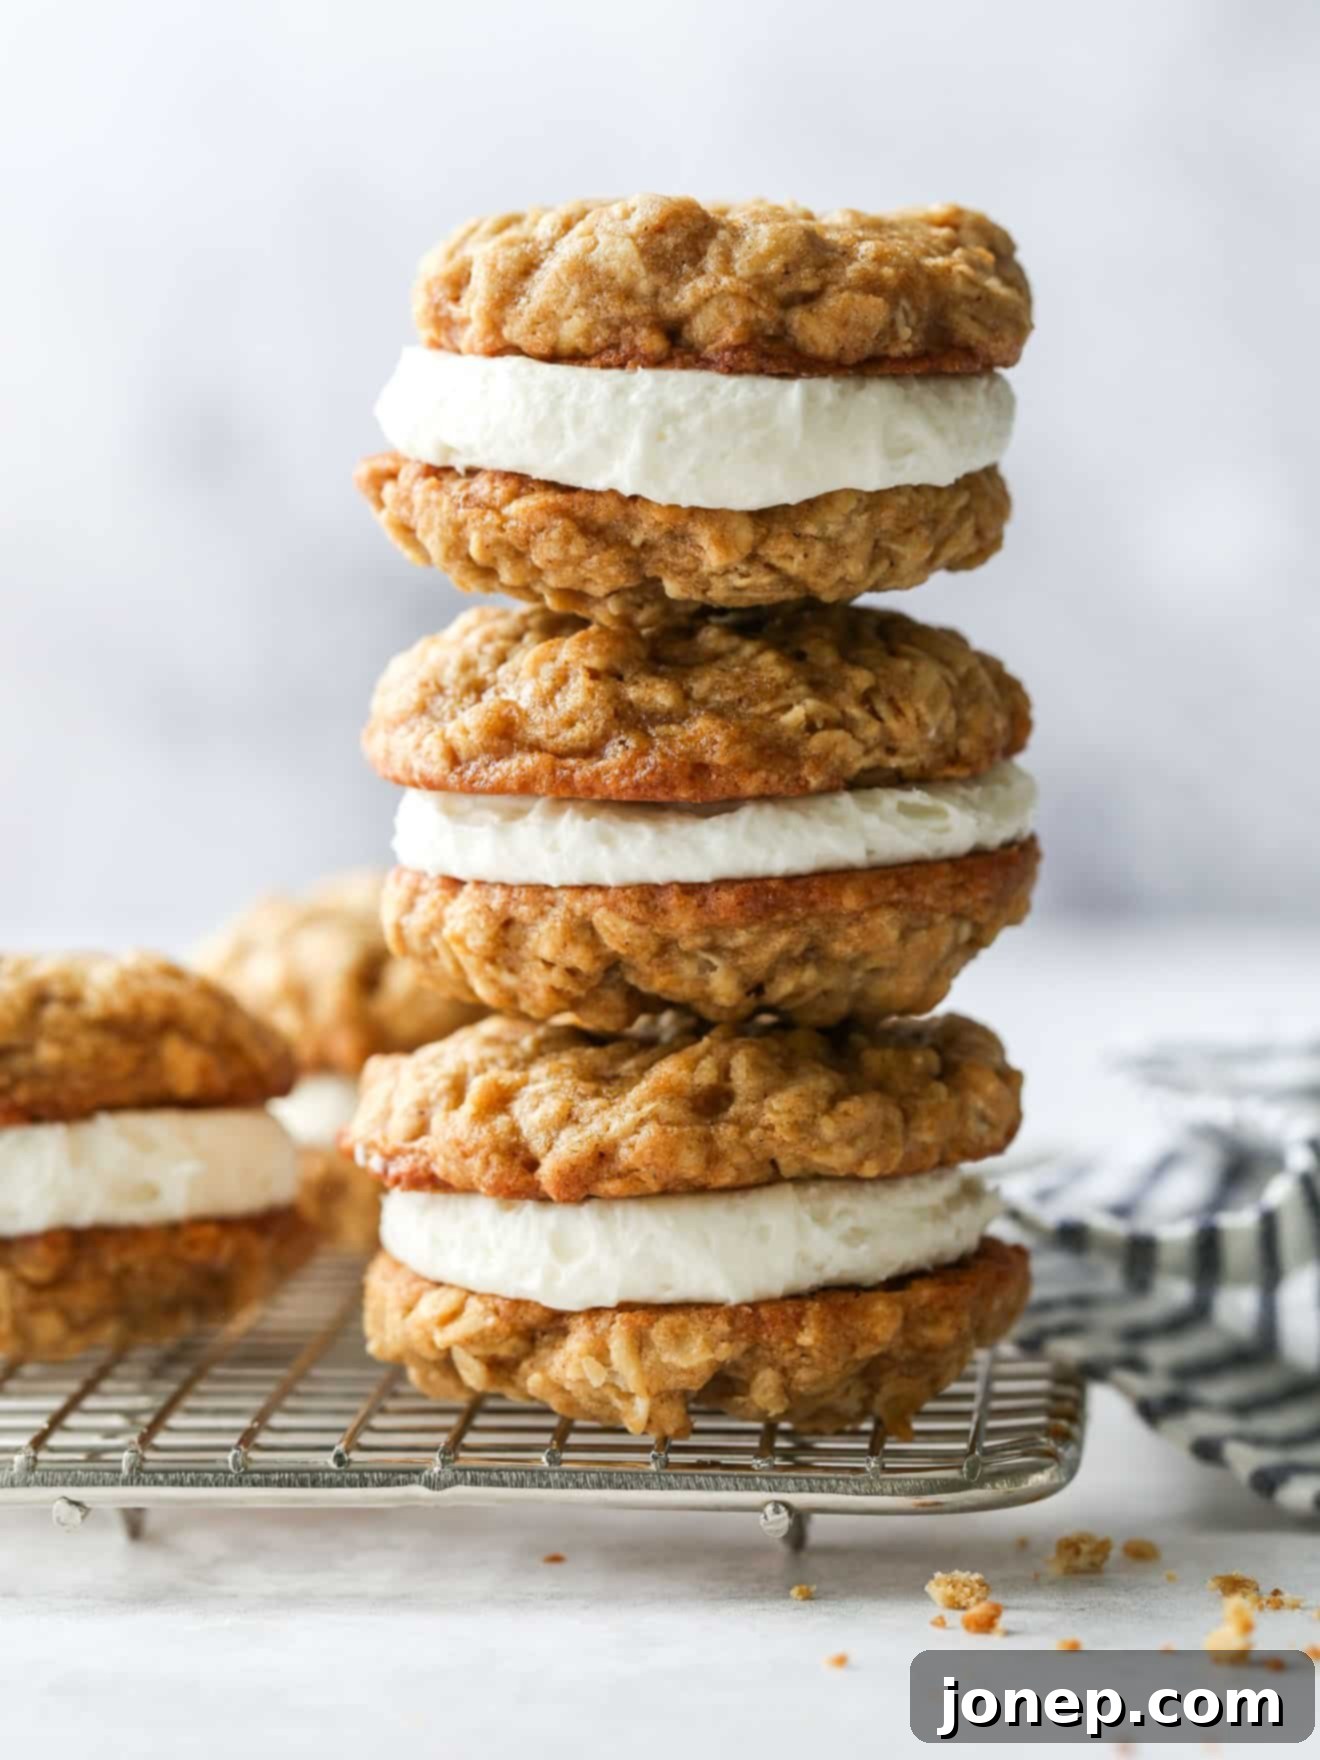
Step into a world of delicious nostalgia with these homemade oatmeal cream pie cookies. This recipe is a delightful tribute to the beloved Little Debbie classic, offering a fresh, from-scratch version that truly elevates the experience. Imagine soft, perfectly chewy oatmeal cookies, infused with warm spices, embracing a luscious, creamy marshmallow filling. Each bite promises an irresistible treat that will transport you straight back to childhood.
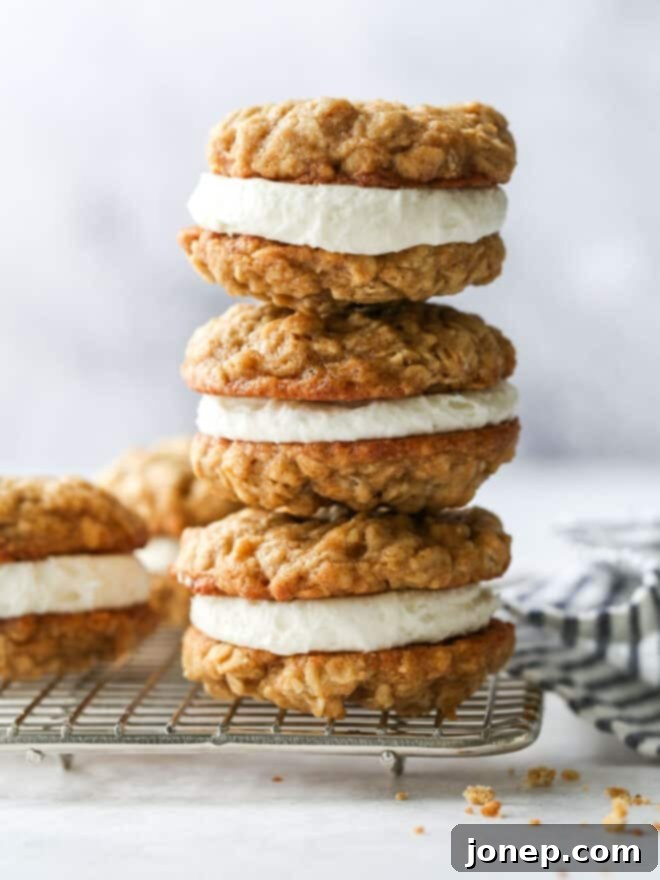
For many, those individually plastic-wrapped oatmeal cream pies were the highlight of a school lunch or an afternoon snack. I vividly recall the joy of unwrapping one, anticipating that perfect blend of soft cookie and sweet, fluffy cream. The balance was always just right: a tender, slightly spiced oatmeal cookie paired with a buttery, sugary filling that melted in your mouth. Having revisited one recently, the wave of childhood memories with every bite was truly something special!
While the original holds a cherished place in our hearts, this homemade copycat version takes everything you love about the store-bought cookie and makes it even better. Crafted entirely from simple, readily available ingredients, it’s a baking project that’s both rewarding and surprisingly easy. Prepare yourself for rave reviews from both kids and adults alike – these homemade oatmeal cream pies are destined to become a new family favorite, perfect for any snack or dessert occasion, anytime you crave a comforting, sweet indulgence.
Table of Contents
- What are Oatmeal Cream Pies?
- Essential Ingredients for Your Pies
- Step-by-Step: How to Make Oatmeal Cream Pie Cookies
- Expert Baking Tips for Perfect Oatmeal Cream Pies
- More Irresistible Cookie Recipes
- Get the Full Recipe

What are Oatmeal Cream Pies? Understanding the Classic Treat
Little Debbie’s Oatmeal Crème Pies are iconic sandwich cookies, instantly recognizable by their soft, chewy oatmeal cookies and a thick, creamy vanilla icing filling. Since their introduction in 1960 as the very first Little Debbie snack cake, they have become a staple in lunchboxes and snack cupboards across America. You’d typically find them in a distinct long white rectangular box, with each cookie individually wrapped, promising a sweet escape in every portion.
The magic of these pies lies in their unique texture combination: the comforting chewiness of the oatmeal cookie perfectly complements the smooth, slightly airy sweetness of the crème filling. It’s a harmonious blend that creates a truly satisfying treat. For this homemade iteration, we’ve taken inspiration from that classic and elevated it. We start with a tried-and-true recipe for chewy oatmeal cookies – the foundation of any great oatmeal cream pie. The real secret to capturing that signature soft, sweet, and creamy taste in the filling? Marshmallow fluff or cream. Incorporating this ingredient into our vanilla frosting ensures the filling is not just sweet, but incredibly light and smooth, mirroring the delightful texture of the original and making our homemade version truly exceptional.
Ready to bake a batch that will impress even the most discerning Little Debbie fans? Let’s dive into the delicious details!
Essential Ingredients for Your Pies
Creating these perfect oatmeal cream pies requires a handful of common baking staples. Each ingredient plays a crucial role in achieving that sought-after texture and flavor. Here’s a detailed look at what you’ll need and why:
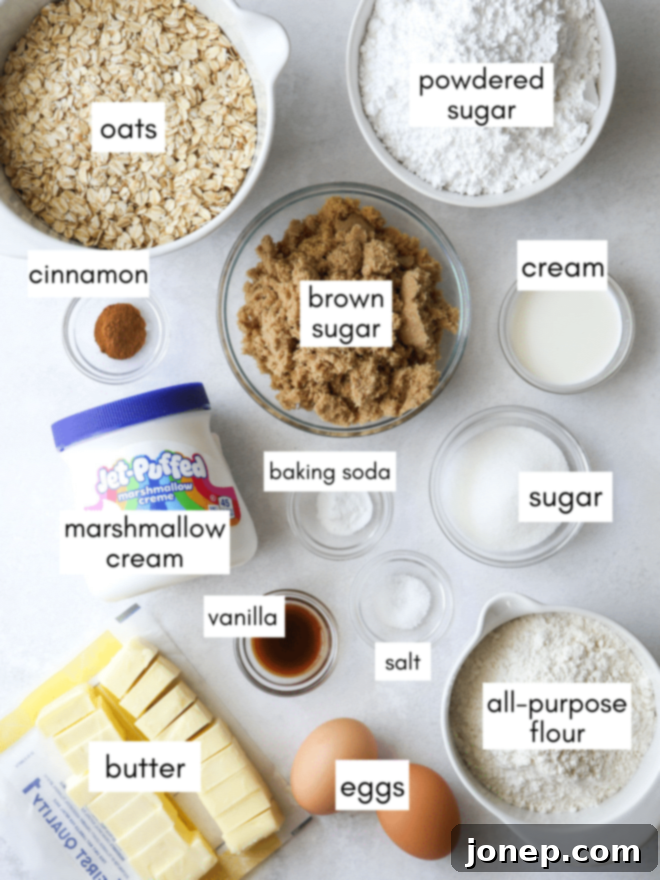
For the Oatmeal Cookies:
- Unsalted Butter (at room temperature): The base of our cookies, providing richness and tenderness. Room temperature butter creams beautifully with sugar.
- Packed Light or Dark Brown Sugar: Essential for that characteristic chewy texture and molasses-rich flavor that defines oatmeal cookies.
- Granulated Sugar: A touch of white sugar helps with spread and crispness around the edges, balancing the chewiness from the brown sugar.
- Large Eggs: Binders that add moisture and structure to the cookies. Ensure they are also at room temperature for better emulsion.
- Vanilla Extract: A flavor enhancer that complements the oatmeal and spices. Use good quality extract for the best taste.
- All-Purpose Flour: The primary structural component. Make sure to measure it correctly (see tips below!).
- Baking Soda: A leavening agent that helps the cookies rise and spread, contributing to their soft texture.
- Salt: Balances the sweetness and enhances all the other flavors.
- Ground Cinnamon: The quintessential spice for oatmeal cookies, adding warmth and a classic aroma.
- Old-Fashioned Rolled Oats (not quick-cooking): These are key for the texture. Old-fashioned oats hold their shape better and provide a chewier bite compared to quick oats, which can result in a more cake-like cookie.
For the Cream Filling:
- Unsalted Butter (at room temperature): Forms the rich, creamy base of the frosting.
- Powdered or Confectioners Sugar: Provides sweetness and a smooth, lump-free texture to the filling.
- Marshmallow Crème or Fluff: This is the secret ingredient that gives the filling its iconic light, fluffy, and slightly sticky texture, mimicking the original Little Debbie pies.
- Heavy Cream: Adds richness and helps achieve the perfect creamy consistency. Milk can be substituted, but heavy cream offers a superior texture.
- Vanilla Extract: Infuses the filling with a lovely vanilla aroma and flavor.
- Salt: A pinch of salt cuts through the sweetness and balances the flavors in the filling.
Step-by-Step: How to Make Oatmeal Cream Pie Cookies
Creating these delightful sandwich cookies is a straightforward process, broken down into making the cookies, preparing the filling, and finally assembling your pies. Follow these steps for perfect results:
-
Crafting the Perfect Oatmeal Cookies
Prepare oatmeal cookie dough: This recipe utilizes the classic “creaming method,” which is fundamental for soft, tender cookies. Begin by creaming together the softened butter, brown sugar, and granulated sugar in a large bowl with an electric hand mixer or a stand mixer fitted with a paddle attachment. Beat on medium speed until the mixture is light, fluffy, and pale, typically 2-3 minutes. This process incorporates air, contributing to the cookies’ texture. Next, add the large eggs one at a time, mixing well after each addition to ensure everything is fully combined. Stir in the vanilla extract until just incorporated.
In a separate medium bowl, whisk together all of your dry ingredients: all-purpose flour, baking soda, salt, and ground cinnamon. Finally, fold in the old-fashioned rolled oats. Gradually add this dry mixture to your wet ingredients, mixing on low speed until just combined. Be careful not to overmix, as this can develop the gluten in the flour, leading to tough cookies.

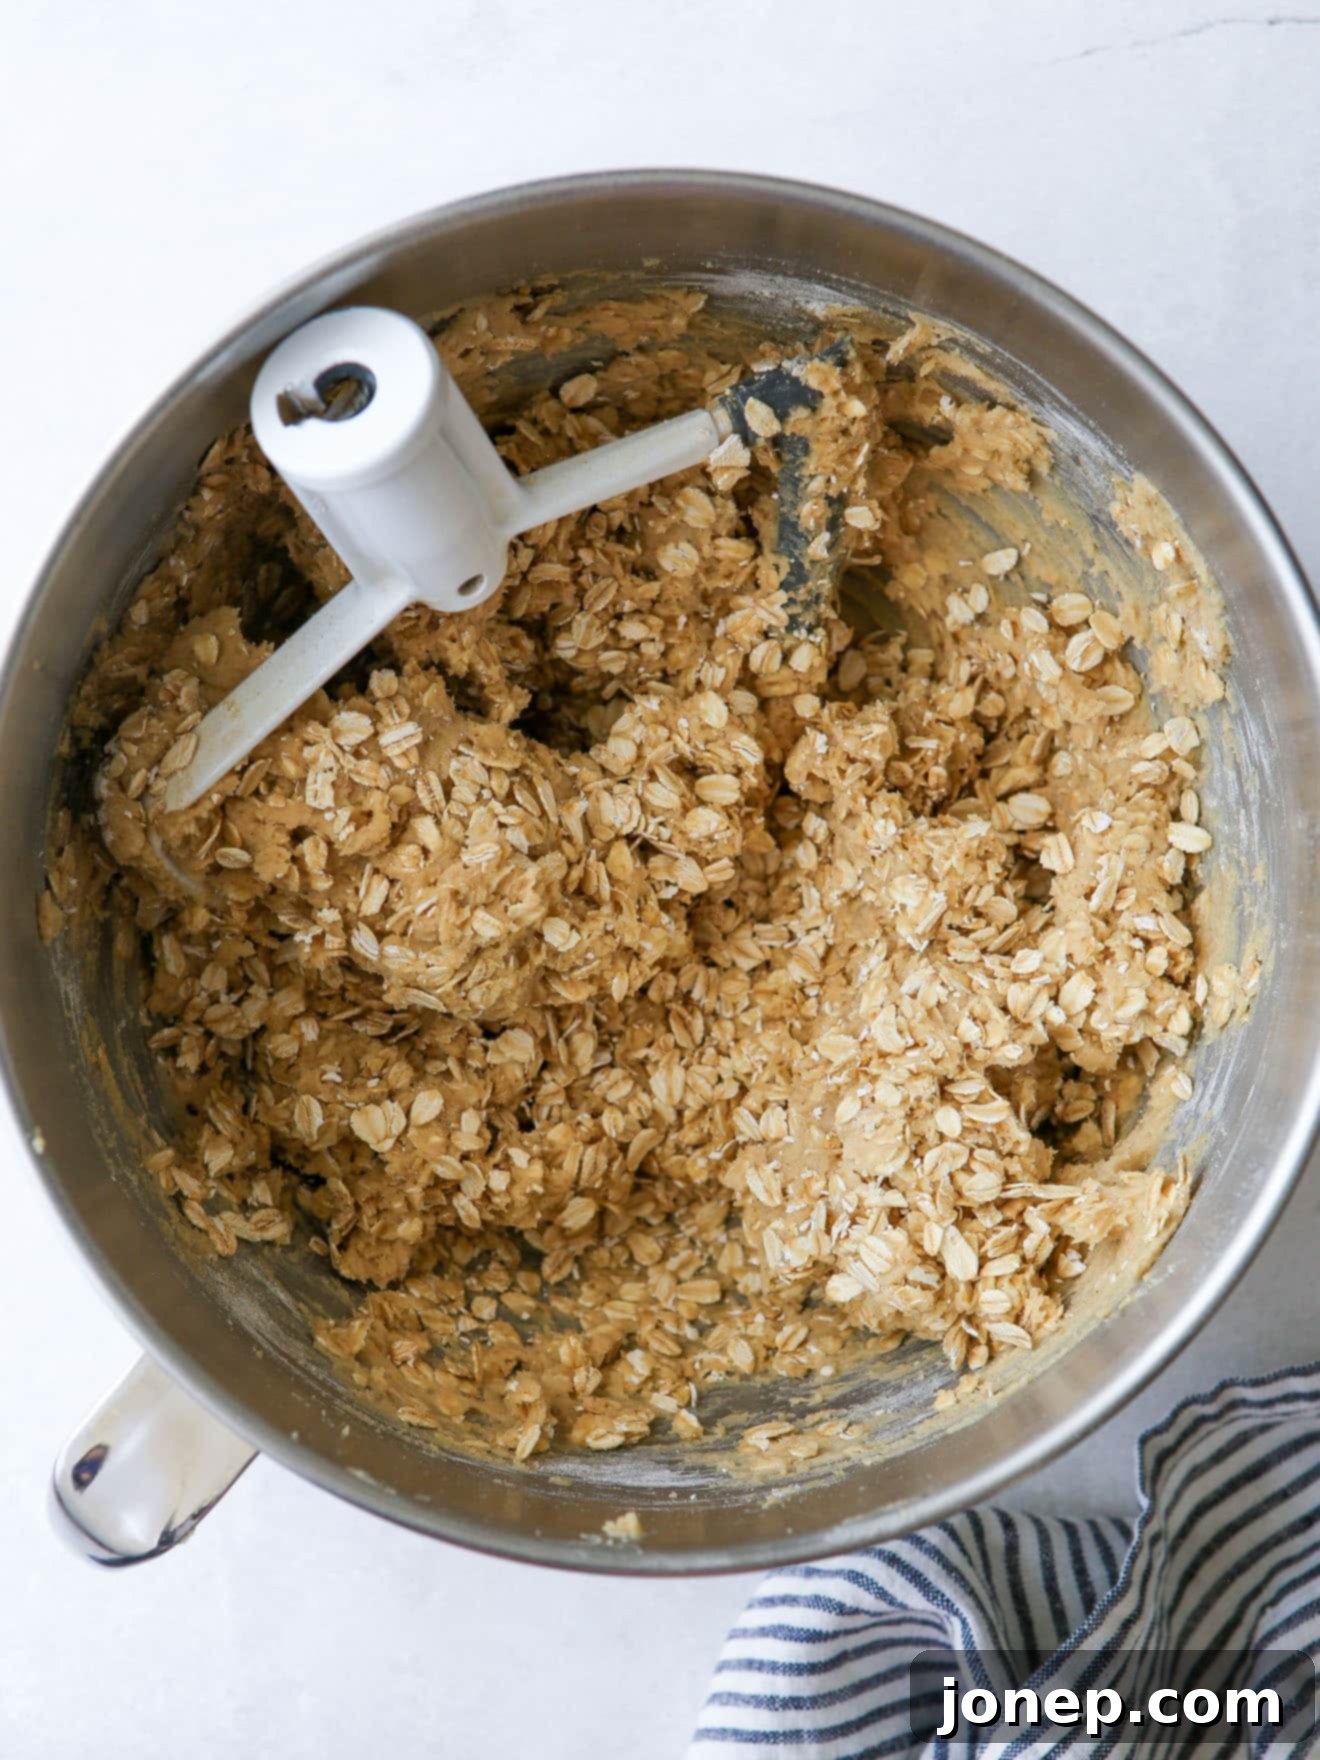
The beautifully mixed oatmeal cookie dough, rich and fragrant with spices. -
Portion and roll into balls: Once your dough is ready, preheat your oven to 350°F (175°C) and line a baking sheet pan with parchment paper. Using a #40 (1.5 Tbsp) cookie scoop or a rounded tablespoon, portion out the cookie dough. Gently roll each portion into a smooth ball between your palms. Arrange these dough balls a few inches apart on your prepared baking sheets to allow for even spreading during baking.

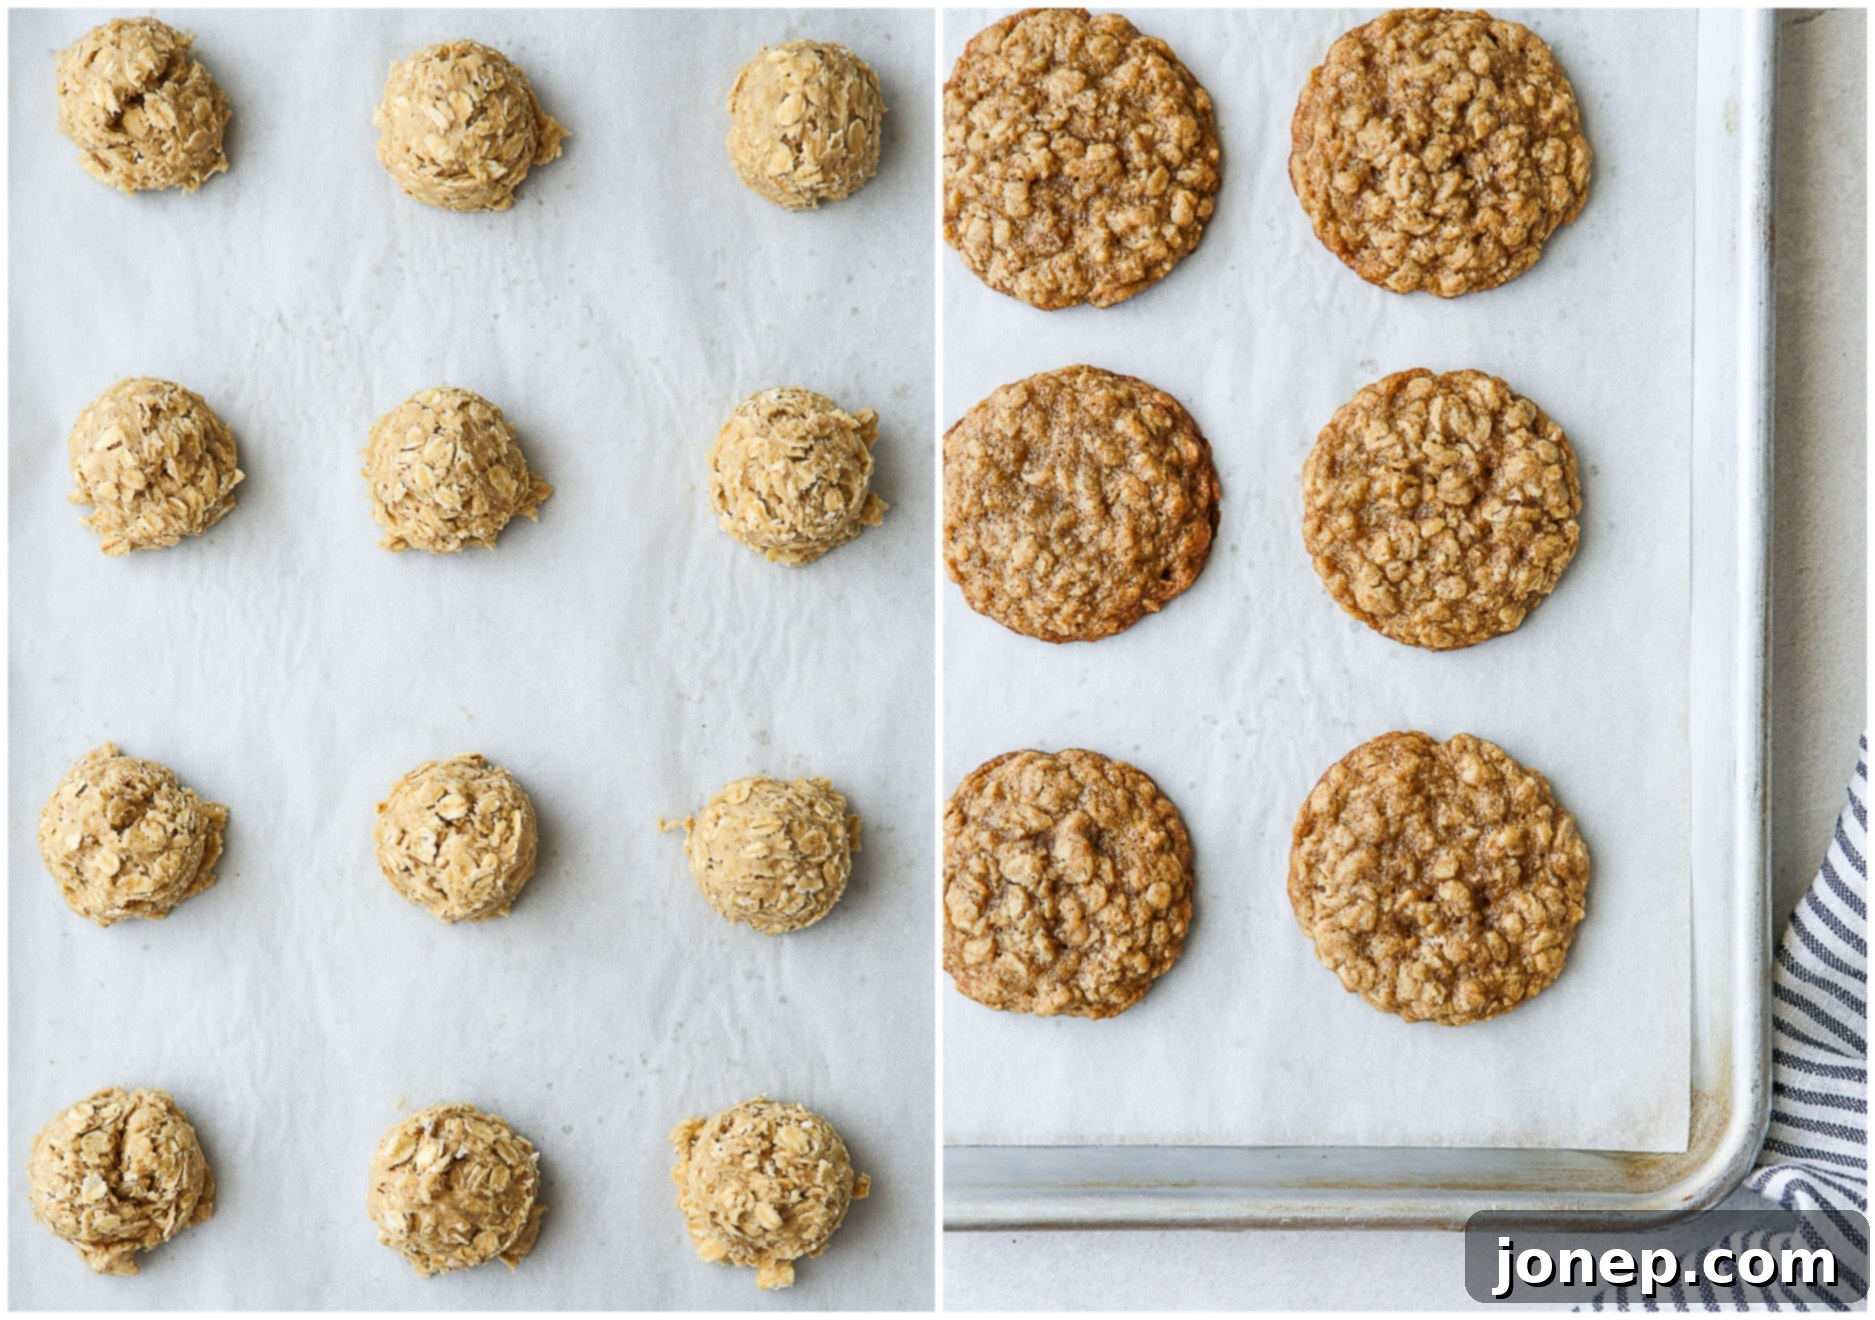
Cookie dough balls before baking, and perfectly golden cookies after. -
Bake oatmeal cookies: Bake the cookies in your preheated oven for 8-10 minutes. You’re looking for cookies where the edges and bottoms are lightly golden brown, but the tops appear just barely set and haven’t browned at all. They might look slightly underdone in the center, but this is key for that soft, chewy texture. Overbaking will result in crisp, dry cookies. Allow them to cool on the hot cookie sheet for about 5 minutes; this allows them to finish setting up without becoming too firm. Then, carefully transfer them to a wire rack to cool completely before filling.
-
Whipping Up the Dreamy Marshmallow Filling
Prepare marshmallow filling: While your cookies cool, it’s time to create the star filling. In the bowl of your stand mixer (or a large bowl with a hand mixer), combine the powdered sugar, softened unsalted butter, marshmallow cream (or fluff), heavy cream, vanilla extract, and a pinch of salt. Start mixing on low speed to prevent a cloud of powdered sugar, then gradually increase to medium speed. Beat until the frosting smooths out and just comes together. Scrape down the sides and bottom of the bowl thoroughly with a spatula to ensure all ingredients are incorporated. Then, beat for another 1-2 minutes on medium-high speed until the frosting is wonderfully light, fluffy, and creamy. The marshmallow cream will give it a unique, airy texture that’s truly delightful.

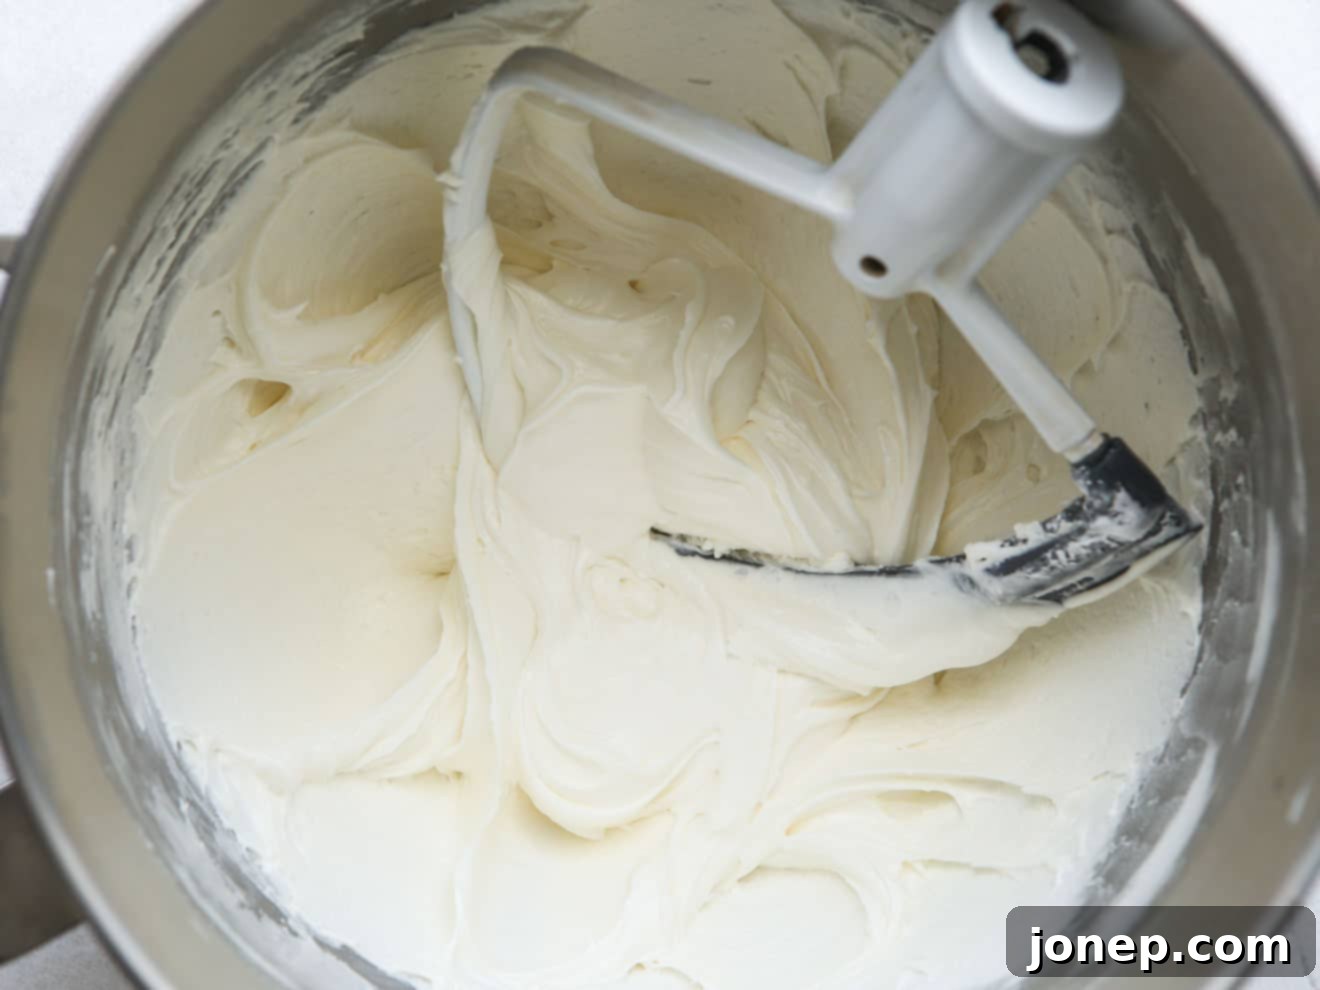
The light and fluffy marshmallow cream filling, ready for assembly. -
Assembling Your Perfect Sandwich Cookies
Make sandwich cookies: Once your oatmeal cookies are completely cool, it’s time for assembly. Take half of your cooled cookies and invert them (bottom-side up) on your work surface or wire rack. Spoon a generous dollop of the creamy marshmallow filling onto the flat bottom of each inverted cookie. For a perfectly even cookie-to-filling ratio, consider using the same 1.5 Tbsp cookie scoop you used for the dough! Take another cooled cookie and gently place it on top, pressing down just enough to spread the filling evenly to the edges, creating a beautiful sandwich. Repeat with the remaining cookies and filling.

The final step: expertly assembling the delightful sandwich cookies. -
Enjoy and store: Your homemade oatmeal cream pies are now ready to be devoured! These delightful cookies will stay fresh and delicious for several days when stored in an airtight container at room temperature. However, if your kitchen tends to be on the warmer side, I recommend storing them in the refrigerator to keep the creamy filling firm and prevent it from becoming too soft. Just remember to let them come to room temperature for about 15-20 minutes before serving for the best texture and flavor.
baking tip: How to Bake Soft and Chewy Cookies Every Time
- Embrace Brown Sugar: Look for cookie recipes that utilize brown sugar, or a combination of brown and granulated sugar. Brown sugar contains molasses, which contributes significantly to a chewier, moister cookie, while granulated sugar tends to yield a crispier result.
- Mind the Temperature: Baking at a slightly lower temperature, such as 350°F (175°C) instead of 375°F (190°C), allows the cookies to bake through fully without browning too quickly on the outside. This helps maintain a soft interior.
- Don’t Overbake: This is arguably the most crucial tip! Remove your cookies from the oven when their edges are just set and lightly golden, and the centers still look slightly pale or even a tiny bit underdone. They will continue to cook and set up from residual heat as they cool on the baking sheet.
Expert Baking Tips for Perfect Oatmeal Cream Pies
To ensure your homemade oatmeal cream pies turn out absolutely perfect every time, keep these expert tips in mind. They address common baking challenges and offer insights that will elevate your baking game.
- Measure Flour Accurately: This is a game-changer in baking! All of my recipes are meticulously tested using the spoon and level method. If you simply scoop your measuring cup directly into the flour bag, you’re likely compacting it and ending up with too much flour. Excess flour results in cookies that are thick, dry, and lack that desirable tender chewiness. Always spoon flour into your measuring cup and then level it off with a straight edge.
- Avoid Overbaking at All Costs: This cannot be stressed enough for chewy cookies! Overbaking is the quickest way to turn soft, delightful cookies into hard, dry pucks. Pull them from the oven when the edges are just barely golden brown and the centers are set but still look pale or slightly soft. They will continue to set up and firm on the hot baking sheet for a few minutes after removal, achieving that perfect texture.
- Marshmallow Cream Substitution: If you find yourself without marshmallow cream or simply prefer a different filling, don’t fret! You can easily substitute the filling recipe here with my delicious whipped vanilla buttercream frosting. It offers a slightly different, but equally delightful, creamy texture and rich vanilla flavor.
- Reshape Warm Cookies for Perfection: If, right after coming out of the oven, your cookies look a little irregular or misshapen, you have a small window of opportunity to fix them. Use the back of a spatula or a round cookie cutter slightly larger than your cookies to gently press and shape them back into perfect circles while they are still warm and pliable. This simple trick ensures beautifully round cookies.
- Freeze Cookie Dough for Future Cravings: Planning ahead or want to have fresh cookies on demand? This cookie dough freezes exceptionally well! Refer to this detailed guide on how to store and freeze cookie dough. When you’re ready to bake, simply thaw the dough balls slightly before baking as directed.
- Adjust for Chilled or Frozen Dough: If you’ve prepared the cookie dough ahead of time and stored it in the fridge or freezer, you might notice the oats have absorbed more moisture, making the dough less prone to spreading in the oven. To counteract this and ensure a good spread, gently flatten the tops of the cookie dough balls slightly before baking. This extra step helps them bake up nicely and evenly. (If baking the dough immediately after mixing, this step is not necessary.)
- Piping Bag vs. Cookie Scoop for Filling: While a piping bag can offer a neat and decorative way to apply the filling, I actually find using the same cookie scoop (1.5 Tbsp) that I used for the dough to be incredibly efficient and effective. It scoops out the perfect amount of filling for each cookie, minimizing mess and ensuring a consistent cookie-to-filling ratio without the fuss of a piping bag.

More Irresistible Cookie Recipes to Try
If you’ve enjoyed making these oatmeal cream pies, you might be looking for more delightful cookie recipes to add to your repertoire. Here are a few other favorites that are sure to satisfy your sweet tooth:
Get the Full Recipe: Homemade Oatmeal Cream Pie Cookies

Oatmeal Cream Pie Cookies
15 cookies
30 mins
30 mins
1 hr
These oatmeal cream pie cookies are a homemade version of the Little Debbie classic. The soft and chewy oatmeal cookies sandwiched with a creamy marshmallow filling makes for an irresistible treat!
Pin Recipe
Leave a Review
Ingredients
For the oatmeal cookies:
- 1 cup butter, at room temperature (226 grams, 2 sticks)
- 1 cup packed light or dark brown sugar (213 grams)
- ¼ cup granulated sugar (50 grams)
- 2 large eggs
- 2 teaspoons vanilla extract
- 1 ½ cup all-purpose flour (200 grams)
- ½ teaspoon baking soda
- ½ teaspoon salt
- ½ teaspoon ground cinnamon
- 3 cups old-fashioned rolled oats, not quick cooking (297 grams)
For the cream filling:
- ¾ cup butter, at room temperature (170 grams)
- 3 cups powdered or confectioners sugar (340 grams)
- 7 oz marshmallow crème or fluff (1 regular container, 198 grams)
- 3 tablespoons cream or heavy cream
- 1 teaspoon vanilla extract
- ¼ teaspoon salt
Equipment
Instructions
To make the cookies:
- Preheat oven to 350°F (175°C). Line a baking sheet pan with parchment paper.
- In the bowl of a stand mixer fitted with a paddle attachment, or in a large bowl with a hand-held mixer, beat the butter, brown sugar, and granulated sugar until creamy, about 2-3 minutes. Add eggs one at a time, mixing after each. Add vanilla and mix until well combined.
- In a medium bowl, combine the flour, baking soda, salt, cinnamon, and oats. Add this mixture to the butter mixture all at once and mix on low speed until just combined. Do not overmix.
- Use a medium cookie scoop (1½ tablespoon #40) to portion the dough or drop by “rounded tablespoon” and use your hands to roll the rounds into balls. Arrange them a few inches apart on the sheet pans lined with parchment paper.
- Bake until the edges just begin to turn golden and the tops are set but still pale, about 8-10 minutes. Let the cookies cool on the sheet pan for 5 minutes to finish setting up, then transfer to a wire rack to cool completely.
To make filling and assemble sandwich cookies:
- In the bowl of a stand mixer fitted with a paddle attachment, or in a large bowl with a hand-held mixer, beat the butter, powdered sugar, marshmallow crème, heavy cream, vanilla, and salt on low speed until smooth and the frosting starts to come together.
- Scrape down the bowl well and mix again on medium-high speed until light and creamy, about 1-2 minutes.
- Spoon frosting onto half of the cooled cookies, inverted so the bottoms are up (use the same cookie scoop you portioned dough with for the perfect filling-to-cookie ratio). With the other half of the cookies, place them on top and gently press so that the filling evenly spreads to the edges.
- Store cookies in an airtight container at room temperature for several days. If your kitchen is warm, consider storing them in the fridge to keep the frosting more firm, but allow them to come to room temperature for 15-20 minutes before serving for the best texture.
Notes
- Be sure to measure flour correctly with the spoon and sweep method. This prevents dry, dense cookies.
- If you have prepped the cookie dough ahead of time (stored in the fridge or freezer), the oats will have absorbed some moisture, which might prevent the cookies from spreading as much. To combat this, simply flatten the cookie dough balls slightly so they have flat tops before baking. This will help them bake up nicely. (This step is not necessary if baking the dough right away.)
- Do not overbake the cookies! This is crucial for maintaining their soft, chewy texture. Remove them from the oven when the edges and bottoms are lightly golden, even if the tops look slightly underbaked. They will continue to set on the baking sheet after being removed from the oven.
Nutrition Information (approximate per cookie):
Calories: 521kcal, Carbohydrates: 74g, Protein: 5g, Fat: 24g, Saturated Fat: 15g, Polyunsaturated Fat: 1g, Monounsaturated Fat: 6g, Trans Fat: 1g, Cholesterol: 82mg, Sodium: 338mg, Potassium: 111mg, Fiber: 2g, Sugar: 50g, Vitamin A: 738IU, Vitamin C: 0.02mg, Calcium: 35mg, Iron: 2mg
I’d love to hear about it! Leave a rating and review below, or take a photo and tag it on Instagram @completelydelicious with #completelydelicious.
