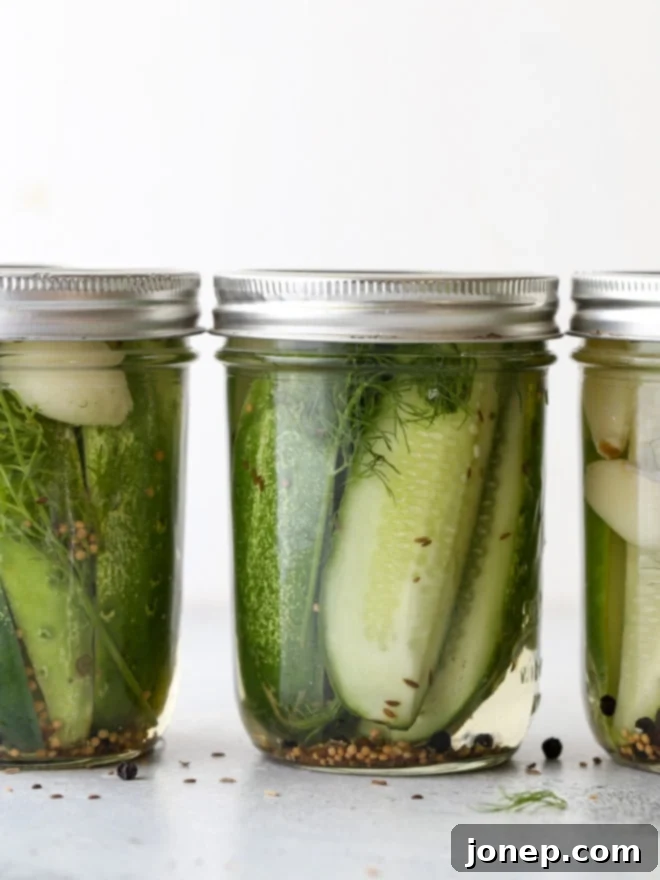
Effortless Homemade: The Ultimate Guide to Easy Refrigerator Dill Pickles (No Canning Required!)
Craving that satisfying crunch and tangy burst of a perfectly pickled cucumber? Look no further! These quick refrigerator dill pickles are not just easy to make, they’re downright simple, requiring no special canning equipment whatsoever. Imagine fresh, crisp cucumbers, infused with the perfect balance of aromatic garlic and vibrant dill, all crafted in your own kitchen in under 30 minutes of active prep time. Get ready to elevate your snack game and impress friends and family with these homemade delights!
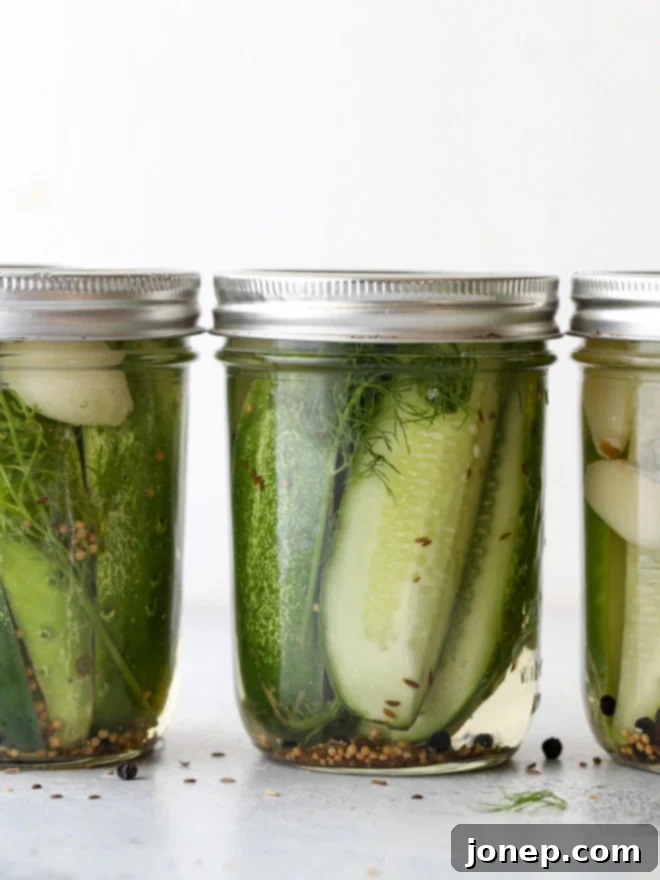
My journey into the wonderful world of quick pickling began several years ago when I experimented with a batch of refrigerator pickles with my friend Kelley of Mountain Mama Cooks. From that moment, I was completely hooked! The sheer simplicity and incredible flavor instantly won me over, and ever since, making a fresh batch has become a cherished summer tradition. It’s a fantastic way to enjoy the bounty of the season and savor those vibrant flavors long after the garden harvest.
The beauty of these pickles lies in their accessibility. They are so fun and incredibly easy to make, eliminating the need for any specialized canning equipment beyond standard glass jars to store them in. Seriously, anyone can master this recipe! The entire hands-on process, from chopping your cucumbers to assembling your jars, takes less than 30 minutes. After just 24 hours chilling in the refrigerator, you’ll be rewarded with the most delicious, snappy pickles bursting with the amazing flavors of fresh dill, pungent garlic, and a medley of well-balanced spices. It’s a game-changer for homemade food enthusiasts!
Table of Contents
- What are Refrigerator Pickles?
- Ingredients & Essential Supplies You’ll Need
- How to Make Easy Refrigerator Dill Pickles (Step-by-Step)
- Expert Pickle Tips & FAQs
- Get the Full Recipe
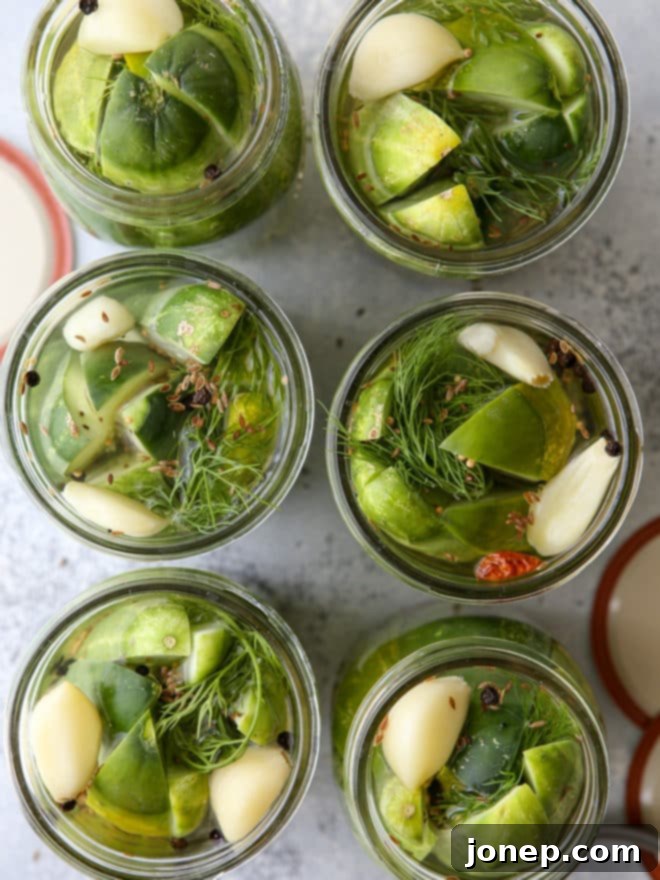
What Exactly Are Refrigerator Pickles?
“Refrigerator pickles,” also affectionately known as quick pickles or “cold-pack” pickles, are a fantastic and approachable method for preserving vegetables, most commonly cucumbers. Unlike traditional canning methods that rely on heat processing (like a water bath or pressure canning) to create a vacuum seal for long-term, shelf-stable storage, refrigerator pickles take a much simpler route. They involve packing fresh cucumbers into jars with a hot, flavorful vinegar-based brine and then storing them in the refrigerator.
The magic happens as the cucumbers sit and soak in the cold brine for 1-2 days (or even longer for intensified flavor). During this time, they absorb all the wonderful aromas and tastes from the vinegar, salt, dill, garlic, and other spices, transforming into those perfectly tangy and crunchy delights you crave. This method is incredibly appealing because it bypasses the complexities and specialized equipment of traditional canning, making it accessible to home cooks of all experience levels. While they won’t last for years on a pantry shelf, these refrigerator pickles will maintain their deliciousness and crisp texture for several weeks, and often up to a few months, when kept properly chilled in your fridge. They offer a fresh, vibrant flavor that many argue surpasses their shelf-stable counterparts.
The versatility of these quick dill pickles is another reason to love them! Enjoy them as a zesty sidekick to your favorite meals, a delightful topping for pulled BBQ chicken sandwiches, or a refreshing crunch on gourmet burgers. They’re also fantastic simply as a healthy, flavorful snack straight from the jar, or as an impressive addition to any appetizer tray or charcuterie board. Furthermore, their homemade charm makes them thoughtful and much-appreciated gifts for neighbors, friends, and family!
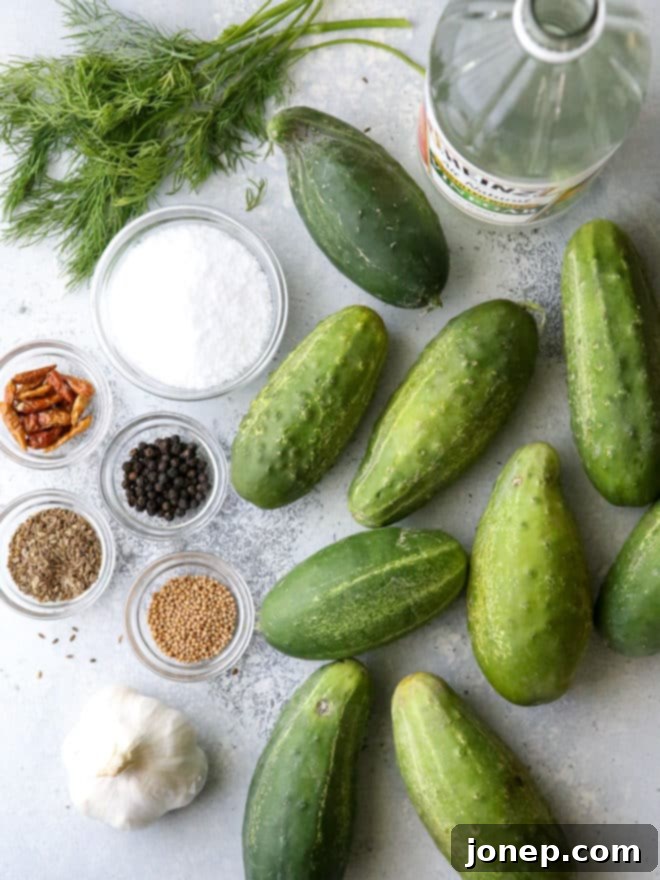
Ingredients & Essential Supplies You’ll Need
Gathering your ingredients is the first exciting step towards your homemade pickle adventure. Here’s a breakdown of what you’ll need and why each component is crucial:
- 6 pint-sized (16oz) jars or containers with lids: These are your vessels for pickling! While traditional Mason jars are perfect, any clean, sealable glass jars will work. Ensure they are thoroughly cleaned and sterilized (even without heat processing) to prevent any unwanted microbial growth and ensure the best flavor.
- Kirby cucumbers or “pickling cucumbers”: The undeniable stars of the show! These smaller, firmer cucumbers are ideal for pickling due to their low seed count, thin skin, and naturally crisp texture. They hold up beautifully in the brine and deliver that satisfying snap everyone loves.
- Dill seed, mustard seed, and whole black peppercorns: This trio of whole spices forms the classic, aromatic base for traditional dill pickles. Using whole spices ensures a slow, deep infusion of flavor into your brine and pickles.
- Fresh dill: Absolutely essential for authentic dill pickle flavor. Fresh dill sprigs provide a bright, herbaceous, and unmistakable aroma that truly makes these pickles sing. Don’t be shy with it!
- Thai chili (optional): For those who appreciate a delightful kick of heat, a small fresh Thai chili can be added to each jar. Adjust the quantity based on your preferred spice level, or omit for a milder experience.
- Distilled white vinegar, salt, and garlic: These form the foundational brine solution that both preserves and flavors your pickles.
- Distilled white vinegar: Chosen for its clean, neutral acidity, it ensures your pickles retain their vibrant color and the flavors of dill and garlic shine through without any competing tastes.
- Coarse salt: Crucial for the brine. Use pickling salt, kosher salt, or coarse sea salt. Avoid iodized table salt, which can make your brine cloudy and may contain anti-caking agents that affect flavor.
- Garlic: Fresh garlic cloves, peeled and often smashed or sliced, impart that signature savory depth that is characteristic of classic dill pickles.
- Water: The primary liquid component of your brine. Use filtered water for the purest flavor profile.
How to Make Easy Refrigerator Dill Pickles (Step-by-Step)
The entire process for making these irresistible dill pickles is truly quick and refreshingly easy. You can comfortably make this a satisfying 30-minute kitchen project, yielding delicious results that last!
- Prepare and Pack Cucumbers and Spices into Jars: Begin by thoroughly washing your Kirby cucumbers. Depending on your preference and their size, you can slice them into rounds (chips), cut them into spears (quarters or halves), or even leave smaller ones whole. For the crispest result, consider trimming about 1/16th inch off the blossom end of each cucumber, as this end contains enzymes that can sometimes lead to softer pickles. Into each of your clean pint jars, evenly distribute the dry spices: mustard seed, dill seed, and whole black peppercorns. Add a generous sprig or two of fresh dill to each, along with your optional Thai chili. Now, tightly pack the sliced or quartered cucumbers into the jars. The tighter you pack them, the more pickles you’ll yield and the less likely they are to float in the brine.
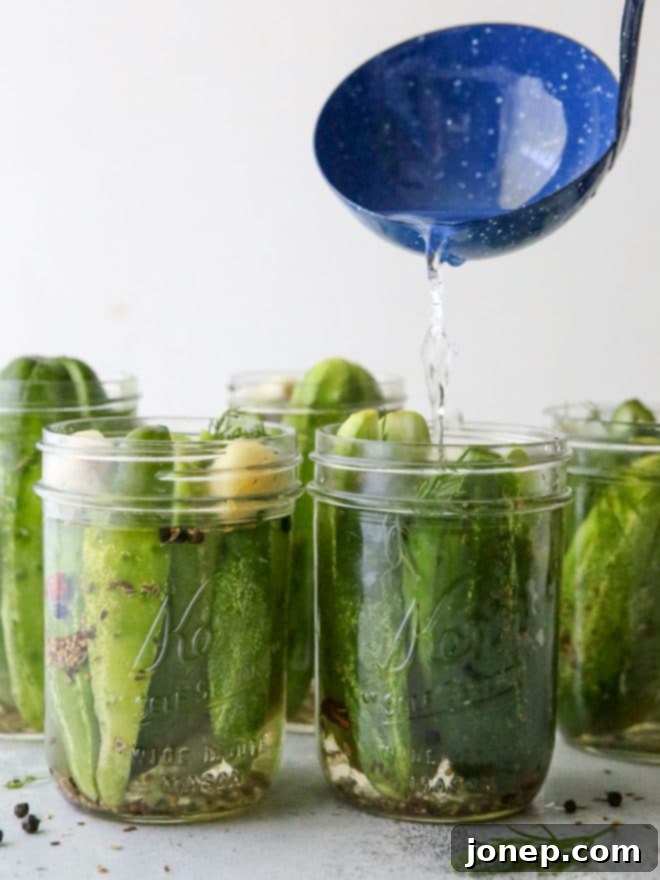
- Craft and Top with Hot Brine: In a medium to large saucepan, combine your measured water and the peeled garlic cloves. Bring this mixture to a rolling boil and allow it to boil for about 5 minutes. This step helps to soften the garlic and infuse its flavor deeply into the water base. Next, add the distilled white vinegar and coarse salt to the pot. Continue to heat the mixture, stirring occasionally, until the salt is completely dissolved. Once dissolved, remove the hot brine from the heat. Carefully scoop the garlic cloves out of the pot and distribute them evenly among the prepared jars. Then, using a ladle, pour the hot vinegar mixture into each jar, ensuring that the cucumbers are fully submerged and the jars are filled almost to the top, leaving about a quarter-inch of headspace.
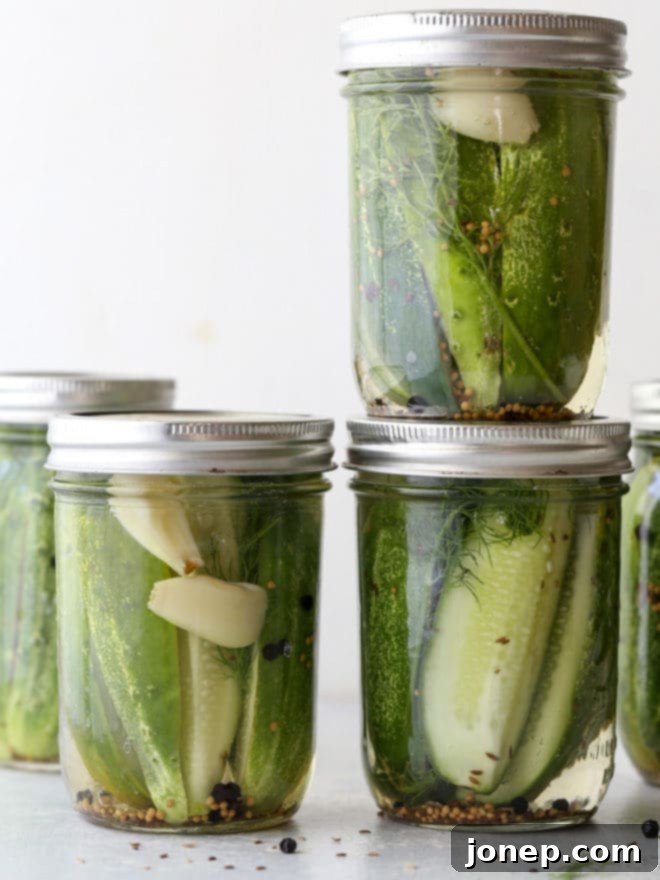
- Cover, Cool, Store, and Enjoy!: Once all jars are filled, securely place the lids on them. Allow the jars to cool completely at room temperature before transferring them to the refrigerator. This gradual cooling process is important for the initial flavor infusion. Once cooled, place the jars in your refrigerator. The anticipation is part of the fun – it takes at least 1-2 days for the cucumbers to truly soak up all the vibrant flavors from the brine and spices. For the most intense and delicious results, patience is a virtue; waiting 3-5 days will yield an even better flavor profile. These fantastic homemade refrigerator dill pickles are perfect as a quick snack straight from the jar, but their uses are endless! Enjoy them on sandwiches, alongside grilled meats, or as a crunchy addition to salads. They will keep beautifully in the fridge for up to several months.
Expert Pickle Tips & FAQs
Making pickles is a joyful experience, and a few expert tips can help ensure your batches are consistently perfect. Here are answers to some common questions:
Kirby cucumbers, often labeled as “pickling cucumbers,” are your best bet for achieving that ideal crisp and snappy texture. You can usually find them pretty easily at summer farmers’ markets, which often stock a wider variety of seasonal produce. Many grocery stores also carry them seasonally, typically during the warmer months. And of course, if you have a garden, growing your own pickling cucumbers is incredibly rewarding! While it is possible to use other varieties of cucumbers like English cucumbers or Persian cucumbers, the results won’t be exactly the same. These varieties tend to have a higher water content and thinner skin, which might result in pickles that are not quite as crisp or “snappy” as those made with Kirbys. If you do use other types, ensure they are very fresh and firm.
One of the best aspects of this recipe is the excellent shelf life these pickles offer in the refrigerator. Pickles prepared with this method will last for several weeks, and often up to a few months, when stored properly in your fridge. The vinegar and salt act as natural preservatives, keeping them fresh and delicious. However, I can almost guarantee that you will gobble them up long before they even approach their maximum fridge life – they’re just too good to last!
Absolutely! The beauty of quick pickling is its incredible versatility. This dill and garlic brine recipe is fantastic for a wide array of other vegetables. Feel free to experiment with crunchy carrots, tender green beans, earthy beets (which will beautifully color your brine!), sharp red onion slices, or even crisp cauliflower florets. You can use them in addition to, or entirely instead of, cucumbers. The preparation method remains largely the same: clean, chop, pack, and cover with the hot brine. Just keep in mind that harder vegetables might benefit from an extra day or two of chilling to fully absorb the flavors.
Achieving that perfect crispness is often the holy grail for pickle makers! Here are a few reliable tips: 1. Start with the Freshest Cucumbers: The fresher and firmer your cucumbers, the crisper your pickles will be. Avoid any that are soft or wrinkly. 2. Trim the Blossom End: The blossom end of a cucumber (opposite the stem end) contains enzymes that can lead to softer pickles. Trimming off about 1/16th of an inch from this end can help. 3. Grape Leaves or Pickle Crisp: Adding a clean grape leaf to each jar can help keep pickles crisp due to their tannin content. Alternatively, a pinch of a product like “Pickle Crisp” (calcium chloride) can significantly enhance firmness. 4. Hot Brine: Pouring hot brine over cold-packed cucumbers helps them maintain their structure and absorb flavor efficiently.
The type of salt you use really does matter for pickling. Always opt for coarse, non-iodized salt such as pickling salt, kosher salt, or coarse sea salt. Avoid using standard iodized table salt. Iodized salt can contain anti-caking agents that often make your brine cloudy, and the iodine itself can sometimes impart an undesirable flavor or color to your pickles. Coarse salt also dissolves more slowly, allowing for a more controlled brine concentration.
While full, intense canning sterilization (like in a boiling water bath) isn’t strictly necessary for refrigerator pickles since they aren’t shelf-stable, it is always a good practice to ensure your jars and lids are meticulously clean. Washing them thoroughly in hot, soapy water and rinsing well, or running them through a dishwasher, will help eliminate any unwanted bacteria. This step helps ensure the best flavor and extends the fresh life of your pickles in the fridge, preventing any premature spoilage.
Get the Recipe
Quick Refrigerator Dill Pickles
Pin Recipe
Leave a Review
Ingredients
- 1 head garlic , all heads peeled
- 6 cups water
- 3 cups distilled white vinegar
- ¼ cup coarse salt
- 2 teaspoons dill seed
- 2 teaspoons mustard seed
- 2 teaspoons whole black pepper seeds
- 3 lbs kirby cucumbers or “pickling cucumbers” , cleaned and sliced or quartered into spears
- 1 bunch fresh dill
Equipment
Instructions
-
Add garlic and water to a large pot and bring to a boil. Boil for 5 minutes.
-
Add vinegar and salt and heat until salt is dissolved. Remove from heat and set aside.
-
Divide sliced cucumbers, spices, and dill evenly between the 6 empty pint jars. Scoop garlic out of the pot and add to the jars too. Each jar should be even with amount of cucumbers and spices.
-
Use a ladle to spoon hot vinegar mixture into each jar, filling them almost to the top.
-
Cover jars with lids and let cool. Store in fridge for at least 1-2 days before serving. Pickles will keep in the fridge for up to several months.
Notes
- If you don’t have kirby or “pickling cucumbers”, other cucumber varieties will work too. They just may not have the most ideal crisp texture. Ensure they are very fresh and firm.
- You can also replace cucumbers and pickle other vegetables like carrots, green beans, cauliflower, beets, or red onion, using the same brine. The rest of the recipe stays the same, though denser vegetables might need slightly longer to infuse.
- This recipe makes enough pickles to fill 6 pint jars, but you can use whatever size jars you’d like. Glass storage containers are ideal because they are non-porous and won’t leach chemicals like plastic can. Always ensure your jars are clean and have tight-fitting lids.
- For extra crispness, add a small grape leaf to each jar (tannins help with crispness) or a pinch of pickling lime (calcium chloride).
Recipe adapted from Mountain Mama Cooks.
You might enjoy these other delightful recipes that help you preserve the freshness of summertime and beyond:
Embarking on your homemade pickling journey is an incredibly rewarding experience, and these quick refrigerator dill pickles are the absolute perfect starting point. With minimal effort, no intimidating specialized equipment, and just a short wait, you can enjoy crisp, tangy, and intensely flavorful pickles that far surpass anything you’d find on a store shelf. They are a true testament to the joy of fresh, simple ingredients and a delightful, practical way to preserve the bounty of summer or enjoy fresh flavors year-round.
So, gather your cucumbers, embrace the aromatic dill and garlic, and get ready to enjoy the satisfying crunch of your very own homemade dill pickles. They’re not just food; they’re a celebration of flavor and simplicity. Don’t forget to share your creations and experiences with us – happy pickling!
