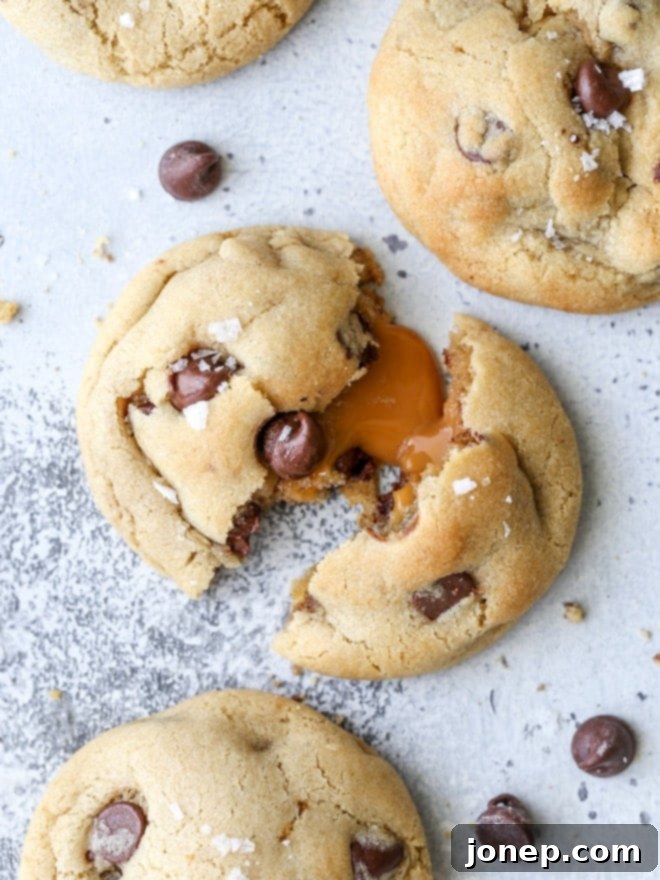
Ultimate Gooey Caramel Stuffed Chocolate Chip Cookies: A Sweet & Salty Delight
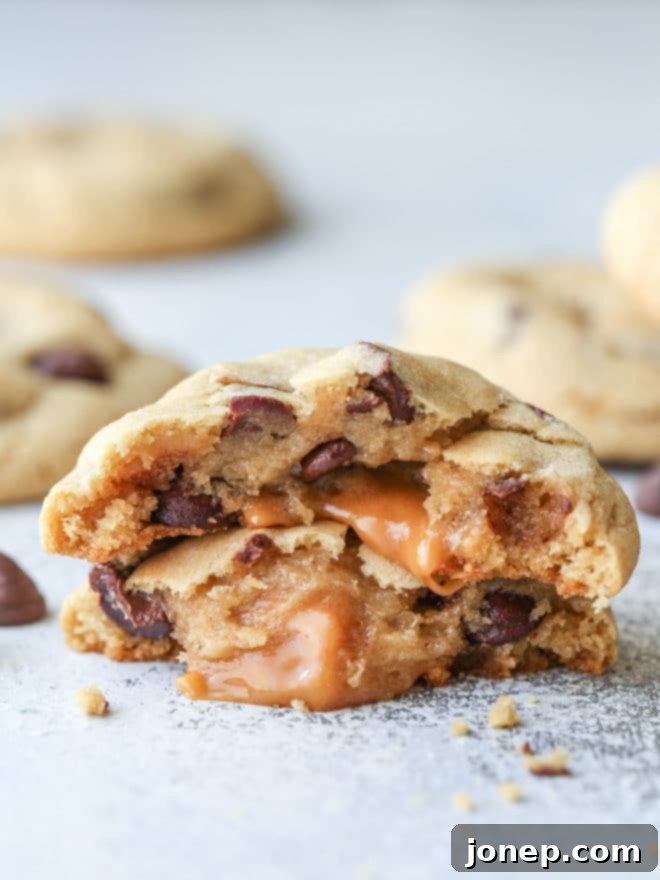
Prepare to fall in love with these incredibly soft, perfectly chewy, and utterly irresistible caramel-stuffed chocolate chip cookies. Forget everything you thought you knew about chocolate chip cookies; these take the classic treat to an entirely new dimension of deliciousness, with a surprise gooey caramel center waiting in every bite!
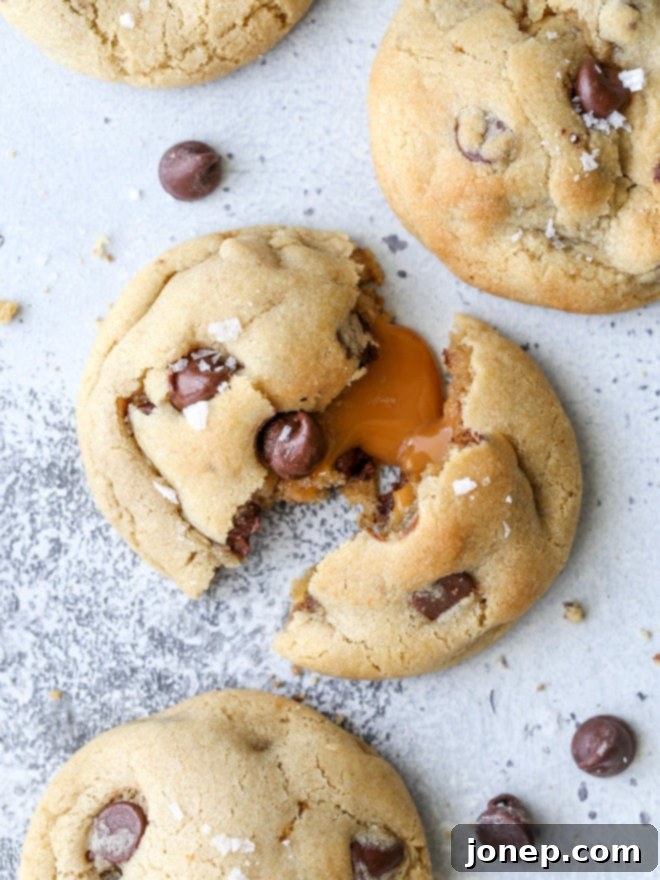
This recipe is proudly sponsored by Challenge Dairy, ensuring the finest quality butter for your baking adventures.
Chocolate chip cookies are undeniably a beloved classic, cherished for their golden edges, soft centers, and melty chocolate chips. So, why would anyone want to “mess” with such a perfect thing? The answer is simple: to make them even better! Imagine biting into that familiar, comforting chocolate chip goodness, only to discover a warm, oozing pocket of sweet, buttery caramel melting in your mouth. This decadent addition elevates the humble cookie into an extraordinary dessert experience.
A touch of flaky sea salt sprinkled on top provides the perfect counterpoint to the sweetness, creating that addictive sweet and salty flavor profile that makes these cookies truly unforgettable. Whether served warm from the oven with a gloriously runny caramel core or cooled for a delightful, chewy caramel surprise, these cookies are destined to become a new favorite in your home. They’re not just cookies; they’re a celebration of flavor and texture, an indulgent treat that’s impossible to resist.
The Secret to Perfect Cookies: Unsalted vs. Salted Butter
When it comes to baking, especially cookies, butter is undeniably a star ingredient. Most professional bakers and recipes often recommend using unsalted butter, primarily because it gives you complete control over the total salt content in your recipe. This allows you to precisely adjust the flavor balance without worrying about varying salt levels from different butter brands. You can delve deeper into the reasons why unsalted butter is a baking staple here.
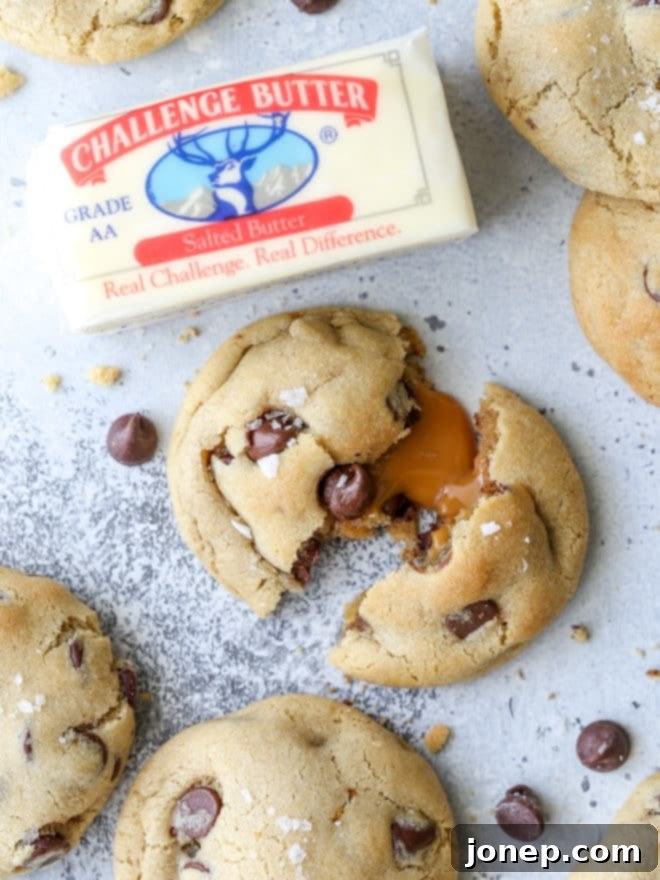
However, for these particular caramel stuffed chocolate chip cookies, I make a delicious exception! I find that using high-quality salted butter adds an incredible depth of flavor and truly enhances the “sweet and salty” dynamic that makes these cookies so special. The subtle saltiness in the butter amplifies the sweetness of both the chocolate chips and the gooey caramel, creating a more complex and satisfying taste experience.
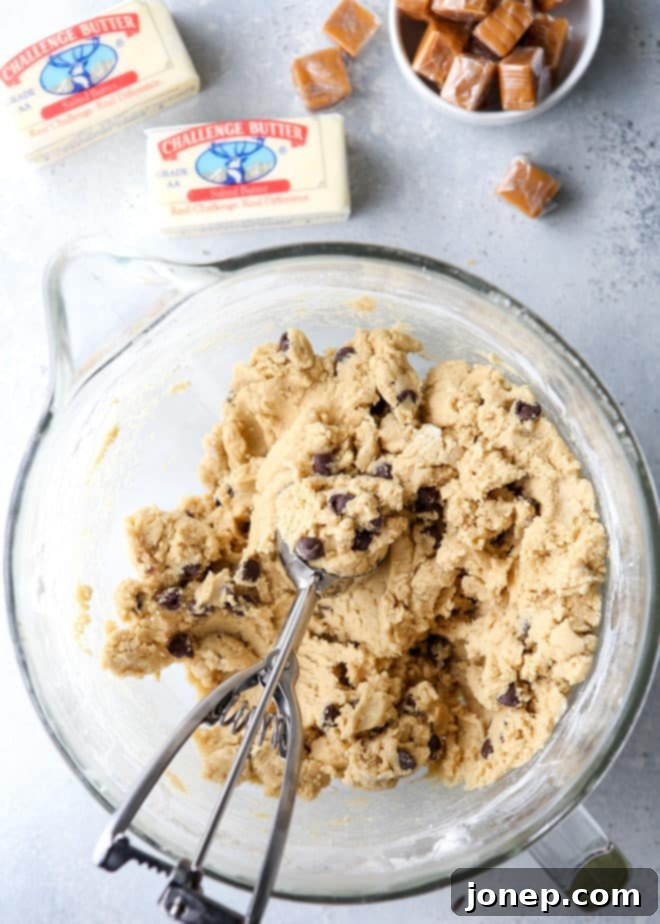
Regardless of your salted or unsalted preference, the quality of your butter matters immensely. For superior results, I wholeheartedly recommend using Challenge Butter. Challenge Butter stands out because it’s crafted the traditional way, using the freshest milk sourced from family-owned dairies. This commitment to heritage means no hormones, additives, or fillers interfere with the pure, rich flavor of the butter. What’s more, Challenge Dairy uniquely oversees the entire butter-making process, from the initial milking of the cows to milk transportation, churning, and final packaging. This meticulous control ensures that every stick of Challenge Butter delivers consistent excellence, making a tangible difference in the flavor and texture of your baked goods. As the saying goes, “Better butter makes better cookies!” and these caramel-stuffed delights are the perfect testament to that.
Crafting Your Perfect Caramel Stuffed Chocolate Chip Cookies: Essential Tips for Success
When I first envisioned these caramel stuffed chocolate chip cookies, I anticipated needing numerous recipe adjustments to achieve perfection. To my delightful surprise, they turned out absolutely flawless on the very first attempt! After several successful batches, I can confidently say this recipe is not only incredibly delicious but also surprisingly simple to execute. There’s no lengthy chilling time required for the dough, and you’ll only need a few extra minutes for the stuffing process. Follow these key tips to ensure your baking experience is just as successful and enjoyable:
-
Choose Your Caramels Wisely
I’ve experimented with various brands of caramel candies, and all yielded delicious results, albeit with slight textural differences. Softer, “old-fashioned” caramels tend to melt more thoroughly into the cookie during baking, creating a truly gooey, almost liquid caramel center. Firmer caramels, like the classic Kraft brand, will retain more of their shape, resulting in cookies with a slightly domed top and a chewier, more distinct caramel bite. Both are fantastic, so choose based on your desired caramel consistency!
-
Perfect Caramel Preparation
For optimal stuffing, your caramels should be roughly 1/2-inch cubes. If you’re using larger caramels, simply cut them in half. Once cut (or if using pre-cut), gently roll each caramel piece in your hands to round out any sharp corners. This crucial step makes it significantly easier to encase the caramel completely within the cookie dough, preventing any pointy edges from poking through.
-
Ensure Full Caramel Coverage
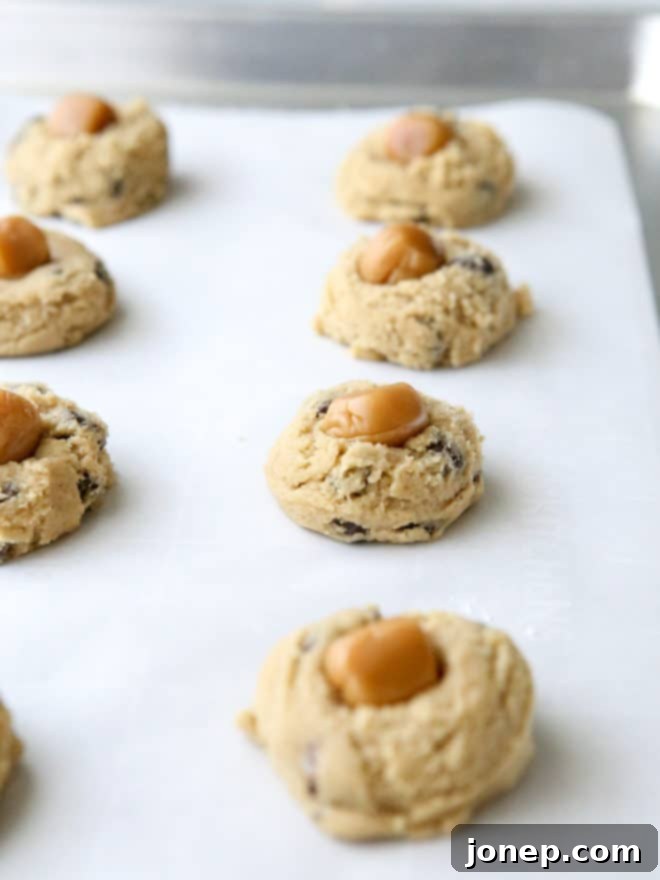
This is perhaps the most important tip for preventing a sticky disaster! The caramels must be entirely covered by the cookie dough. Any visible caramel centers will quickly melt and seep out onto your baking sheet during the baking process, creating a burnt, sticky mess. Take your time to thoroughly enclose each caramel piece, forming a smooth, uniform ball of dough.
-
Prepare Your Baking Surface
Even with careful wrapping, sometimes a tiny bit of caramel might find its way out. To prevent any sticky situations, always bake these stuffed chocolate chip cookies on parchment paper or a silicone baking mat. This ensures easy removal and keeps your baking sheets clean, even if a little caramel decides to escape.
-
Master the Art of Room Temperature Butter
Achieving the correct butter temperature is fundamental for cookie success. Your butter should be softened to room temperature, meaning it’s pliable enough to leave a slight indentation when pressed with your finger, but still offers a little resistance. Butter that is too soft or melted will cause your cookies to spread excessively, potentially compromising the structure needed to hold the caramel filling. If you need tips on how to quickly bring butter to room temperature, I’ve got you covered. Generally, letting it sit on the counter for about 30 minutes before you begin mixing is sufficient.
-
Embrace Flaky Sea Salt
For that irresistible gourmet touch and to perfectly balance the rich sweetness, a delicate sprinkle of flaky sea salt on top of your cookies before baking is a game-changer. It adds a subtle crunch and a burst of flavor that truly elevates these treats. Here’s the type of flaky sea salt I prefer to use.
-
Serving Suggestions & Rewarming
The beauty of these caramel-filled cookies is their versatility in serving. Enjoy them warm from the oven for those coveted soft, melty caramel centers that ooze with every bite. If you prefer a chewier texture, allow them to cool completely to room temperature, where the caramel will firm up slightly. If you have leftovers (a rare occurrence!), simply rewarm them in the microwave for about 15 seconds or in a 350°F (175°C) oven for 3-5 minutes to bring back that warm, gooey goodness.
Enjoy the baking process, and get ready to indulge in these extraordinary chocolate chip cookies!
Storage and Make-Ahead Tips for Your Caramel Stuffed Cookies
These caramel stuffed chocolate chip cookies are undoubtedly best enjoyed fresh from the oven, but with a batch yielding about 36 cookies, you might find yourself with a few extras (if you’re lucky!). Here are some tips to keep them delicious or prepare them in advance:
- Storing Baked Cookies: Once completely cooled, store the cookies in an airtight container at room temperature for up to 3-4 days. For longer storage, you can freeze them for up to 2 months. Thaw at room temperature or rewarm gently in the microwave or oven.
- Freezing Cookie Dough: You can prepare the cookie dough balls, stuff them with caramel, and then freeze them before baking. Place the stuffed cookie dough balls on a baking sheet lined with parchment paper and freeze until solid. Once firm, transfer them to a freezer-safe bag or container. When ready to bake, there’s no need to thaw! Simply add a few extra minutes to the baking time, watching carefully for golden edges.
- Make-Ahead Caramels: If you’re using block caramel that needs cutting, you can prepare all the caramel cubes in advance and store them in an airtight container at room temperature until ready to use. This can save you a little prep time on baking day.
More Irresistible Cookie Recipes to Try
If you’re a cookie enthusiast like us, you’ll love exploring other creative and delicious recipes that push the boundaries of classic cookies. Here are a few more favorites from our collection:
- Chocolate Marshmallow Cookies: Indulge in rich chocolate cookies topped with fluffy marshmallows and coated in a smooth chocolate glaze – a truly decadent treat!
- XL Peanut Butter Chocolate Chip Cookies: Sometimes, bigger is better! This recipe delivers a single, giant, shareable cookie packed with the classic combination of peanut butter and chocolate chips.
- Rice Krispie Treat Chocolate Chip Cookies: A fun and nostalgic twist, these cookies incorporate the crispy texture and sweet flavor of Rice Krispie Treats right into your chocolate chip cookie dough.
Watch the Video: How to Make Caramel Stuffed Chocolate Chip Cookies
See exactly how easy it is to create these incredible cookies. This step-by-step video guide will walk you through the entire process, from mixing the dough to stuffing the caramels and achieving that perfect golden bake.
Shop Essential Tools for This Delicious Recipe
To ensure your baking adventure is smooth and enjoyable, here are some recommended tools that will help you craft these perfect caramel stuffed chocolate chip cookies:

Caramel Stuffed Chocolate Chip Cookies
Pin Recipe
Leave a Review
Ingredients
- ¾ cup (200 grams) Butter , softened to room temperature (salted or unsalted, per preference)
- 1 cup (213 grams) packed light or dark brown sugar
- ½ cup (100 grams) granulated sugar
- 2 large eggs
- 2 teaspoons vanilla extract
- 2 ¾ cups (330 grams) all-purpose flour
- 1 teaspoon baking soda
- ½ teaspoon salt
- 2 cups (350 grams) semi-sweet chocolate chips
- About 36 caramels , roughly 1/2-inch cubes (see Notes for type)
- Flaky sea salt , for sprinkling (optional, but highly recommended!)
Instructions
-
1. Prepare Your Oven: Preheat your oven to 375°F (190°C). Line several large baking sheets with parchment paper or silicone baking mats to prevent sticking.
-
2. Cream Butter and Sugars: In a large mixing bowl, using an electric mixer, beat the softened butter, brown sugar, and granulated sugar together on high speed. Continue mixing for 3-4 minutes until the mixture is light in color, creamy, and adheres to the sides of the bowl. Be sure to scrape down the bowl once or twice during this process to ensure everything is well combined.
-
3. Add Eggs and Vanilla: Beat in the large eggs one at a time, mixing well and scraping down the bowl after each addition. Once the eggs are incorporated, mix in the vanilla extract until just combined.
-
4. Combine Dry Ingredients: In a separate bowl, whisk together the all-purpose flour, baking soda, and salt. Gradually add the dry ingredients to the wet ingredients, mixing on low speed until just combined. Be careful not to overmix. Fold in the semi-sweet chocolate chips by hand until evenly distributed throughout the dough.
-
5. Portion the Dough: Scoop the cookie dough into rounded tablespoons. I find a #40 cookie scoop (equivalent to about 1 ½ tablespoons) works perfectly. Place these dough portions onto your prepared baking sheets, leaving enough space between each (approximately 8 cookies per standard sheet pan).
-
6. Stuff with Caramel: Gently press a caramel candy into the center of each cookie dough round. Using your hands, carefully gather the cookie dough around the caramel, ensuring it is completely covered and sealed within the dough. Roll the dough into a smooth ball and return it to the baking sheet. This step is crucial for preventing caramel from melting out during baking.
-
7. Bake to Perfection: Bake the cookies for 9-10 minutes, or until the edges are lightly golden brown and the tops are just set. They may still appear slightly soft in the center, which is ideal for a chewy texture. Allow the cookies to cool on the baking sheet for a few minutes before carefully transferring them to a wire rack to cool completely. This helps them set and prevents breakage.
-
8. Repeat and Enjoy: Continue the process with the remaining cookie dough and caramels. Serve warm for an extra gooey caramel experience, or let them cool for a chewier caramel center.
Video Instructions
Notes
- Caramel Type & Texture: As discussed in the main article, different caramel brands will yield slightly different results. Softer, “old-fashioned” caramels (often found in specialty candy shops) will melt more into a liquid ooze, while firmer caramels (like Kraft) will maintain a chewier, more structured center. Both are delightful! Ensure caramels are roughly 1/2-inch cubes; cut larger ones if needed.
- Preparing Caramels: Gently roll each caramel piece in your hands to round out the corners. This makes it easier to fully encapsulate the caramel within the cookie dough and helps prevent it from poking through and leaking during baking.
- Serving & Reheating: For the ultimate gooey experience, serve these cookies warm from the oven. The caramel will be perfectly melted and flowy. To rewarm cooled cookies, microwave them for about 15 seconds, or place them in a 350°F (175°C) oven for 3-5 minutes until the caramel softens again. Cooled cookies with chewy caramel centers are also incredibly delicious!
- Butter Temperature: Remember, softened butter means it yields to a gentle press but isn’t greasy or melted. This is key for the correct cookie spread and texture.
- Complete Caramel Coverage: Double-check that each caramel is entirely sealed within the cookie dough to avoid leakage onto your baking sheet.
Disclosure: This recipe was created in partnership with Challenge Dairy, Inc. We extend our sincere gratitude for supporting partnerships with brands we genuinely love and believe in. These collaborations are essential in making Completely Delicious possible. All opinions expressed are always 100% my own. To discover more about Challenge Dairy and their commitment to quality, please visit their official website here. You can also connect with them on social media platforms like Facebook, Instagram, YouTube, and Pinterest.
