Zesty Lemon Coconut Cake Recipe: A Tropical Delight with Velvety Chantilly Cream
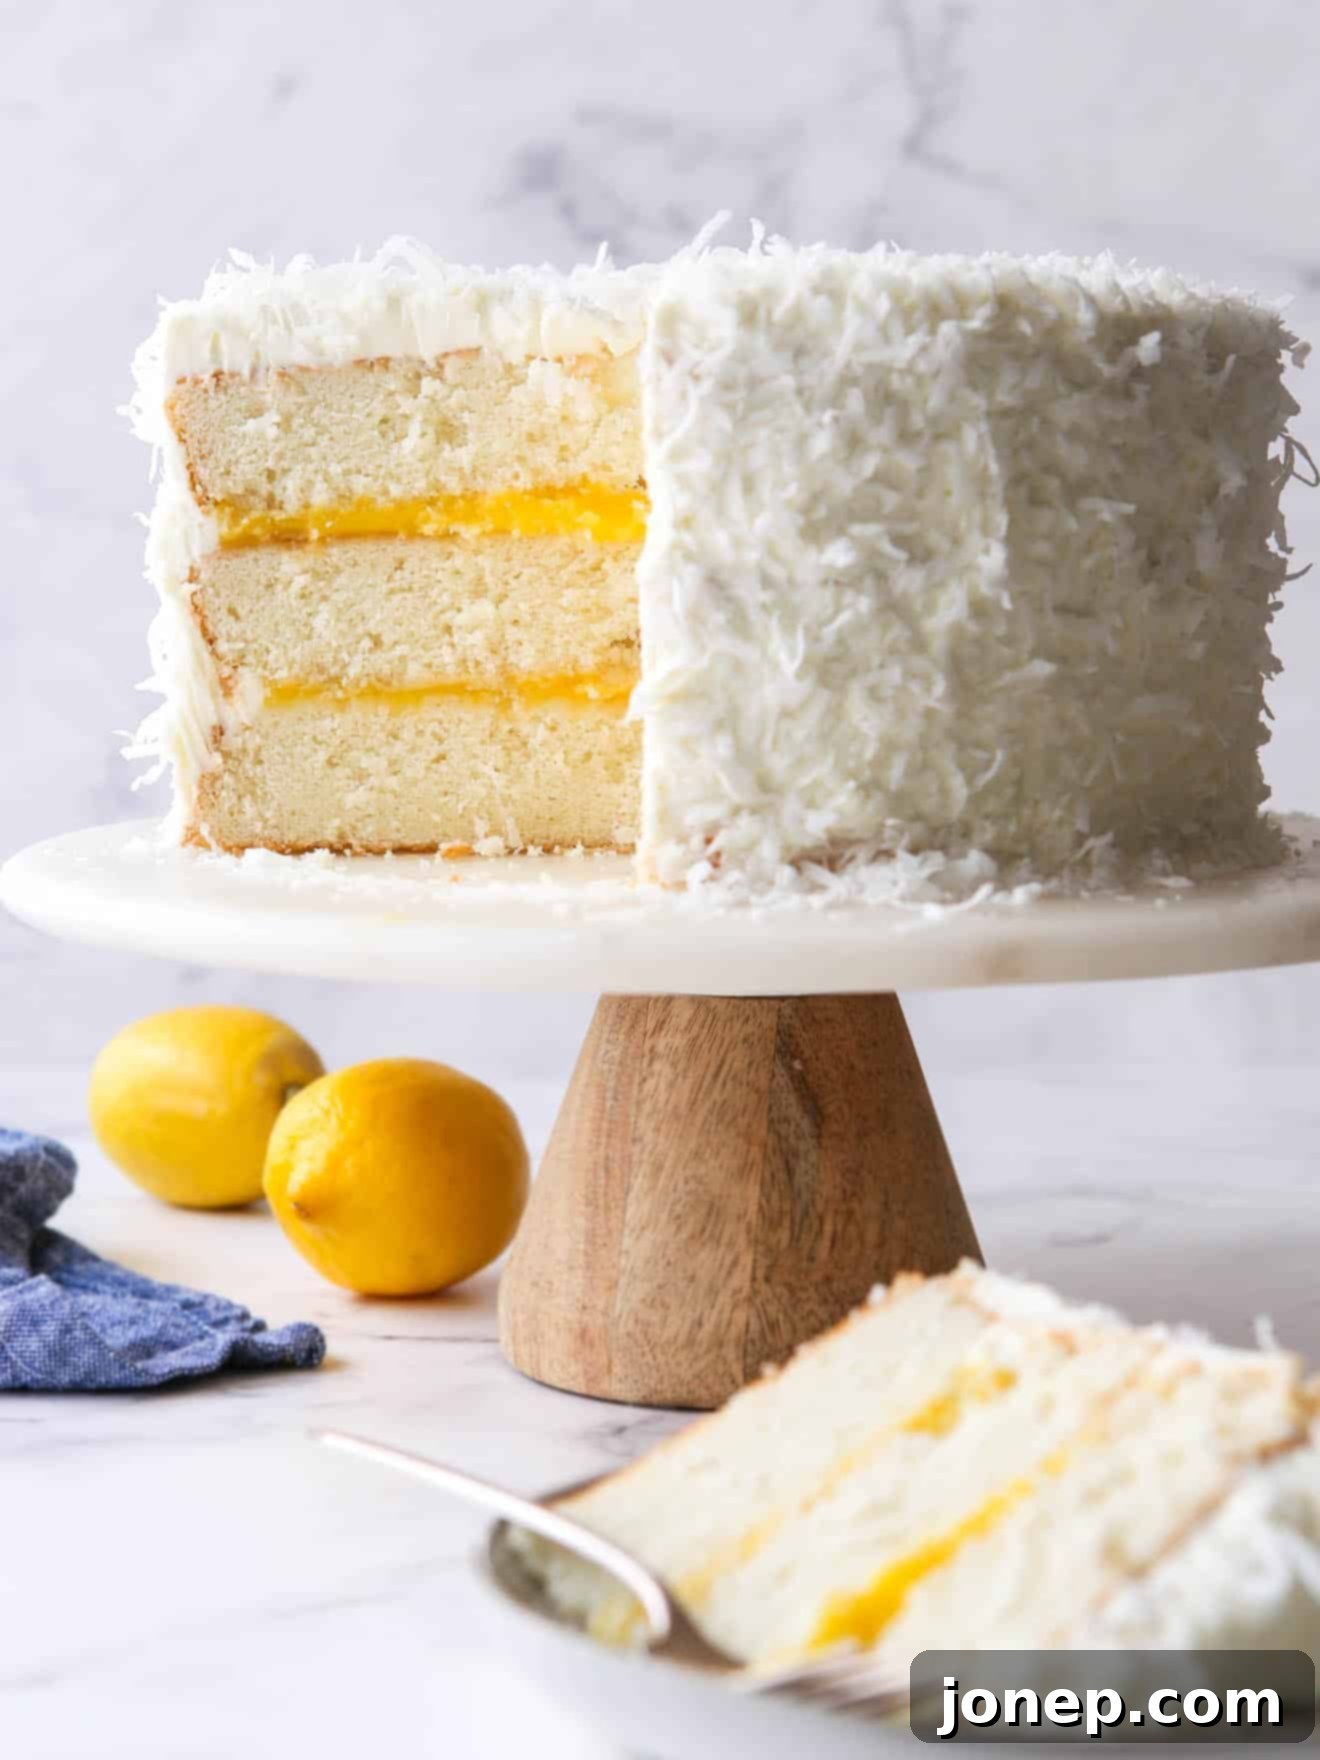
Prepare to fall head over heels for this exquisite Lemon Coconut Cake, a harmonious blend of delicate flavors and luxurious textures. This irresistible dessert features unbelievably tender and moist coconut cake layers, generously filled with a vibrant, homemade zesty lemon curd, all enrobed in a light and airy Chantilly cream frosting. It’s a celebration of spring in every bite, perfect for any special occasion or simply to brighten your day.
It feels long overdue to finally share this incredible cake recipe with you all. For many years, this particular combination has been a closely guarded secret, a staple at my spring gatherings and a personal favorite. I’ve frequently merged my celebrated southern coconut cake recipe with my bright and tangy homemade lemon curd, finishing it with the cloud-like Chantilly cream frosting. This trio creates what I consider the ultimate springtime dessert. When a recent comment on my coconut cake recipe asked, “Can I fill this cake with lemon curd instead?”, I knew it was time to officially unveil this winning combination.
And so, here we are! This Lemon Coconut Cake isn’t just a recipe; it’s an experience. It truly shines as one of my go-to bakes for spring festivities, especially for Easter, Mother’s Day, or any occasion that calls for something refreshingly elegant. However, its delightful flavors are honestly wonderful to enjoy year-round. It masterfully balances being both light and intensely rich at the same time, offering a taste sensation that is simply unparalleled. The pairing of bright, sunny lemon and sweet, tropical coconut creates a fresh, vibrantly delicious, and unforgettable dessert that will leave everyone craving another slice.
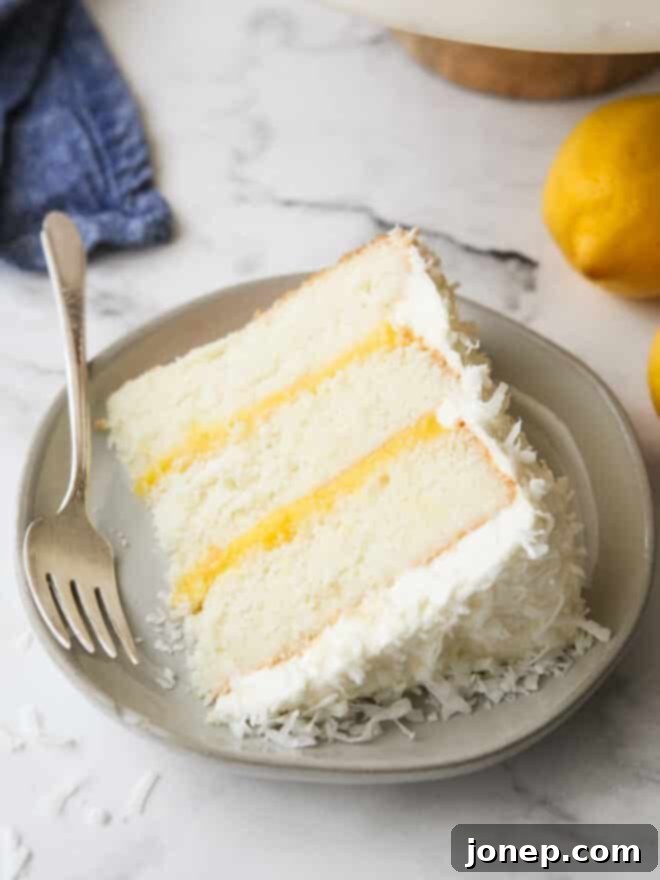
Table of Contents
- What’s in this cake
- Ingredients you’ll need
- How to make lemon coconut cake
- Tips for making this cake
- Storage and how to make-ahead
- More coconut cake recipes
- Get the recipe
Discover the Delectable Layers of This Lemon Coconut Cake
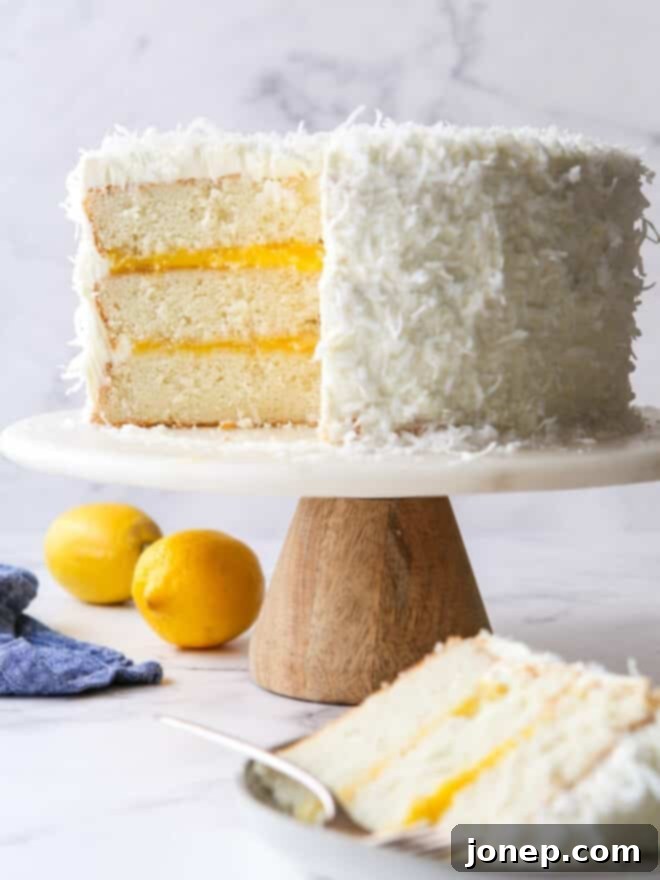
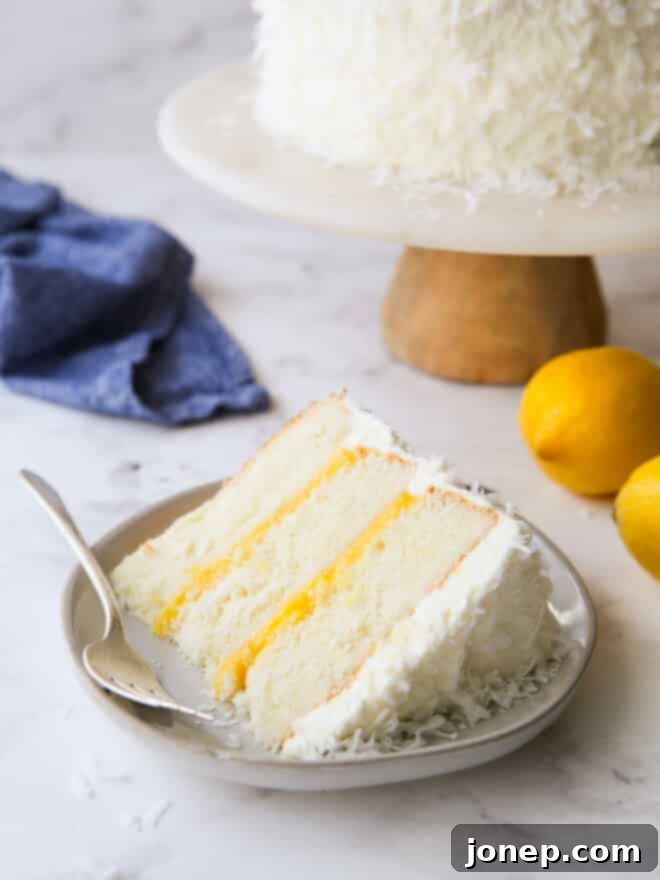
This magnificent layer cake is a masterpiece composed of four distinct, yet perfectly complementary, components:
- The most light, airy, and incredibly tender coconut cake layers, offering a subtle tropical foundation.
- A burst of bright, tangy flavor from the luscious lemon curd filling, truly homemade and brimming with fresh lemon zest.
- An unbelievably fluffy and subtly sweet Chantilly cream frosting, providing a delicate counterpoint to the rich cake and tart curd.
- A beautiful blanket of sweet, finely shredded coconut, adding texture and reinforcing the tropical essence of the cake.
What exactly is Chantilly cream frosting? In its essence, it’s a sophisticated take on sweetened whipped cream. For enhanced stability and a delightful depth of flavor, it’s often beaten with cream cheese. This results in a frosting that finds its perfect place somewhere between a traditional cream cheese frosting and a simple whipped cream. It’s renowned for being incredibly light, wonderfully fluffy, and luxuriously creamy, yet it’s never overly sweet or heavy. This balance makes it the ideal companion for cakes that feature bold flavors like lemon and coconut.
If you’ve ever found classic buttercream or typical cream cheese frosting to be a bit too sweet or rich for your palate, then you are absolutely going to adore this Chantilly cream frosting. Its delicate nature and subtle sweetness provide the perfect finish, allowing the bright lemon and tropical coconut notes of the cake to truly sing. It’s not just a topping; it’s an integral part of what makes this Lemon Coconut Cake so special!
Essential Ingredients for Your Luscious Lemon Coconut Cake
Crafting this delightful cake begins with selecting the right ingredients. Quality makes all the difference in achieving those tender cake layers, vibrant lemon curd, and airy frosting.
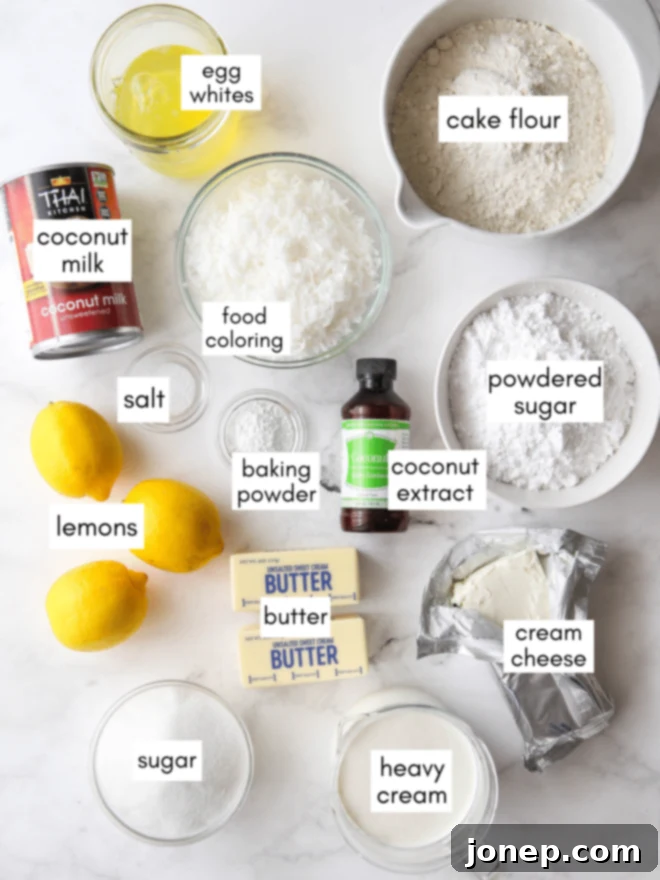
Baking Tip: The Importance of Cake Flour for a Tender Crumb
If you find yourself without cake flour, a quick substitution can be made: for every 1 cup of cake flour, use 3/4 cup + 2 tablespoons of all-purpose flour combined with 2 tablespoons of cornstarch. While you can simply use all-purpose flour cup-for-cup, the results won’t be quite the same, and that signature melt-in-your-mouth tenderness might be less pronounced. However, you’ll still likely end up with a delicious cake, just with a slightly different texture.
Beyond cake flour, remember to use **full-fat canned coconut milk** for the cake layers (not coconut cream or carton beverages, which have different consistencies and fat content). For the lemon curd, **freshly squeezed lemon juice and zest** are non-negotiable for that bright, intense lemon flavor. Room temperature ingredients are also key for the cake batter and frosting to emulsify correctly, ensuring a smooth and cohesive mixture.
Crafting Your Homemade Lemon Coconut Cake: A Step-by-Step Guide
While the thought of making a layer cake might seem daunting, this Lemon Coconut Cake is truly approachable for anyone with basic baking skills, and the effort is undoubtedly worth it. Each component is straightforward, and assembling them brings forth a dessert that tastes like it came from a professional bakery. Take your time, enjoy the process, and prepare to be rewarded with an extraordinary treat.
Now, let’s embark on this delicious baking adventure!
- Prepare the coconut cake batter. This recipe utilizes the “reverse creaming method,” a technique renowned for producing exceptionally tender and moist cakes. In this method, softened butter is first beaten with the dry ingredients (flour, sugar, leavening, salt) before any liquid ingredients are introduced. This process effectively coats the flour particles with fat, which in turn inhibits the development of gluten. The result? A remarkably fine, velvety crumb texture that is characteristic of high-quality cakes. If you’re new to this method, you can find more detailed information and guidance here!
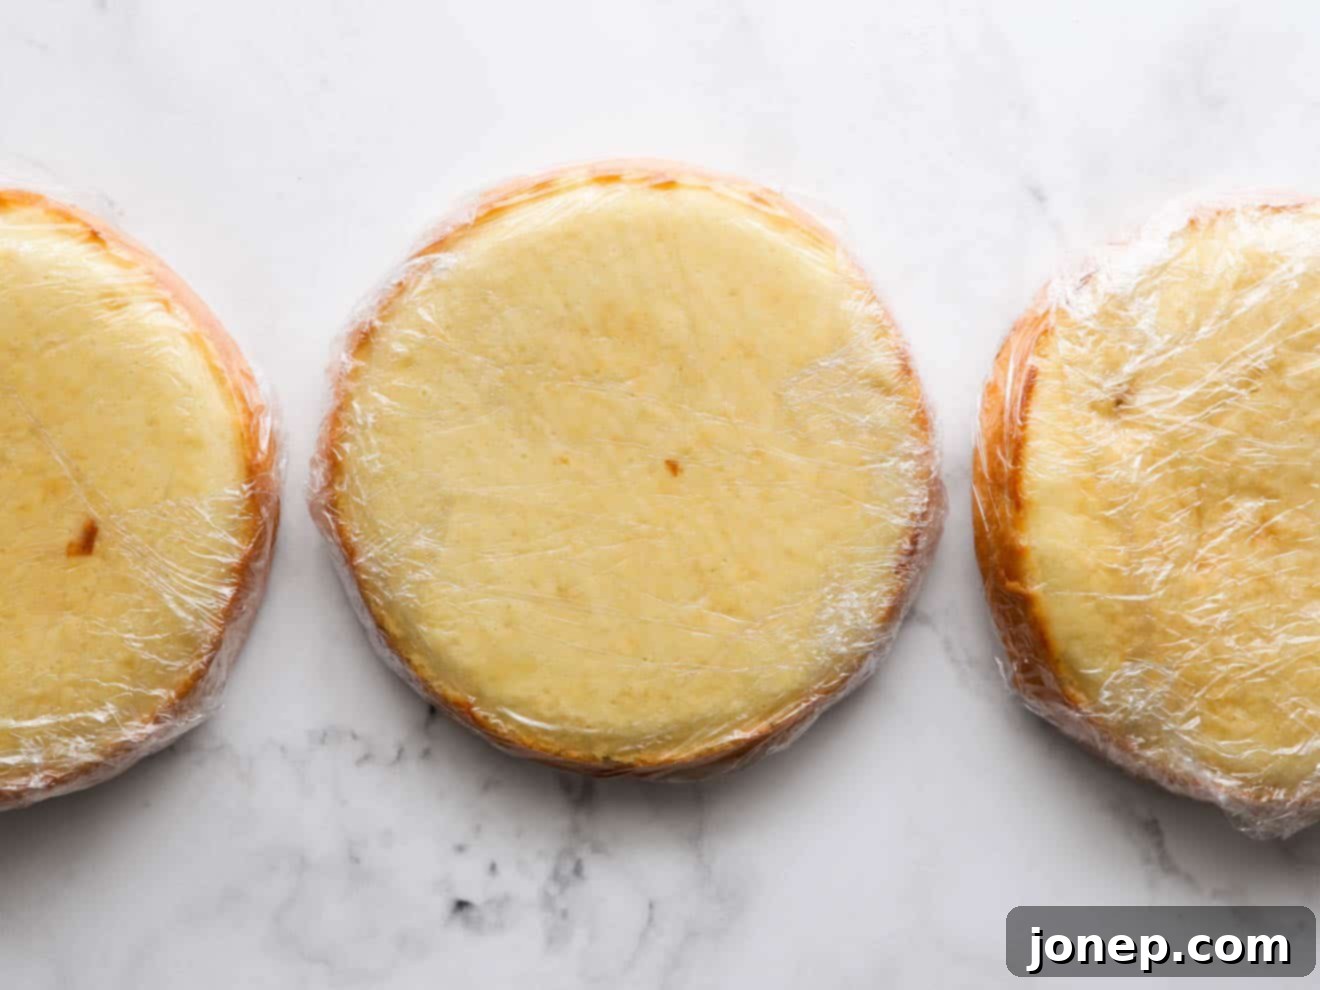
- Bake, then chill your cake layers. Ensure your cake pans are meticulously prepped with parchment paper rounds at the bottom and a generous coating of nonstick baking spray or butter and flour on the sides. Bake until the edges achieve a beautiful golden hue and the center of the cake springs back gently when lightly pressed. The golden rule here is to avoid overbaking, as this can lead to dry cake layers! Once baked, allow the cakes to cool in their pans for about 10-15 minutes before inverting them onto wire racks to cool completely. Chilling the cooled layers is highly recommended, as it makes them much easier to handle and stack without tearing.

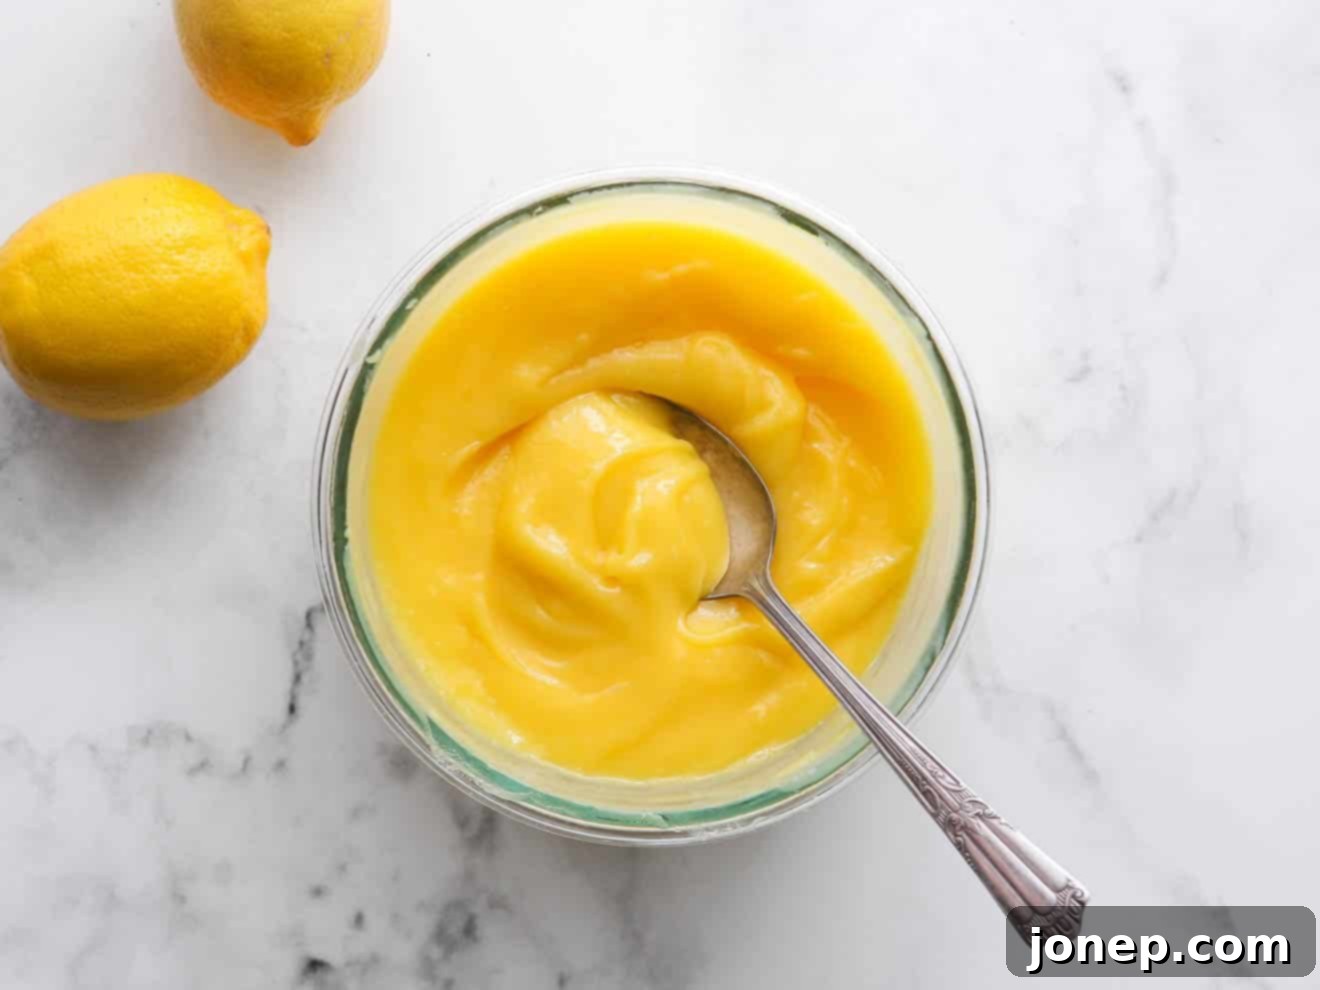
Chilled cake layers are key for neat assembly. - Whip up the homemade lemon curd. You’ll be delighted to discover just how simple and satisfying it is to make your own lemon curd from scratch! This bright and tangy filling is surprisingly easy to prepare, requiring only a few basic ingredients and a little stirring. For comprehensive step-by-step instructions on achieving perfect, silky smooth lemon curd, refer to my detailed guide here. Since the lemon curd needs to be thoroughly chilled before you can assemble the cake, it’s wise to make this component while your cake layers are baking, or even prepare it a day or two in advance. It stores beautifully in the fridge for several weeks, making it an excellent make-ahead step!

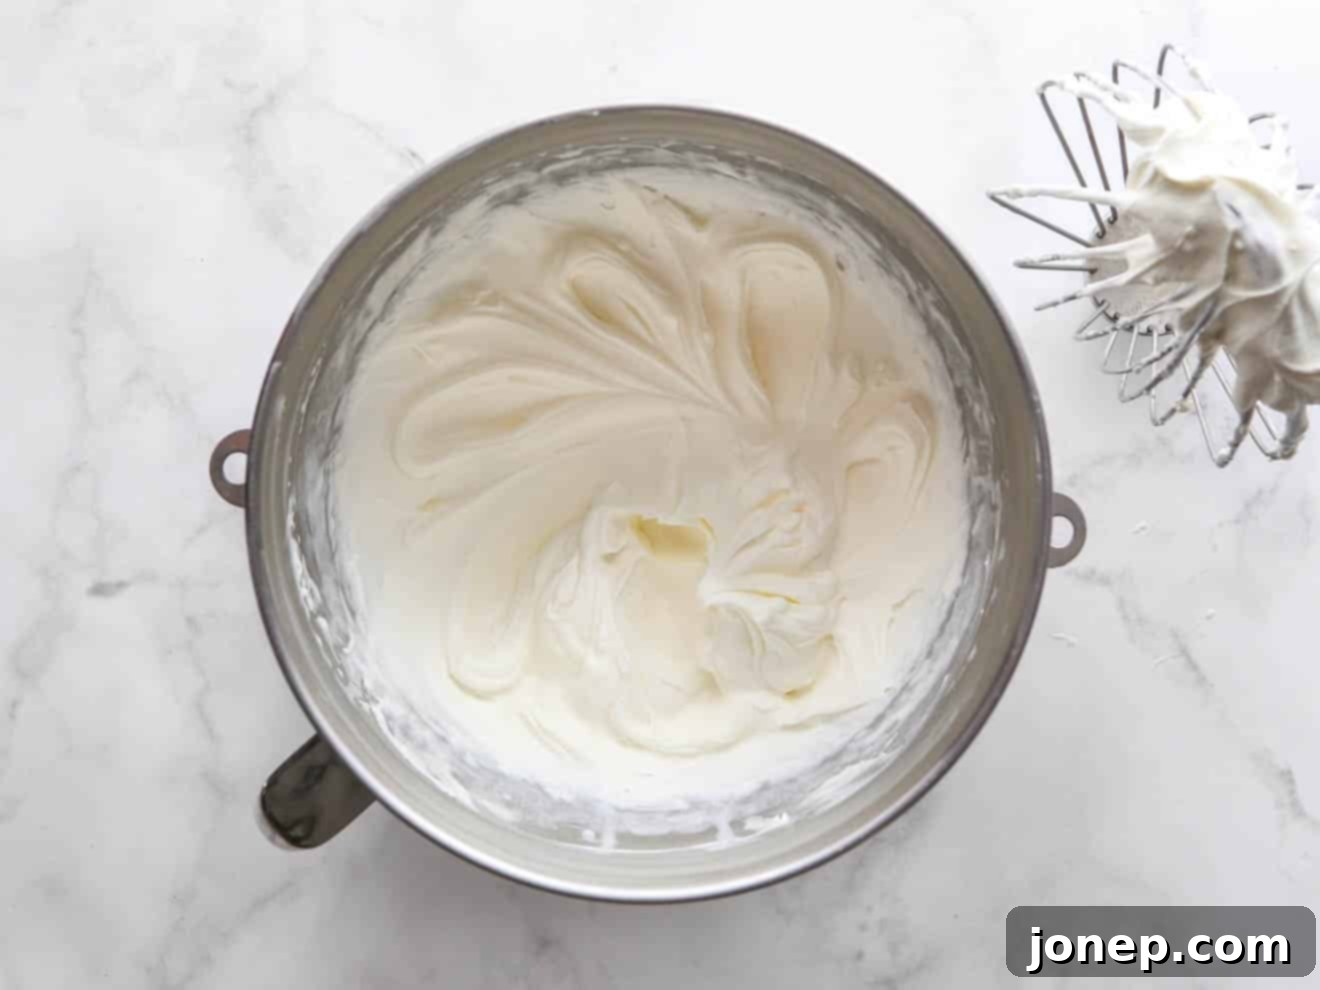
Freshly made lemon curd provides a burst of citrus. - Prepare the fluffy Chantilly frosting. This frosting is a dream to work with and even better to eat! In a stand mixer, combine softened cream cheese, powdered sugar, your chosen extract (coconut or vanilla), and a pinch of salt. Beat these ingredients until the mixture is beautifully smooth and lump-free. Then, gradually add the cold heavy cream in a few stages. Initially, the mixture might appear a bit lumpy or curdled, which is completely normal. Stop frequently to scrape down the beater and the sides of the bowl. As you continue to add cream and beat, the frosting will transform into a wonderfully creamy, light, and airy consistency, achieving perfect medium peaks.

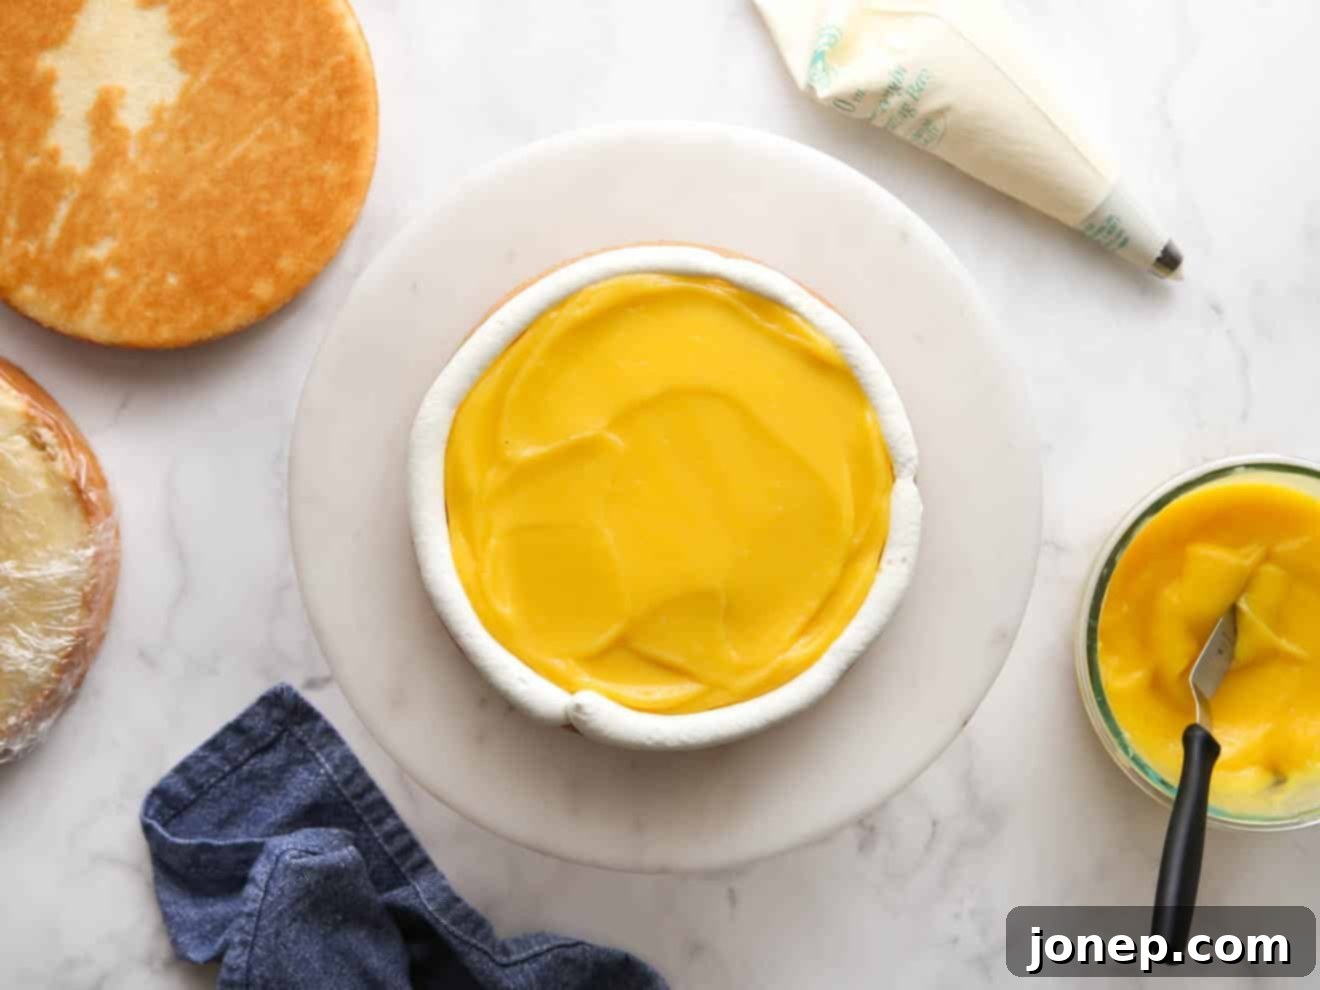
The Chantilly frosting, light and not too sweet. - Fill the cake layers with lemon curd. This step is crucial for a neat and tidy cake! Before spooning in your luscious lemon curd, pipe or carefully spread a small “dam” of Chantilly frosting around the very edges of each cake layer. This clever little barrier acts as a protective wall, preventing the vibrant lemon curd from squishing out the sides when you stack the next cake layer on top. Spread the curd evenly within this frosting dam.

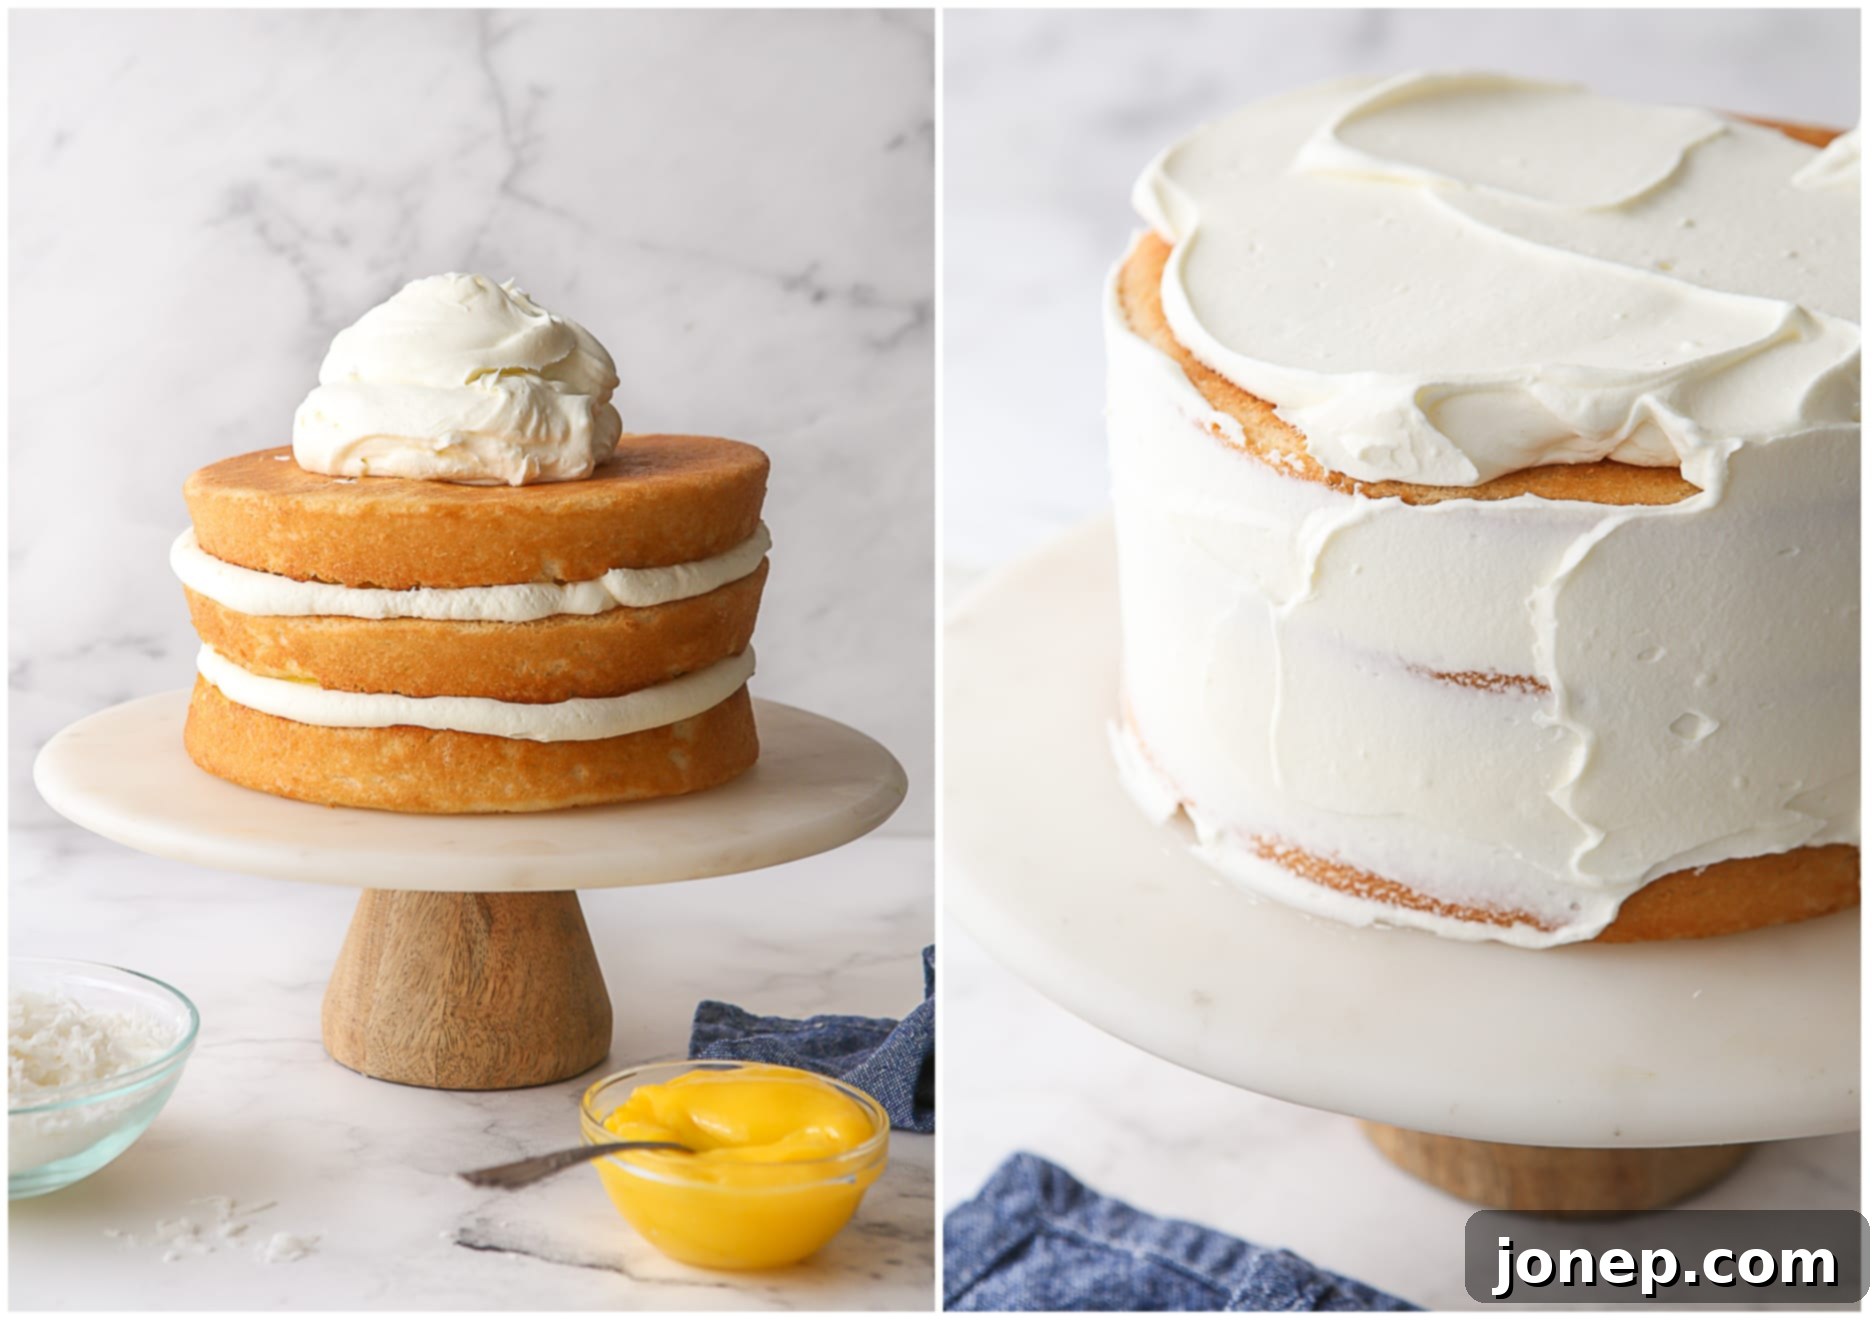
The frosting “dam” keeps the lemon curd neatly in place. - Frost and adorn with coconut. Once all your cake layers are beautifully stacked and filled, it’s time for the grand finale: frosting the entire cake with the remaining Chantilly cream. Start by applying a generous amount to the top, then use an offset spatula to smooth it down the sides, creating a lovely, even coating. Finally, for that signature tropical touch, gently press sweetened shredded coconut onto the sides of the cake with your hands and sprinkle it generously over the top. This not only enhances the flavor but also creates a stunning visual appeal.

Finishing the cake with creamy frosting and shredded coconut. - Slice and indulge! For the cleanest slices and to allow the flavors to fully meld, it’s highly recommended to chill the assembled cake for at least 30 minutes (or preferably an hour) before serving. This brief chill time helps the frosting and curd set beautifully.
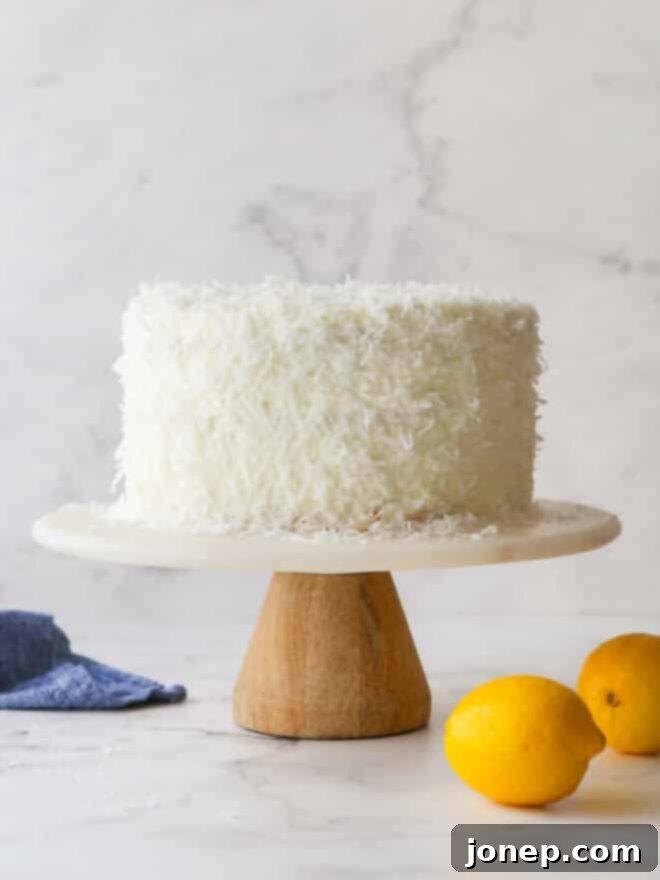
Expert Tips for Baking Your Perfect Lemon Coconut Cake
Achieving a bakery-worthy layer cake at home is easier than you think with a few helpful tips and tricks. Follow these guidelines to ensure your Lemon Coconut Cake turns out flawlessly every time:
- Need extra guidance on assembling a beautiful layer cake? If you’re a novice to the world of layer cakes or just seeking a refresher, I highly recommend consulting my comprehensive guide on how to build a layer cake. It covers everything from leveling cakes to achieving smooth frosting, providing all the essential knowledge for success!
- The right coconut milk is crucial for flavor and texture. This recipe specifically calls for one 13.5-oz can of unsweetened full-fat coconut milk. It’s often found in the ethnic or Asian foods aisle of your grocery store, not with dairy alternatives. It’s essential not to confuse this with “coconut cream” (which is thicker and richer) or coconut milk sold in cartons (which is often diluted and lacks the necessary fat content for this recipe), as they are not interchangeable and will yield different results. In a pinch, if you absolutely cannot find canned coconut milk, you can use whole milk, but you’ll want to increase the coconut extract by an additional teaspoon to boost the flavor.
- Choose your cake pans wisely for your desired cake height. You have the flexibility to use either 8-inch or 9-inch round cake pans for this recipe. (These are the pans I personally use and highly recommend.) Using 8-inch pans will result in a taller, more dramatic cake with thicker layers, while 9-inch pans will produce a slightly wider and shorter cake. Both work wonderfully, so choose based on your preference for presentation.
- Always line your cake pans with parchment paper! For cakes as tender and delicate as these coconut layers, preventing them from sticking to the pan is paramount. Lining the bottom of your pans with a round of parchment paper, in addition to greasing and flouring, is the most reliable method to ensure your cake layers release cleanly and intact every time. For more in-depth advice on preparing your cake pans, check out all my tips here.
- Consider making this a relaxed 2-day baking project. Layer cakes involve several steps, and breaking them up makes the process much more enjoyable and less stressful. I highly recommend preparing the cake layers and the homemade lemon curd on the first day. Once completely cooled, wrap the cake layers tightly in plastic wrap and store them in the fridge alongside the chilled lemon curd. (See my tips for storing cake layers for best results.) On the second day, you can focus on making the Chantilly frosting and assembling your magnificent cake. Chilled cake layers are significantly firmer and easier to handle, resulting in a much neater final assembly.
- Toasted vs. Untoasted Coconut: A matter of preference. I personally prefer to adorn this cake with un-toasted sweetened shredded coconut. Its bright white appearance offers a lovely visual contrast and keeps the overall aesthetic light and fresh. However, if you’re a fan of a deeper, nuttier flavor and a golden-brown visual, feel free to toast your coconut! To do so, spread the shredded coconut in a single layer on a baking sheet and bake in a 350°F (175°C) oven for just 3-4 minutes, watching it very closely to prevent burning, as it browns quickly.
Storage and Make-Ahead Strategies for Your Lemon Coconut Cake
This cake is a true delight, and properly storing it ensures you can savor its deliciousness for days, or even prepare components in advance for convenience.
Any leftover slices of this Lemon Coconut Cake should be stored covered in the fridge. It will maintain its wonderful taste and texture for approximately 5 days. While it’s utterly delicious immediately after assembly, the flavors often deepen and meld beautifully within 1-2 days, making it even more enjoyable. And honestly, I promise it won’t last long once everyone gets a taste!
You can certainly freeze the assembled cake if needed, but due to the cream cheese in the Chantilly frosting, its texture might become slightly softer or weep a little upon thawing. For the best quality when making this cake far in advance, I recommend a strategic approach: freeze the cake layers individually, tightly wrapped in plastic wrap, and store the homemade lemon curd in an airtight container in the fridge for up to 2 weeks (lemon curd also freezes well for several months). When you’re ready to serve, thaw the frozen cake layers overnight in the fridge, prepare a fresh batch of Chantilly frosting, and then proceed with assembling the cake. This method ensures each component is at its peak freshness and texture.
Explore More Delightful Coconut Cake Recipes
If you love the tropical essence of coconut, you’ll adore these other variations and recipes from my collection!
Get the Full Lemon Coconut Cake Recipe Here!
Ready to bake this extraordinary dessert? Below you’ll find the complete, printable recipe card with all the detailed instructions, ingredients, and notes to guide you through making the most delicious Lemon Coconut Cake.

Lemon Coconut Cake
Pin Recipe
Leave a Review
Ingredients
For the Coconut Cake:
- 5 large egg whites
- 1 ½ cup (375 ml) canned unsweetened full-fat coconut milk , divided
- 1 tablespoon coconut flavoring or extract
- 3 cups (340 grams) cake flour
- 2 ⅓ cups (470 grams) granulated sugar
- 4 ½ teaspoons baking powder
- ½ teaspoon salt
- 1 cup (226 grams) unsalted butter , softened to room temperature
For the Lemon Curd Filling:
- ½ cup (113 grams) unsalted butter
- 1 cup (200 grams) granulated sugar
- 1 cup (224 grams) freshly squeezed lemon juice , about 3-4 lemons
- 3 lemons , zested
- 10 large egg yolks
For the Chantilly Frosting:
- 8 oz (226 grams) full-fat cream cheese , cubed and softened
- 1 cup (114 grams) powdered sugar
- 1 teaspoon coconut flavoring/extract or vanilla extract
- ¼ teaspoon salt
- 2 ½ cup (568 grams) heavy cream
- 1 ½ cups (128 grams) sweetened shredded coconut
Equipment
Instructions
To make the cake layers:
-
Preheat your oven to 350°F (175°C). Prepare three 8-inch or 9-inch cake pans by buttering and flouring them, then lining the bottoms with parchment paper rounds. (Refer to the Notes section for more details on pan sizes.)
-
In a small bowl, gently whisk together the egg whites, ½ cup of the canned unsweetened full-fat coconut milk, and the coconut flavoring until they are just combined. Set this mixture aside.
-
In the bowl of a stand mixer fitted with a paddle attachment, combine the cake flour, granulated sugar, baking powder, and salt. Add the softened butter and the remaining 1 cup of coconut milk. Mix on low speed until all the dry ingredients are moistened and just combined. Increase the speed to medium and beat for about 2 minutes, until the mixture is visibly light and fluffy. Remember to scrape down the sides of the bowl as needed to ensure even mixing.
-
Gradually add the egg white mixture from step 2 in 3 separate additions. Mix just long enough on low speed to incorporate each addition, scraping down the sides of the bowl between each one. Be careful not to overmix the batter once the wet ingredients are added.
-
Evenly divide the prepared batter among your buttered and lined cake pans. Bake for 35-40 minutes, or until a wooden skewer or toothpick inserted into the center of a cake comes out clean. Allow the baked cakes to cool in their pans for about 10 minutes before carefully turning them out onto wire cooling racks to cool completely.
-
Because these coconut cake layers are exceptionally soft and tender, I strongly recommend wrapping them individually in plastic wrap and chilling them completely in the fridge for at least 1-2 hours (or overnight). This firming-up process makes them much easier to handle, level, and assemble into a neat layer cake without any crumbling or tearing.
To make the lemon curd filling:
-
In a medium saucepan, combine the butter, ½ cup of granulated sugar, fresh lemon zest from 3 lemons, and the freshly squeezed lemon juice. Heat this mixture over medium-low heat, stirring occasionally, until it reaches a gentle simmer and the butter is fully melted.
-
In a separate medium bowl, whisk together the egg yolks with the remaining ½ cup of granulated sugar until light in color. Slowly, and in a thin stream, pour about half of the hot lemon juice mixture into the egg yolk mixture, whisking continuously and vigorously to temper the egg yolks (this prevents them from scrambling). Once tempered, pour the entire egg yolk mixture back into the saucepan with the remaining hot lemon mixture. Continue to cook over medium-low heat, stirring constantly with a whisk or rubber spatula, until the curd thickens significantly and coats the back of a spoon, or when the whisk leaves a clear trail in the curd. This usually takes about 5-7 minutes. Do not boil.
-
Immediately remove the saucepan from the heat. Pour the hot lemon curd through a fine-mesh strainer set over a clean bowl. This step removes any lemon zest particles and ensures a perfectly smooth, silky curd. Place a piece of plastic wrap directly onto the surface of the curd to prevent a skin from forming. Let it cool slightly at room temperature, then transfer to the fridge to chill completely, which will take 1-2 hours or longer. The curd will continue to thicken as it chills.
-
Once chilled, the lemon curd can be stored in an airtight container in the fridge for up to 2 weeks. (Homemade lemon curd also freezes exceptionally well for several months!)
To make the Chantilly frosting:
-
In the bowl of a stand mixer fitted with the whisk attachment, combine the softened full-fat cream cheese, powdered sugar, coconut/vanilla extract, and salt. Beat on medium-high speed for 3-4 minutes, stopping frequently to scrape down the bowl and the whisk as needed, until the mixture is perfectly smooth and lump-free (it will be quite thick at this stage).
-
With the mixer on medium-low speed, gradually add the cold heavy cream to the mixing bowl in 3 separate additions, allowing each addition to combine before adding the next. Once all the cream has been incorporated, scrape down the bowl. Increase the mixer speed to medium-high and continue to beat for about 1 minute, or until the frosting becomes thick, light, and holds beautiful medium peaks. Be careful not to overbeat, as it can turn granular.
To assemble the cake:
-
Place one chilled cake layer onto your chosen serving plate or cake stand. Transfer a small amount of the Chantilly frosting into a piping bag fitted with a round tip (or simply snip off the corner of a Ziploc bag). Pipe a “dam” (a continuous border) of frosting around the very edges of the cake layer.
-
Spoon a generous ½ cup of the chilled lemon curd onto the center of the cake layer. Carefully spread the lemon curd into an even layer, ensuring it stays neatly within the frosting dam. (Note: If you are using 9-inch cake pans, you may need slightly more lemon curd for adequate coverage.) Gently place the second cake layer directly on top.
-
Repeat the process: pipe another frosting dam around the edge of the second cake layer and fill the center with another heaping ½ cup of lemon curd. Carefully position the final cake layer on top, pressing down gently to ensure it’s level.
-
Now, it’s time to generously cover the entire cake with the remaining Chantilly frosting. Start by applying frosting to the top of the cake, spreading it evenly. Then, use an offset spatula or bench scraper to frost the sides, working your way down to create a smooth finish. For that classic coconut cake look, gently press the sweetened shredded coconut onto the sides of the cake using your hands, ensuring good coverage. Finally, sprinkle any remaining coconut generously on top for a beautiful presentation.
-
For the best results and cleanest slices, chill the assembled cake in the refrigerator for at least 1 hour before serving. You can serve it directly from the fridge for a firmer frosting, or allow it to sit at room temperature for about 15-20 minutes before serving for a slightly softer, more yielding frosting texture.
Notes
- Using the correct coconut milk is crucial for this recipe. This cake recipe is formulated to use approximately one 13.5-oz can of unsweetened full-fat coconut milk. Please do not substitute with “coconut cream” (which is too thick and different in composition) or any coconut milk beverage sold in cartons (which is typically much thinner and less rich).
- Flavoring options for your coconut cake. You can use nearly any type of coconut flavoring for this cake to achieve that authentic tropical taste. Standard coconut extract, readily available in most grocery stores, will work perfectly. Alternatively, you can experiment with baking emulsions or coconut oils, just be sure to consult the product’s recommendations and adjust the quantity if they are more concentrated than typical extracts.
- Pan size flexibility and their impact on your cake. This recipe can be successfully baked in either 8-inch or 9-inch round cake pans. Choosing 8-inch pans will result in a beautifully tall cake with more substantial cake layers. If you opt for 9-inch pans, your cake will be slightly wider but shorter. If using 8-inch pans, I highly recommend dividing the batter among three layers to prevent overflowing, whereas with 9-inch pans, you can bake either 2 or 3 layers as preferred.
- Optimize your baking process with a 2-day plan. To simplify the baking of this multi-component layer cake and achieve the best results, consider splitting the work over two days. Prepare and bake the cake layers and make the lemon curd on the first day. Once cooled, chill both components thoroughly in the refrigerator. On the second day, you can then focus on preparing the Chantilly frosting and assembling the cake. Working with chilled cake layers is significantly easier and leads to a cleaner, more professional-looking final product.
